Array ( [0] => 280 [ID] => 280 [1] => 1 [TYPEID] => 1 [2] => 0 [SECTIONID] => 0 [3] => project-details [MOD_NAME] => project-details [4] => [TITLE] => [5] => Project Details [META_TITLE] => Hello Friend - Blue Rose Grid Layout [6] => [META_DESCRIPTION] => Hello Friend - Blue Rose Grid Layout [7] => [META_KEYWORDS] => [8] => [BUTTON_TITLE] => [9] => [BODY] => [10] => [BODY_SIDE] => [11] => [MODULE_PROCESSING] => [12] => [MODULE_META] => [13] => project-details-head.php [MODULE_HEAD] => project-details-head.php [14] => project-details-body.php [MODULE_BODY] => project-details-body.php [15] => [MODULE_SIDE] => [16] => 0 [TOP_ORDER] => 0 [17] => 0 [HITS_UNIQUE] => 0 [18] => 0 [HITS_REPEAT] => 0 [19] => 0 [ROBOT_HITS] => 0 [20] => 0000-00-00 00:00:00 [LASTVIEWED] => 0000-00-00 00:00:00 [21] => 0000-00-00 00:00:00 [ROBOT_LASTVIEWED] => 0000-00-00 00:00:00 [22] => 0.70 [PRIORITY] => 0.70 [23] => 1 [SITEMAP] => 1 [24] => 1 [ACTIVE] => 1 [25] => 1 [DISPLAY_TITLE] => 1 [26] => 0 [SSL_MODE] => 0 [27] => 0 [EDITABLE] => 0 [28] => 0 [DELETABLE] => 0 [29] => 2013-11-05 00:00:00 [LASTUPDATED] => 2013-11-05 00:00:00 [30] => 2013-11-05 00:00:00 [CREATED] => 2013-11-05 00:00:00 )
Imagine Crafts
LearnMakeCommunityShop

Hello Friend - Blue Rose Grid Layout

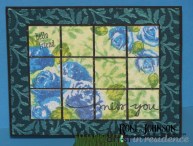
Sometimes you just want to let your friend how much they mean to you.  Making them a special card will do just that…with a bit of sparkle, some shine and shimmer your love will shine…one inch at a time!


Hello Friend - Blue Rose Grid Layout

Directions:

2015_August_RJ_Friends_MissYou_01

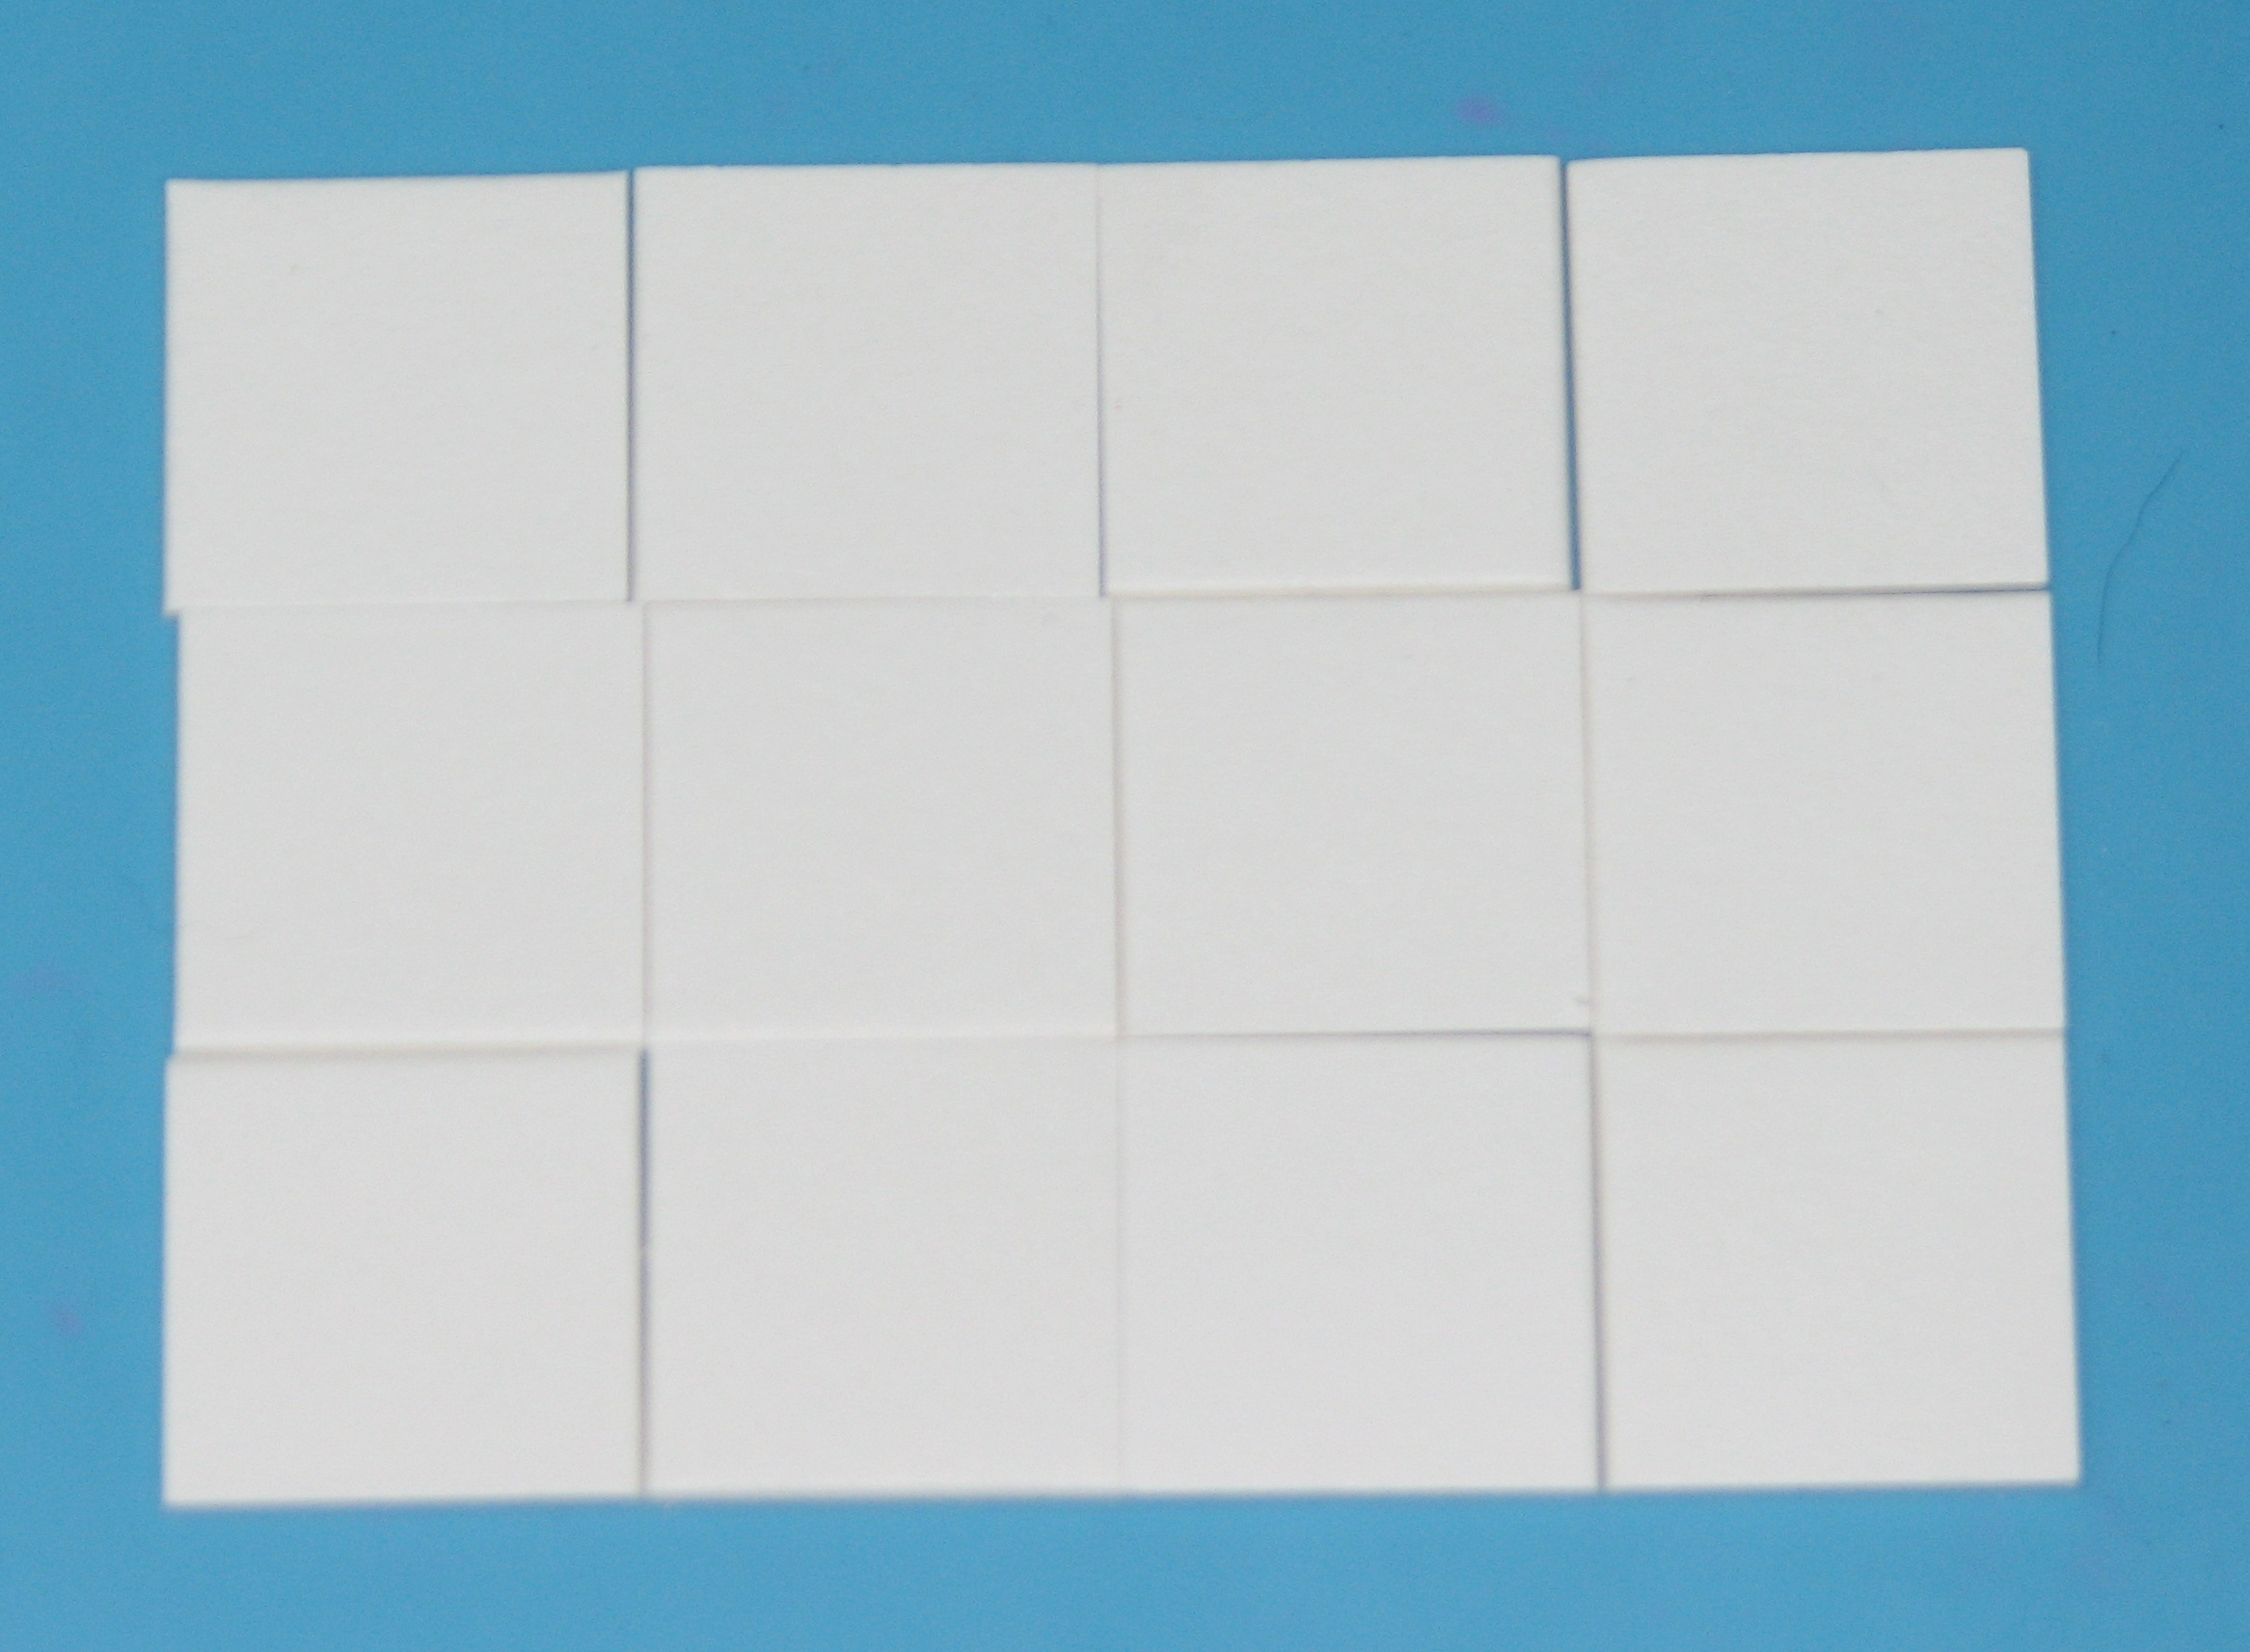
1. Arrange the desired number of Art Square Inchies on your craft mat.

2015_August_RJ_Friends_MissYou_02

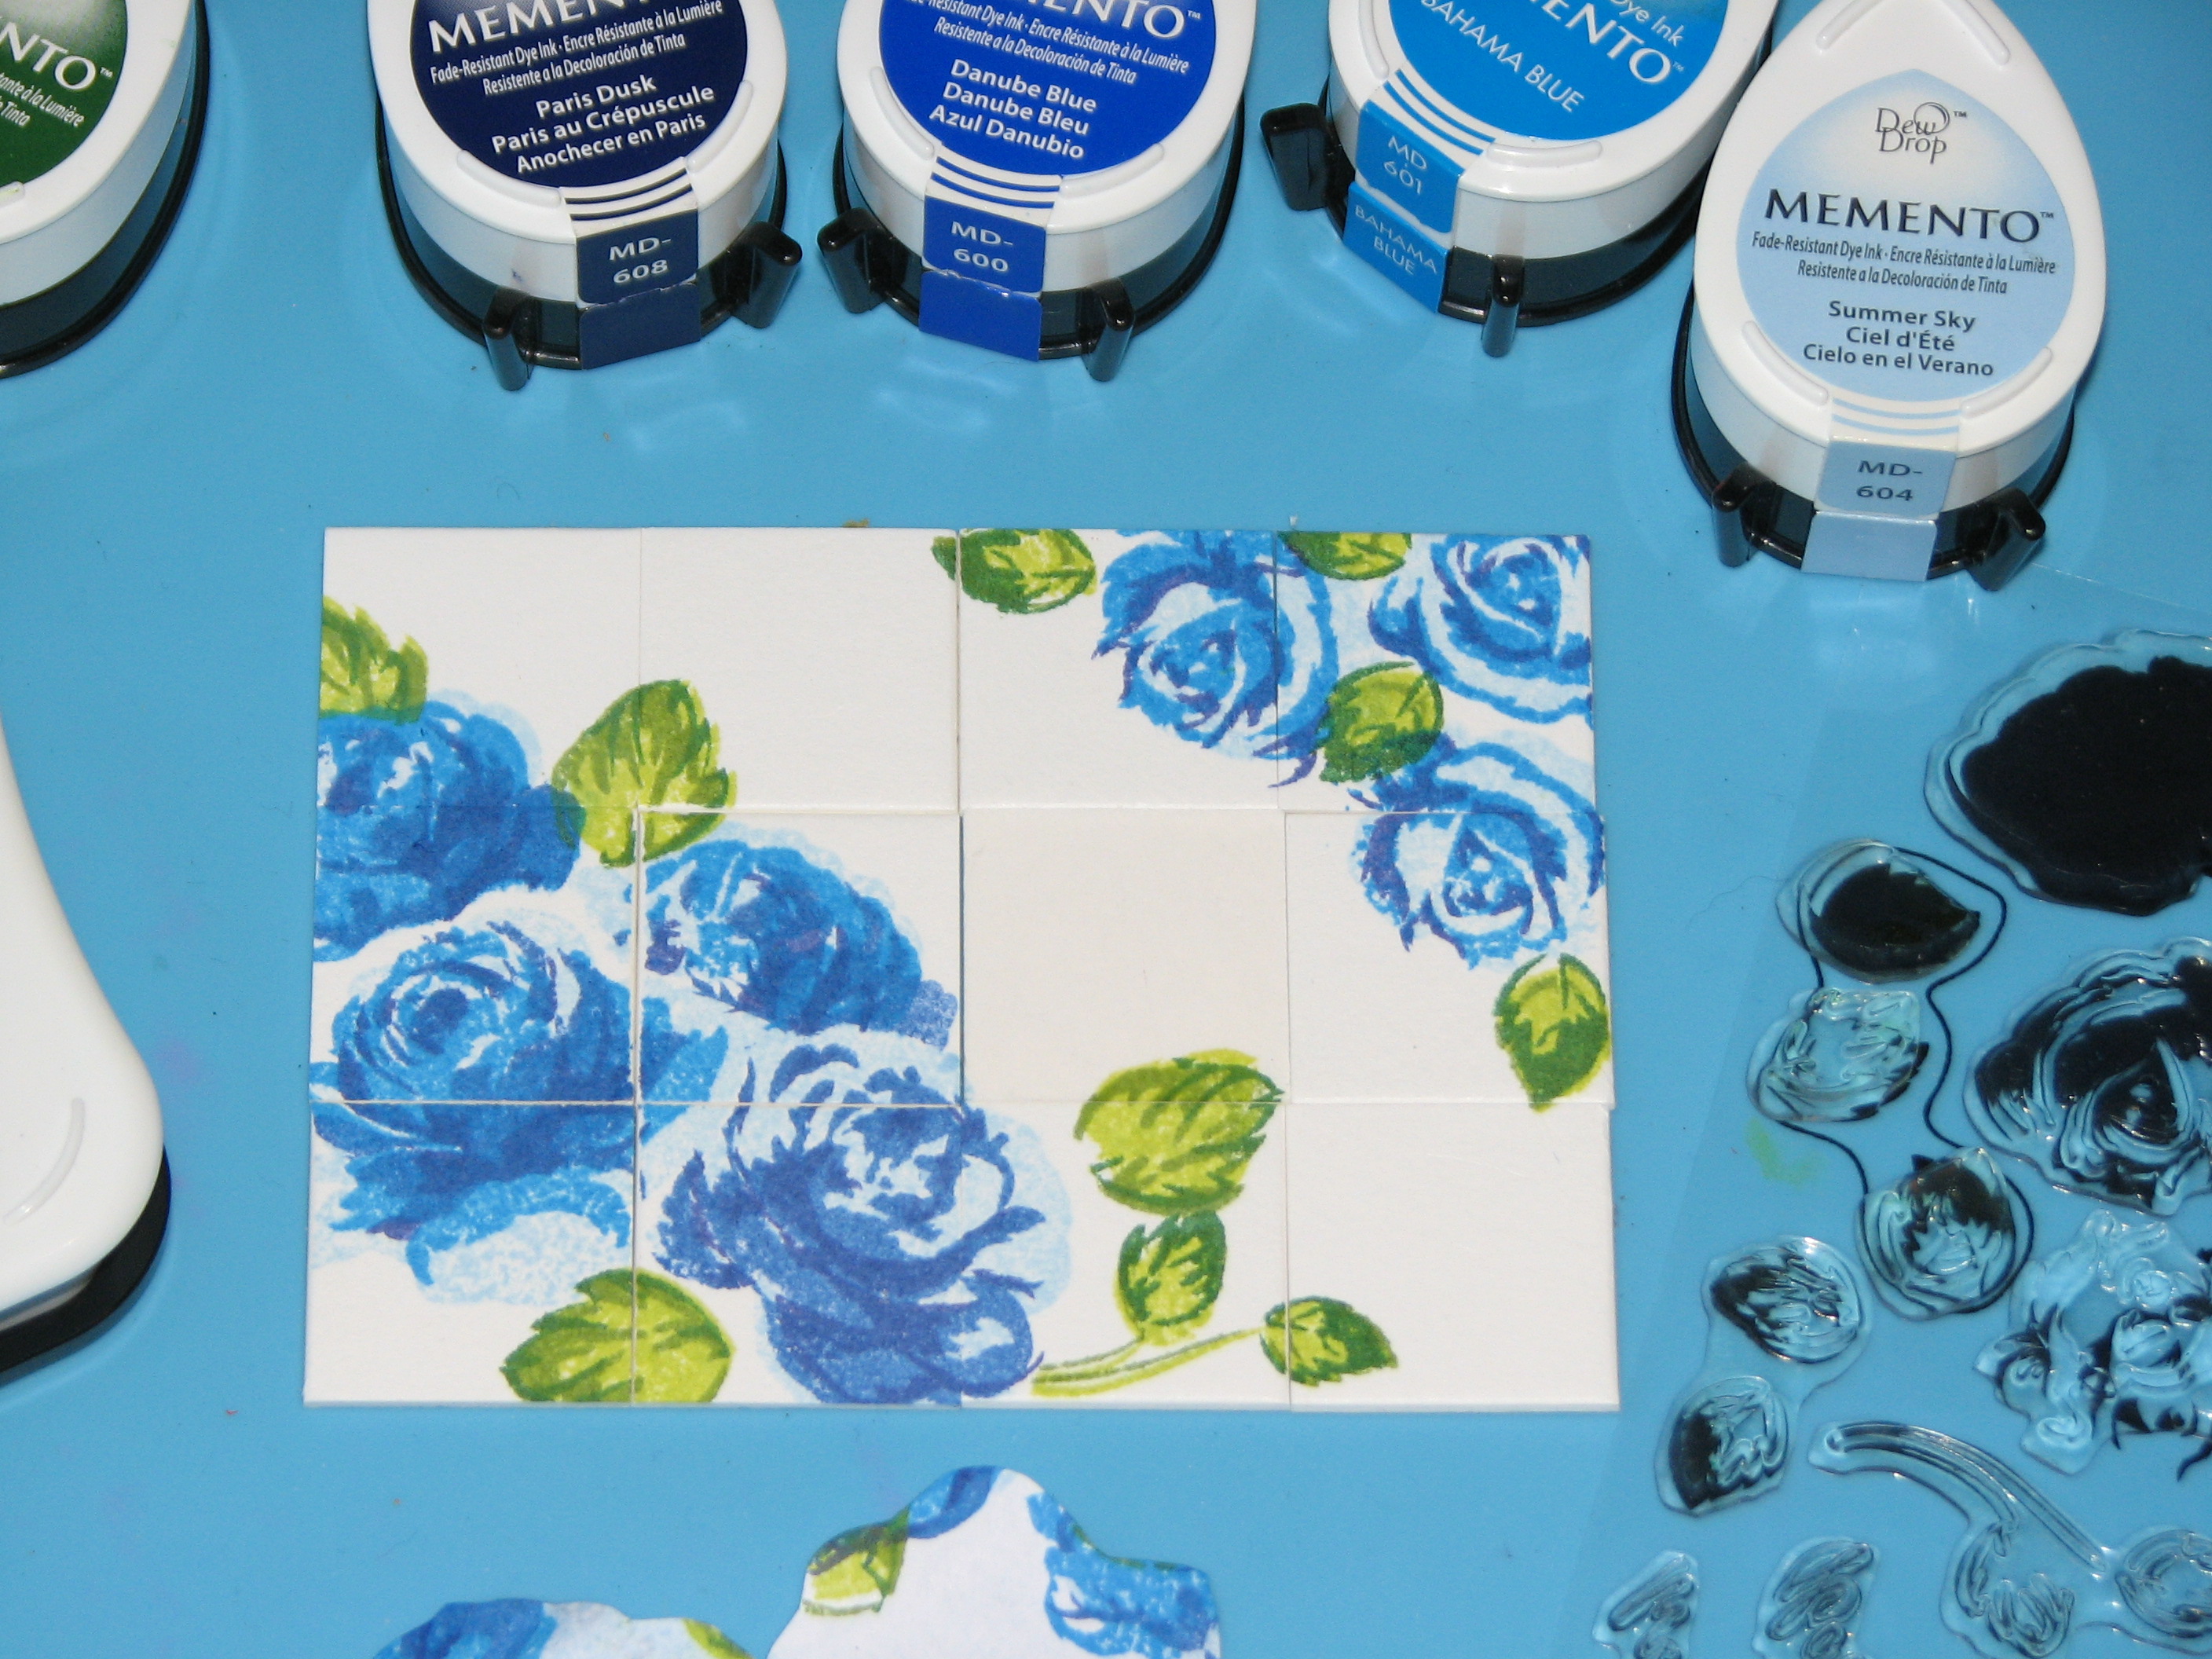
2. Stamp the multi layer roses and leaves with various shades of Memento Dye Inks. Summer Sky, Danube Blue, Bahama Blue and Paris Dusk were used for the flowers; Pear Tart, Bamboo Leaves and Ivy Cottage were used for the leaves.

2015_August_RJ_Friends_MissYou_03

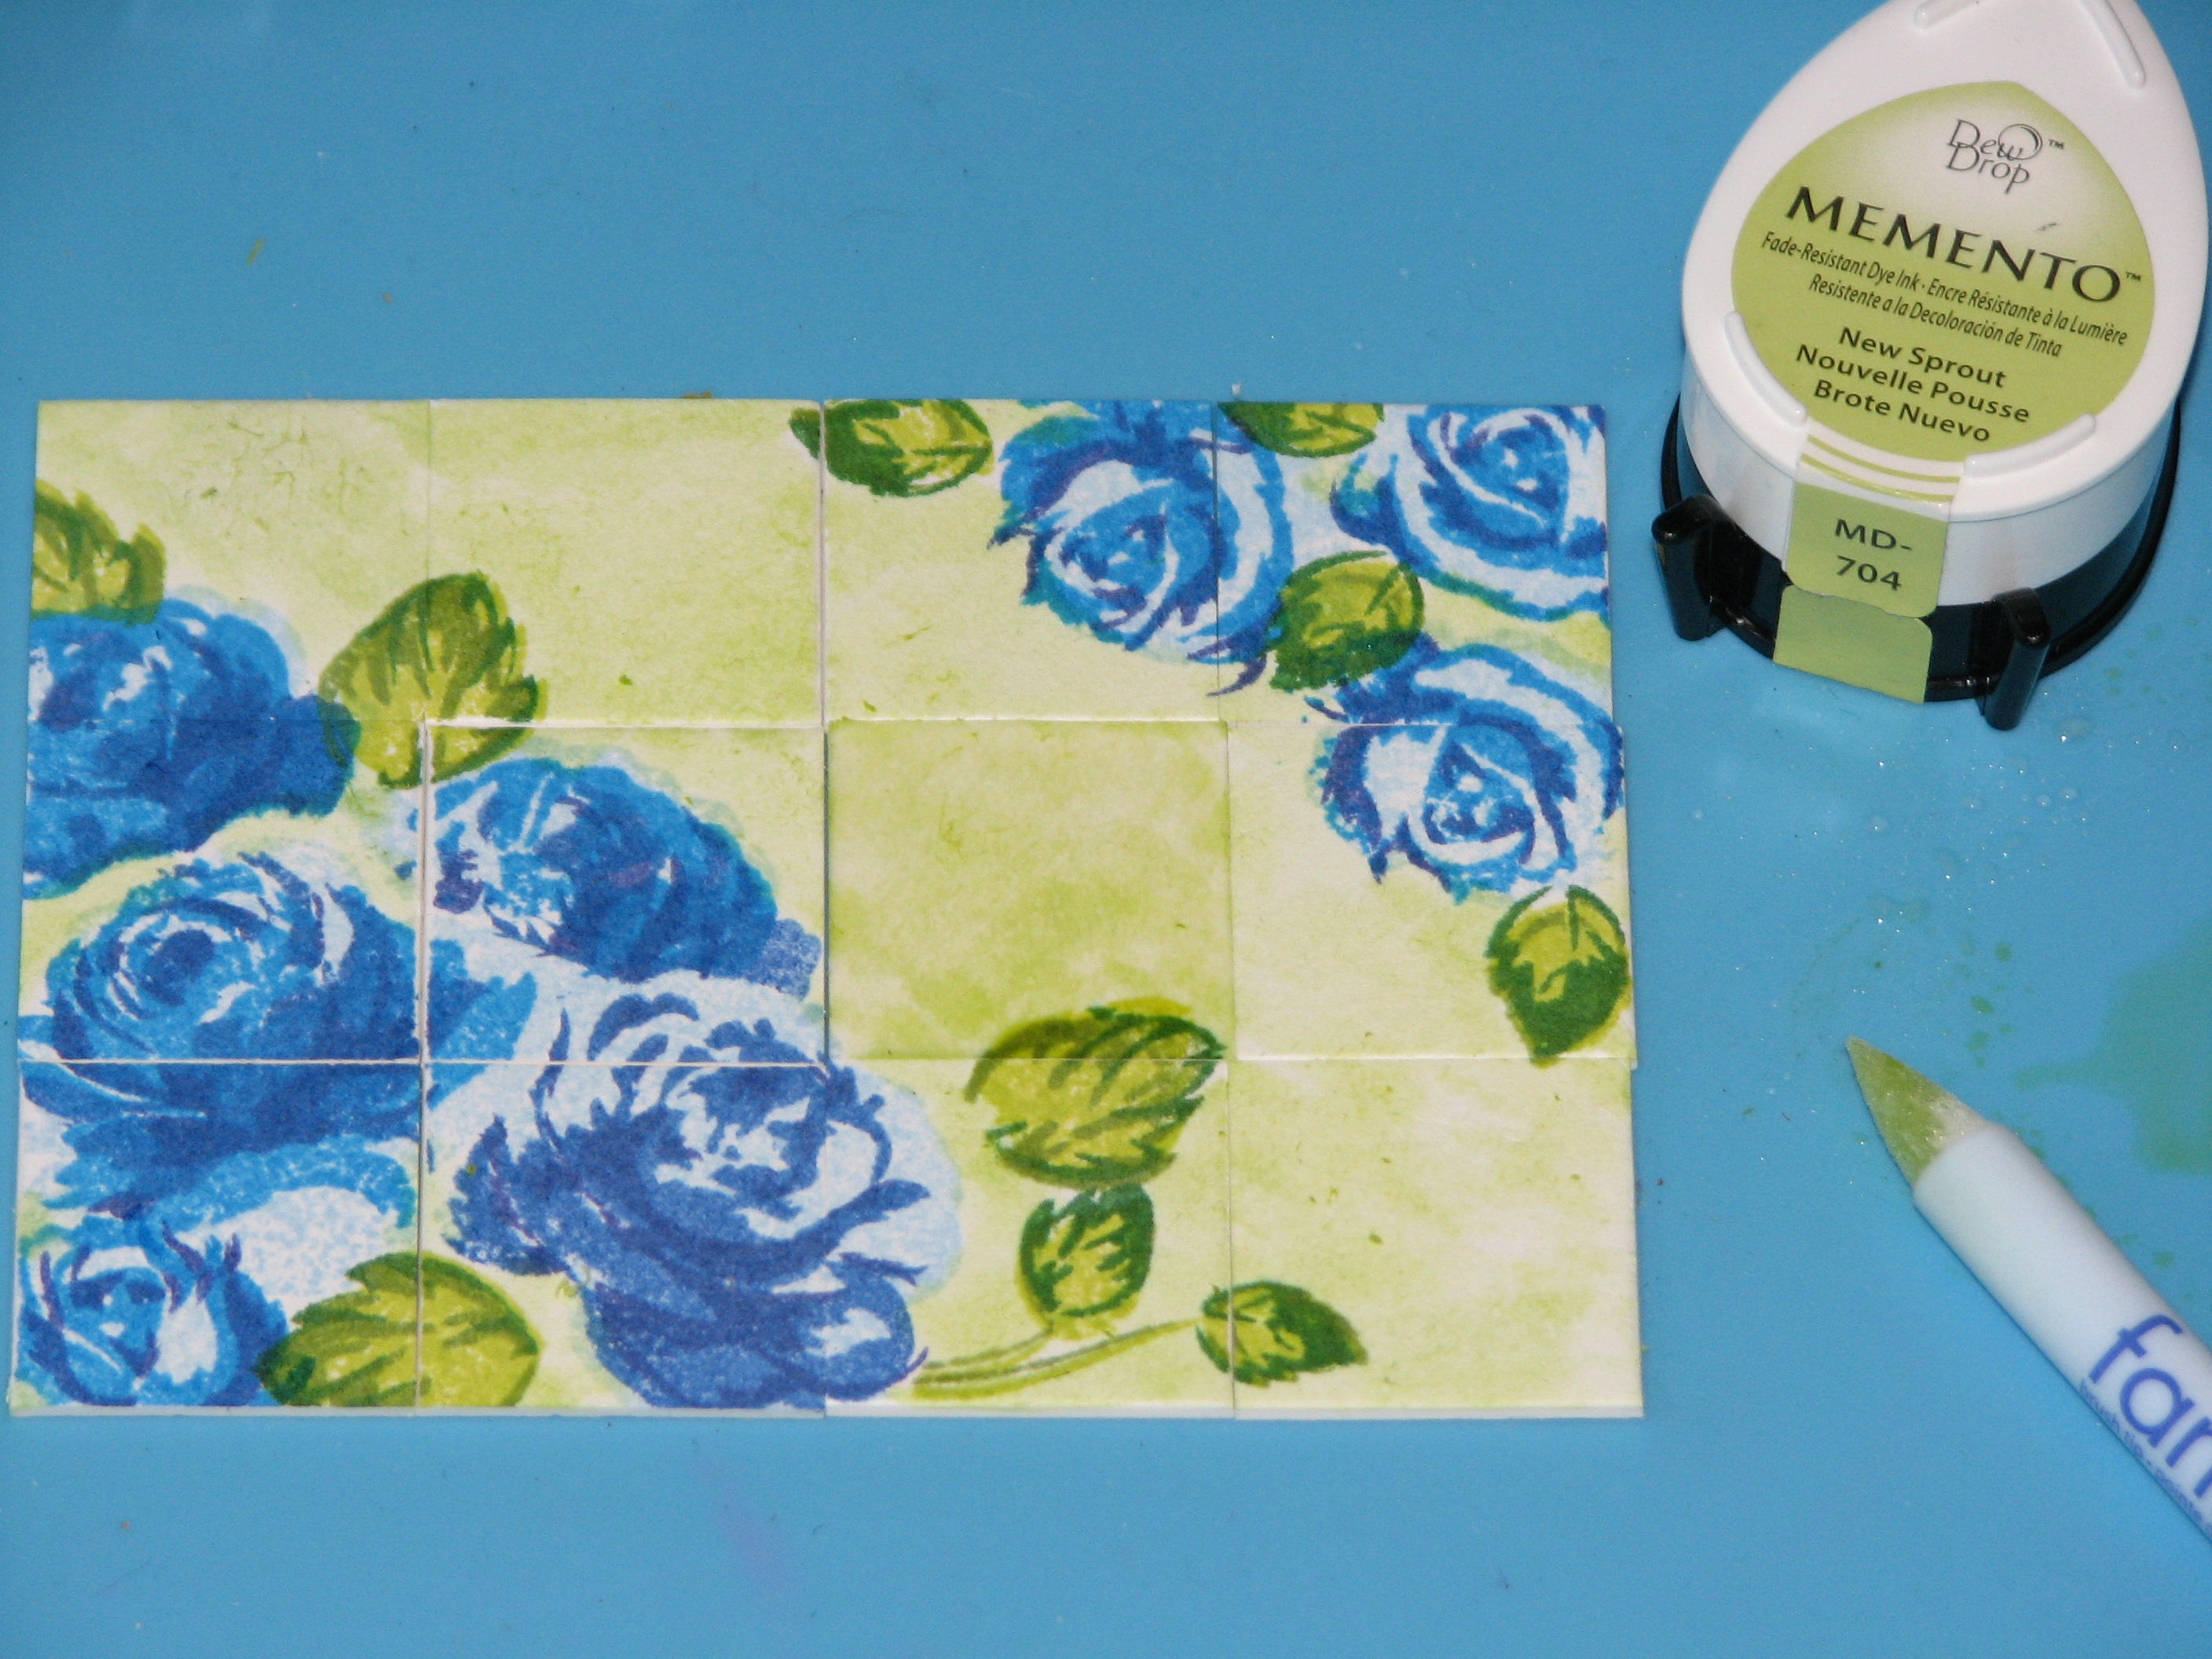
3. Fill in the remaining areas with New Sprout ink, do so by picking up the ink and a dab of water with a Fantastix and painting it on the art board.

2015_August_RJ_Friends_MissYou_04

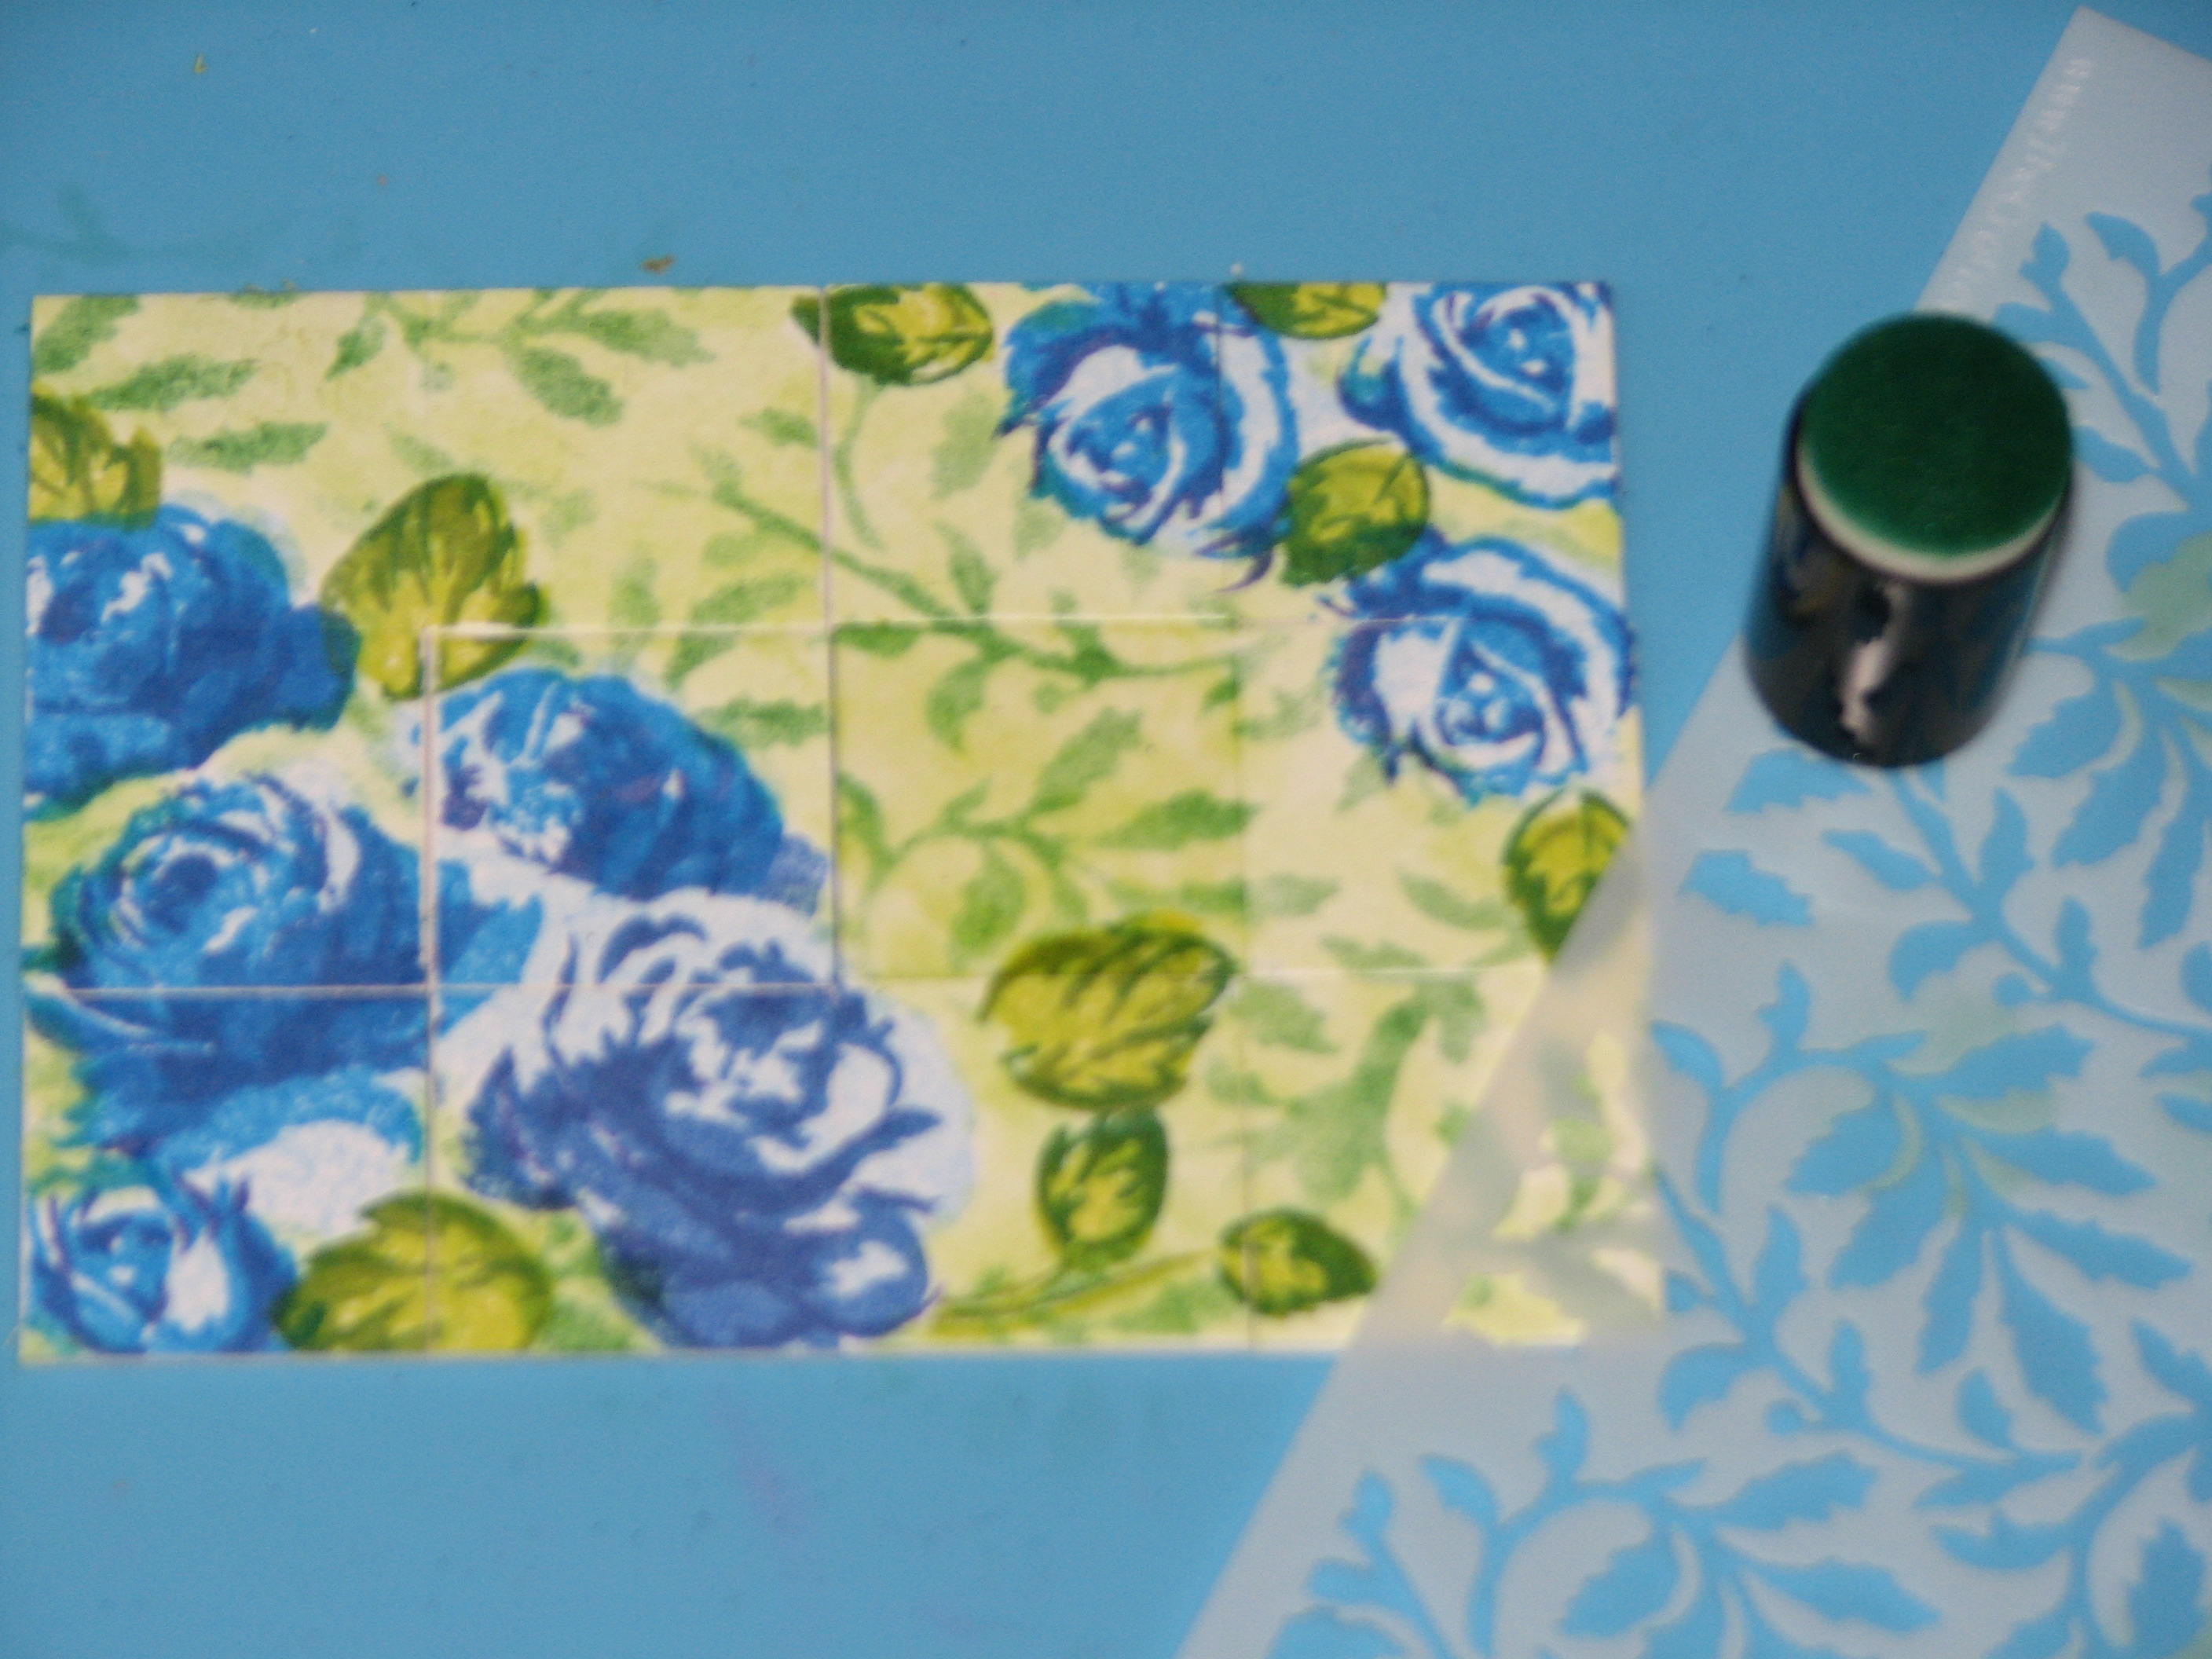
4. Position the vine stencil over the art work, use a Sponge Dauber to apply Ivy Cottage faintly in the background.

5. Spritz the finished inchie art with Sparkle Sheer Shimmer Spritz; let dry.

2015_August_RJ_Friends_MissYou_05

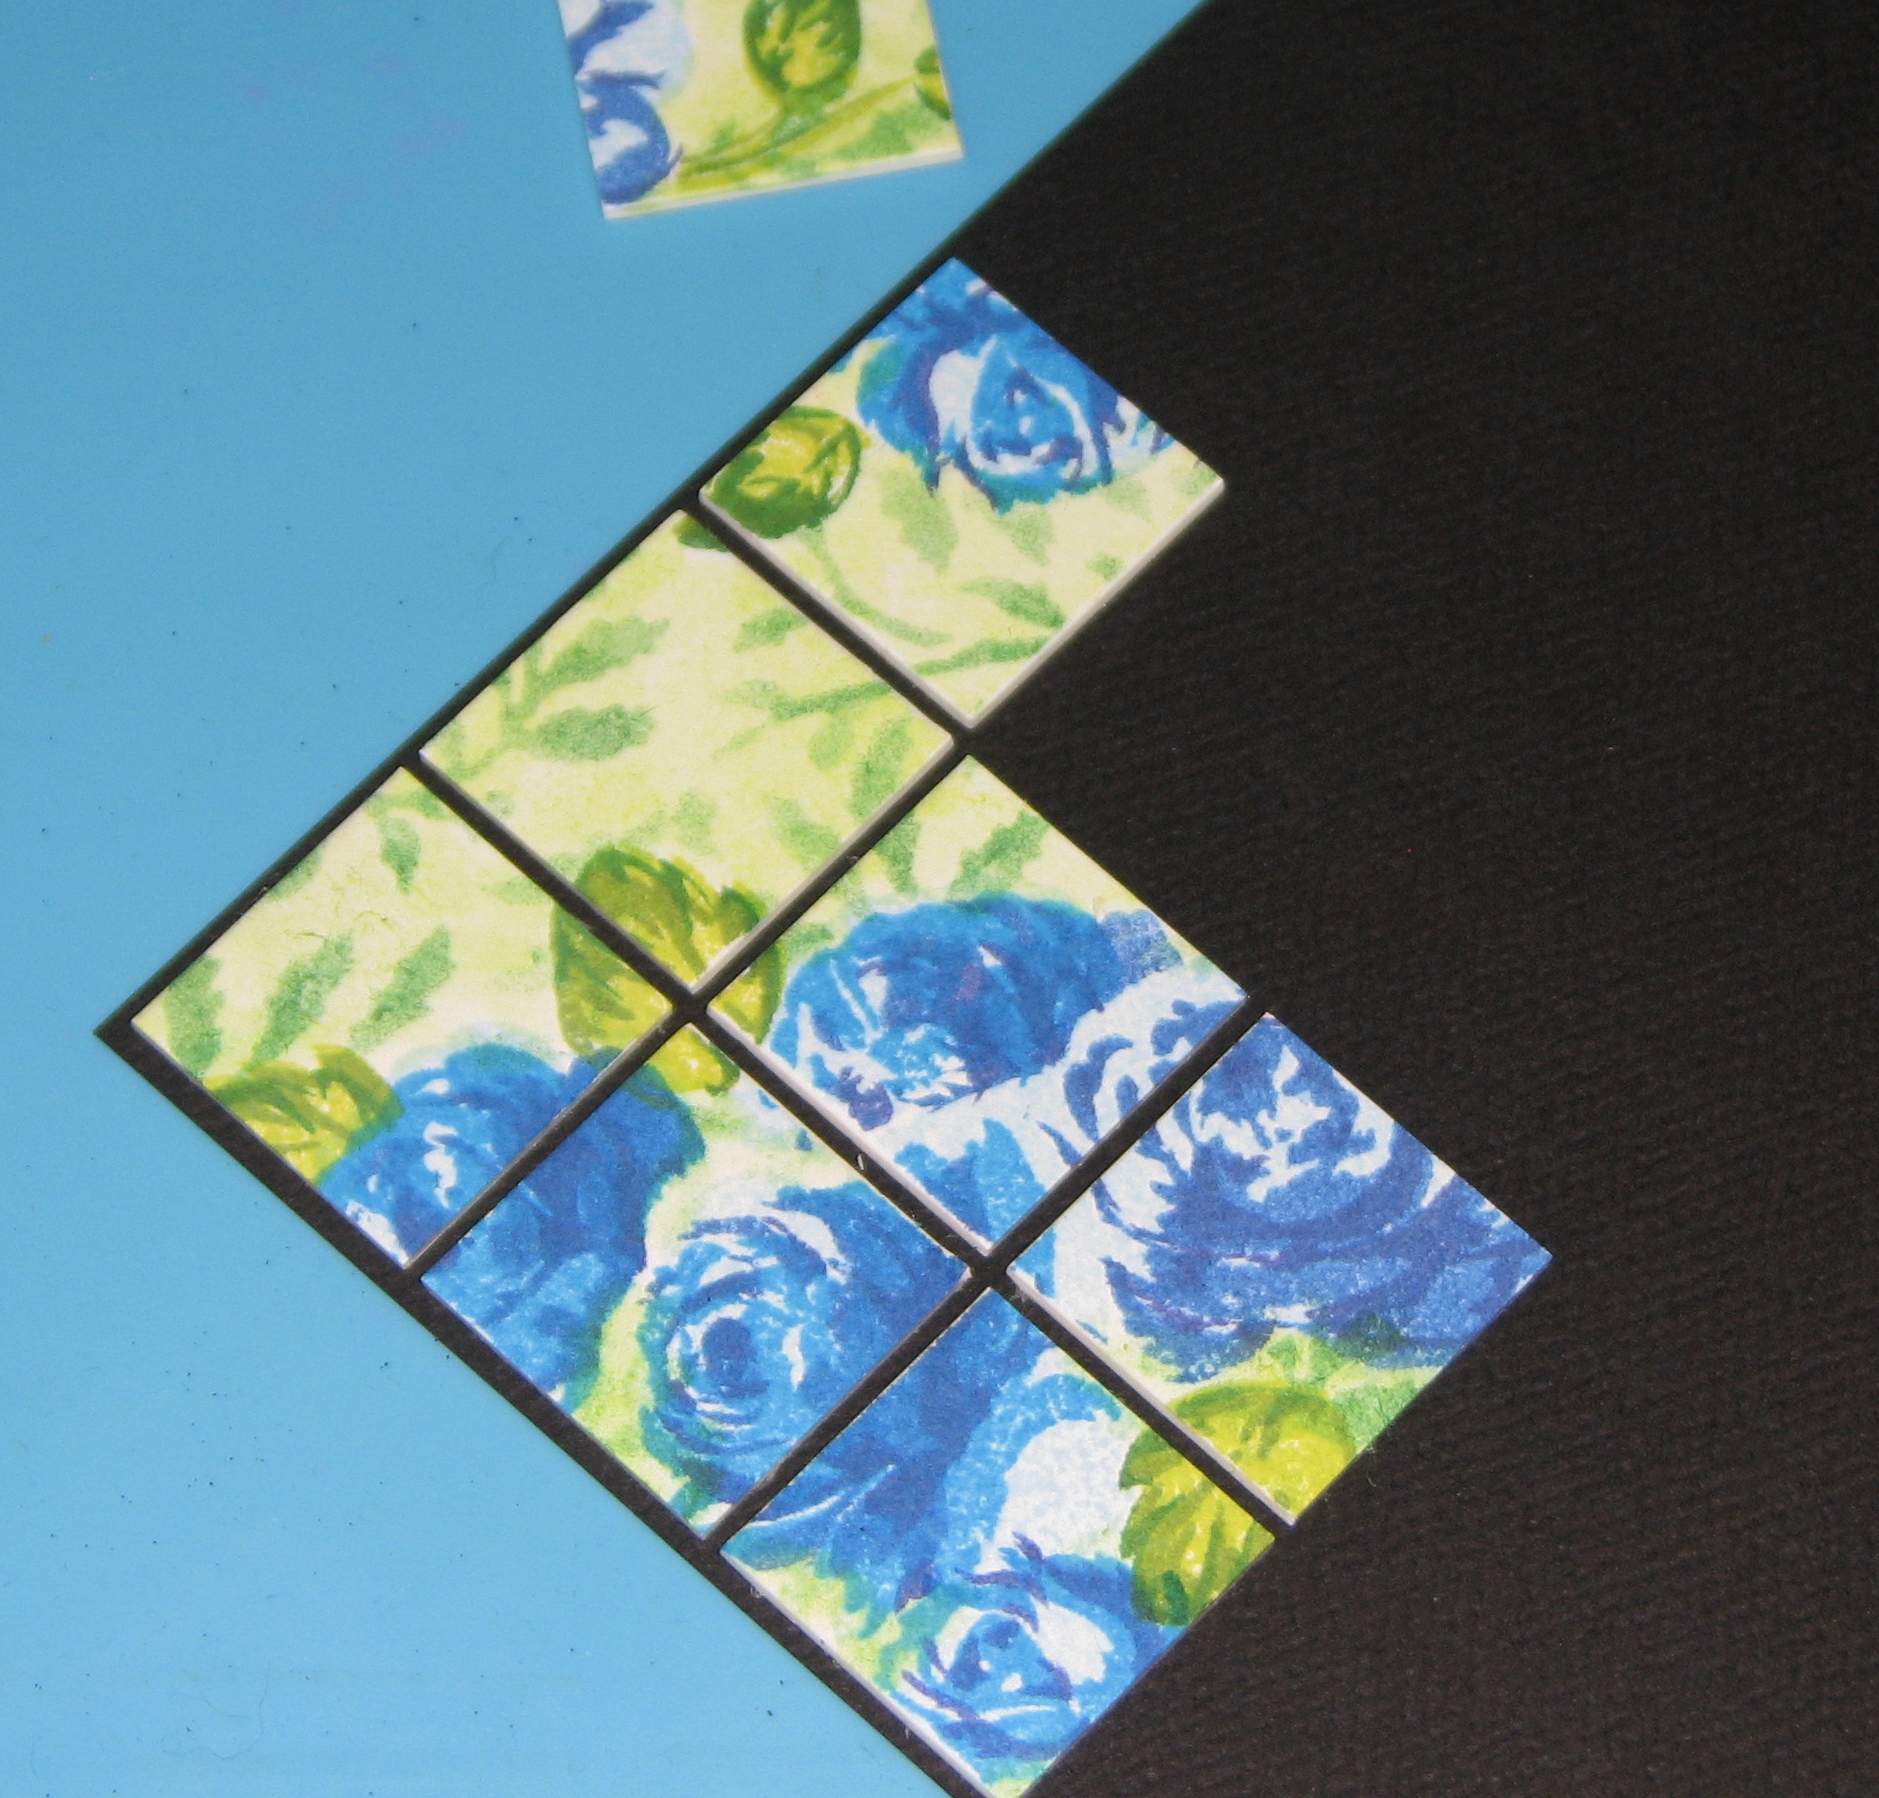
6. Adhere the inchies to a black card panel leaving a 1/16″ space between each square.

7. Stamp the desired sentiments on the card.

2015_August_RJ_Friends_MissYou_06

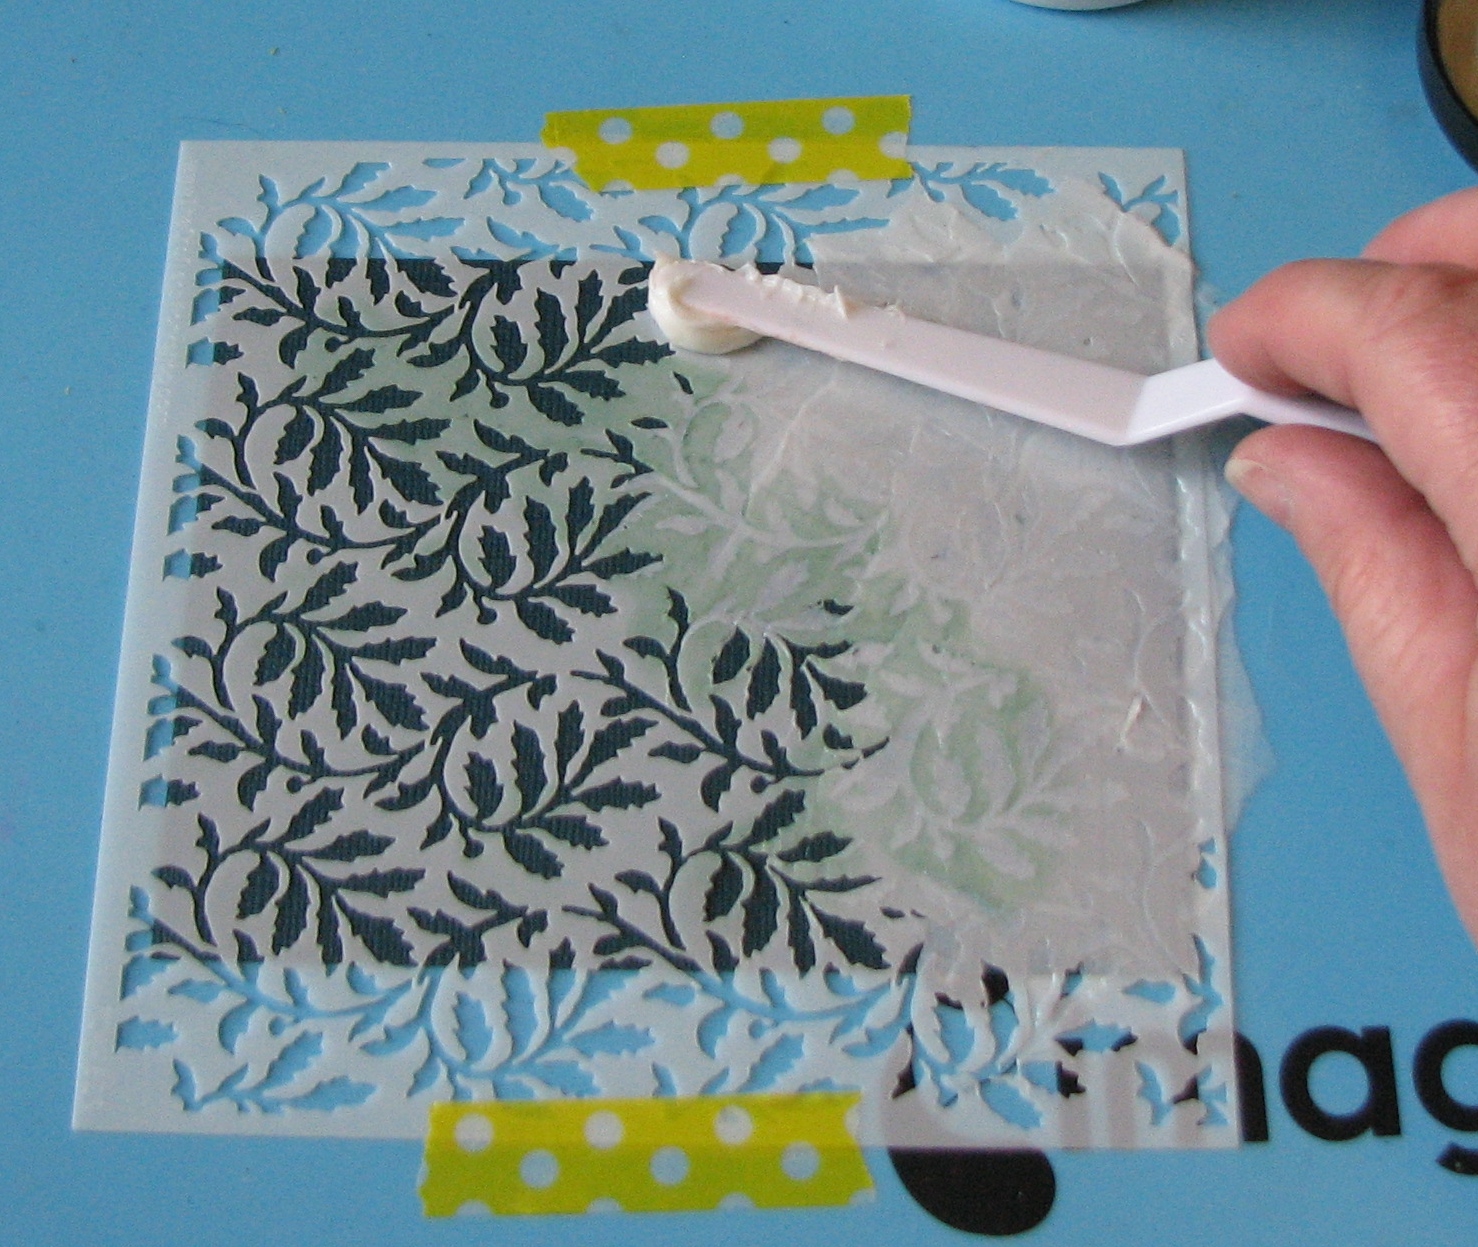
8. Secure the same vine stencil over a piece of dark green cardstock.  Use a trowel to spread Green Iridescent Creative Medium over the entire panel.  Immediately remove the stencil and wash both the stencil and trowel with warm soapy water.

9. Affix the CM Vine panel to a black card blank and mount the inchie art in the center of the card.

by Roni Johnson

Difficulty

Beginner - Intermediate

Time

1/2 hour + dry time

Materials Needed

IMAGINE Crafts featuring Tsukineko:

Other Supplies:

  • Art Squares – 1″ matboard squares
  • Altenew Stamps – Vintage Roses
  • Avery Elle – Sentiment stamps
  • The Crafters Workshop – Stencil TCW482S
  • ClubScrap.com – Cardstock


Sign up for our newsletter
Facebook Pinterest Twitter YouTube Vimeo