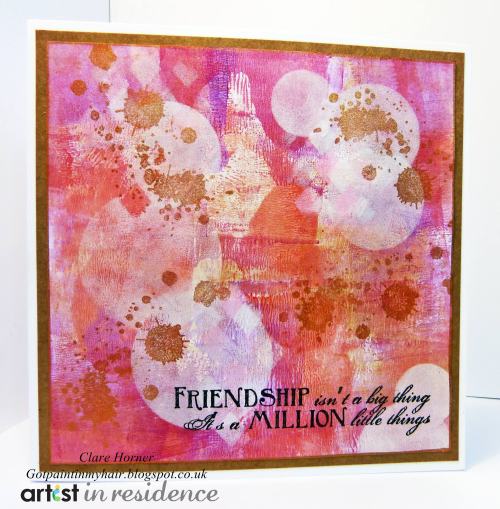
I am really loving the Bokeh effect trend that is appearing all around the web lately, I worked out with a few test pieces that you could re-create it relatively easily with the amazing Memento Luxe in Wedding Dress and a piece of cardstock with varying sized circles cut into it.
1. Cut one piece each of kraft and white cardstock to 5 3/4 inch square.
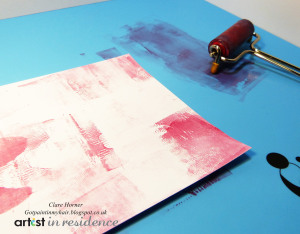
2. Squeeze a pea sized amount of StazOn Studio Glaze Claret onto your Imagine Crafts mat. Roll your brayer through it several times and the onto the white card stock. For optimal effect keep your brayer strokes parallel to the edges of the card, avoiding diagonal strokes. This will dry very quickly.
4. Repeat the same process with StazOn Studio Glaze in Gothic Purple and St Valentine allowing each color layer to dry completely.
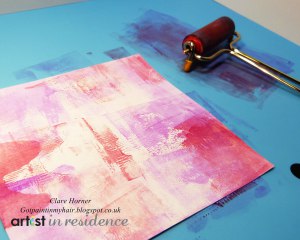
5. Lighten up the background slightly and a little shimmer to the piece with a mixture of Cotton White and Gold StazOn Studio Glaze.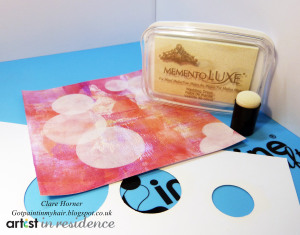
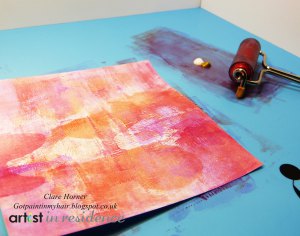
6. Cut from a sturdy piece of cardstock all the circles from the Spellbinders Circle die with a good inch gap between each circle.
7. Randomly daub with Memento Luxe Wedding Dress circles all over your piece. Make sure some circles overlap each other. Let dry.
7. Apply Memento Luxe Angel Pink through the diamond stencil using a Sponge Dauber. Let dry.
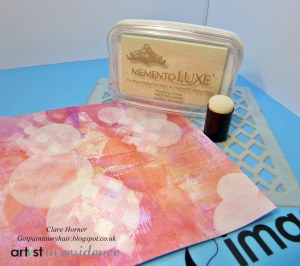
8. Offset the diamond stencil from the pink diamonds and daub Wedding Dress Memento Luxe through the stencil.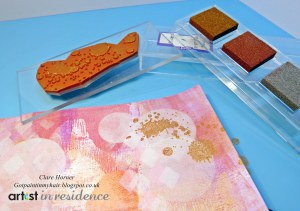
9. Ink up the Ink Splats stamp with Delicata Bronze Burst and randomly stamp over the background. Avoid the lower right corner of the background where the sentiment will be stamped.
10. Swipe the Delicata Bronze Burst around the edge of the background piece to create a border.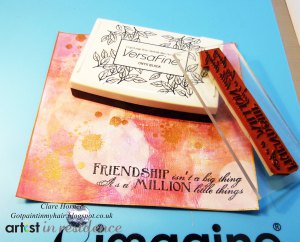
11. With Versafine Onyx Black stamp the phrase in the bottom corner of the piece. Let dry.
12. Attach the kraft cardstock to the white card base and then the decorated piece on top of that with suitable adhesive.
IMAGINE Crafts/Tsukiniko:
Other Supplies: