Array ( [0] => 280 [ID] => 280 [1] => 1 [TYPEID] => 1 [2] => 0 [SECTIONID] => 0 [3] => project-details [MOD_NAME] => project-details [4] => [TITLE] => [5] => Project Details [META_TITLE] => Honeymoon Sunset Valentine's Day Card [6] => [META_DESCRIPTION] => Honeymoon Sunset Valentine's Day Card [7] => [META_KEYWORDS] => [8] => [BUTTON_TITLE] => [9] => [BODY] => [10] => [BODY_SIDE] => [11] => [MODULE_PROCESSING] => [12] => [MODULE_META] => [13] => project-details-head.php [MODULE_HEAD] => project-details-head.php [14] => project-details-body.php [MODULE_BODY] => project-details-body.php [15] => [MODULE_SIDE] => [16] => 0 [TOP_ORDER] => 0 [17] => 0 [HITS_UNIQUE] => 0 [18] => 0 [HITS_REPEAT] => 0 [19] => 0 [ROBOT_HITS] => 0 [20] => 0000-00-00 00:00:00 [LASTVIEWED] => 0000-00-00 00:00:00 [21] => 0000-00-00 00:00:00 [ROBOT_LASTVIEWED] => 0000-00-00 00:00:00 [22] => 0.70 [PRIORITY] => 0.70 [23] => 1 [SITEMAP] => 1 [24] => 1 [ACTIVE] => 1 [25] => 1 [DISPLAY_TITLE] => 1 [26] => 0 [SSL_MODE] => 0 [27] => 0 [EDITABLE] => 0 [28] => 0 [DELETABLE] => 0 [29] => 2013-11-05 00:00:00 [LASTUPDATED] => 2013-11-05 00:00:00 [30] => 2013-11-05 00:00:00 [CREATED] => 2013-11-05 00:00:00 )
Imagine Crafts
LearnMakeCommunityShop

Honeymoon Sunset Valentine's Day Card

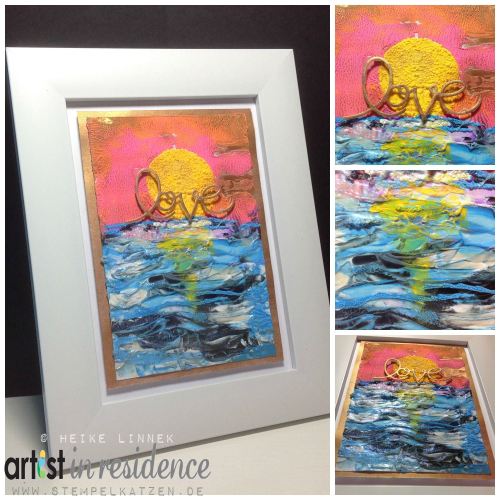
I couldn’t believe what I saw when I first played with the new Radiant Neon Amplify! What a fun! Since Valentine's Day is approaching, I began thinking of moments in love and pictures of my honeymoon came to mind. Check it out!


Honeymoon Sunset Valentine's Day Card

1. Cut white cardstock to 4” x 6”.
2. Punch out a circle and place it on the Craft Mat.

2015_January_HL_Theme_step1

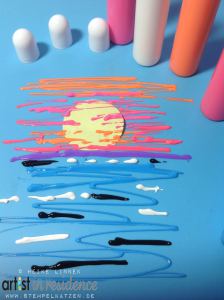
3. Apply Radiant Neon Amplify! colors directly on the Craft Mat in the order shown on photo.

2015_January_HL_Theme_step2

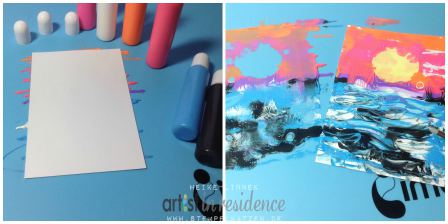
4. Remove the punched circle. Take an imprint with the cardstock.

2015_January_HL_Theme_step3

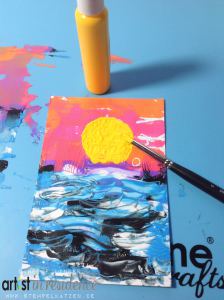
5. Color the sun with Radiant Neon Amplify! Electric Yellow. Create the water surface area using DoodleStix Flat Chisel. Carefully heat it to fluff the Radiant Neon Amplify! up.

2015_January_HL_Theme_step4

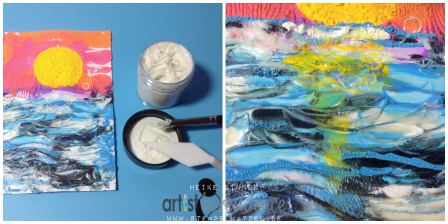
6. Apply Creative Medium Iridescent Blue onto water surface area with the Diamont Trowel Palette Knive. Allow to dry.
7. Create the sun reflection with Radiant Neon Amplify! Electric Yellow.

2015_January_HL_Theme_step5

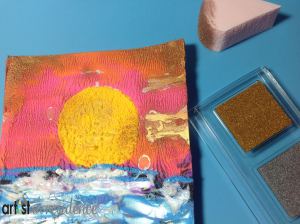
8. Ink the sky area with Delicata 4 Bronze Burst using InkBlushers.

2015_January_HL_Theme_step6

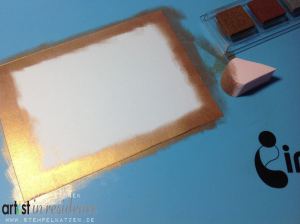
9. Cut a 5 ½ “ x 6 ½ “ card base.
10. Ink the border with Delicata 4 Bronze Burst.

2015_January_HL_Theme_step7

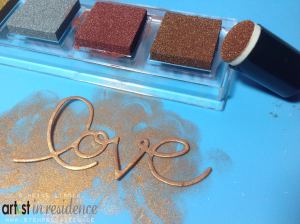
11. Die cut sentiment.
12. Ink sentiment with Delicata 4 Bronze Burst using InkBlushers or Sponge Dauber.

2015_January_HL_Theme_step8

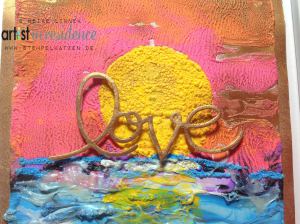
13. Place the sentiment with foam adhesive.
14. Adhere card layers.

 
by Heike Linnek

Difficulty

Intermediate

Time

Less than an hour

Materials Needed

Imagine Crafts/Tsukineko:

Other Supplies:

  • Stampin Up!: 1 ¼” circle punch, Expressions Thinlits Dies
  • Miscellaneous: white cardstock, photo frame, paper trimmer; scissors, adhesive of choice, foam adhesive, heat gun


Sign up for our newsletter
Facebook Pinterest Twitter YouTube Vimeo