make / by aesthetic / hand colored invitation with radiant neon ink
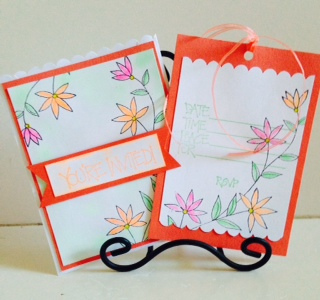
Hand Colored Invitation with Radiant Neon Ink
Create this floral invitation with a few stamps and hand coloring with Radiant Neon inks.
-
Cut two pieces of white cardstock to the following dimensions – inside tag piece to 3½˝ x 5˝, base piece to 4˝ x 5˝.
-
Cut two pieces of orange cardstock to the following dimensions – 4 x 5½˝ for the inside tag piece, 4¼˝ x 5¼˝for the layering base piece.
-
Stamp the flower image on both sheets of white card stock using Memento Tuxedo Black.
-
Color in the flowers and leaves with a Fantastix with your choice of Radiant Neon colors. Allow to dry completely or heat set.
-
Add Radiant Neon Electric Green to your background with a Sponge Dauber, using a light hand to create subtle shading.
-
Seal the envelope shut. Using a decorative border punch, punch along the long end of the envelope to create a pocket.
-
Assemble the pieces together as shown, then punch a hole at the top and add ribbon.
-
Fill in your party info to complete your invitation.