Array ( [0] => 280 [ID] => 280 [1] => 1 [TYPEID] => 1 [2] => 0 [SECTIONID] => 0 [3] => project-details [MOD_NAME] => project-details [4] => [TITLE] => [5] => Project Details [META_TITLE] => Upcycled Coasters with Memento Dye Ink and Resin [6] => [META_DESCRIPTION] => Upcycled Coasters with Memento Dye Ink and Resin [7] => [META_KEYWORDS] => [8] => [BUTTON_TITLE] => [9] => [BODY] => [10] => [BODY_SIDE] => [11] => [MODULE_PROCESSING] => [12] => [MODULE_META] => [13] => project-details-head.php [MODULE_HEAD] => project-details-head.php [14] => project-details-body.php [MODULE_BODY] => project-details-body.php [15] => [MODULE_SIDE] => [16] => 0 [TOP_ORDER] => 0 [17] => 0 [HITS_UNIQUE] => 0 [18] => 0 [HITS_REPEAT] => 0 [19] => 0 [ROBOT_HITS] => 0 [20] => 0000-00-00 00:00:00 [LASTVIEWED] => 0000-00-00 00:00:00 [21] => 0000-00-00 00:00:00 [ROBOT_LASTVIEWED] => 0000-00-00 00:00:00 [22] => 0.70 [PRIORITY] => 0.70 [23] => 1 [SITEMAP] => 1 [24] => 1 [ACTIVE] => 1 [25] => 1 [DISPLAY_TITLE] => 1 [26] => 0 [SSL_MODE] => 0 [27] => 0 [EDITABLE] => 0 [28] => 0 [DELETABLE] => 0 [29] => 2013-11-05 00:00:00 [LASTUPDATED] => 2013-11-05 00:00:00 [30] => 2013-11-05 00:00:00 [CREATED] => 2013-11-05 00:00:00 )
Imagine Crafts
LearnMakeCommunityShop

Upcycled Coasters with Memento Dye Ink and Resin

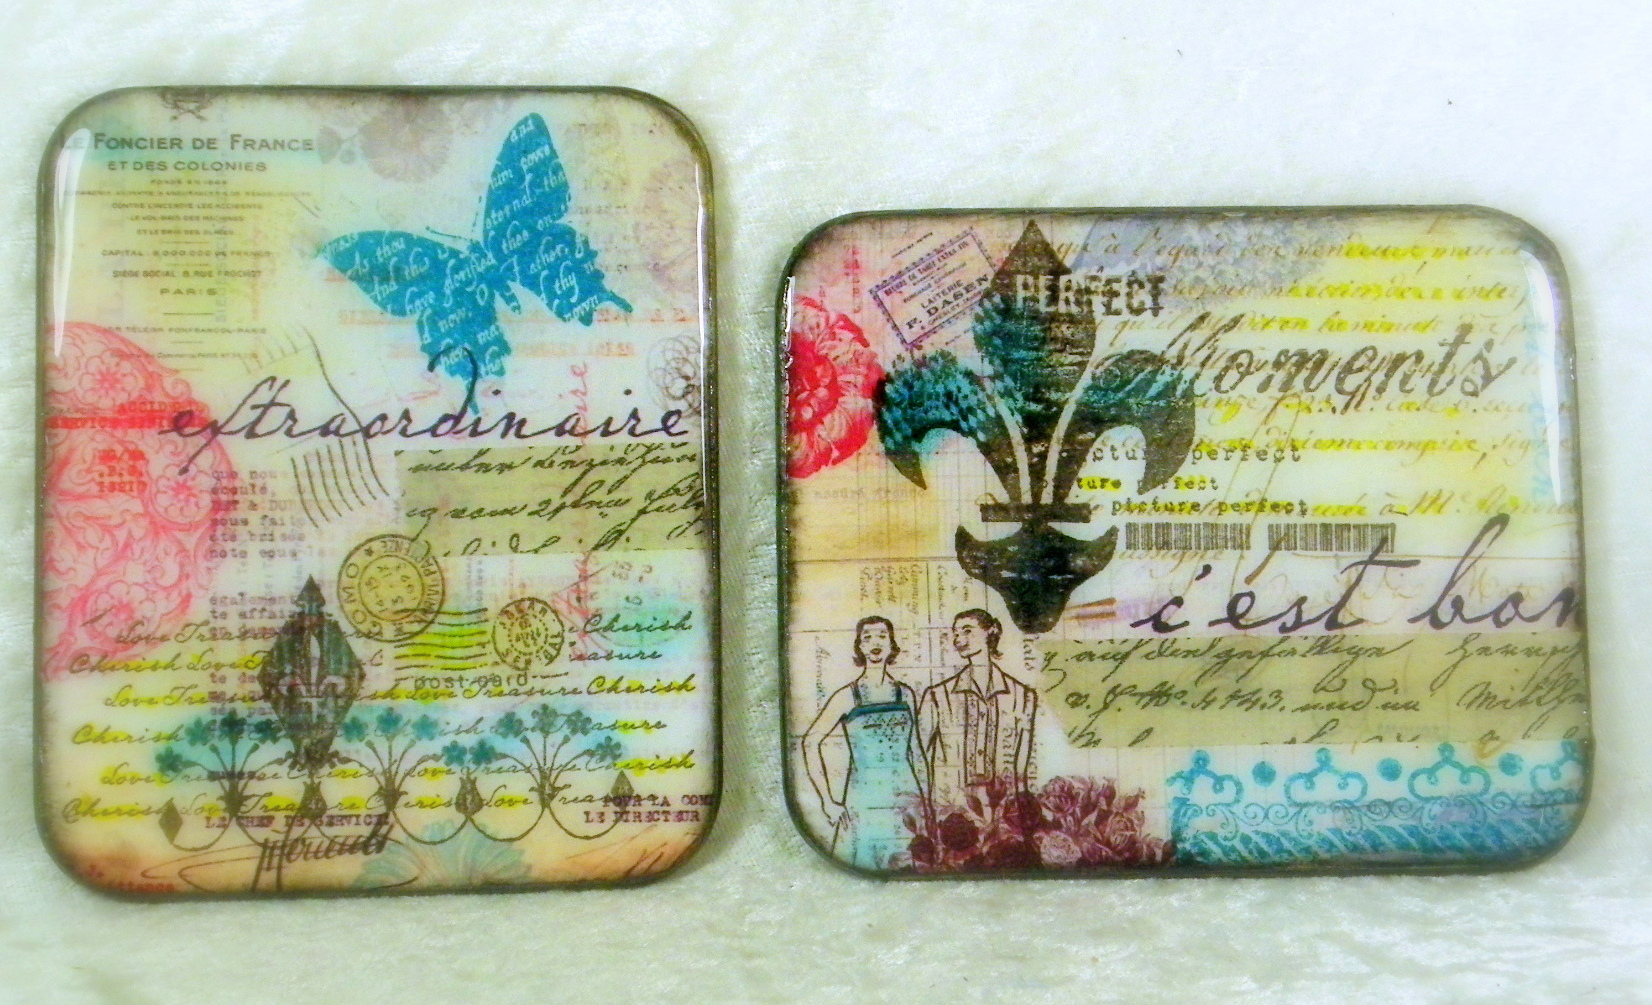
Repurpose old coffee coasters into these beautiful works of art!


Upcycled Coasters with Memento Dye Ink and Resin
  1. Lightly rub sandpaper over the coasters to create a slight texture.
  2. Apply a primer coat of white paint to the surface of the coasters; allow to dry completely.
  3. Trace coaster outline onto the ephemera paper and cut out.
  4. Adhere paper to the top of the coaster with Creative Medium. Smooth out any air bubbles using a brayer.
  5. Stamp images onto the coaster using Memento Espresso Truffle and Teal Zeal.
  6. Highlight areas with Pear Tart Memento marker.
  7. Mix ICE Resin (following manufacturer's instructions) and pour carefully (and slowly) onto the coaster.  NOTE: Having a light/lamp close to where you are working makes it easier to see that the ICE Resin is smooth.
  8. Allow resin to fully cure.
by Linda Lucas

Difficulty

Intermediate

Time

½ hour + cure time (minimum 24 hours)

Materials Needed

IMAGINE Crafts/Tsukineko:

Other supplies:

  • Stamp-It: rubber stamps
  • ICE Resin: ICE Resin
  • Spellbinders: Ephemera Papers One
  • Miscellaneous: brayer, tissue tape, old coasters, white paint to use as an undercoat/primer, liquid adhesive, sandpaper


Sign up for our newsletter
Facebook Pinterest Twitter YouTube Vimeo