Array ( [0] => 280 [ID] => 280 [1] => 1 [TYPEID] => 1 [2] => 0 [SECTIONID] => 0 [3] => project-details [MOD_NAME] => project-details [4] => [TITLE] => [5] => Project Details [META_TITLE] => Cheers! Polka Dot Postcard Invitation [6] => [META_DESCRIPTION] => Cheers! Polka Dot Postcard Invitation [7] => [META_KEYWORDS] => [8] => [BUTTON_TITLE] => [9] => [BODY] => [10] => [BODY_SIDE] => [11] => [MODULE_PROCESSING] => [12] => [MODULE_META] => [13] => project-details-head.php [MODULE_HEAD] => project-details-head.php [14] => project-details-body.php [MODULE_BODY] => project-details-body.php [15] => [MODULE_SIDE] => [16] => 0 [TOP_ORDER] => 0 [17] => 0 [HITS_UNIQUE] => 0 [18] => 0 [HITS_REPEAT] => 0 [19] => 0 [ROBOT_HITS] => 0 [20] => 0000-00-00 00:00:00 [LASTVIEWED] => 0000-00-00 00:00:00 [21] => 0000-00-00 00:00:00 [ROBOT_LASTVIEWED] => 0000-00-00 00:00:00 [22] => 0.70 [PRIORITY] => 0.70 [23] => 1 [SITEMAP] => 1 [24] => 1 [ACTIVE] => 1 [25] => 1 [DISPLAY_TITLE] => 1 [26] => 0 [SSL_MODE] => 0 [27] => 0 [EDITABLE] => 0 [28] => 0 [DELETABLE] => 0 [29] => 2013-11-05 00:00:00 [LASTUPDATED] => 2013-11-05 00:00:00 [30] => 2013-11-05 00:00:00 [CREATED] => 2013-11-05 00:00:00 )
Imagine Crafts
LearnMakeCommunityShop

Cheers! Polka Dot Postcard Invitation

Simple and fun, these postcard invitations will be the talk of the party!


Cheers! Polka Dot Postcard Invitation
  1. Cut cardstock to 4¼˝ x 5½˝, punch corners to round edges.
  2. Stamp 'Cheer's' and 1" dots to one side with Delicata Golden Glitz.
  3. Edge the sides of the cardstock by running the inkpad around the sides of the card to highlight the design.  Allow to dry completely.
  4. Turn the card over and  measure 3½˝ from the left side of card and draw a vertical line so you'll have a separated address and invite areas.
  5. Stamp the silverware using Versamark for a watermark effectStamp the gold lines for a cancelled postmark appearance over the silverware image.
  6. Stamp the larger silverware pattern, again using Versamark this time on left side of card.
  7. Stamp "You're Invited..." towards the top of the card on the left side, leaving room towards the bottom to fill in all the party details.
  8. Erase any pencil guide lines you may have created.
  9. Add a few blank black lines with a black marker on the right hand side as shown to create address lines.
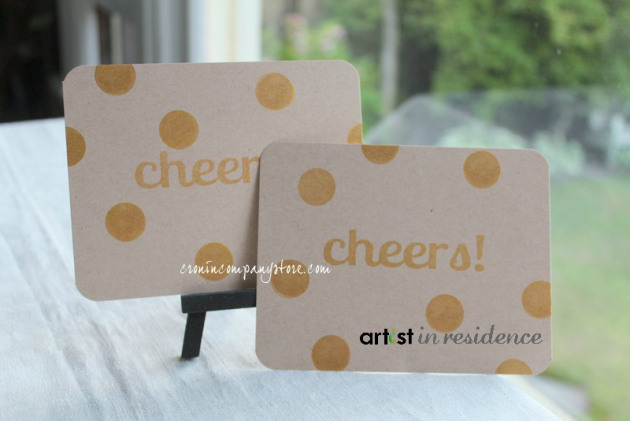
by Maureen Cronin

Difficulty

Beginner

Time

½ hour

Materials Needed

IMAGINE Crafts/Tsukineko:

Other supplies:

  • Amuse Studio (rubber stamps): 'You're Invited' set, Vintage 'Cheers' and Dots
  • Miscellaneous: kraft cardstock, ruler, pencil, fine point black marker, corner punch


Sign up for our newsletter
Facebook Pinterest Twitter YouTube Vimeo