Array ( [0] => 280 [ID] => 280 [1] => 1 [TYPEID] => 1 [2] => 0 [SECTIONID] => 0 [3] => project-details [MOD_NAME] => project-details [4] => [TITLE] => [5] => Project Details [META_TITLE] => Bless Our Nest Textured Greeting Cards [6] => [META_DESCRIPTION] => Bless Our Nest Textured Greeting Cards [7] => [META_KEYWORDS] => [8] => [BUTTON_TITLE] => [9] => [BODY] => [10] => [BODY_SIDE] => [11] => [MODULE_PROCESSING] => [12] => [MODULE_META] => [13] => project-details-head.php [MODULE_HEAD] => project-details-head.php [14] => project-details-body.php [MODULE_BODY] => project-details-body.php [15] => [MODULE_SIDE] => [16] => 0 [TOP_ORDER] => 0 [17] => 0 [HITS_UNIQUE] => 0 [18] => 0 [HITS_REPEAT] => 0 [19] => 0 [ROBOT_HITS] => 0 [20] => 0000-00-00 00:00:00 [LASTVIEWED] => 0000-00-00 00:00:00 [21] => 0000-00-00 00:00:00 [ROBOT_LASTVIEWED] => 0000-00-00 00:00:00 [22] => 0.70 [PRIORITY] => 0.70 [23] => 1 [SITEMAP] => 1 [24] => 1 [ACTIVE] => 1 [25] => 1 [DISPLAY_TITLE] => 1 [26] => 0 [SSL_MODE] => 0 [27] => 0 [EDITABLE] => 0 [28] => 0 [DELETABLE] => 0 [29] => 2013-11-05 00:00:00 [LASTUPDATED] => 2013-11-05 00:00:00 [30] => 2013-11-05 00:00:00 [CREATED] => 2013-11-05 00:00:00 )
Imagine Crafts
LearnMakeCommunityShop

Bless Our Nest Textured Greeting Cards

Create some fun textures with Kaleidacolor inkpads. Play with some Creative Medium for some fun textured effects. Learn more...


Bless Our Nest Textured Greeting Cards

Step 1

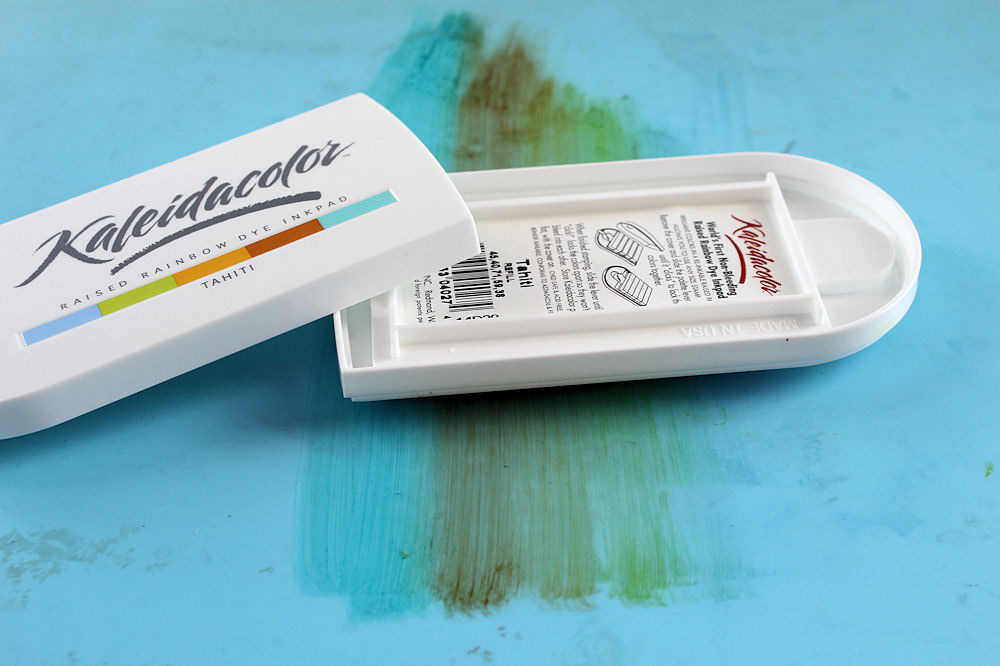
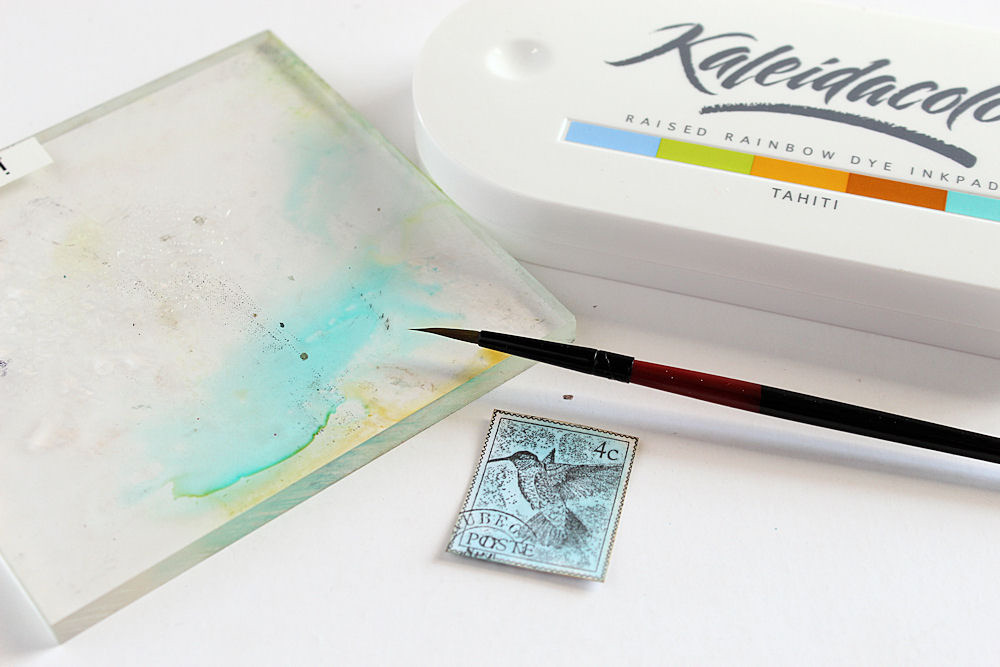
Apply the Kaleidacolor Tahiti ink to your craft mat. Remember to close the ink pad to add the ink and then open it up before storing so the colors won’t run into each other.

Step 2

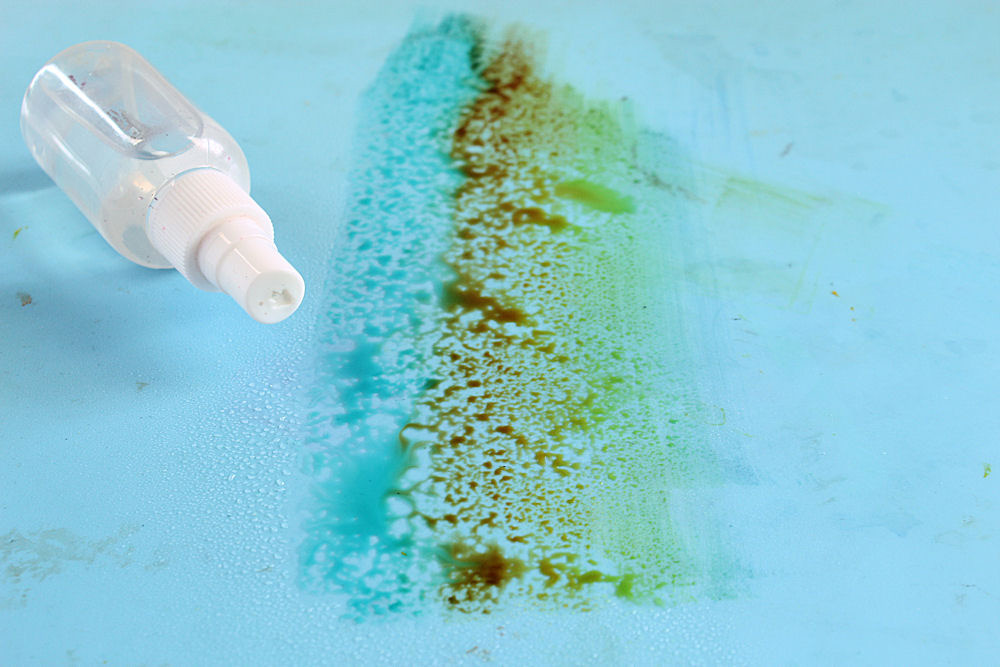
Mist the ink on the craft sheet with water until colored drops start to form.

Step 3

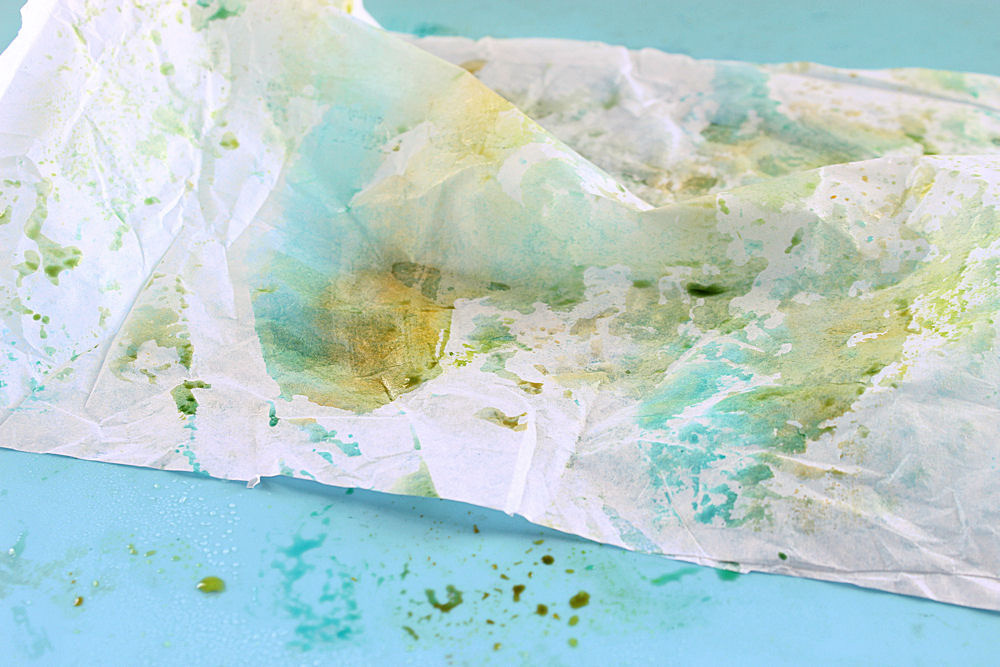
Use white gift wrap tissue paper and carefully lay it down onto the ink on the craft mat. Lift it and dip it repeatedly to add a layer of color all over the tissue paper.

Step 4

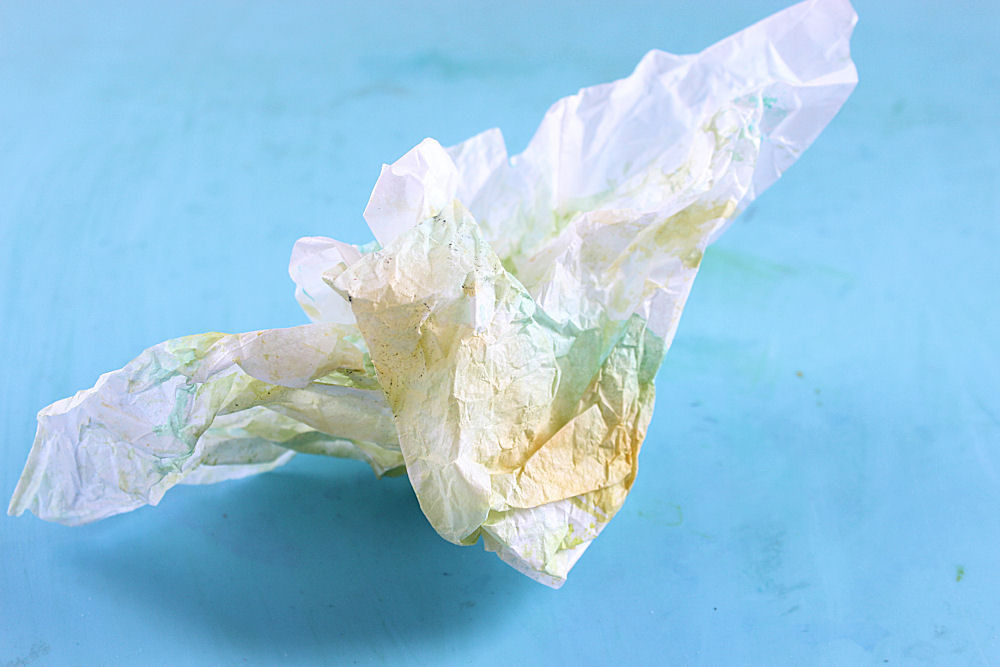
Use your heat gun to dry the tissue paper. Once dry scrunch up the tissue paper and then open it up again. By scrunching it up you are adding more texture and crinkles to the paper.

Step 5

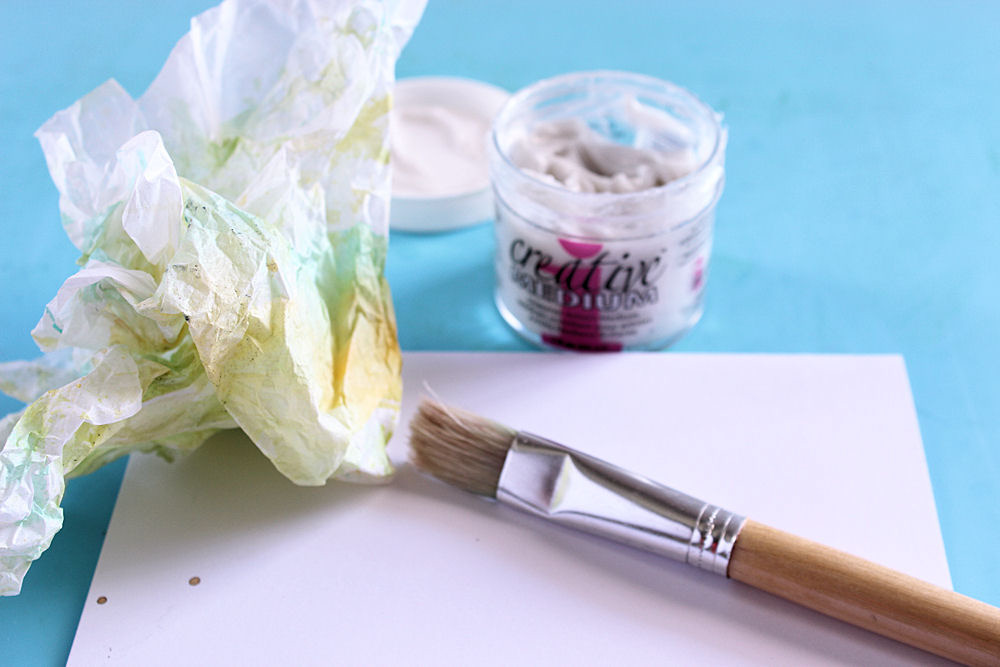
Adhere the colored tissue paper to a sheet of white cardstock using Creative Medium. Paint a layer of medium onto the cardstock, then place the tissue paper into the layer of Creative Medium.

Step 6

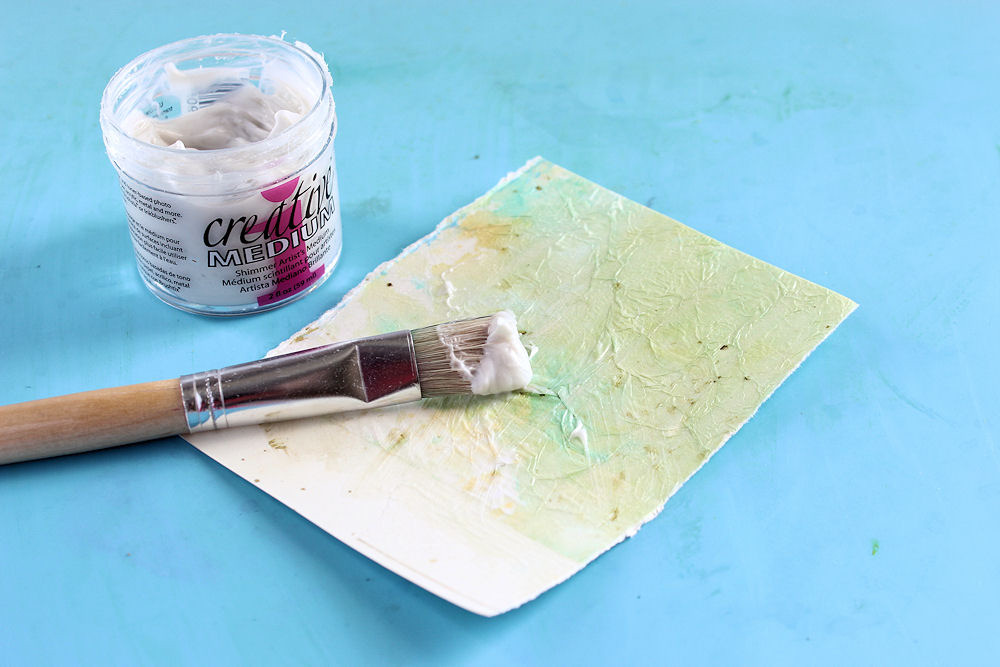
Carefully smooth out the tissue paper with your brush. Paint from the middle towards the outer edges to avoid tearing the thin tissue paper. Seal the top of the paper with a layer of creative medium.

Step 7

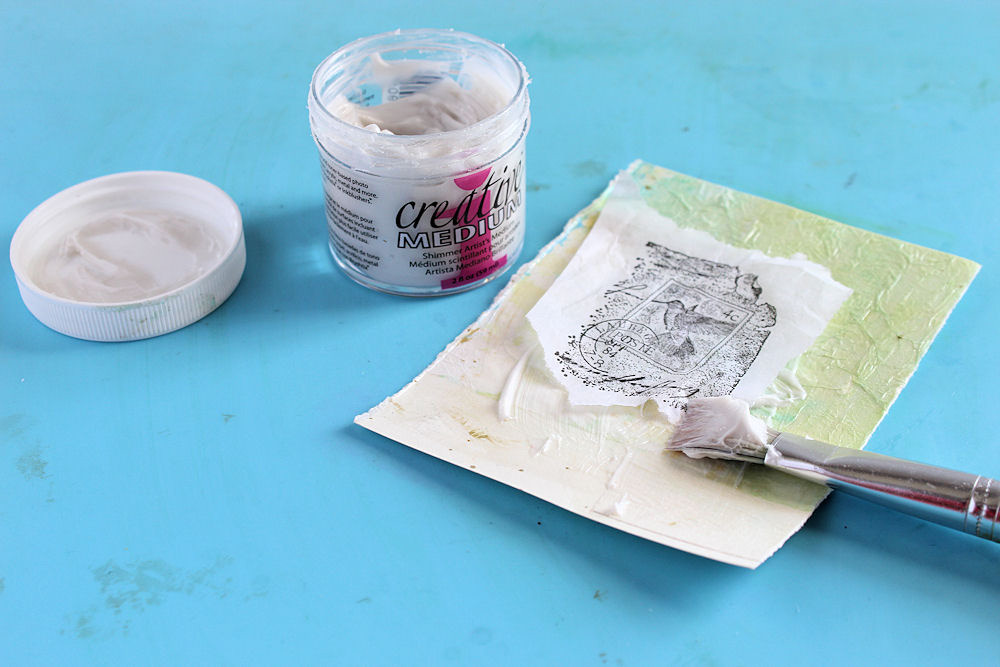
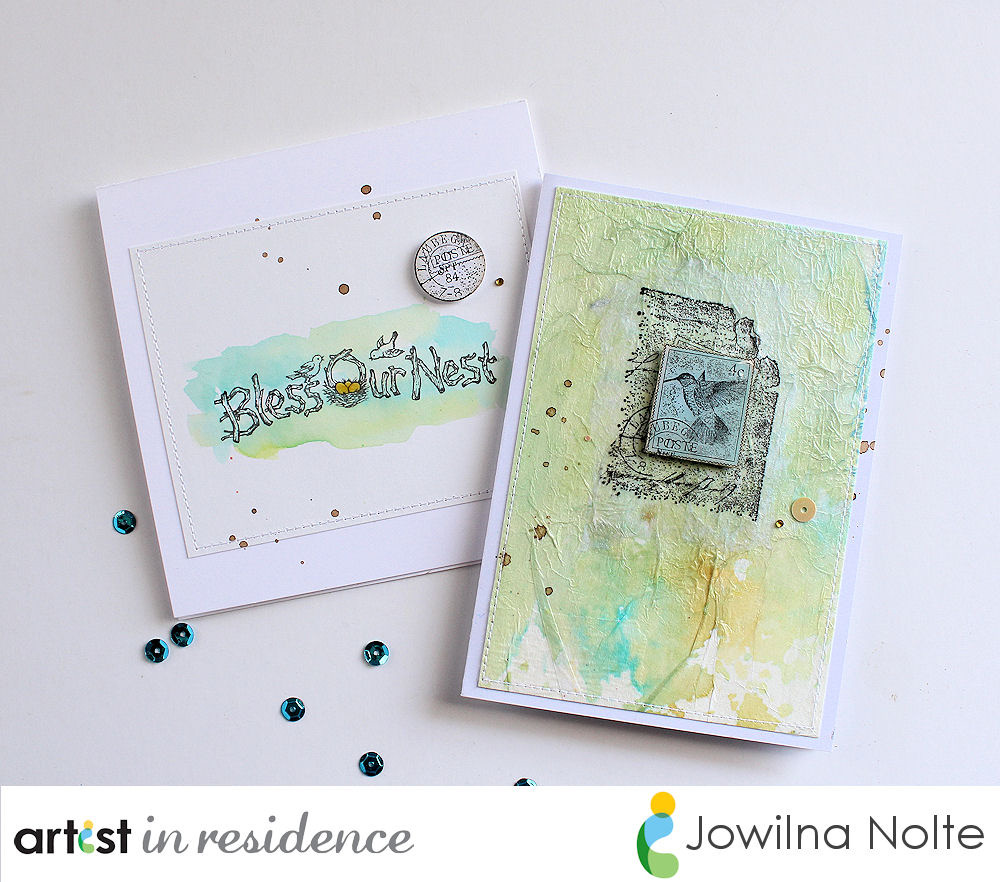
Stamp your bird image onto another piece of white tissue paper using VersaFine ink. Tear around the edges and adhere the stamped image to the top of your texture layer. Let dry.

Step 8

Stamp the bird image onto white cardstock using VersaFine and cut out the middle portion. Use colors from your Kaleidacolor ink pad to paint the image. Layer it using foam tape to the front of your texture piece. Sew or adhere to the front of your card base. Add embellishments to finish off your card.

by Jowilna Nolte

Difficulty

Intermediate

Time

1 hour plus dry time

Materials Needed

Imagine
Other
  • Cardstock – white
  • Inkadinkado – stamp
  • Paint brush
  • Heat gun
  • Acrylic block
  • Tissue paper
  • Foam adhesive
  • Adhesive or sewing machine
  • Embellishments


Sign up for our newsletter
Facebook Pinterest Twitter YouTube Vimeo