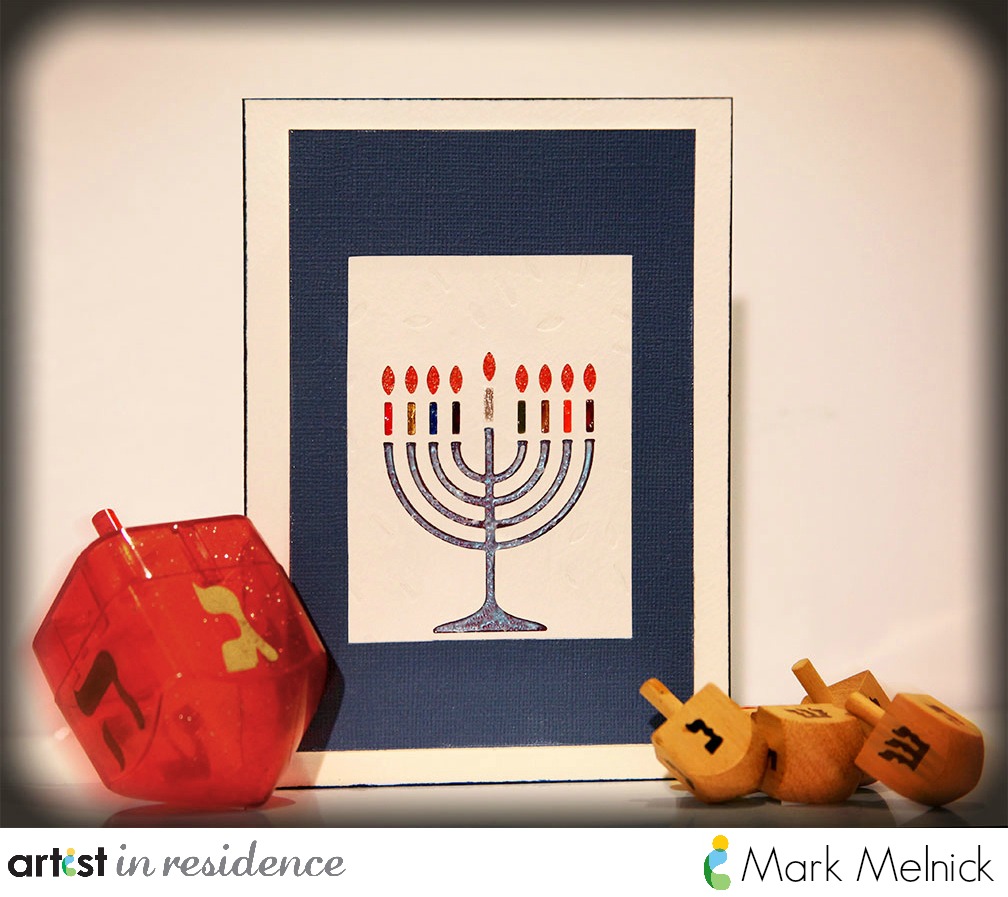
With the winter holidays coming soon [Christmas, Hanukkah and Kwanzaa] I decided to start with the first of three, Hanukkah, known as the ‘festival of lights.’ Here’s the card and ‘how to’ tutorial…enjoy!
Step One:
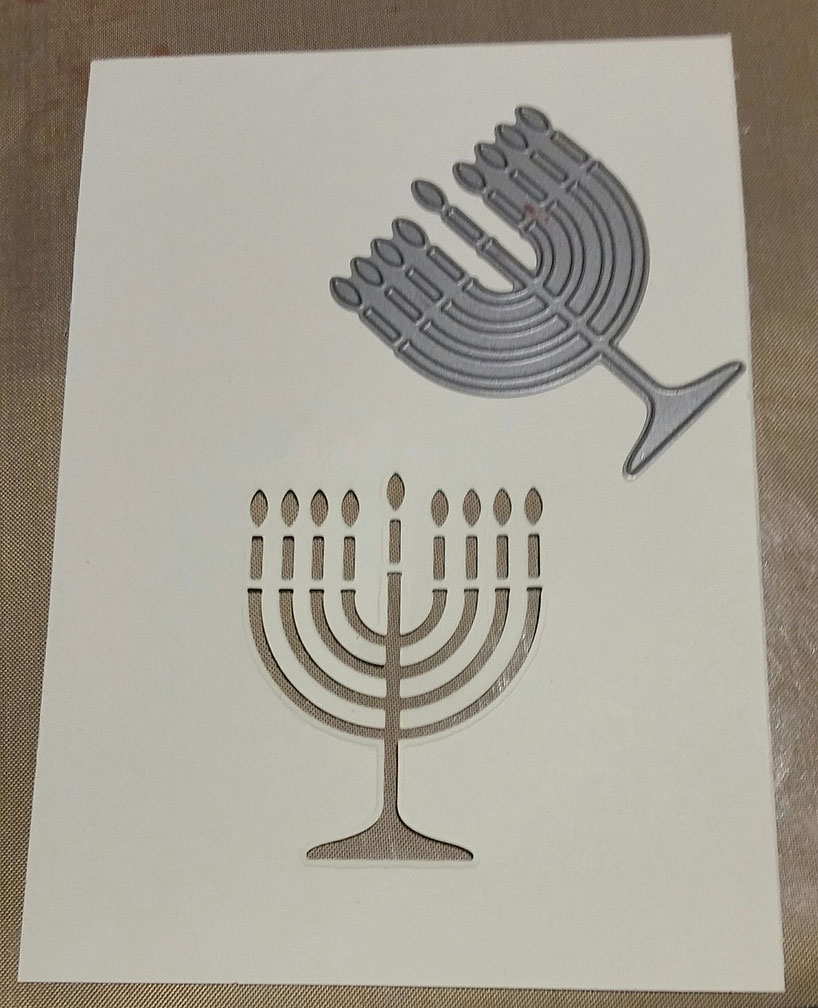
Starting with the Papetry Ink Menorah Die from the Menorah Medley Set, run a 4″x6″ piece of watercolour paper and a second piece of plain cardstock [with the Menorah Die] through your die cut machine of choice. Place the candle and flame pieces from the die randomly onto the watercolor piece around the Menorah. Run this piece through your die cut machine a second time creating a wonderful debossed texture to your card.
Note: The second die cut is for use as a stencil for the candle and flame coloration.
Step Two:
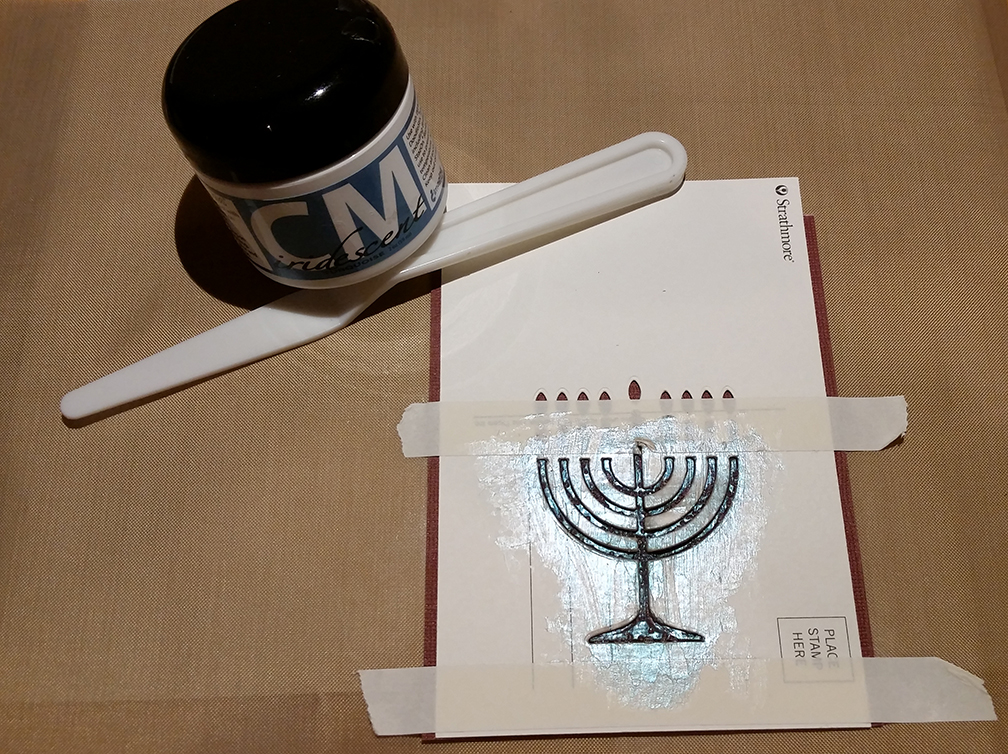
Mix Creative Medium with the Glass Bead Texture Gel. Apply mixture generously to Menorah Stencil with Palette Knife. Carefully scrape off excess leaving a level base amount. Lift off stencil and let dry.
Step Three:
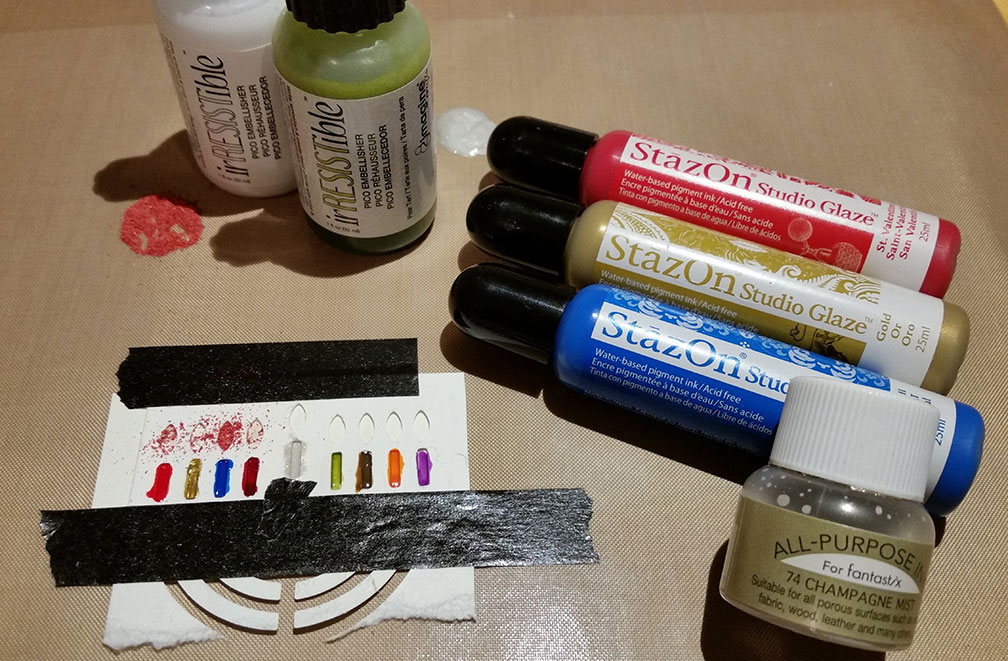
Take the piece of plain cardstock and cut off just the portion containing the candles and flames. Adhere this piece to a craft mat with washi tape. Color each candle with StazOn Studio Glaze [I also used Pico Embellishers.] When finished, use the pointed end of a VersaMark Ink Pen and rub into each candle spaces. Pour embossing powder into these spaces covering the flame holes. Undo washi tape and tap off excess embossing powder.
Step Four:
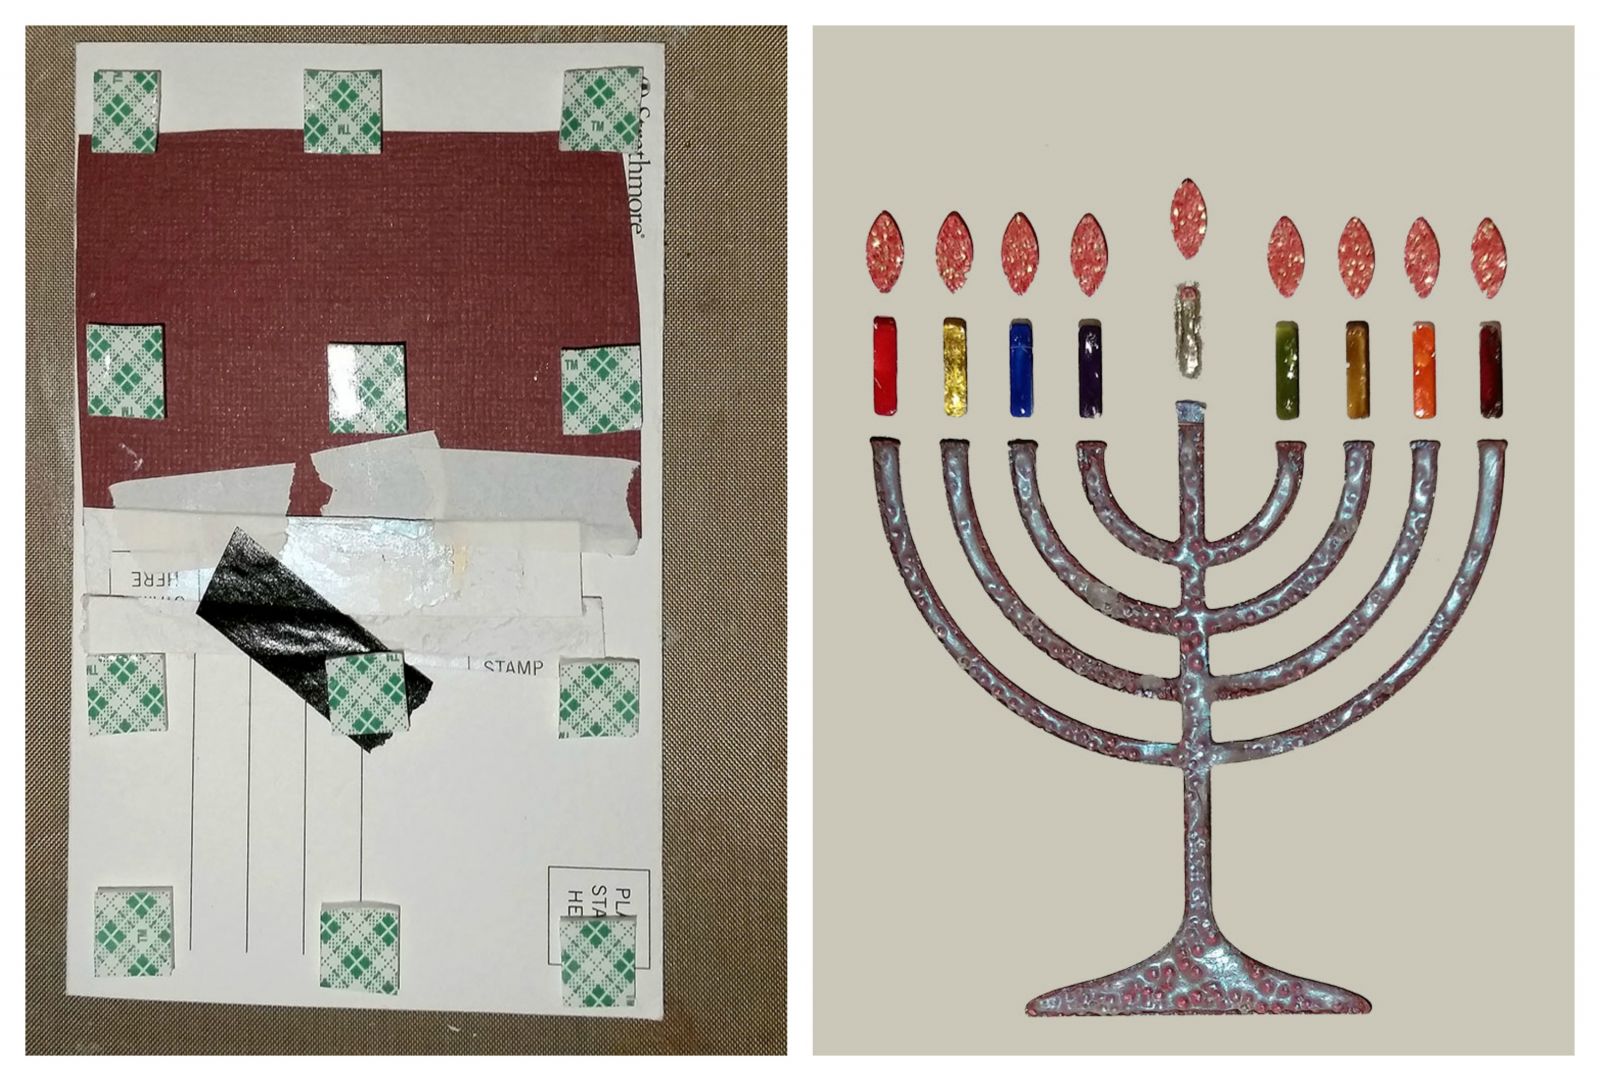
Place finished Menorah and Candle/Flame piece behind the Menorah stencil and align so that the dry Creative Medium piece and the Candles/Flames align perfectly with the open stencil parts.
Step Five:
Cut frame out of colored cardstock. Adhere frame over Menorah piece and place on card base with adhesive squares. This will leave the piece raised and add not only dimension, but visual interest to your finished care, as well. Rub Memento Dye Ink color of your choice along all four edges of the card.
Imagine Crafts featuring Tsukineko
Other: