Array ( [0] => 280 [ID] => 280 [1] => 1 [TYPEID] => 1 [2] => 0 [SECTIONID] => 0 [3] => project-details [MOD_NAME] => project-details [4] => [TITLE] => [5] => Project Details [META_TITLE] => Juicy Watermelon Tank Top Fabric Project [6] => [META_DESCRIPTION] => Juicy Watermelon Tank Top Fabric Project [7] => [META_KEYWORDS] => [8] => [BUTTON_TITLE] => [9] => [BODY] => [10] => [BODY_SIDE] => [11] => [MODULE_PROCESSING] => [12] => [MODULE_META] => [13] => project-details-head.php [MODULE_HEAD] => project-details-head.php [14] => project-details-body.php [MODULE_BODY] => project-details-body.php [15] => [MODULE_SIDE] => [16] => 0 [TOP_ORDER] => 0 [17] => 0 [HITS_UNIQUE] => 0 [18] => 0 [HITS_REPEAT] => 0 [19] => 0 [ROBOT_HITS] => 0 [20] => 0000-00-00 00:00:00 [LASTVIEWED] => 0000-00-00 00:00:00 [21] => 0000-00-00 00:00:00 [ROBOT_LASTVIEWED] => 0000-00-00 00:00:00 [22] => 0.70 [PRIORITY] => 0.70 [23] => 1 [SITEMAP] => 1 [24] => 1 [ACTIVE] => 1 [25] => 1 [DISPLAY_TITLE] => 1 [26] => 0 [SSL_MODE] => 0 [27] => 0 [EDITABLE] => 0 [28] => 0 [DELETABLE] => 0 [29] => 2013-11-05 00:00:00 [LASTUPDATED] => 2013-11-05 00:00:00 [30] => 2013-11-05 00:00:00 [CREATED] => 2013-11-05 00:00:00 )
Imagine Crafts
LearnMakeCommunityShop

Juicy Watermelon Tank Top Fabric Project

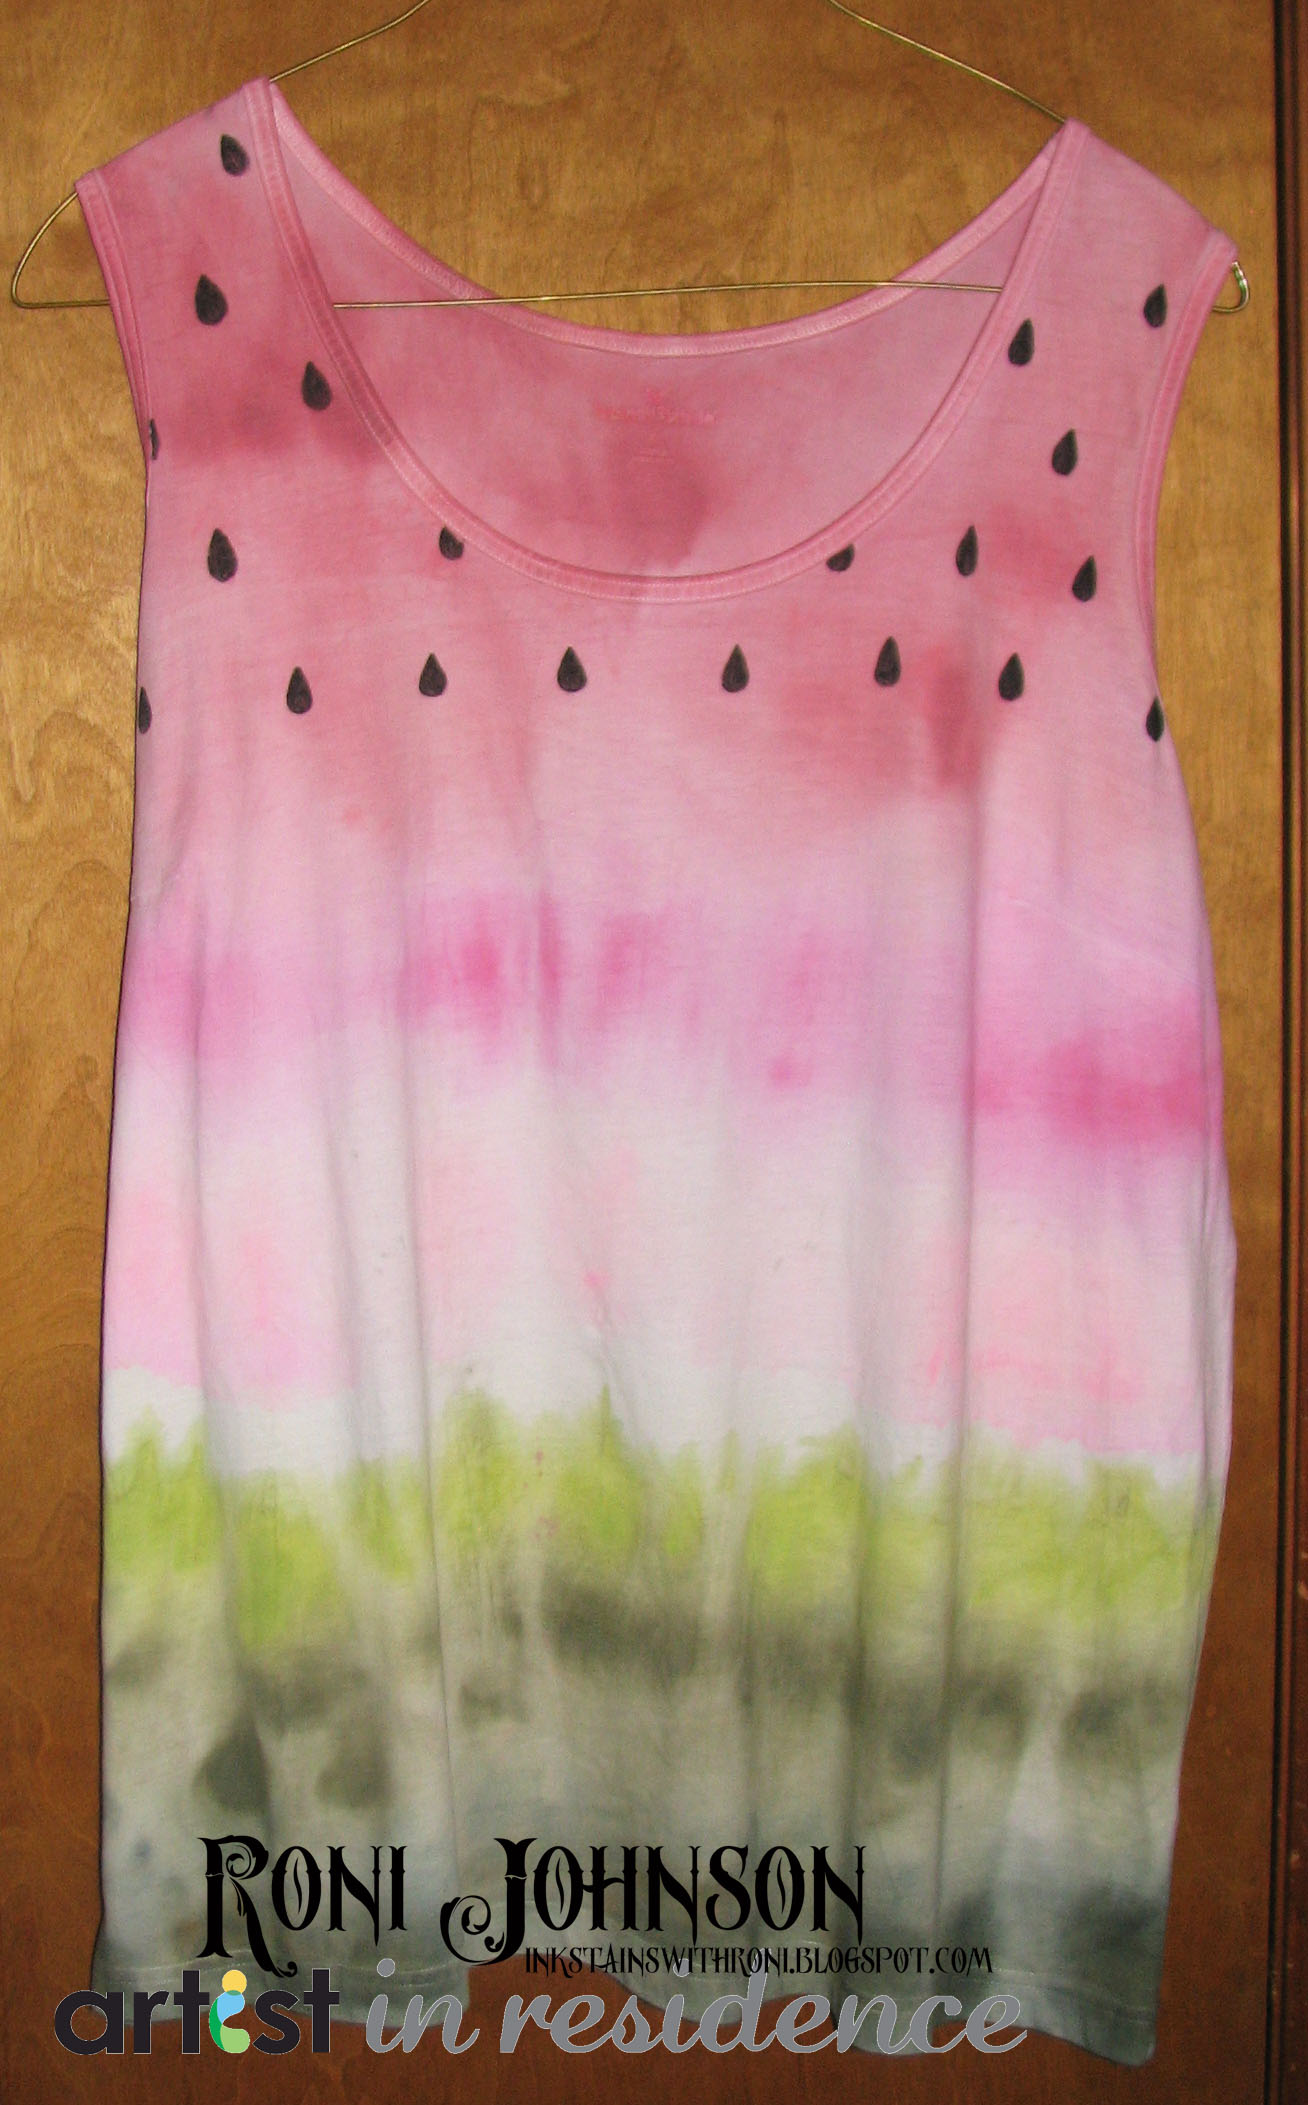
A delicious DIY tank, just in time for summer!


Juicy Watermelon Tank Top Fabric Project

Directions:

2015_June_RJ_SummerT_02

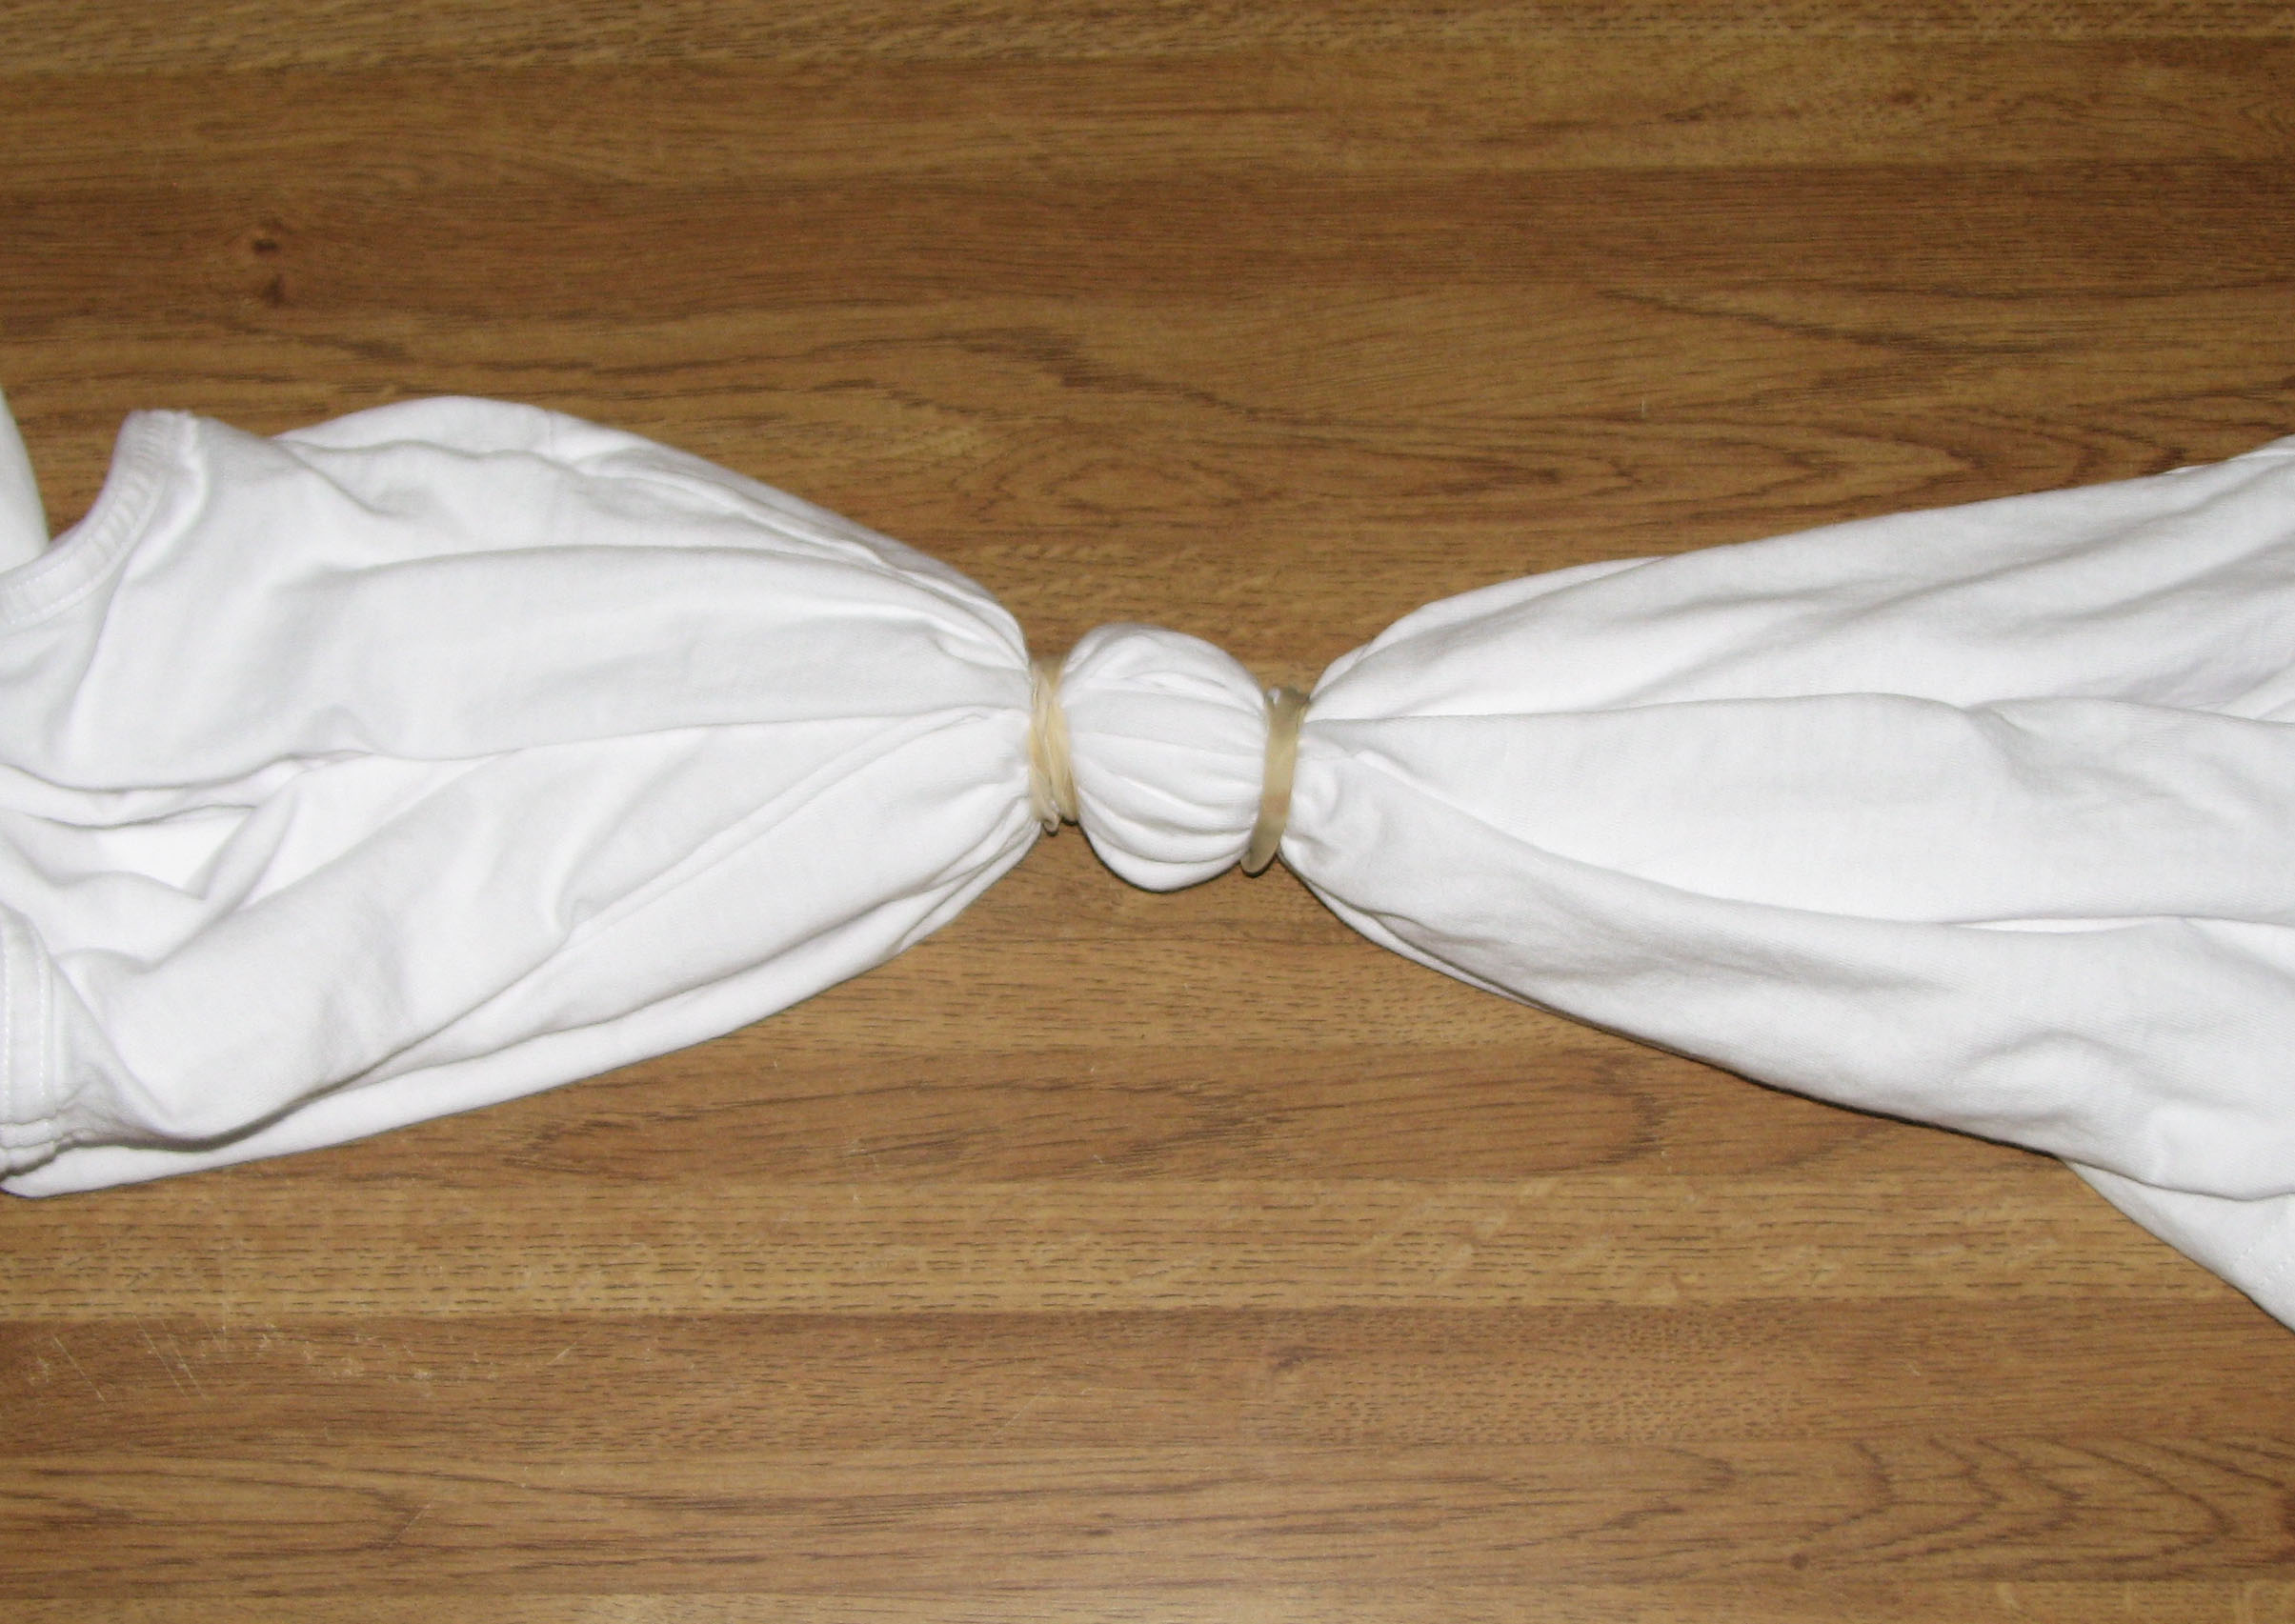
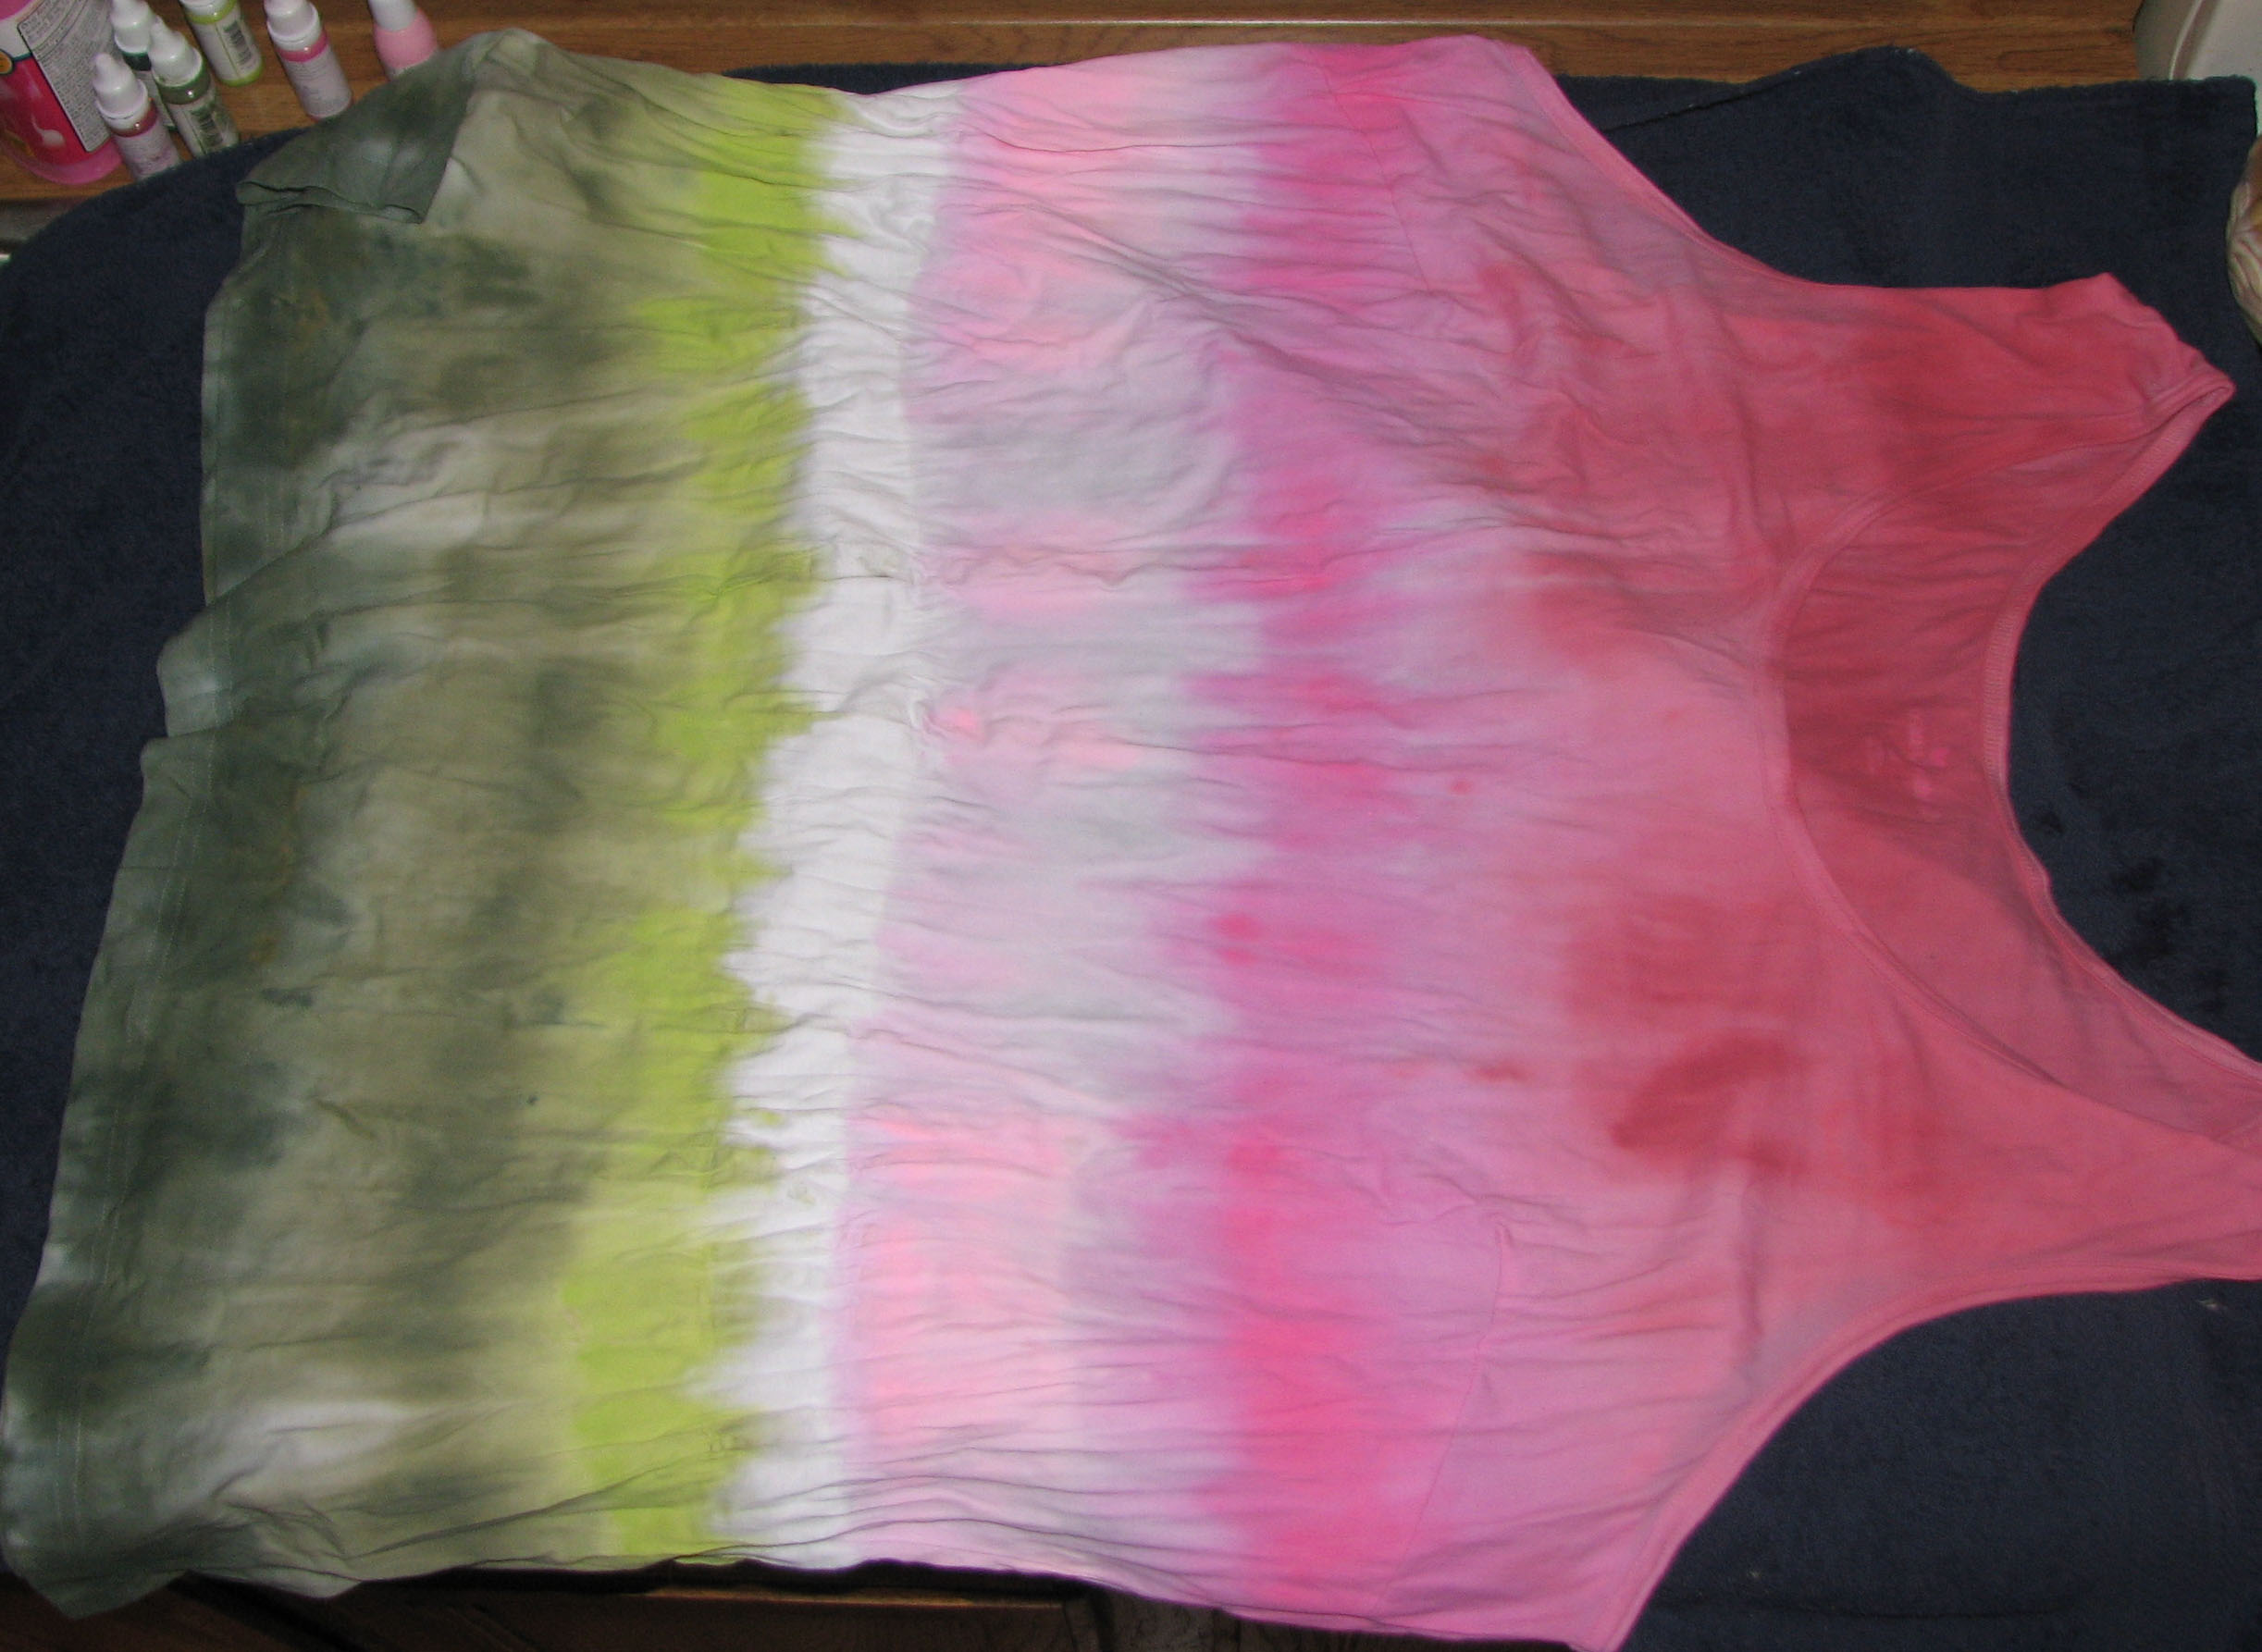
1. Wrap two rubber bands near the bottom third of the shirt.  This will leave a white space between the green "rind" and the pink center of the watermelon.

2015_June_RJ_SummerT_03

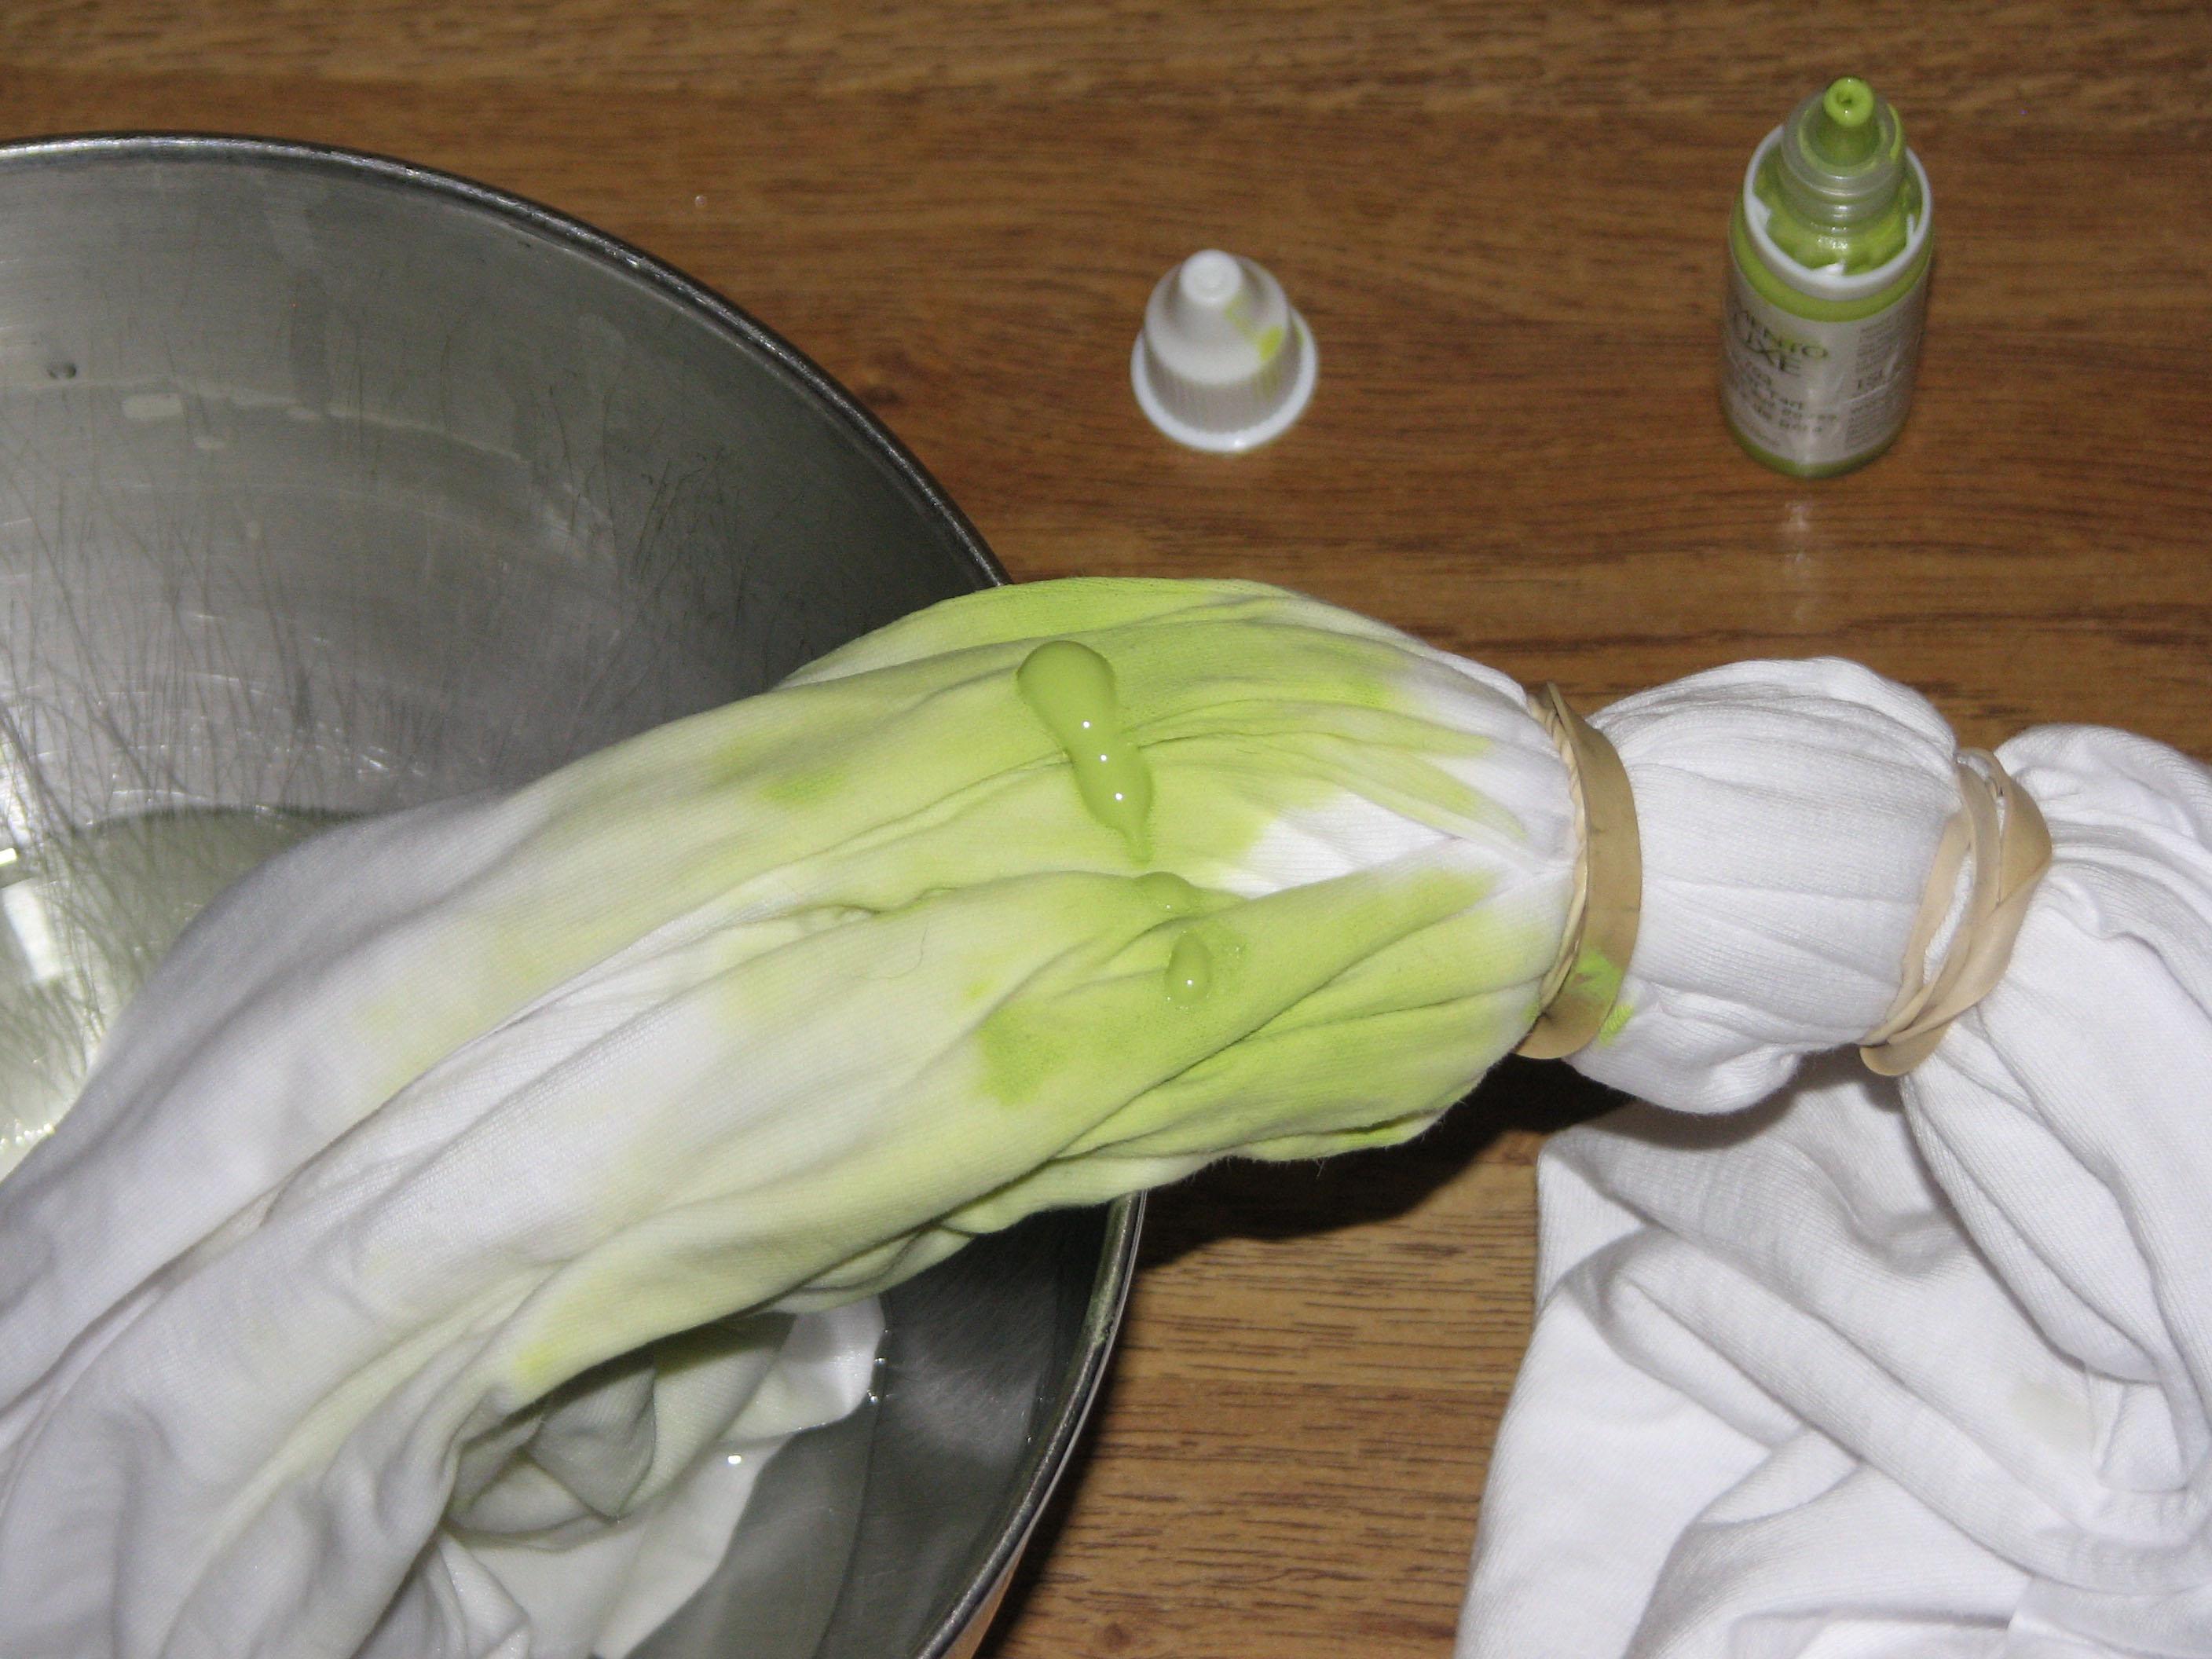
2. Dip bottom third of the shirt into warm water.  Squeeze a dollop of Memento Luxe Pear Tart inker near the lower rubber band and work it into the material by squeezing it with your hand.  Turn the shirt and continue adding ink as necessary.

2015_June_RJ_SummerT_04

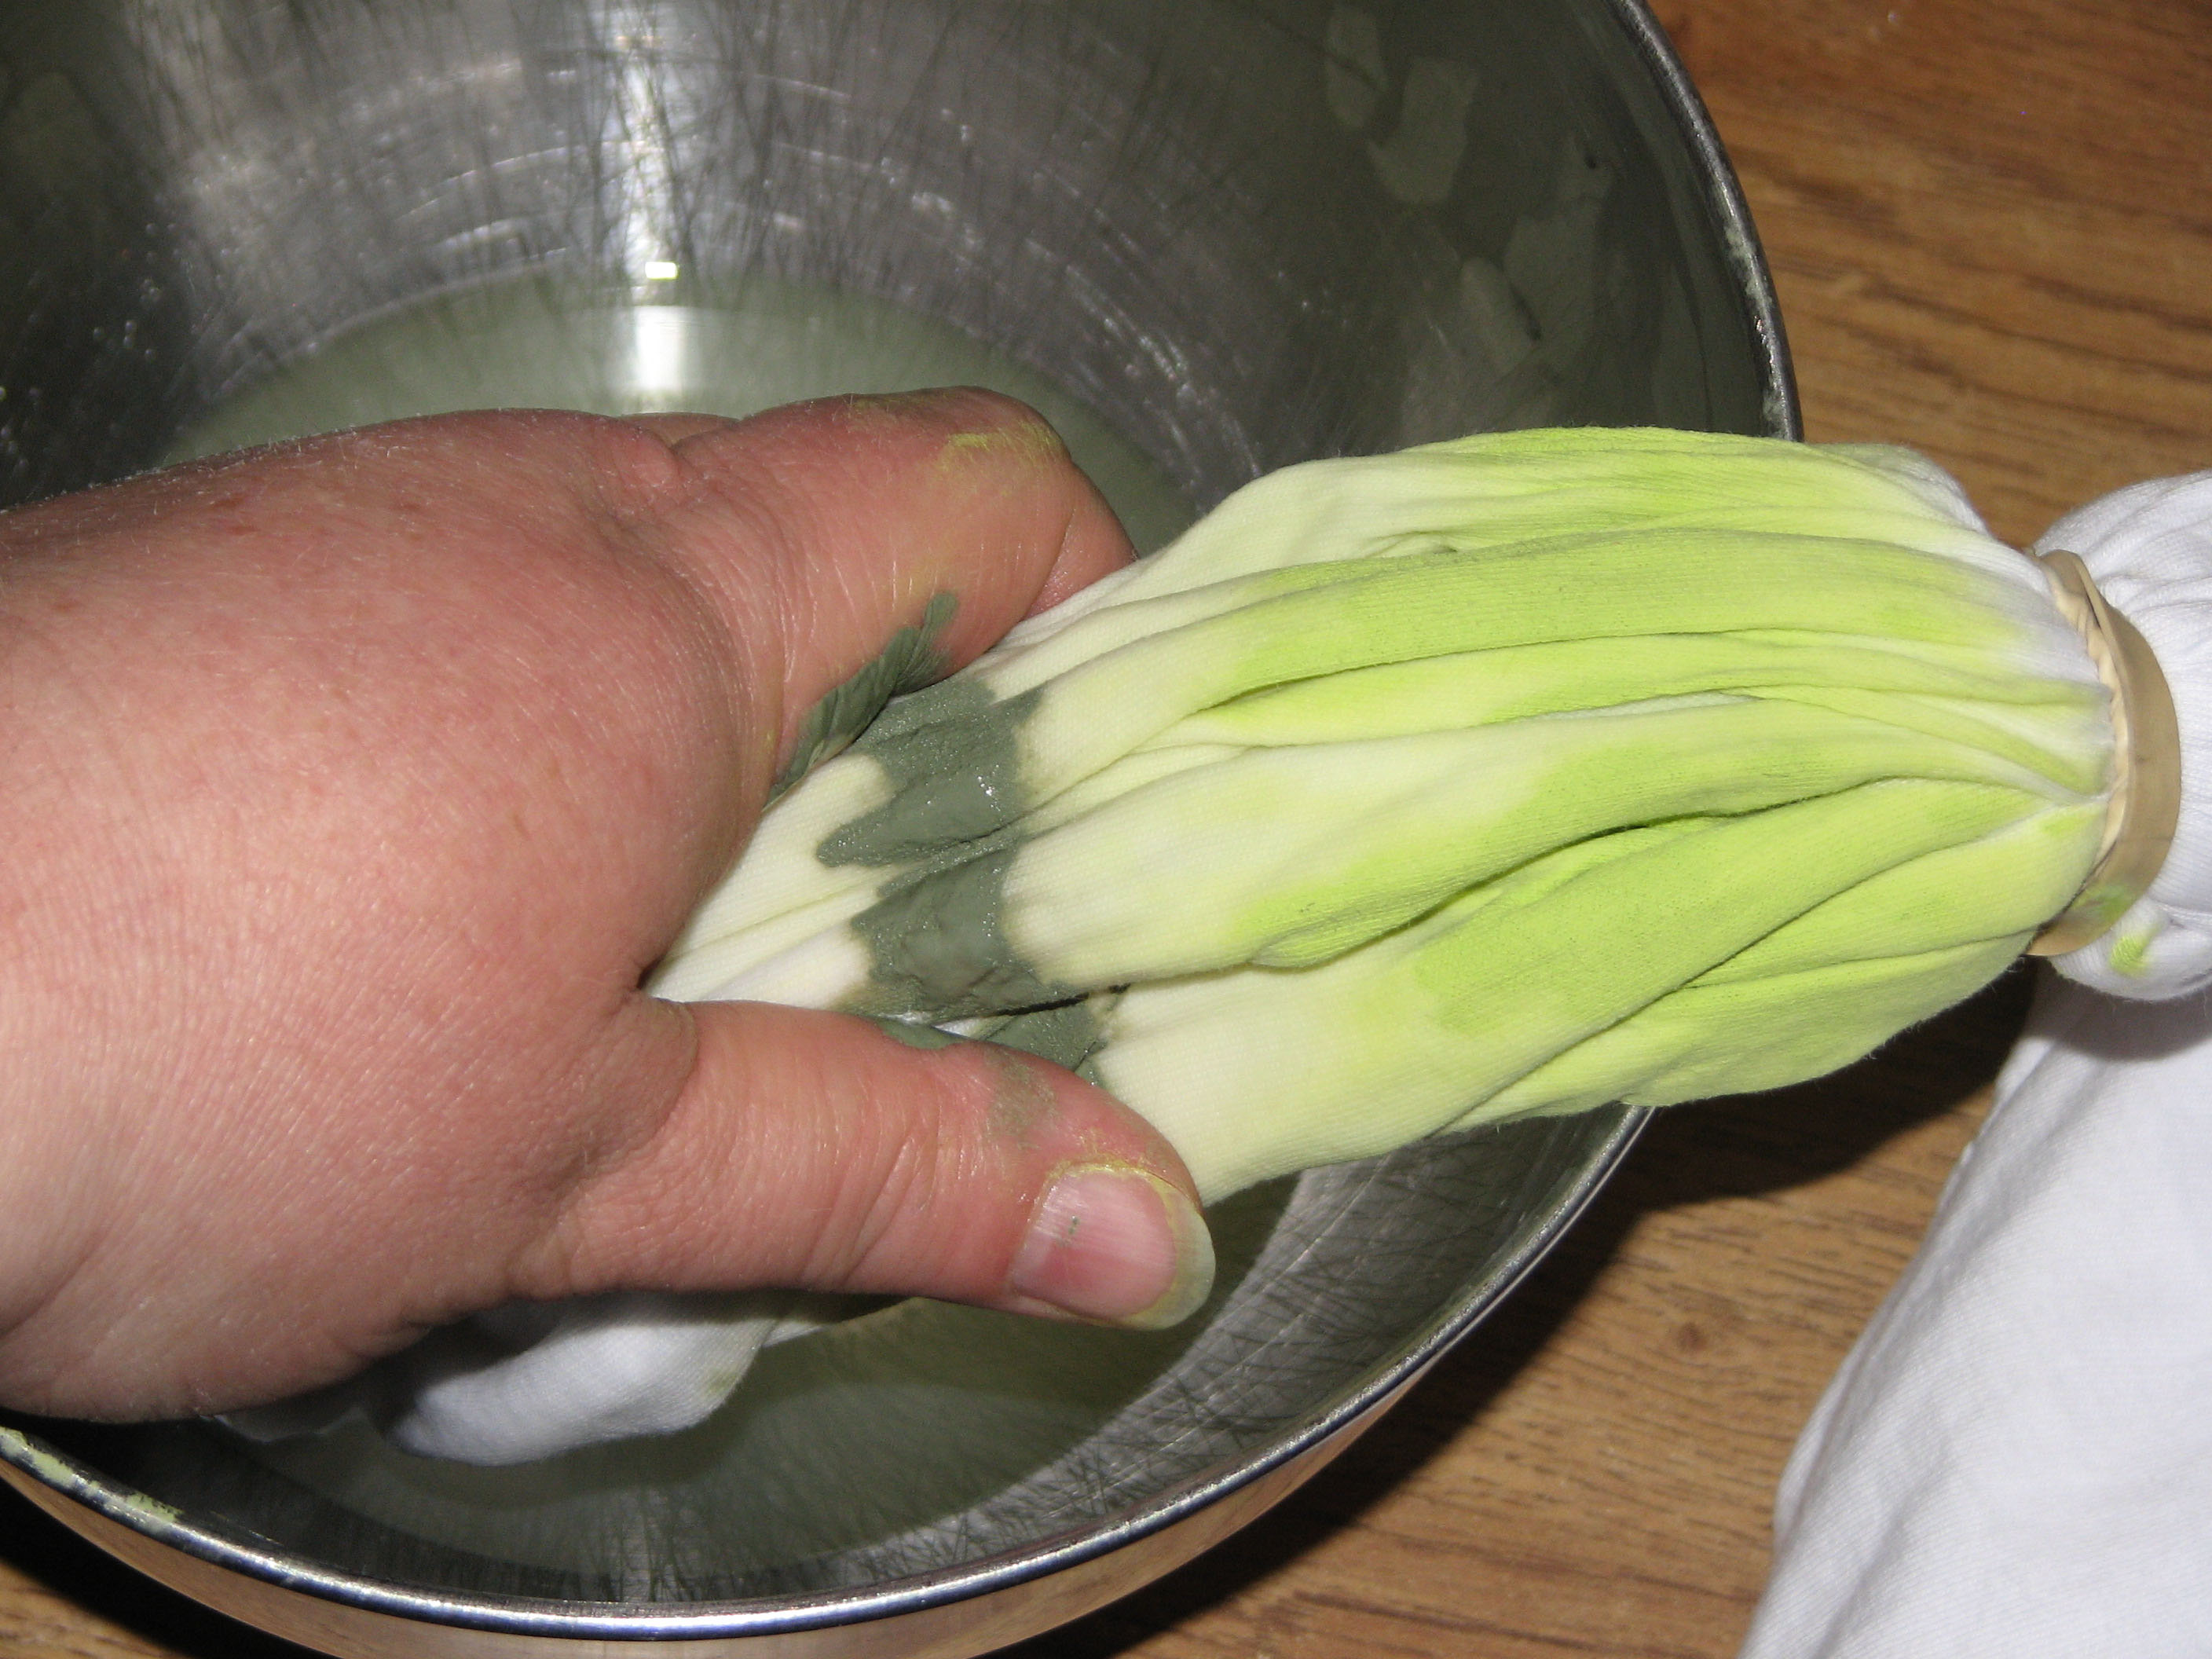
3. Just below the Pear Tart, add Memento Luxe Olive Grove ink and work it into the fabric just as you did the Pear Tart.

2015_June_RJ_SummerT_05

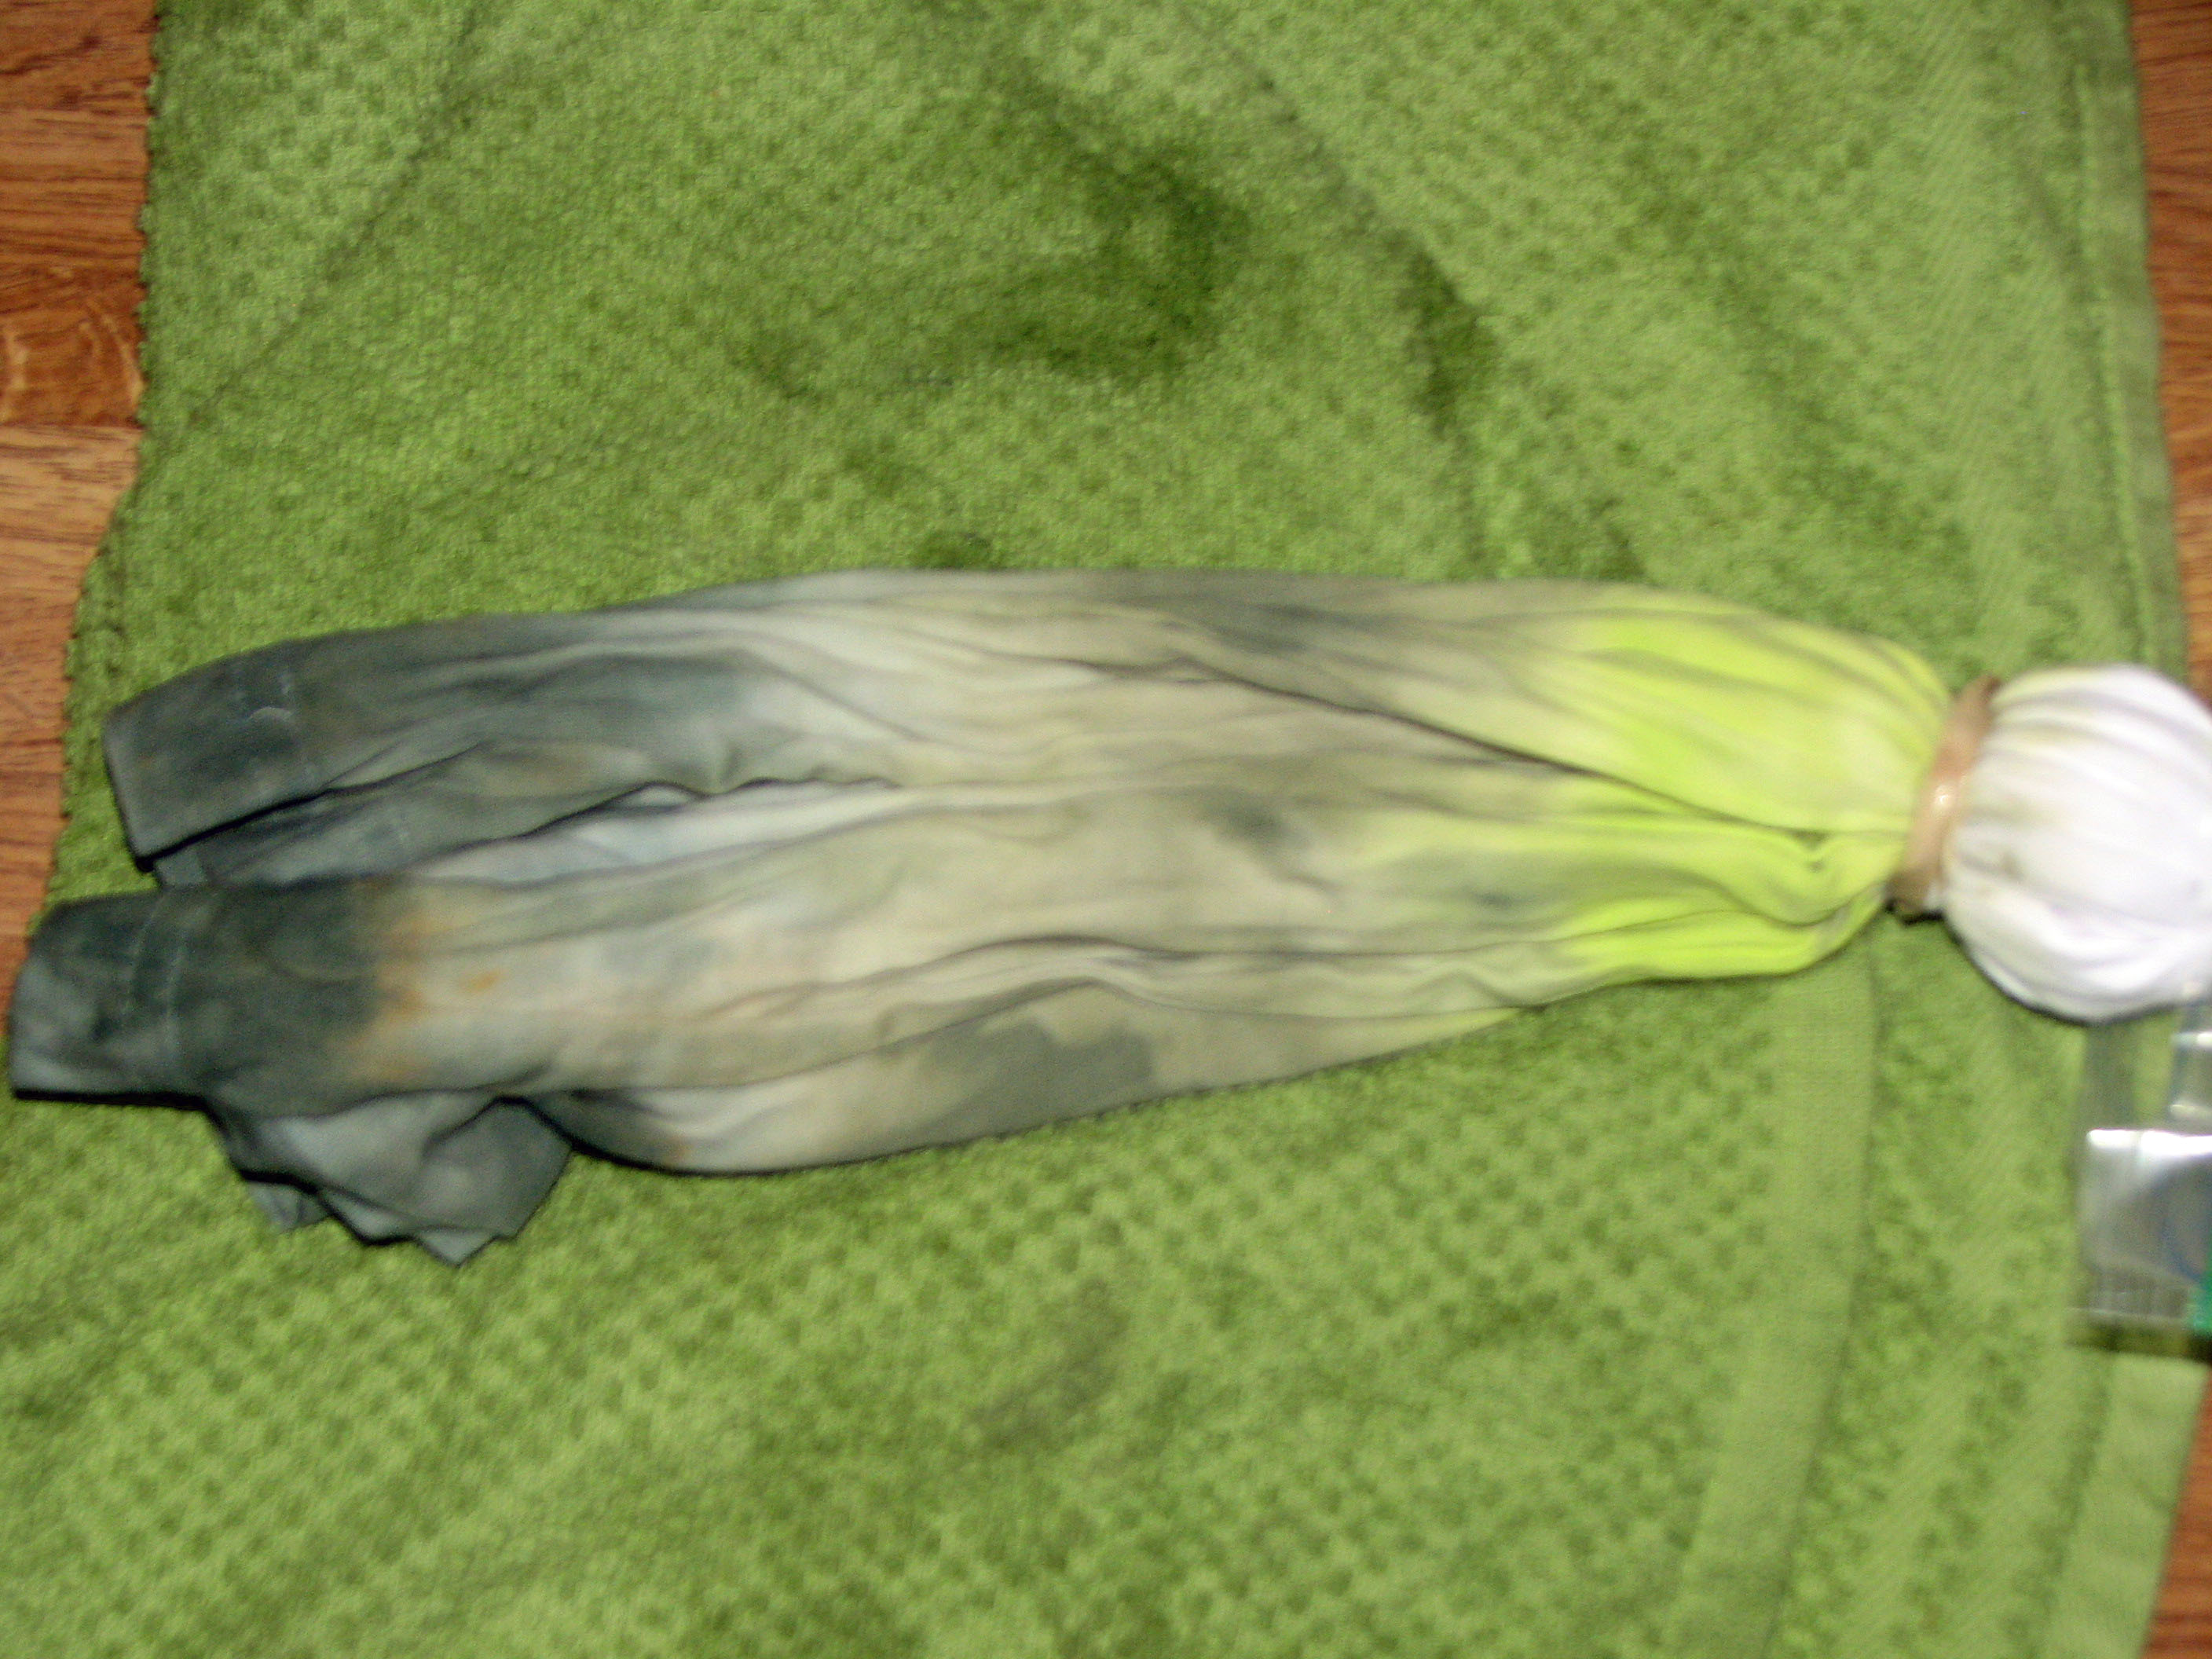
4. Finally, apply Northern Pine ink along the bottom of the shirt.

2015_June_RJ_SummerT_06

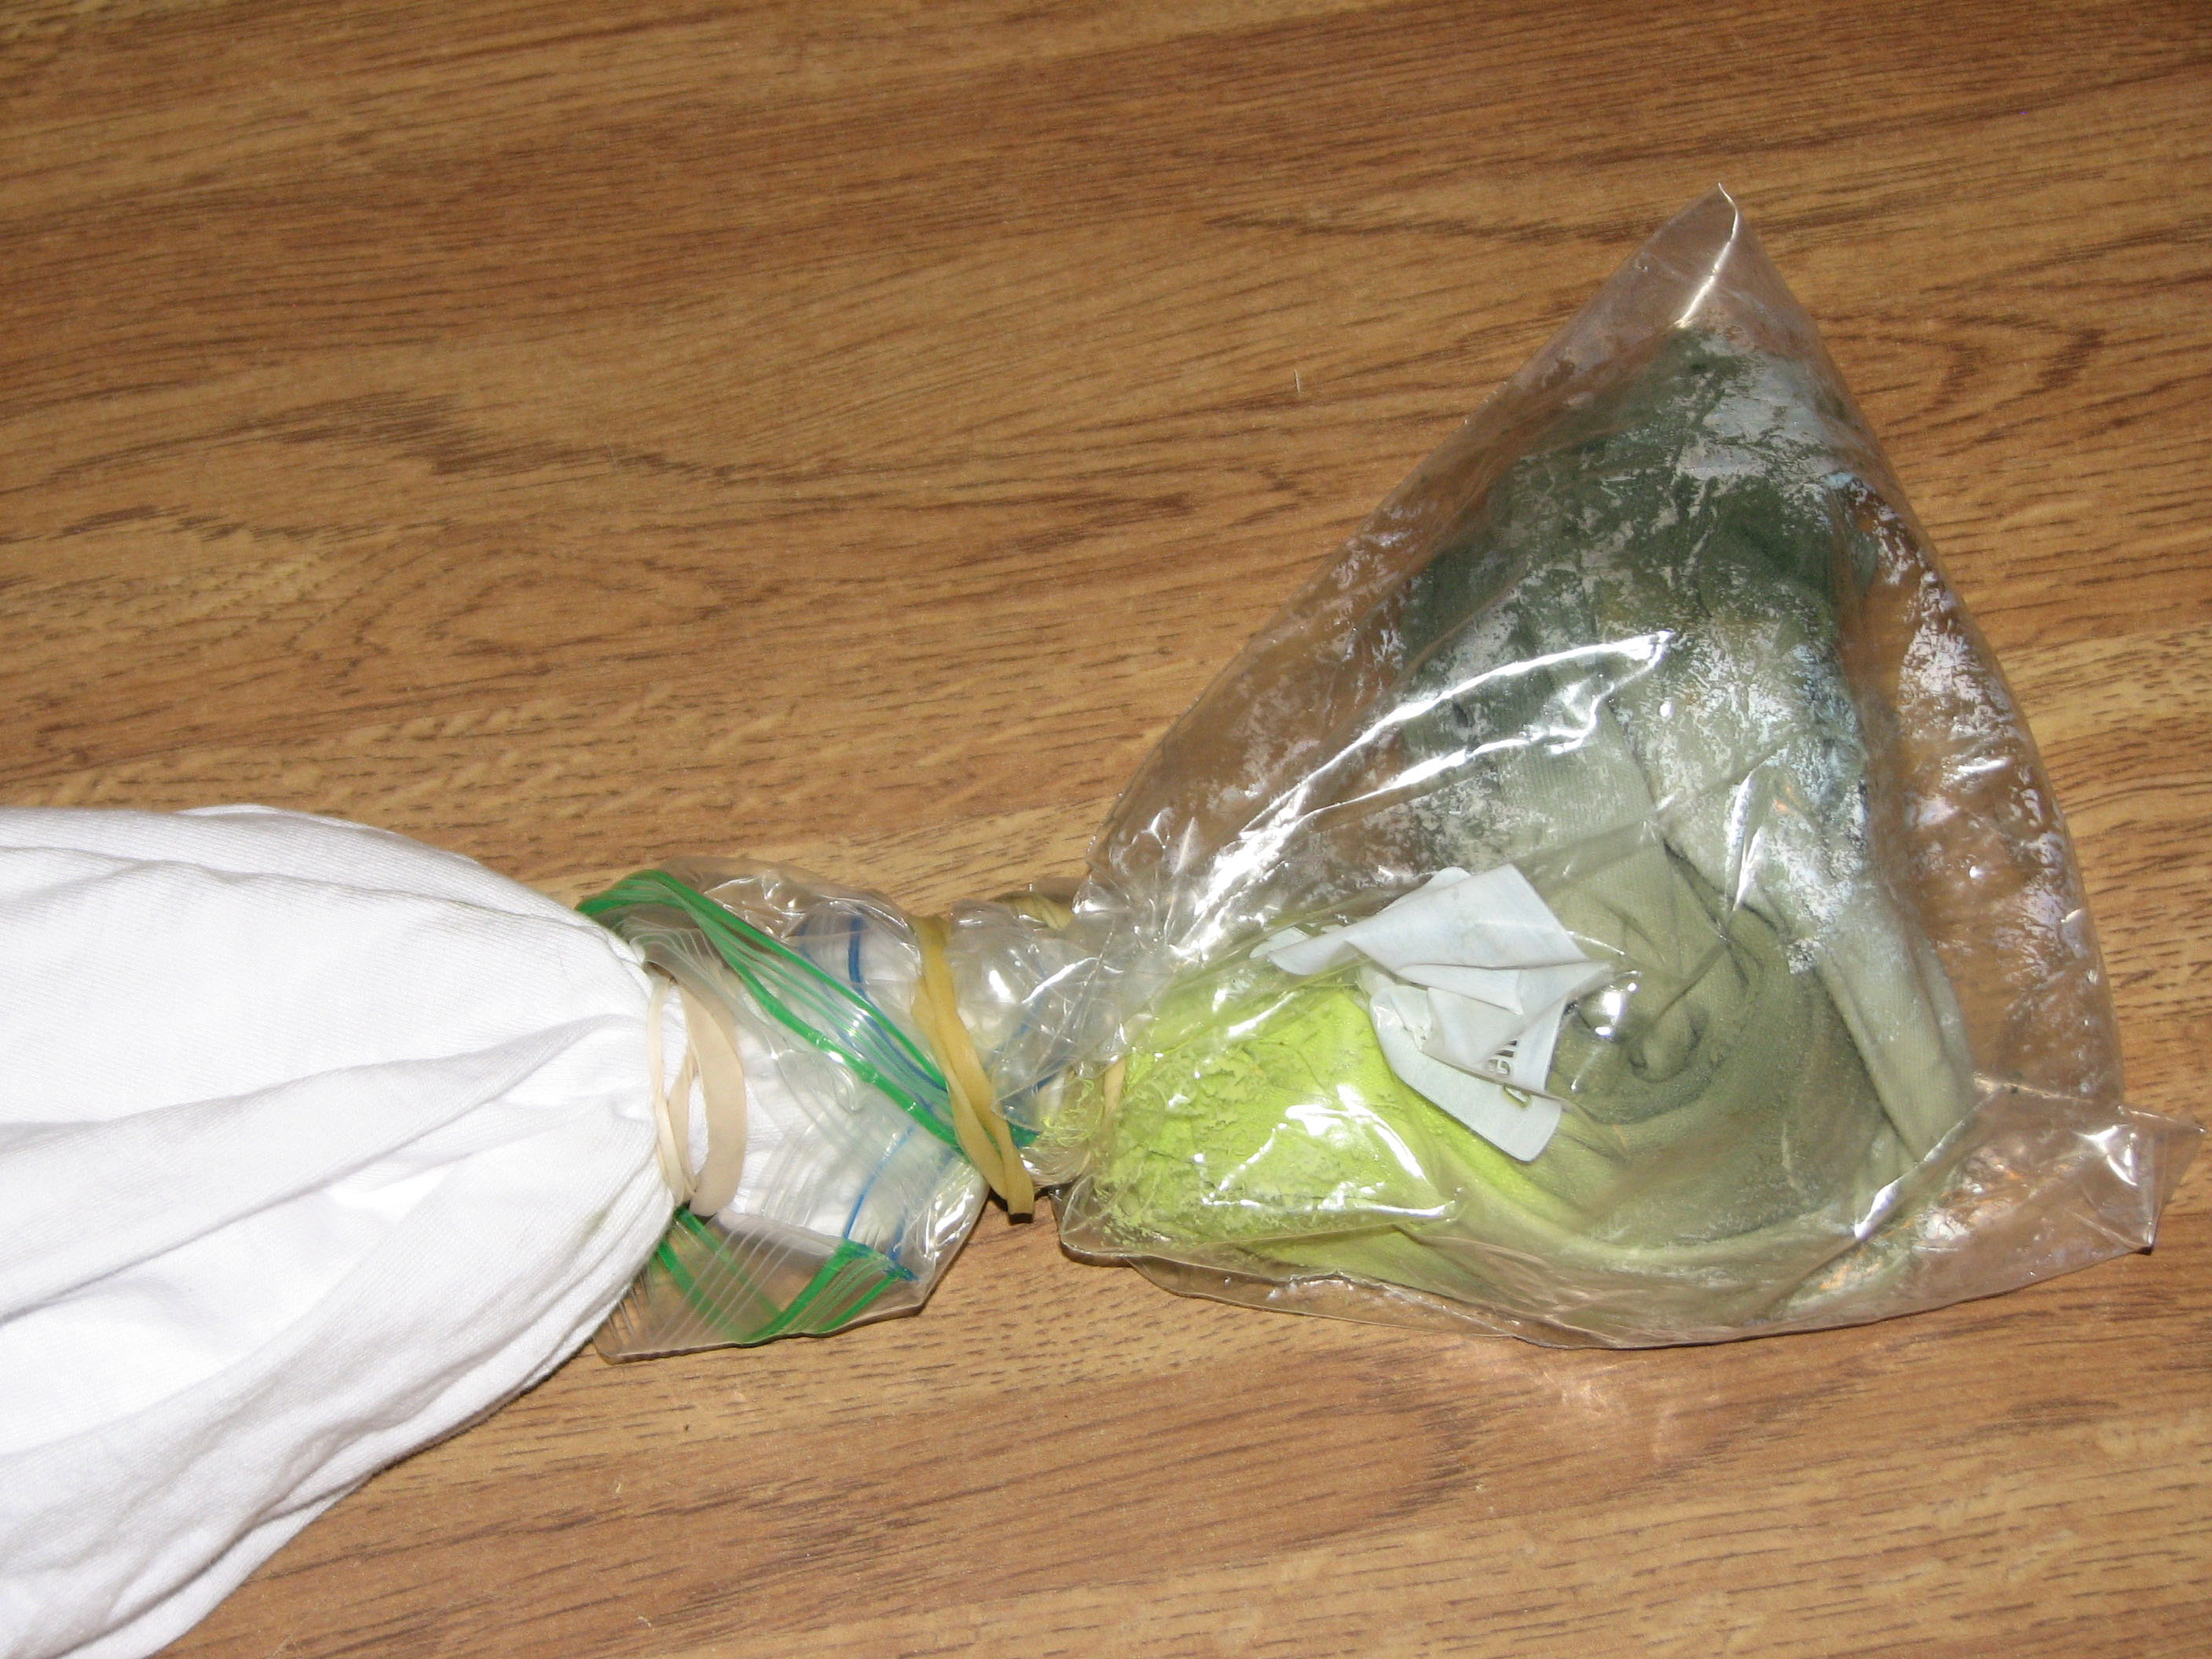
5. Place the green dyed area of the shirt in a plastic baggie and secure the top with a rubber band.  This will protect this finished section of the shirt while working on the top half.

2015_June_RJ_SummerT_07

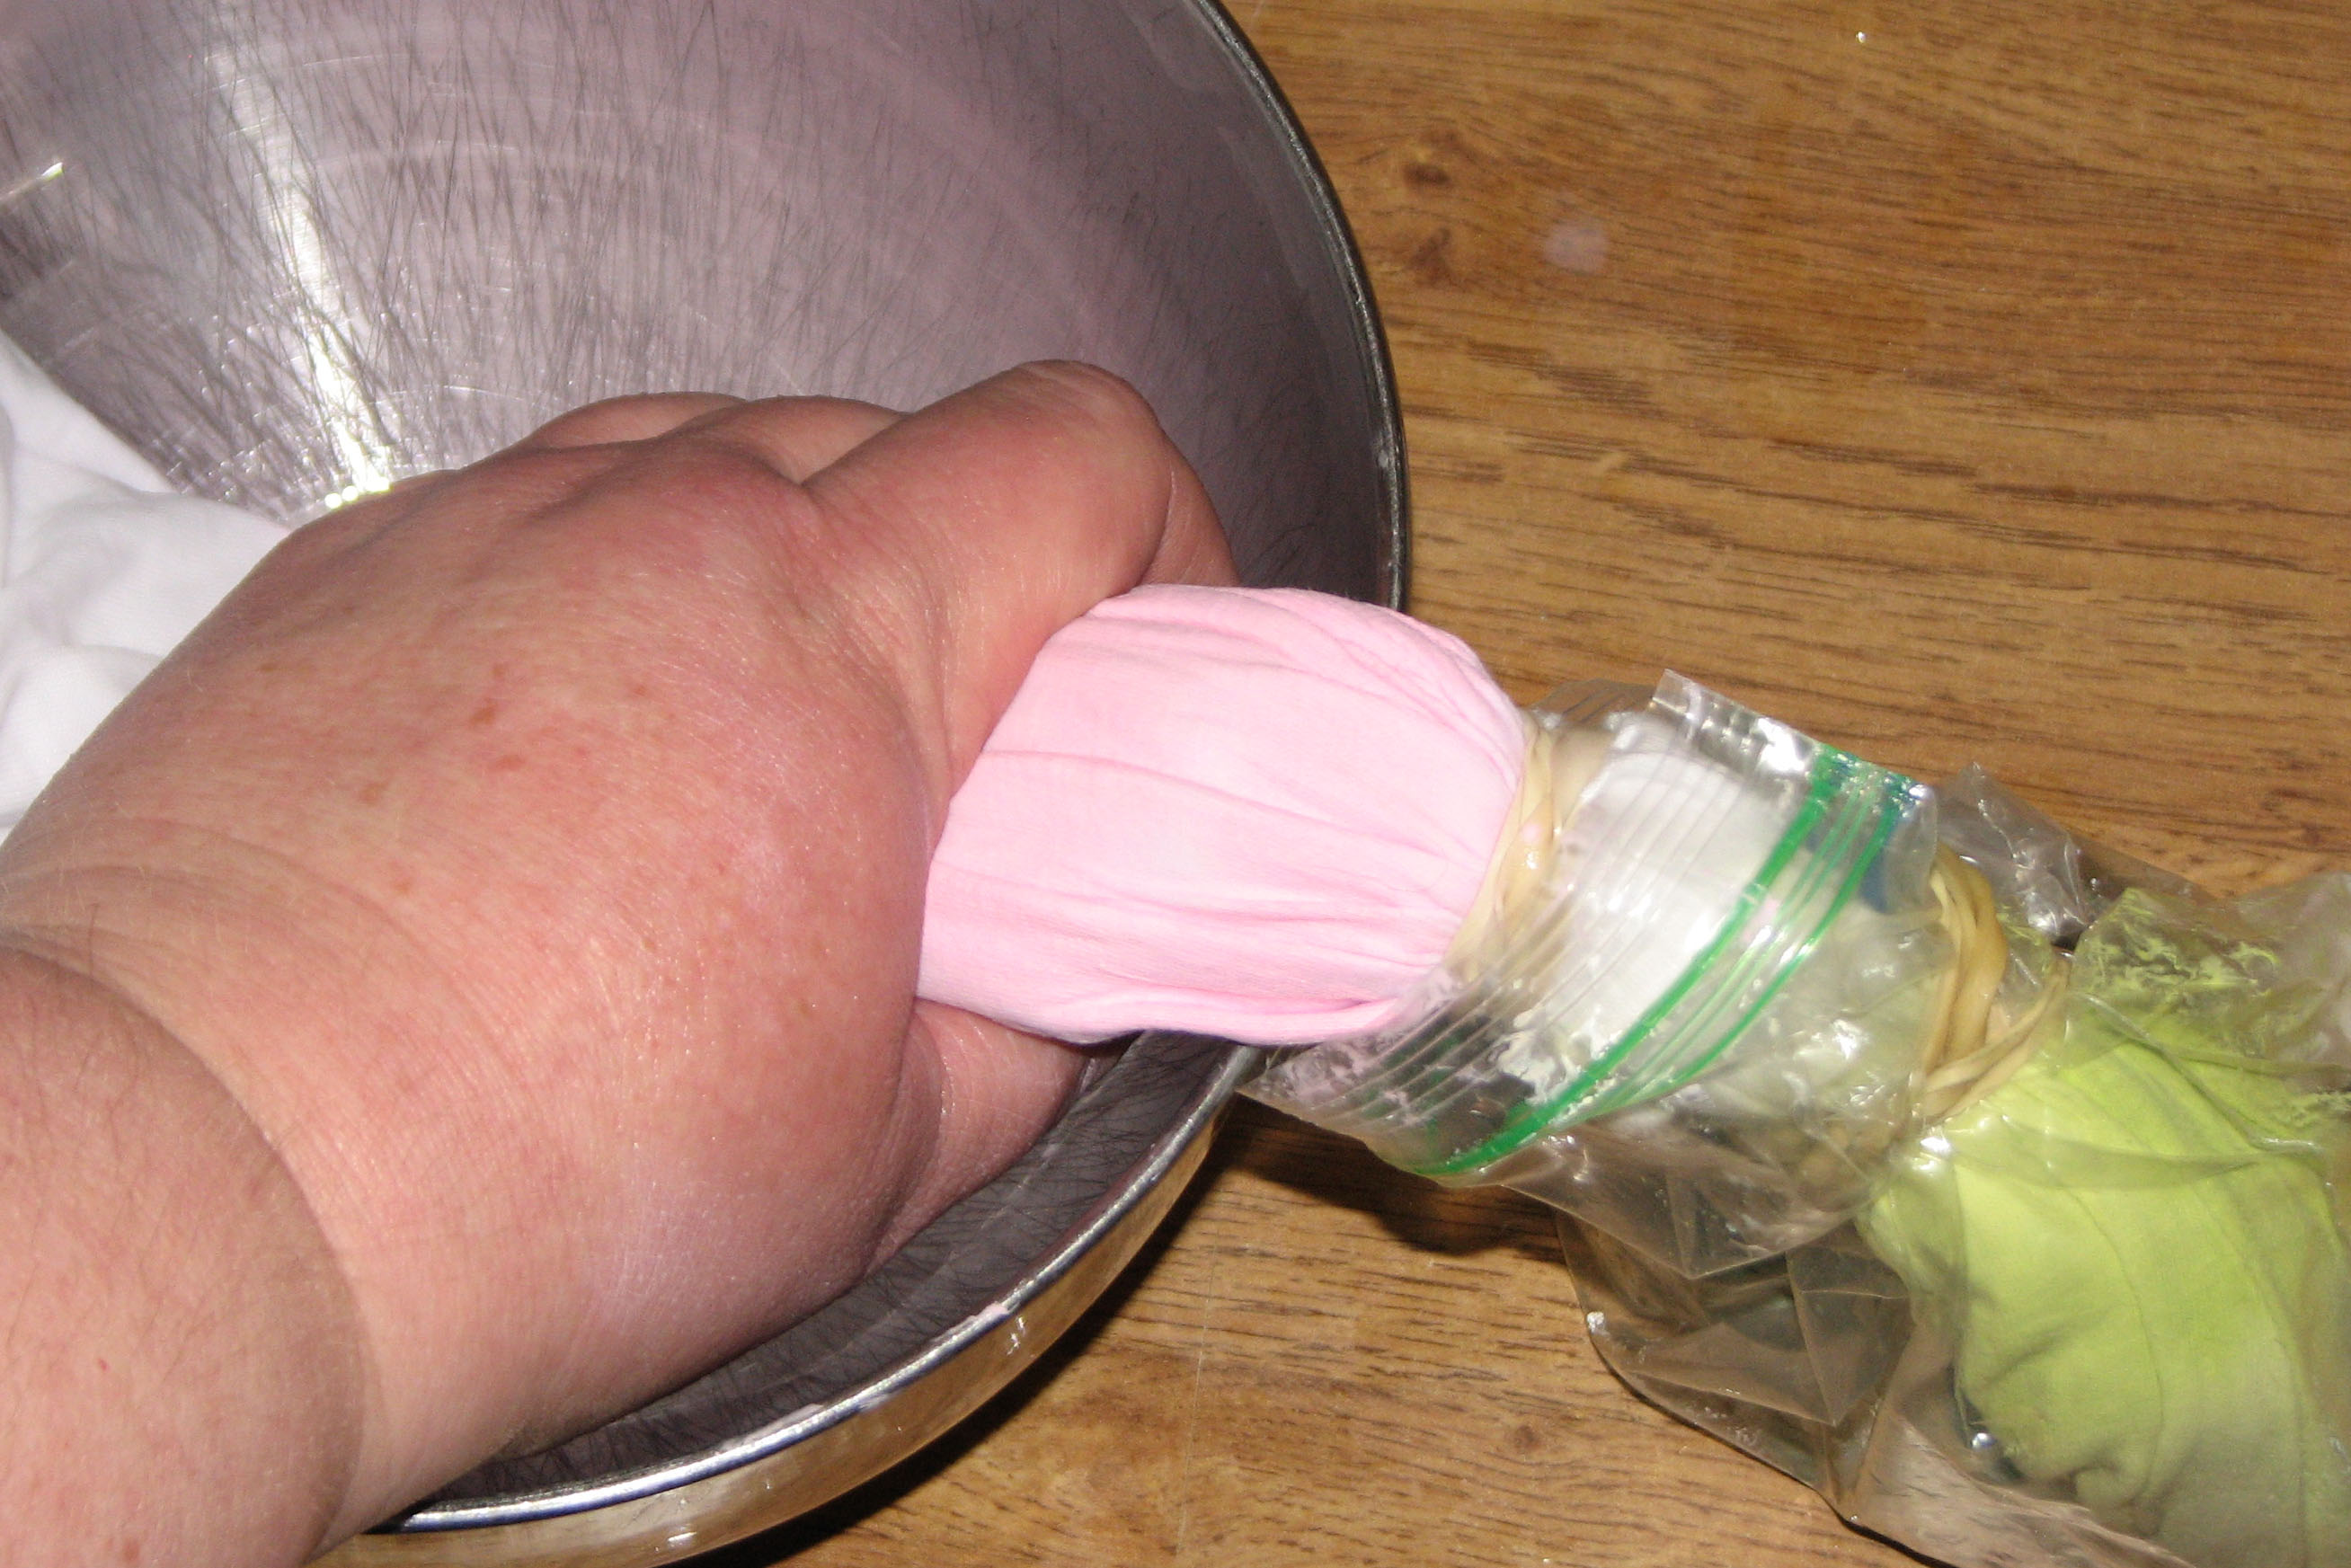
6. Apply the pink inks to the top of the shirt just as you did the green ink. Start by adding Angel Pink Memento Luxe ink near the rubber banded area and work it into the material with your hand.

2015_June_RJ_SummerT_08

7. Repeat  by adding Rosebud ink next then top off the watermelon effect with Rhubarb Stalk.

2015_June_RJ_SummerT_09

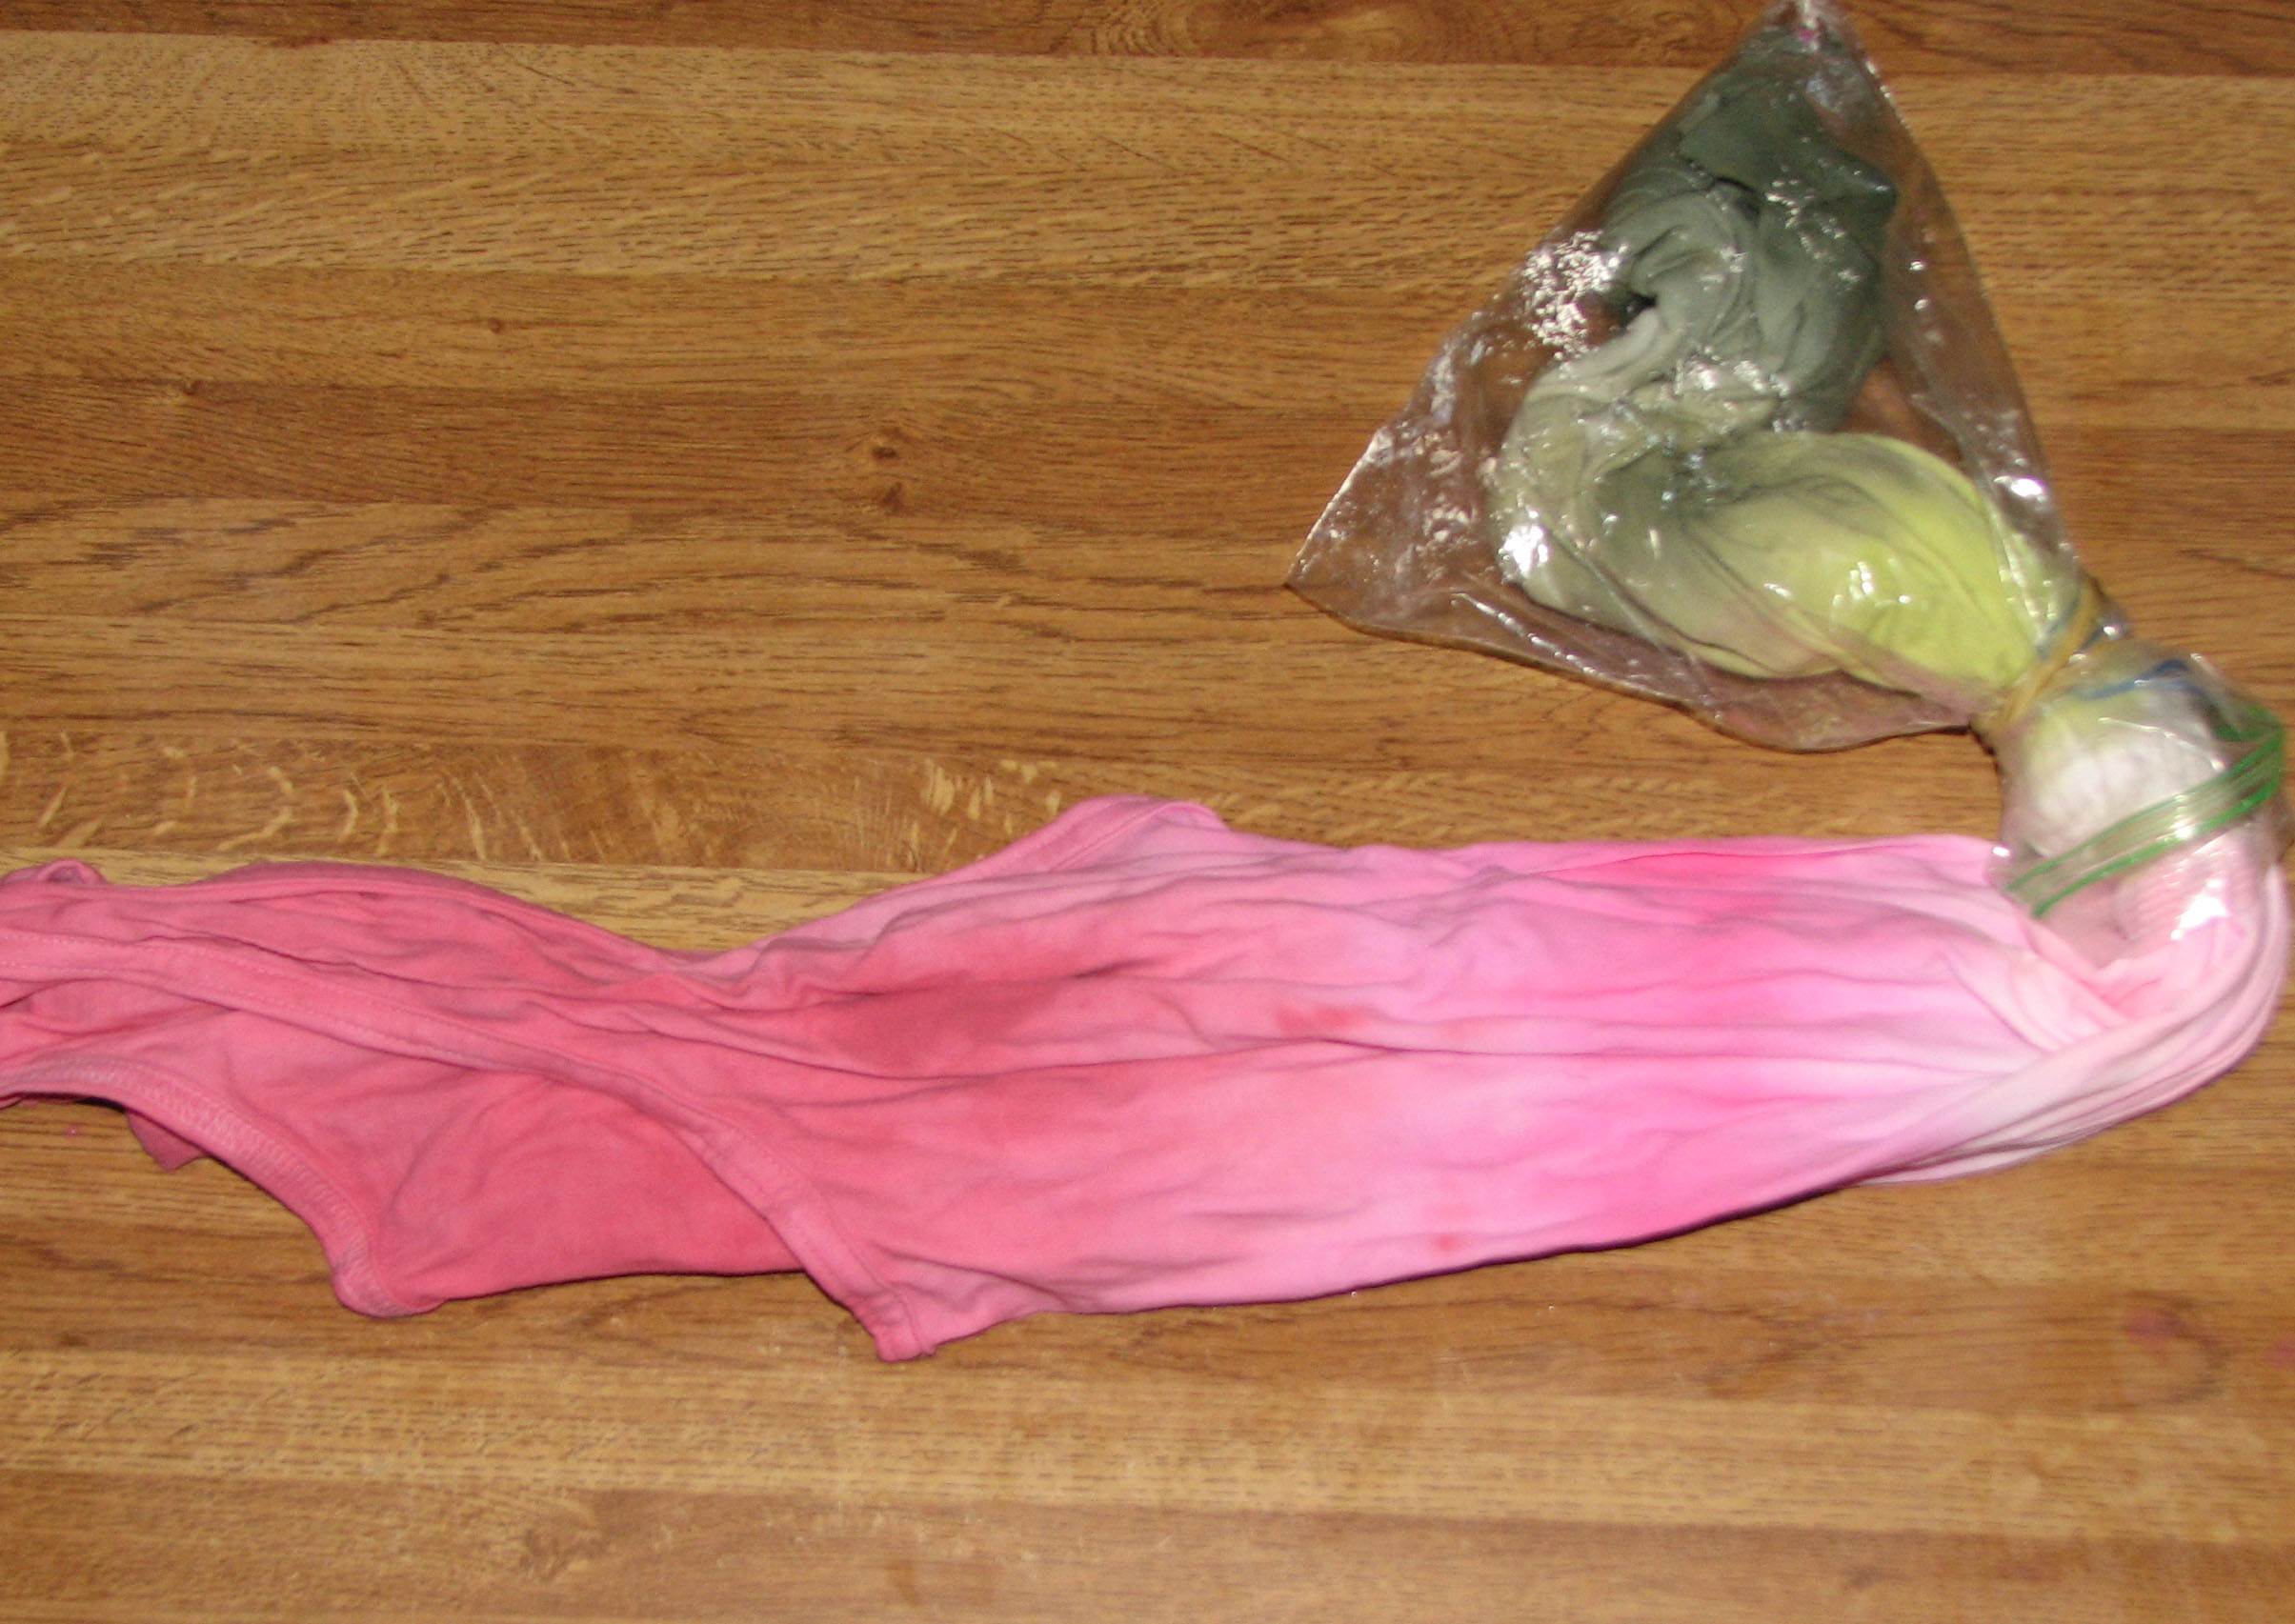
8. Remove the plastic bag and rubber bands, unfurl the shirt and lay it flat to dry.

9. Once the shirt has dried, iron the entire shirt using a hot iron (the hottest temperature allowed for the material).

2015_June_RJ_SummerT_10

10. Add "seeds" to the top portion of the shirt using Fabrico Real Black marker. Iron to set the ink.

 
by Roni Johnson

Difficulty

Beginner - Intermediate

Time

1/2 hour + dry time

Materials Needed

IMAGINE Crafts featuring Tsukineko:

Other Supplies:

  • White Cotton (pre-washed) Tank Top, Rubber Bands, Water, Iron, Baggie


Sign up for our newsletter
Facebook Pinterest Twitter YouTube Vimeo