Array ( [0] => 280 [ID] => 280 [1] => 1 [TYPEID] => 1 [2] => 0 [SECTIONID] => 0 [3] => project-details [MOD_NAME] => project-details [4] => [TITLE] => [5] => Project Details [META_TITLE] => See this masculine card project with nautical theme [6] => [META_DESCRIPTION] => See this masculine card project with nautical theme [7] => [META_KEYWORDS] => [8] => [BUTTON_TITLE] => [9] => [BODY] => [10] => [BODY_SIDE] => [11] => [MODULE_PROCESSING] => [12] => [MODULE_META] => [13] => project-details-head.php [MODULE_HEAD] => project-details-head.php [14] => project-details-body.php [MODULE_BODY] => project-details-body.php [15] => [MODULE_SIDE] => [16] => 0 [TOP_ORDER] => 0 [17] => 0 [HITS_UNIQUE] => 0 [18] => 0 [HITS_REPEAT] => 0 [19] => 0 [ROBOT_HITS] => 0 [20] => 0000-00-00 00:00:00 [LASTVIEWED] => 0000-00-00 00:00:00 [21] => 0000-00-00 00:00:00 [ROBOT_LASTVIEWED] => 0000-00-00 00:00:00 [22] => 0.70 [PRIORITY] => 0.70 [23] => 1 [SITEMAP] => 1 [24] => 1 [ACTIVE] => 1 [25] => 1 [DISPLAY_TITLE] => 1 [26] => 0 [SSL_MODE] => 0 [27] => 0 [EDITABLE] => 0 [28] => 0 [DELETABLE] => 0 [29] => 2013-11-05 00:00:00 [LASTUPDATED] => 2013-11-05 00:00:00 [30] => 2013-11-05 00:00:00 [CREATED] => 2013-11-05 00:00:00 )
Imagine Crafts
LearnMakeCommunityShop

A Father's Love Greeting Card

There are so many occasions to make and give masculine cards. A friend of ours recently had a baby and the new Dad would certainly enjoy knowing he was not forgotten in all of the excitement! See this masculine card project. 


See this masculine card project with nautical theme

Directions:

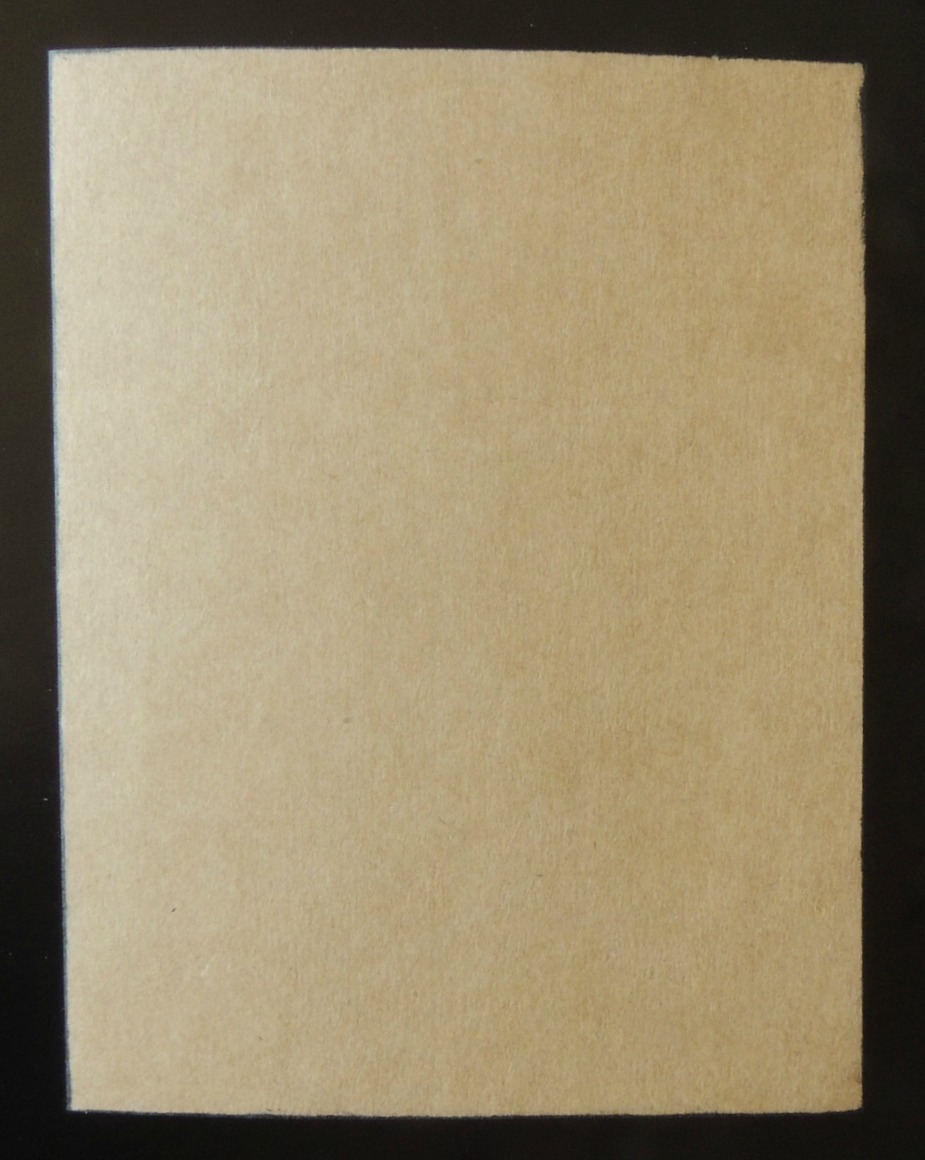
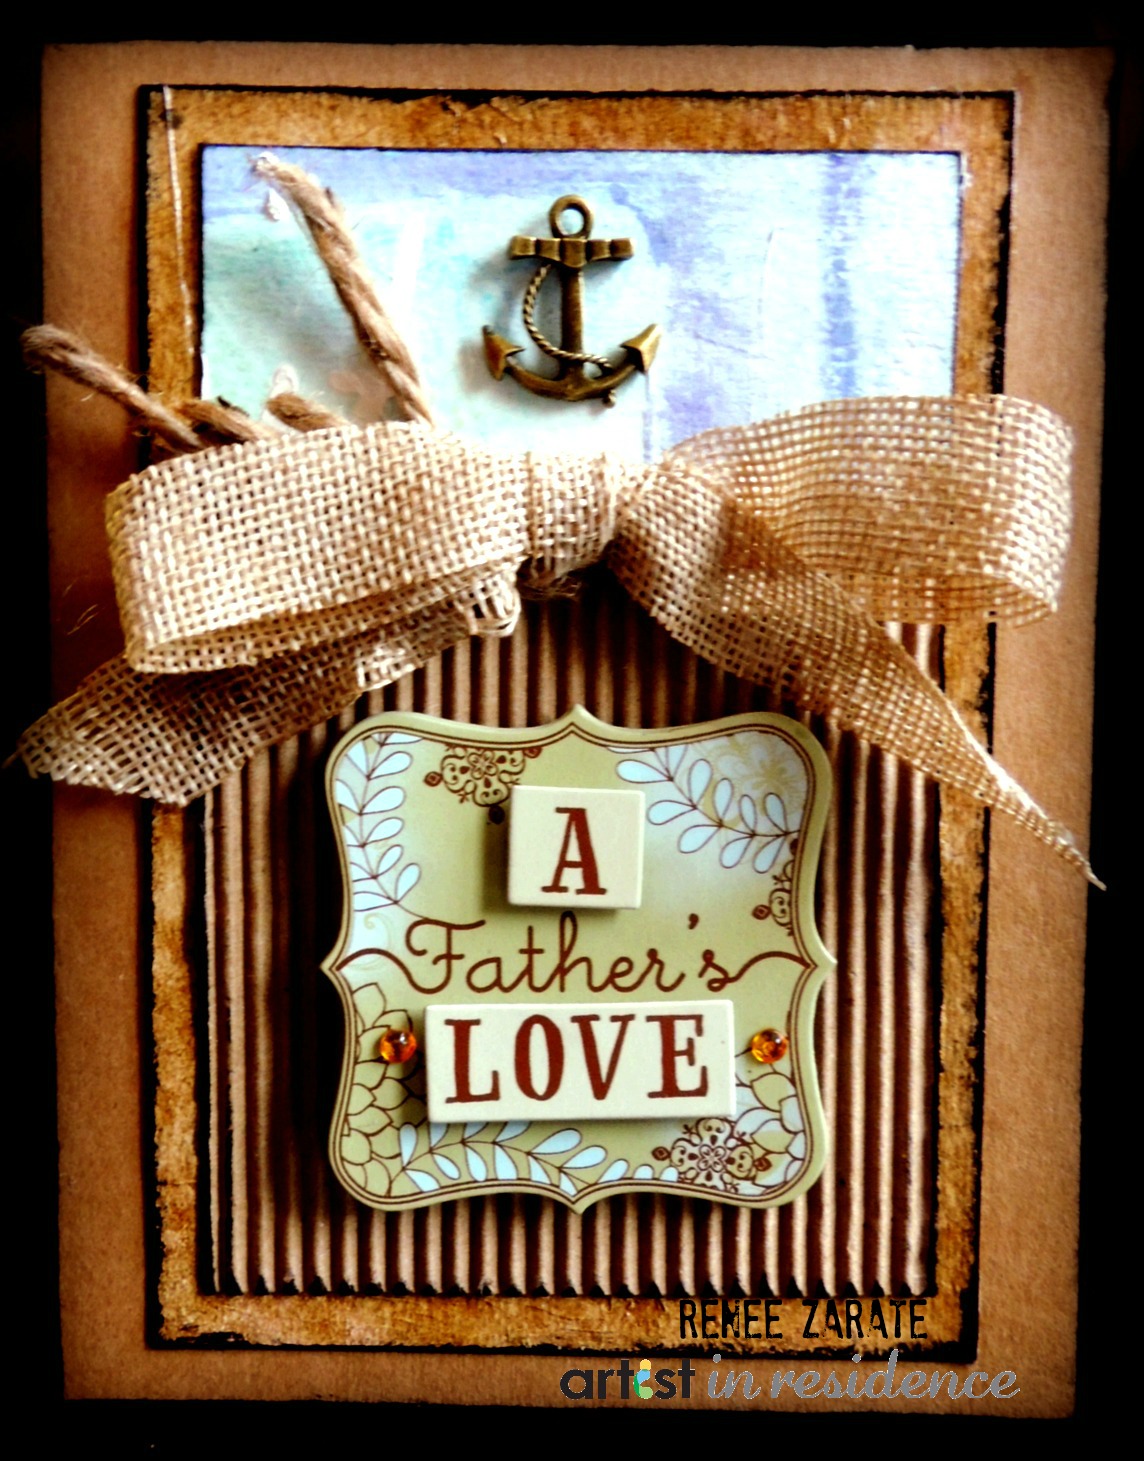
Step 1:  Fold a piece of Kraft colored paper to make a card that measures 5” by 6 ¼”.  Ink the edges with black ink.

2015_June_RZ_Artist_step1

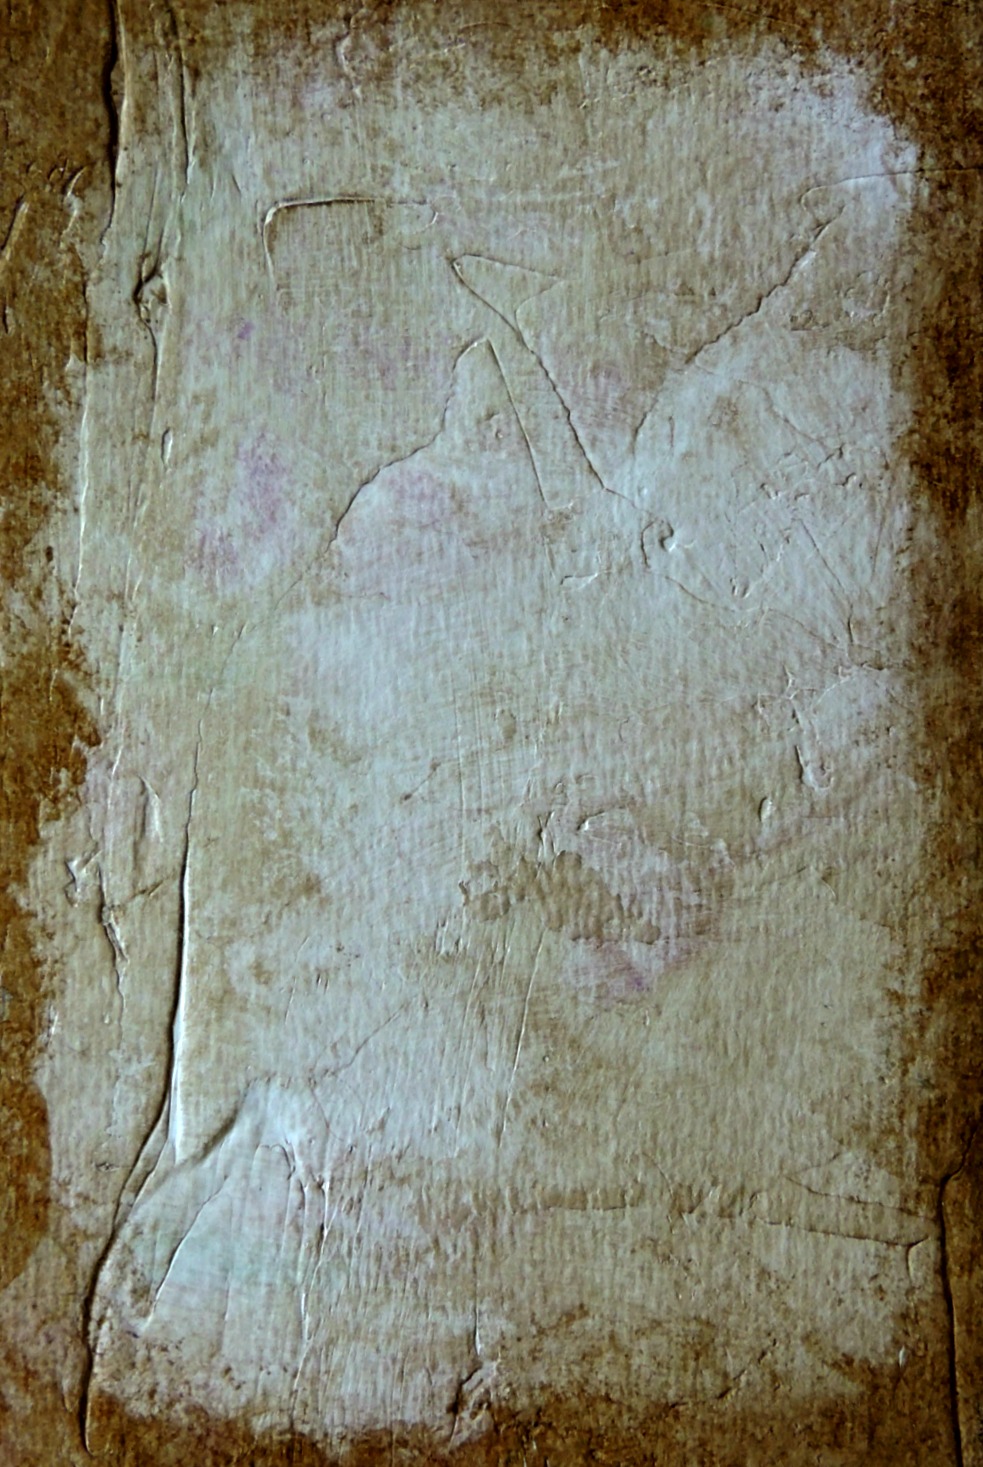
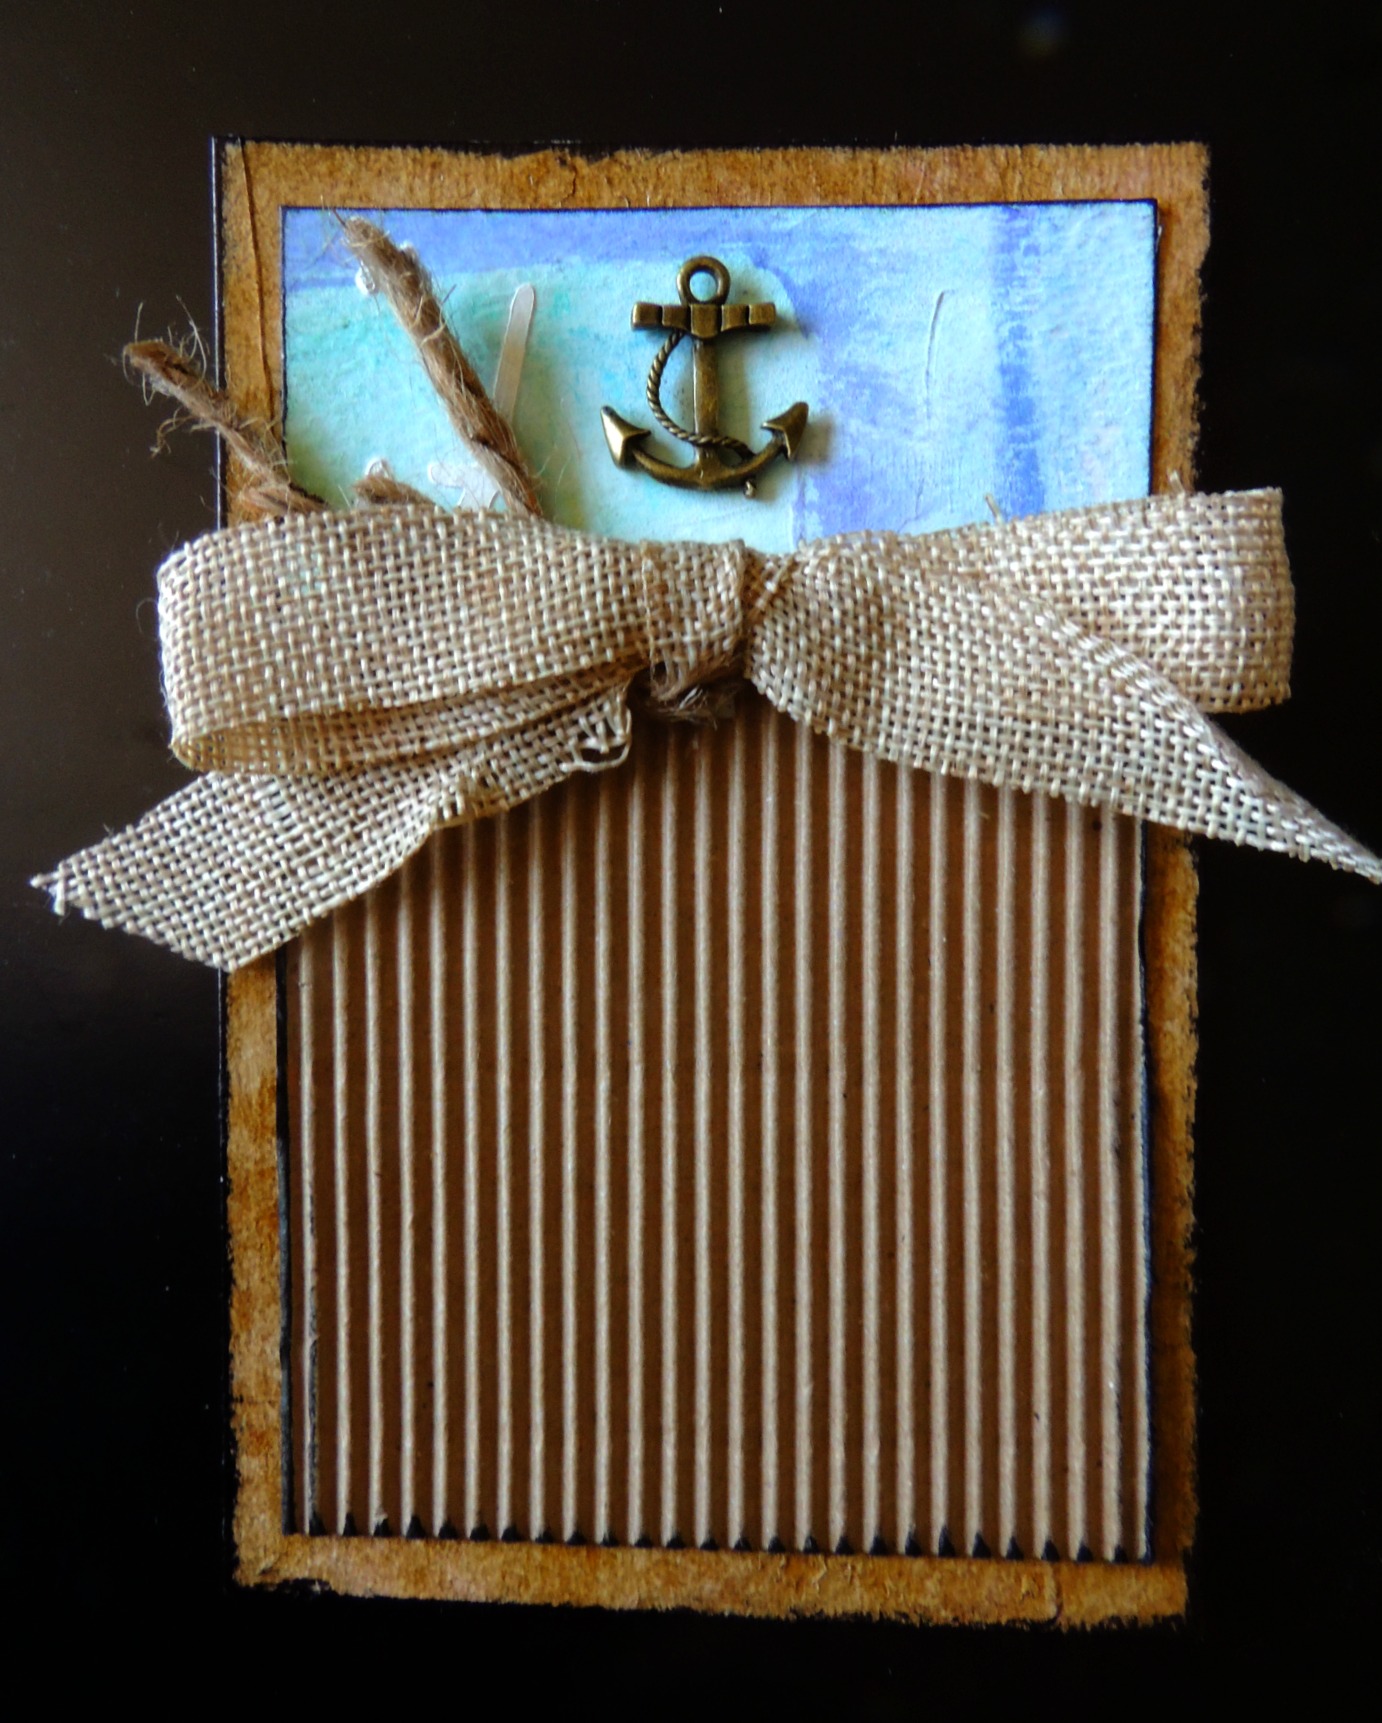
Step 2:  Cut a piece of gessoed watercolor paper to measure 4” by 6”.  Apply StazOn Studio Glaze Spiced Chai and Ganache colors to the paper and blend with a baby wipe.

2015_June_RZ_Artist_step2

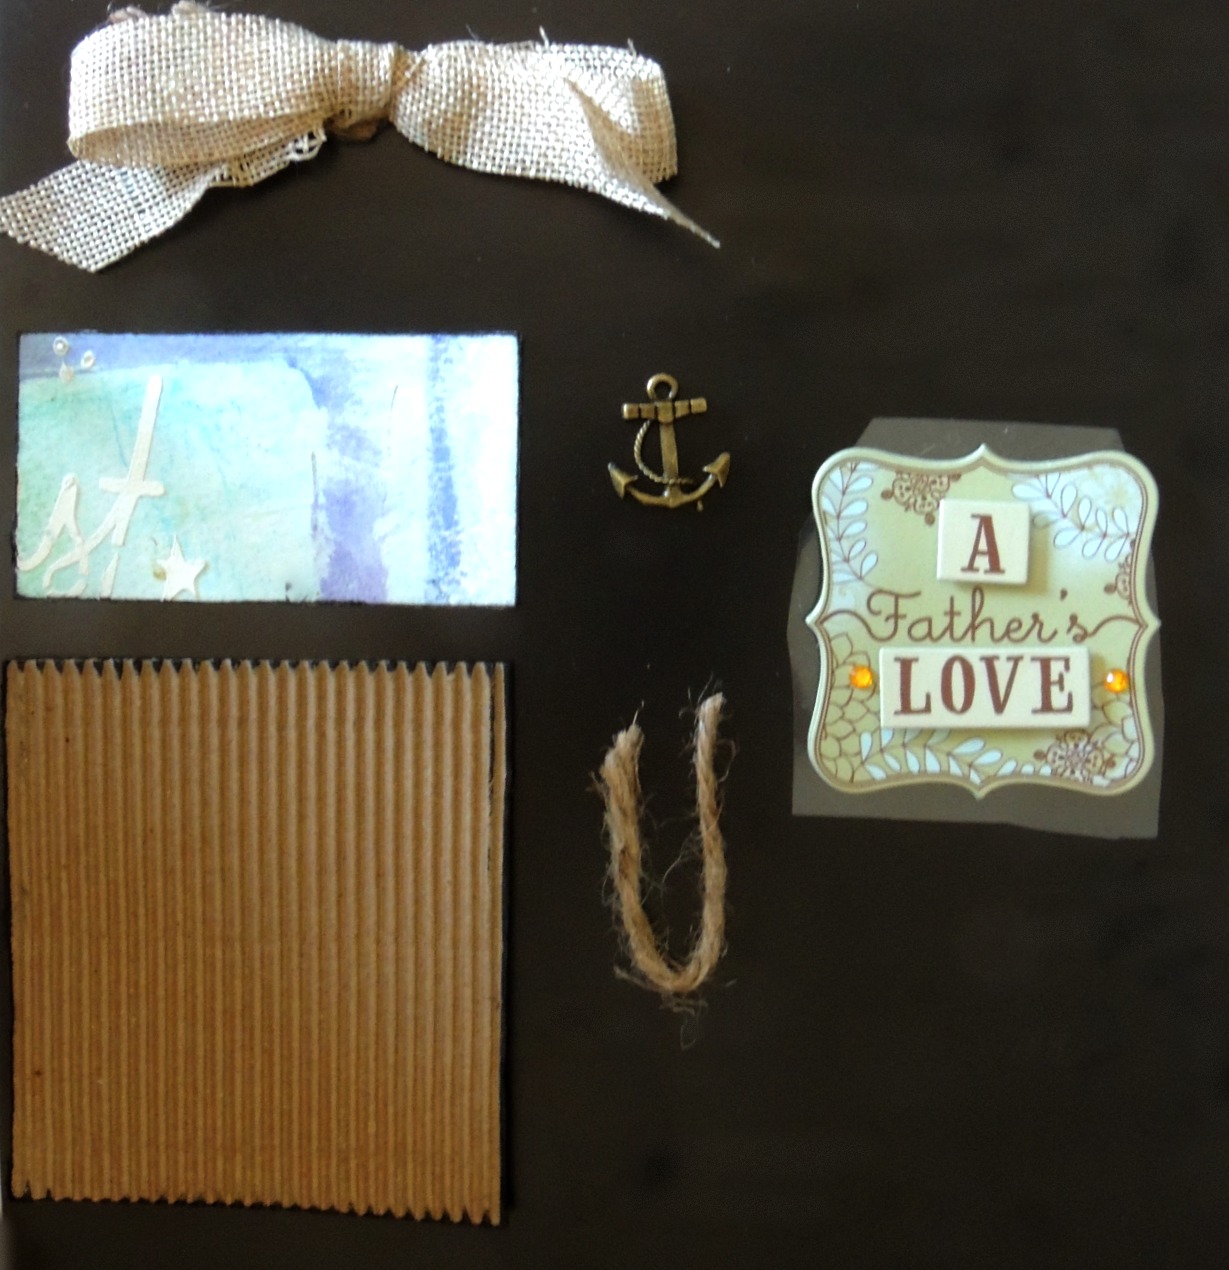
Step 3:  Assemble components for the card, a burlap bow, a piece of corrugated cardboard cardstock, a scrap piece of colorful master board cardstock, stickers, twine and metal embellishments.

2015_June_RZ_Artist_step3

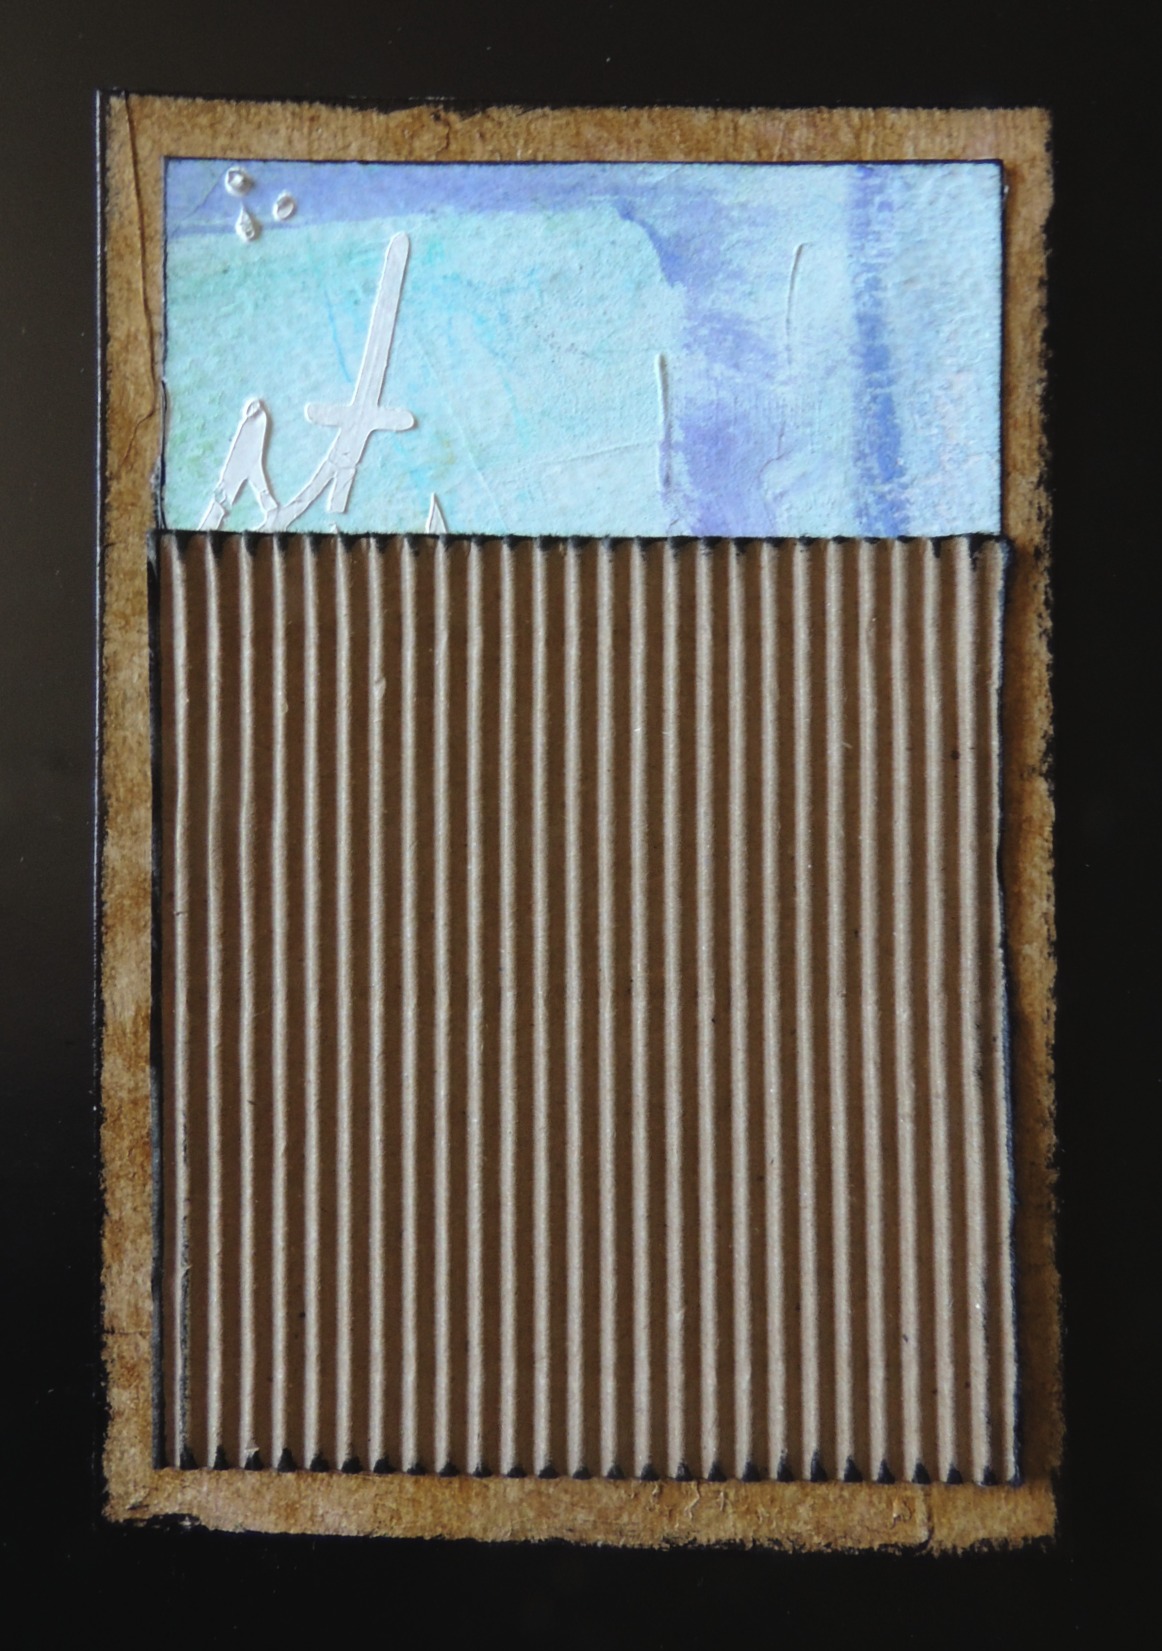
Step 4:  The paper components have been cut to measure 5 ½” x 3 ¾” when glued together.  Adhere the two pieces of paper to the glazed panel.  Ink the edges of the panel with black ink, dry.

2015_June_RZ_Artist_step4

Step 5:  Adhere the metal anchor, the twine and the bow to the panel.

2015_June_RZ_Artist_step5

Step 6:  Adhere the sticker/phrase to the lower center portion of the panel.

2015_June_RZ_Artist_step6

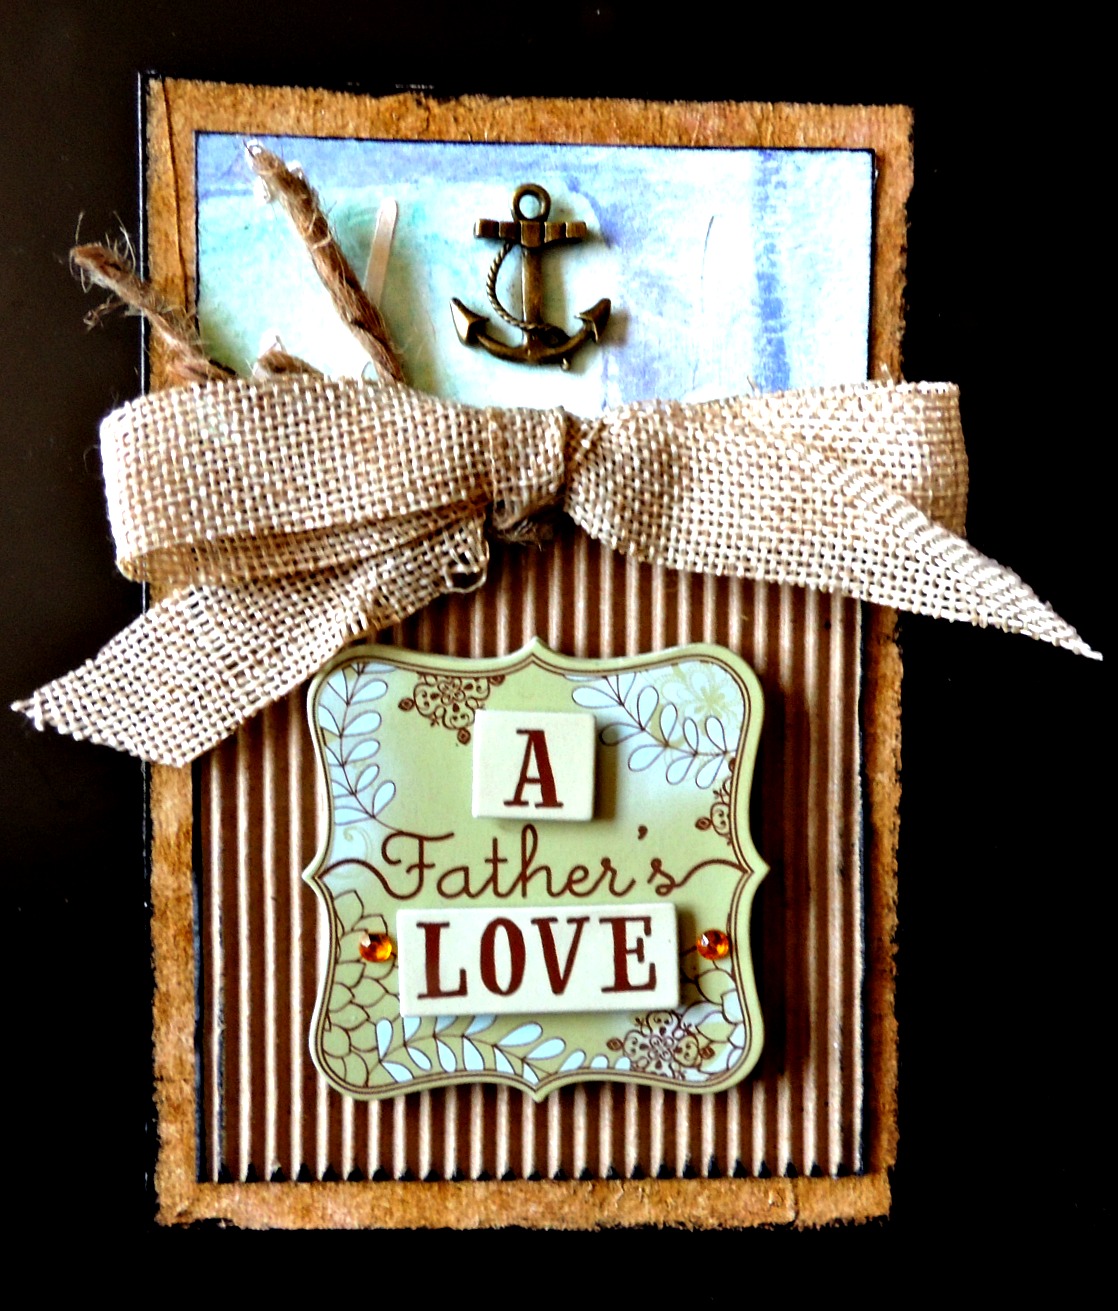
Step 7:  Using a strong adhesive attach the entire panel to the prepped Kraft colored card.

2015_June_RZ_Artist_mainphoto

by Renee Zarate

Difficulty

Intermediate

Time

45 min + dry time

Materials Needed

Imagine Crafts featuring Tsukineko:

Other/Miscellaneous:

  • Kraft colored paper folded to make a card measuring 5” by 6 ¼”
  • Baby wipes, cutting tool, twine, burlap bow, adhesive
  • Gessoed watercolor paper cut to measure 6” by 4”
  • Soft Spoken masculine themed stickers
  • A metal embellishment such as an anchor


Sign up for our newsletter
Facebook Pinterest Twitter YouTube Vimeo