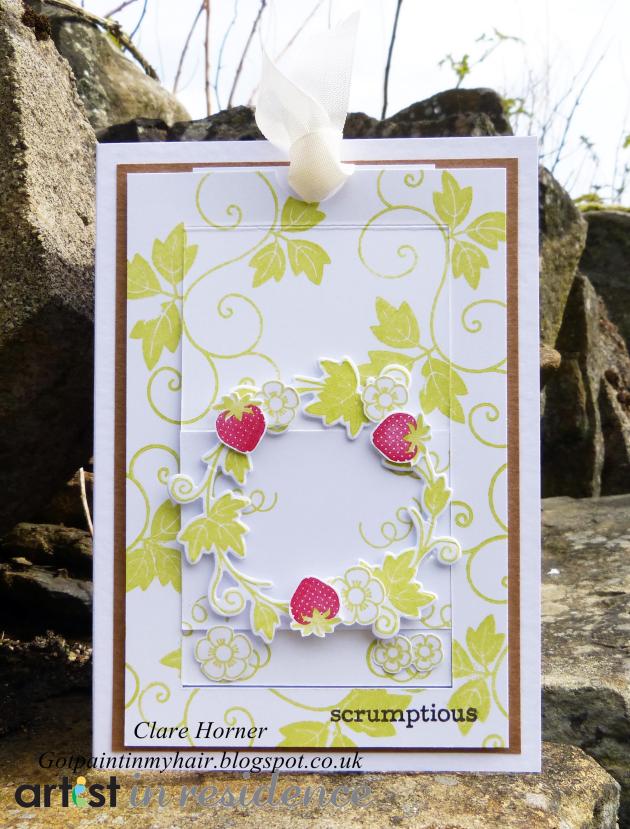
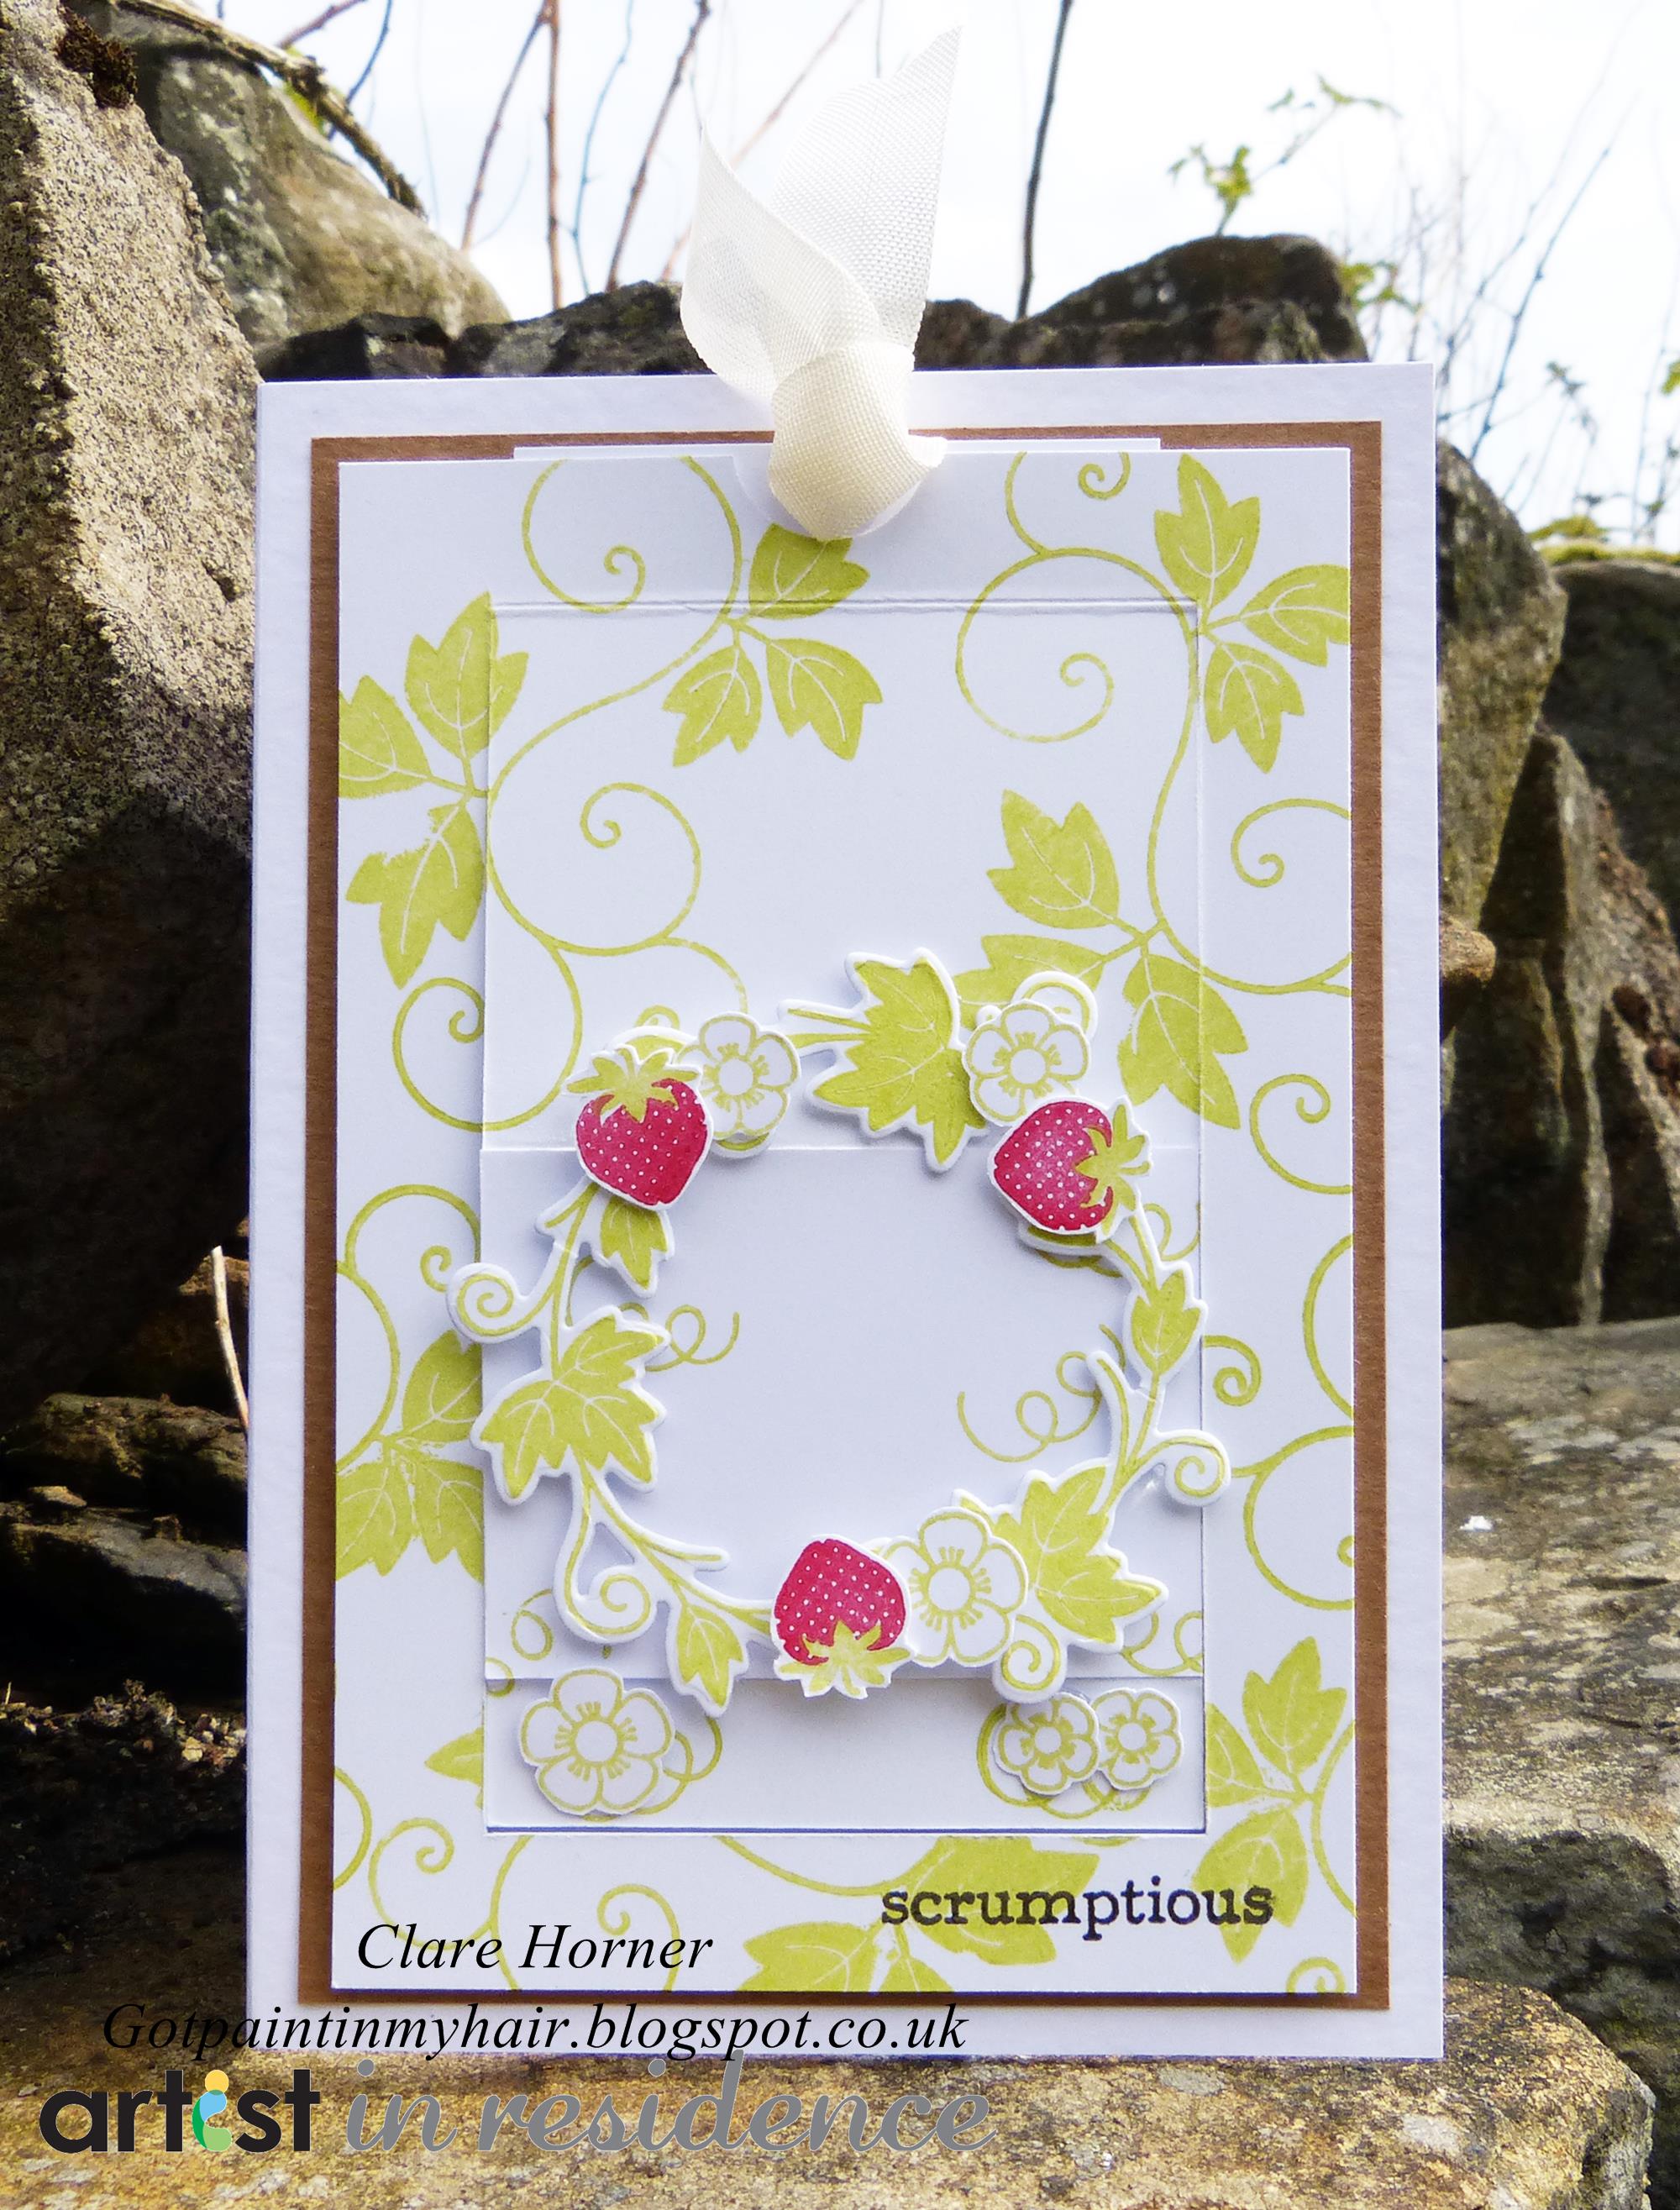
Some times it is just so much simpler to give that picky Teenager a gift card than buy a gift. I never know what to buy my nieces mainly because they have everything twice over already! I decided to create a slider card and figured that I could hide a gift card within the mechanism.
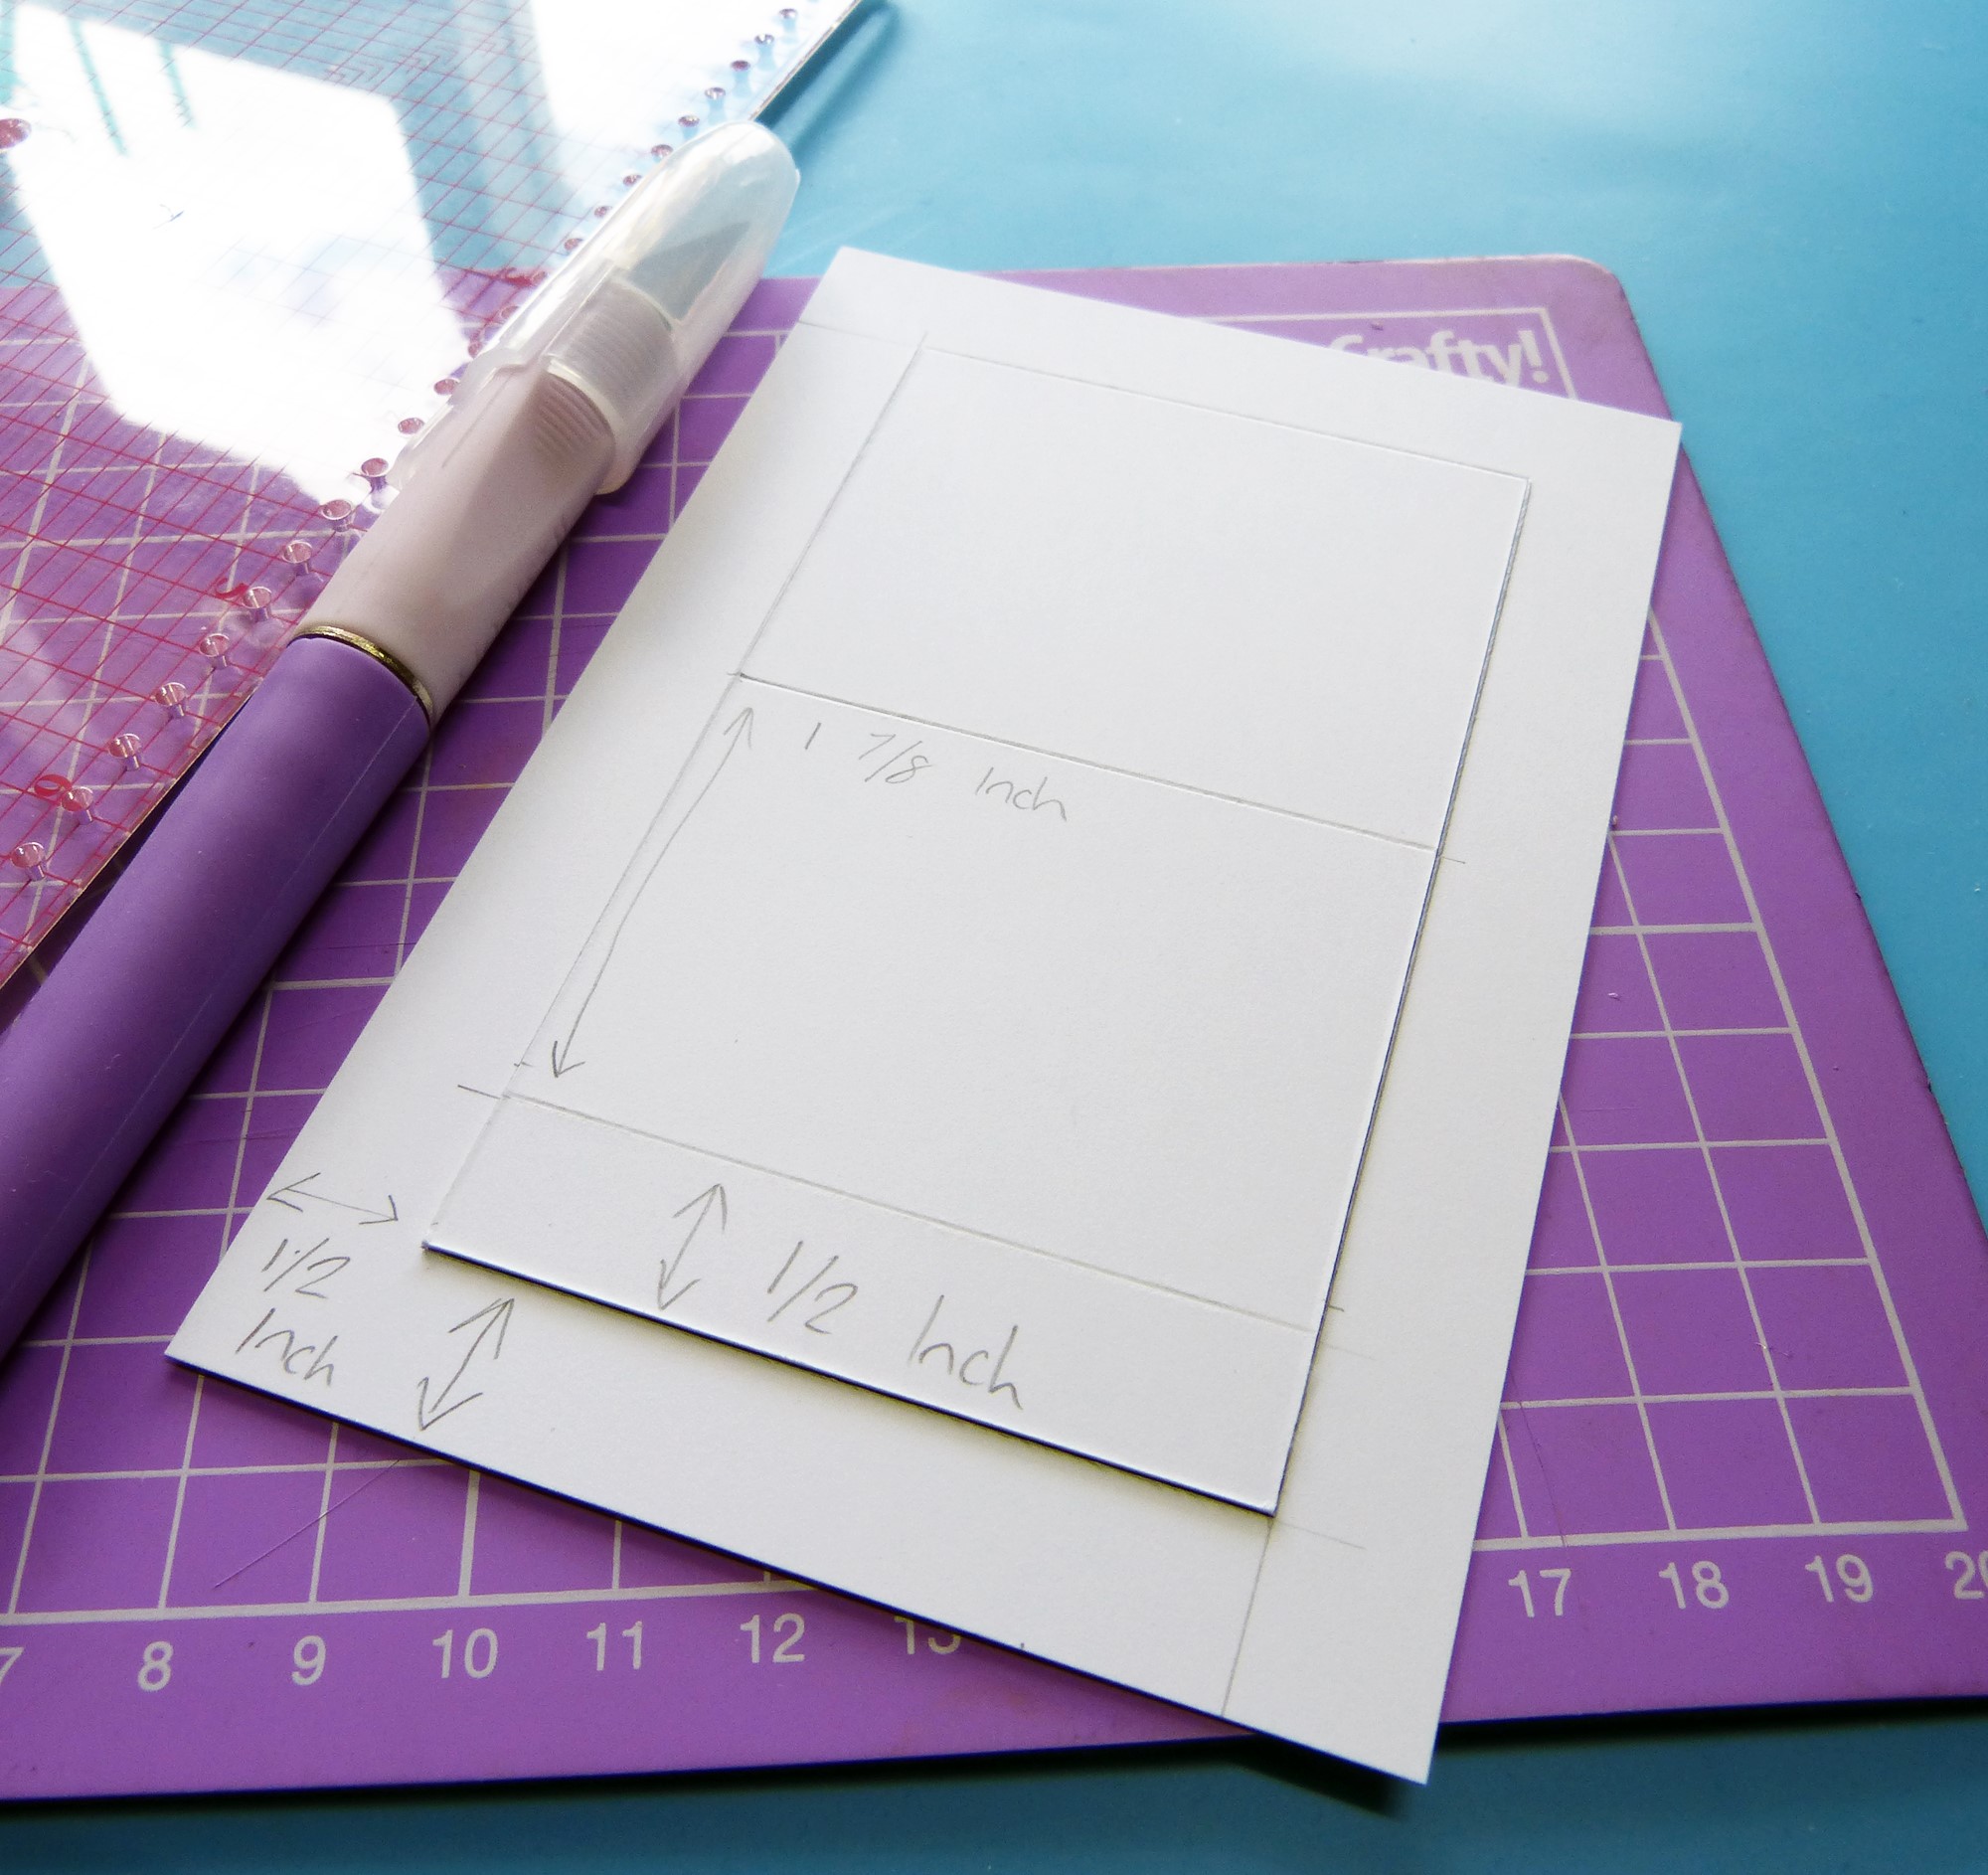
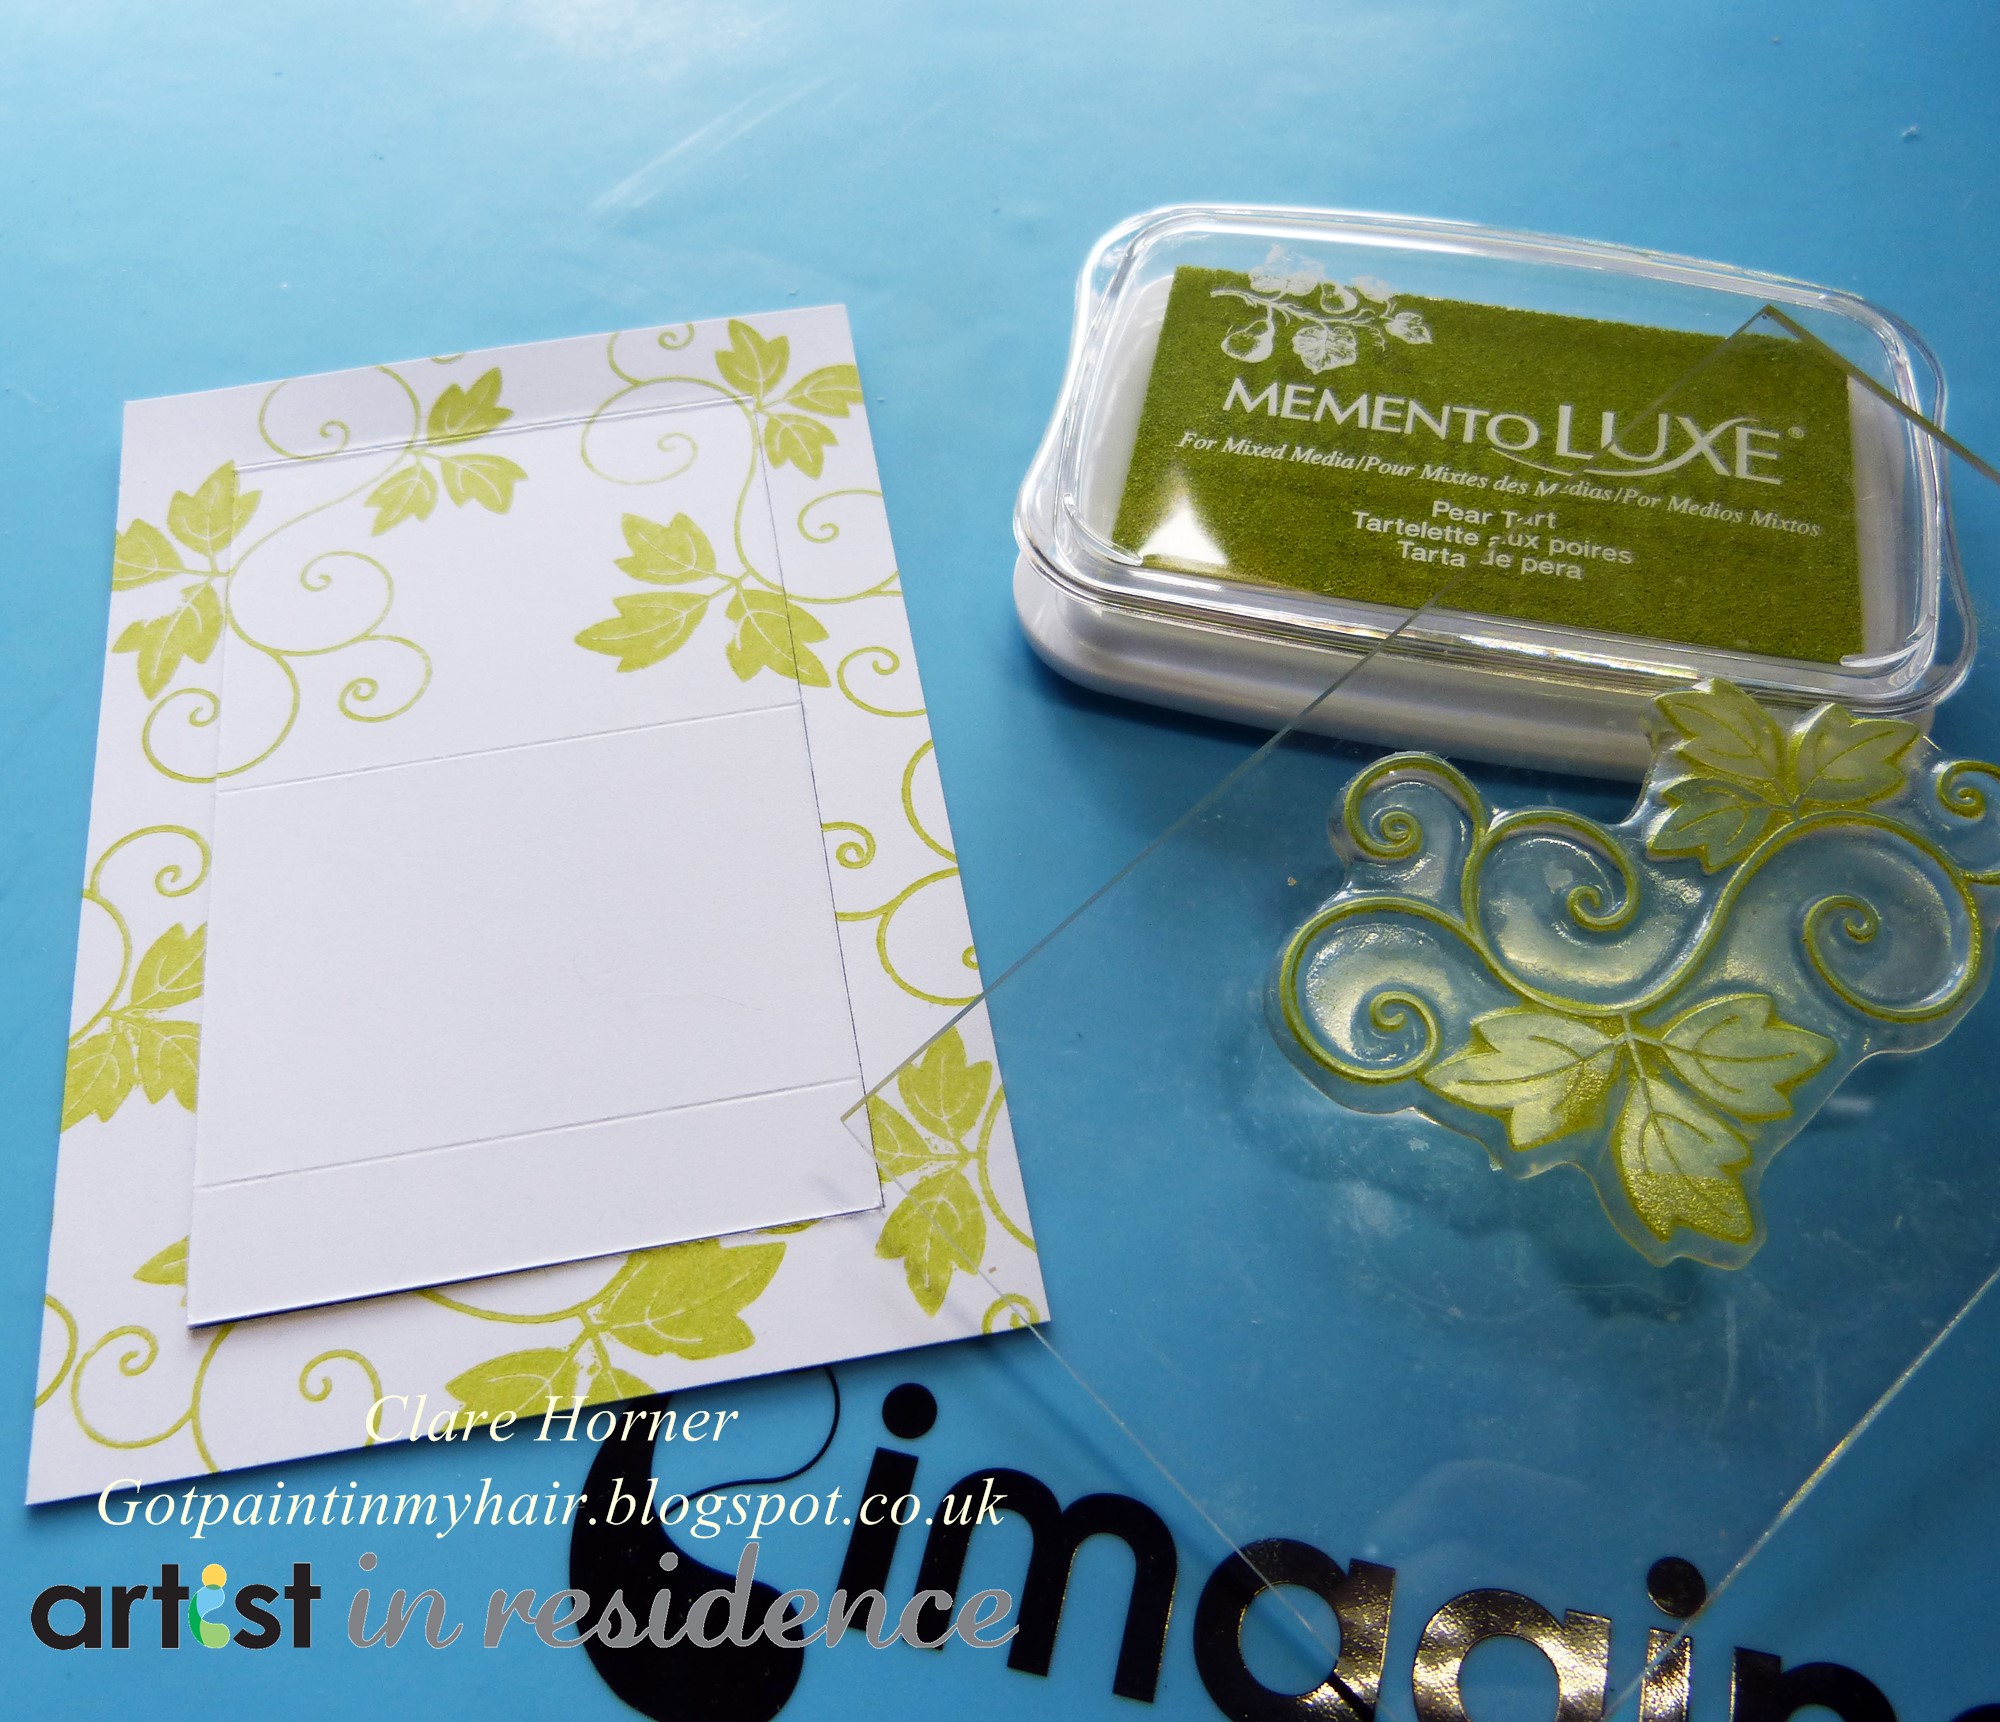
1: Cut a piece of Kraft card to 3 3/4 X 5 1/2 inch. Cut 2 pieces of white card to 3 1/2 X 5 1/4 inch.
2a: On the back of one of the white pieces of card, lightly mark a line 1/2 an inch in from the outside edge on all sides
2b: Mark and score a line within the box you have created 1/2 an inch from the bottom and 1 7/8ths of an inch from the top
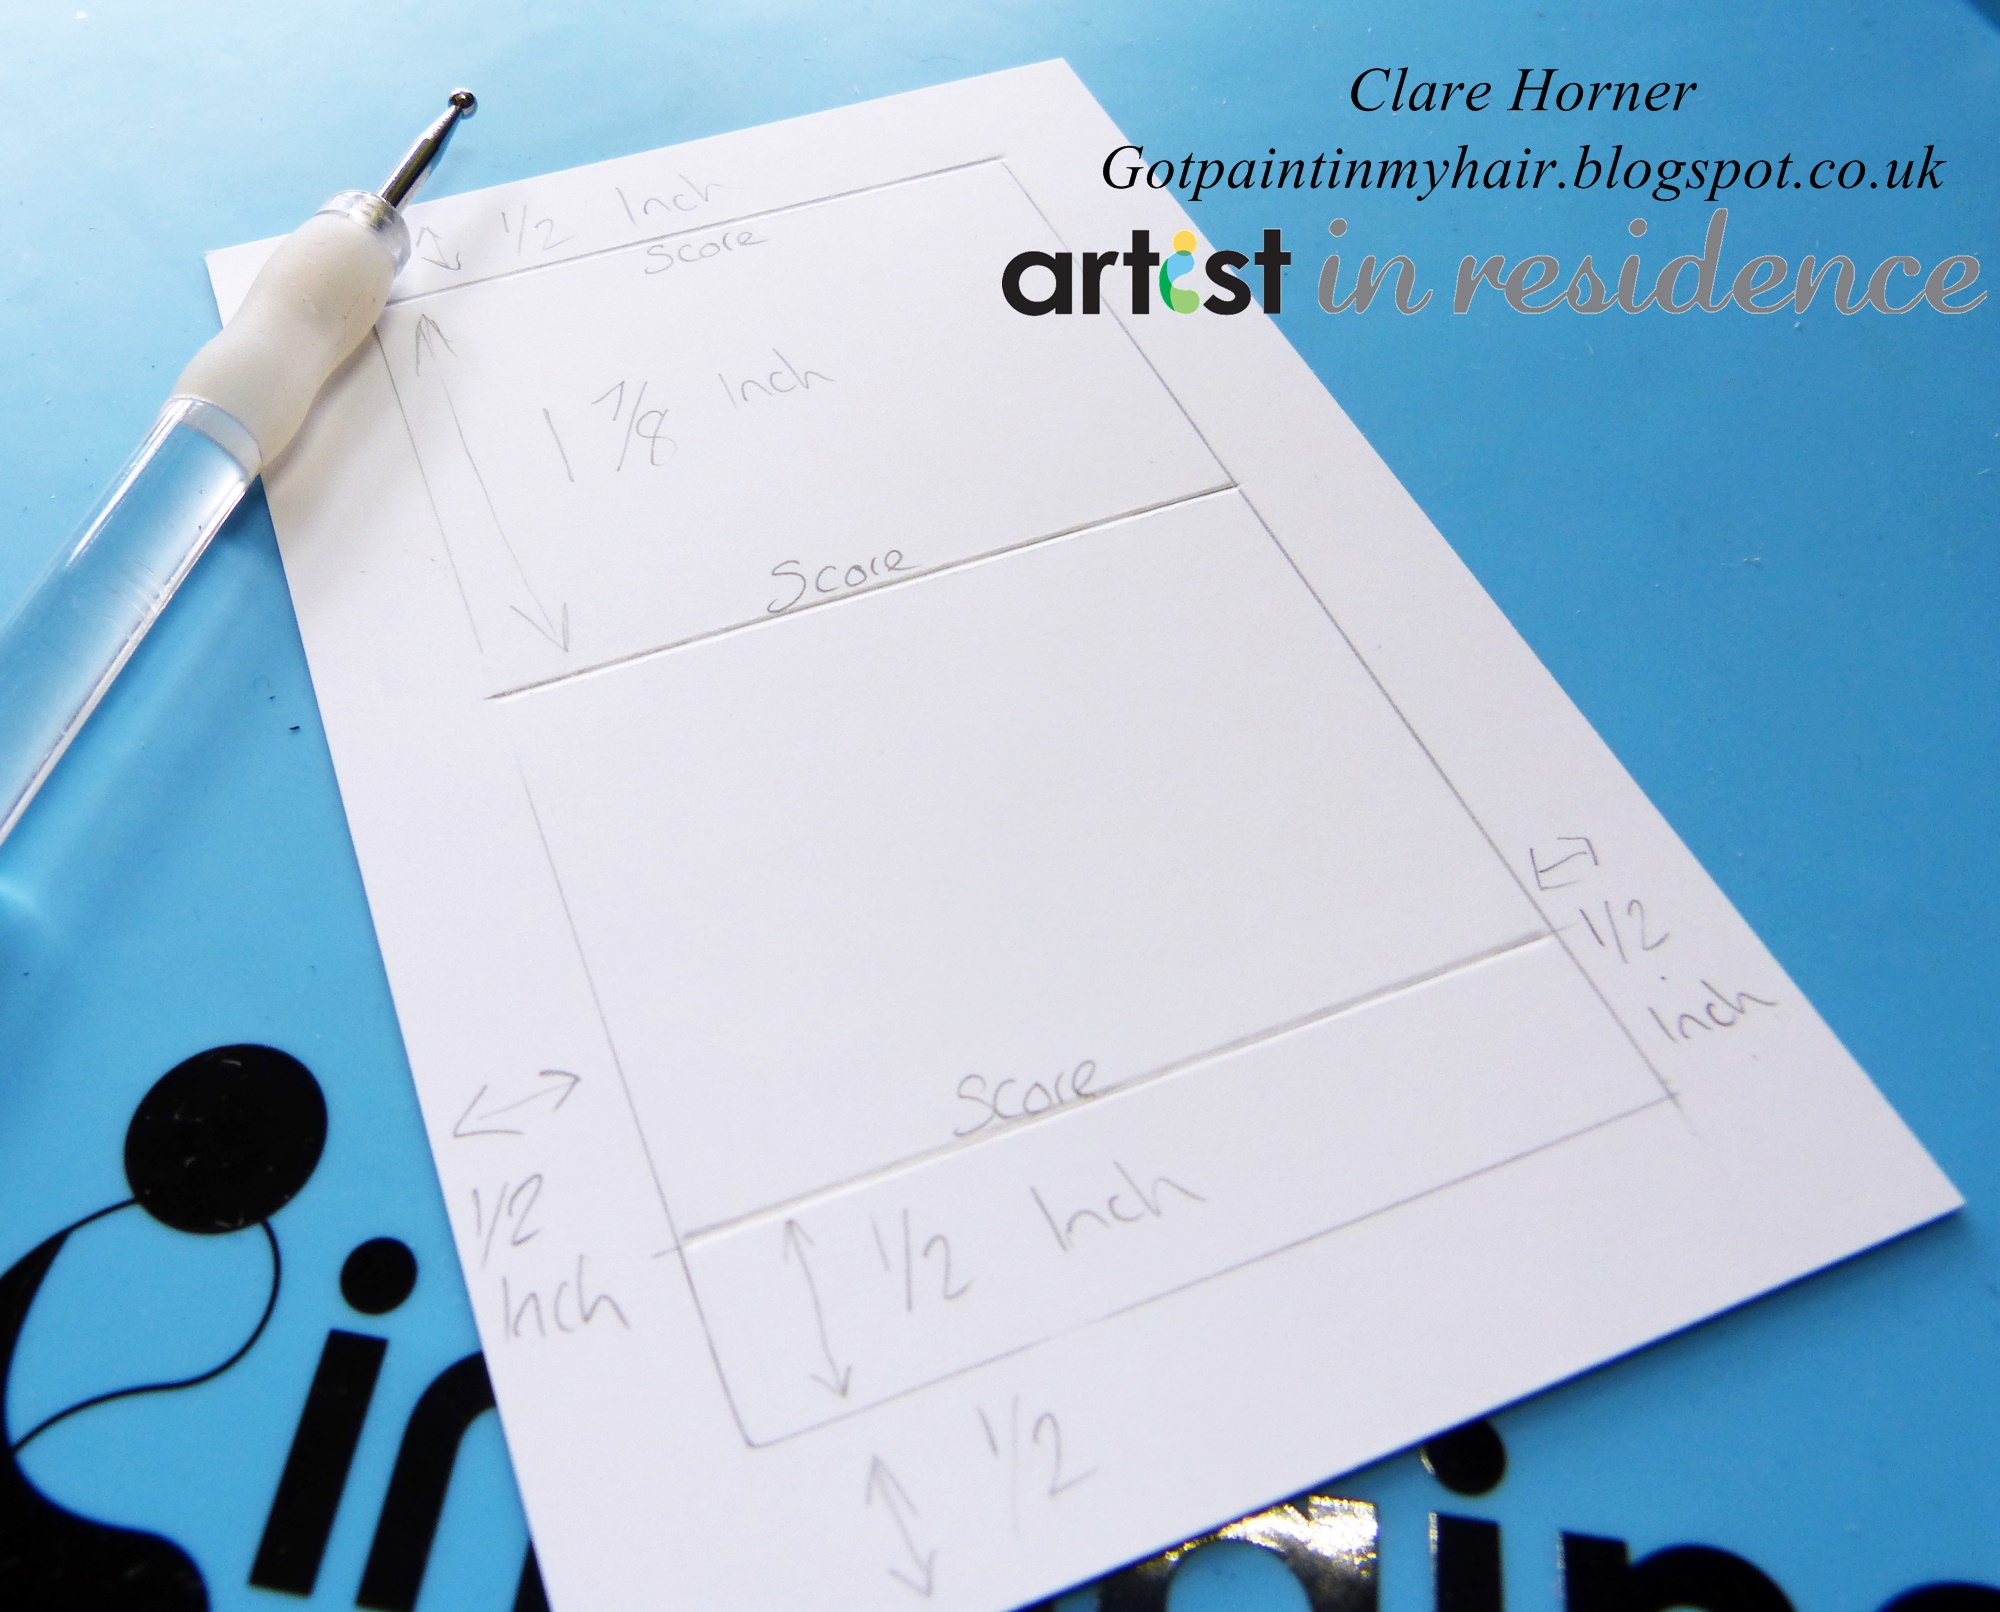
3: Using a cutting mat and craft knife, cut the bottom line and both sides. Erase all lines.
4: Working on the reverse stamp the large leaf with Pear tart Memento Luxe, avoiding the the lower inner square.
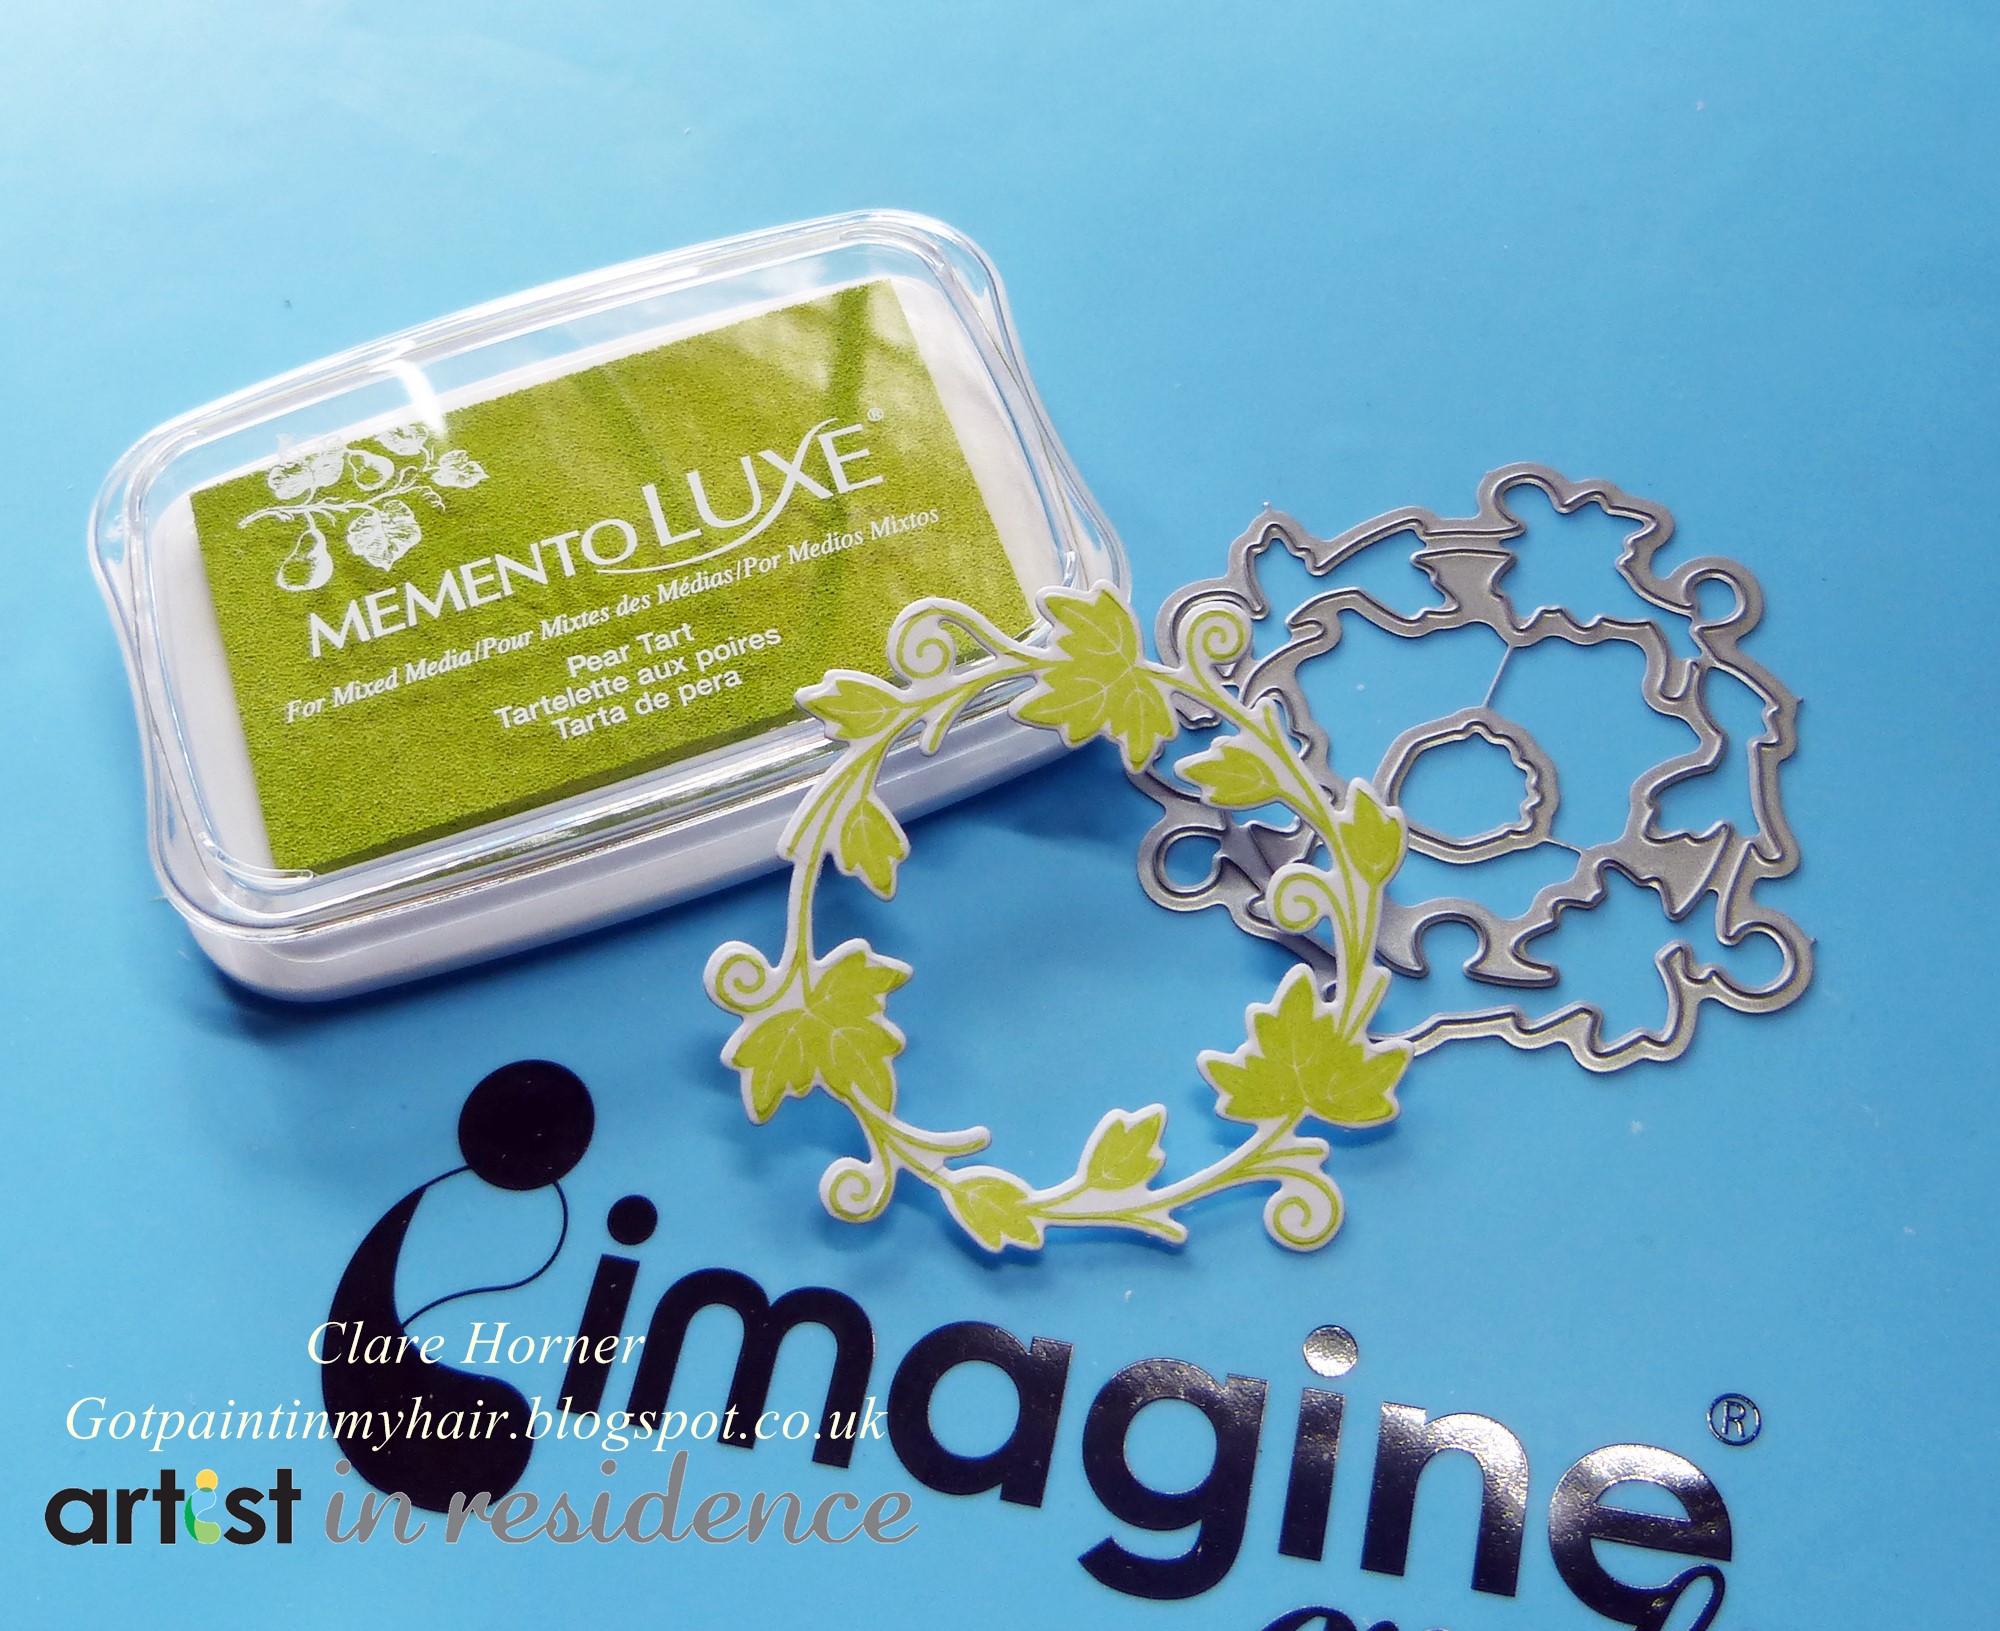
5: Stamp the leaf circle in Pear Tart Memento Luxe and die cut
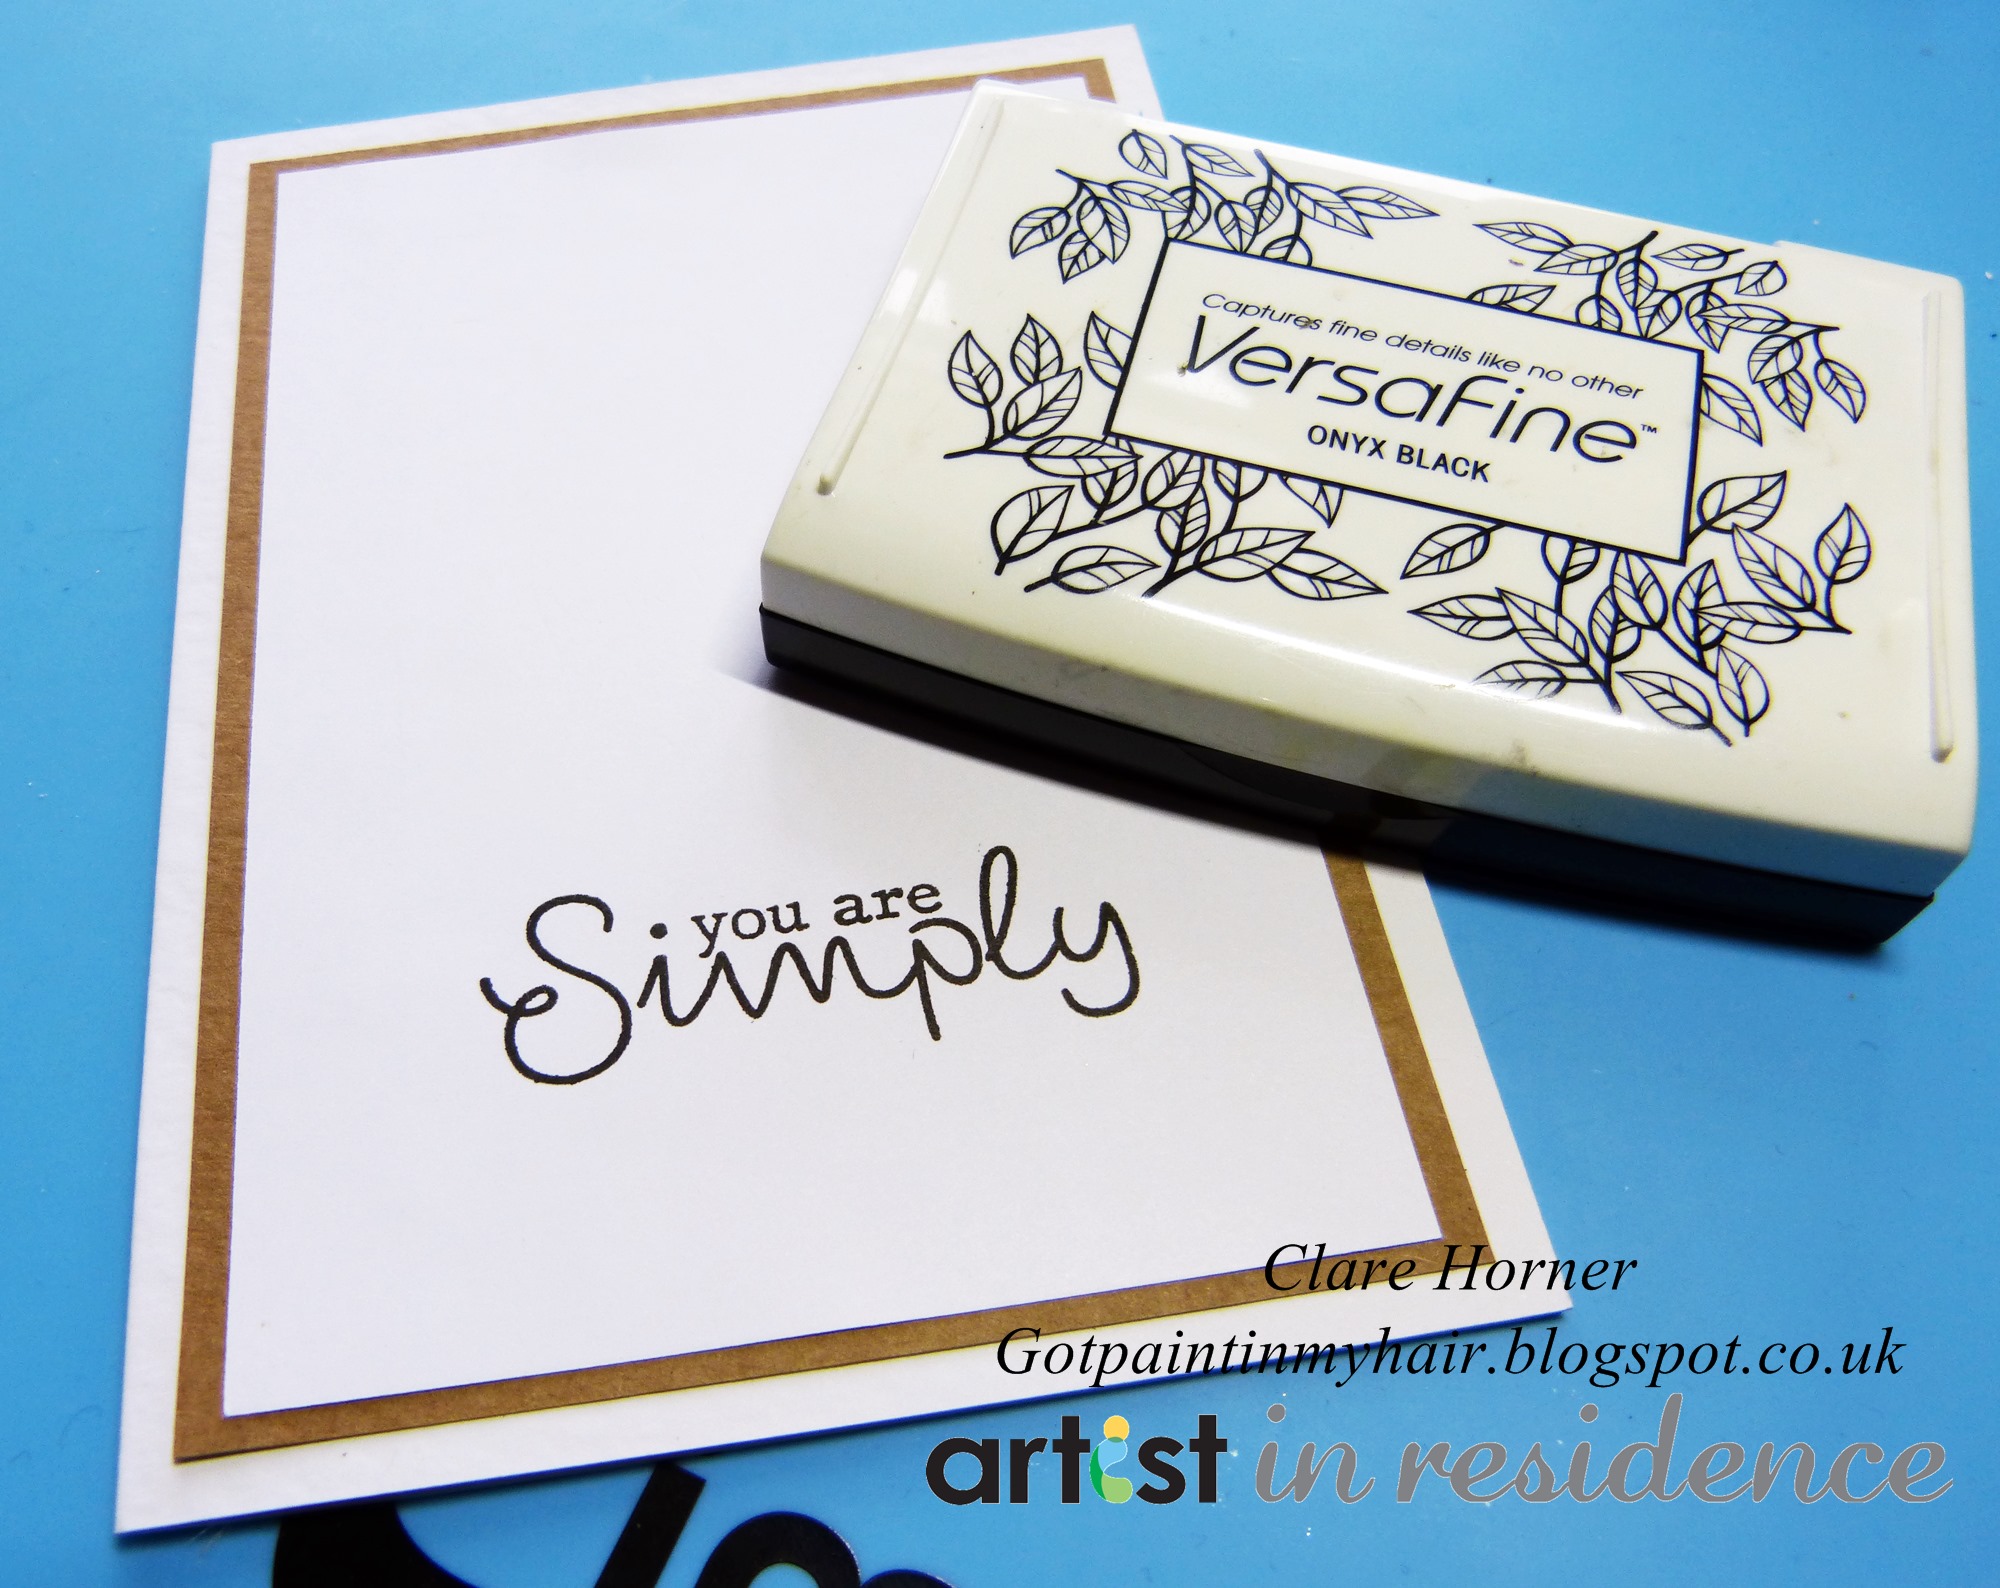
6: Adhere the kraft card and the un-marked white card to the card base.
7: Stamp the phrase with Versafine Onxy Black in the middle of the bottom half of the card base.
8: With Versafine Onyx Black Stamp the ''scrumptious'' on the card front then dry.
9: Cut a half circle notch from the top of the decorated piece of card with a circle punch
10: Fold the score lines, top line over, middle line under, bottom line over.
11a: Cut a piece of white card to 2 1/4 x 5 3/4 inch
11b: Punch a hole centrally in the top of the thin piece of card and attach a ribbon
11c: Glue the piece of card to the bottom 1/2 inch flap of the card front
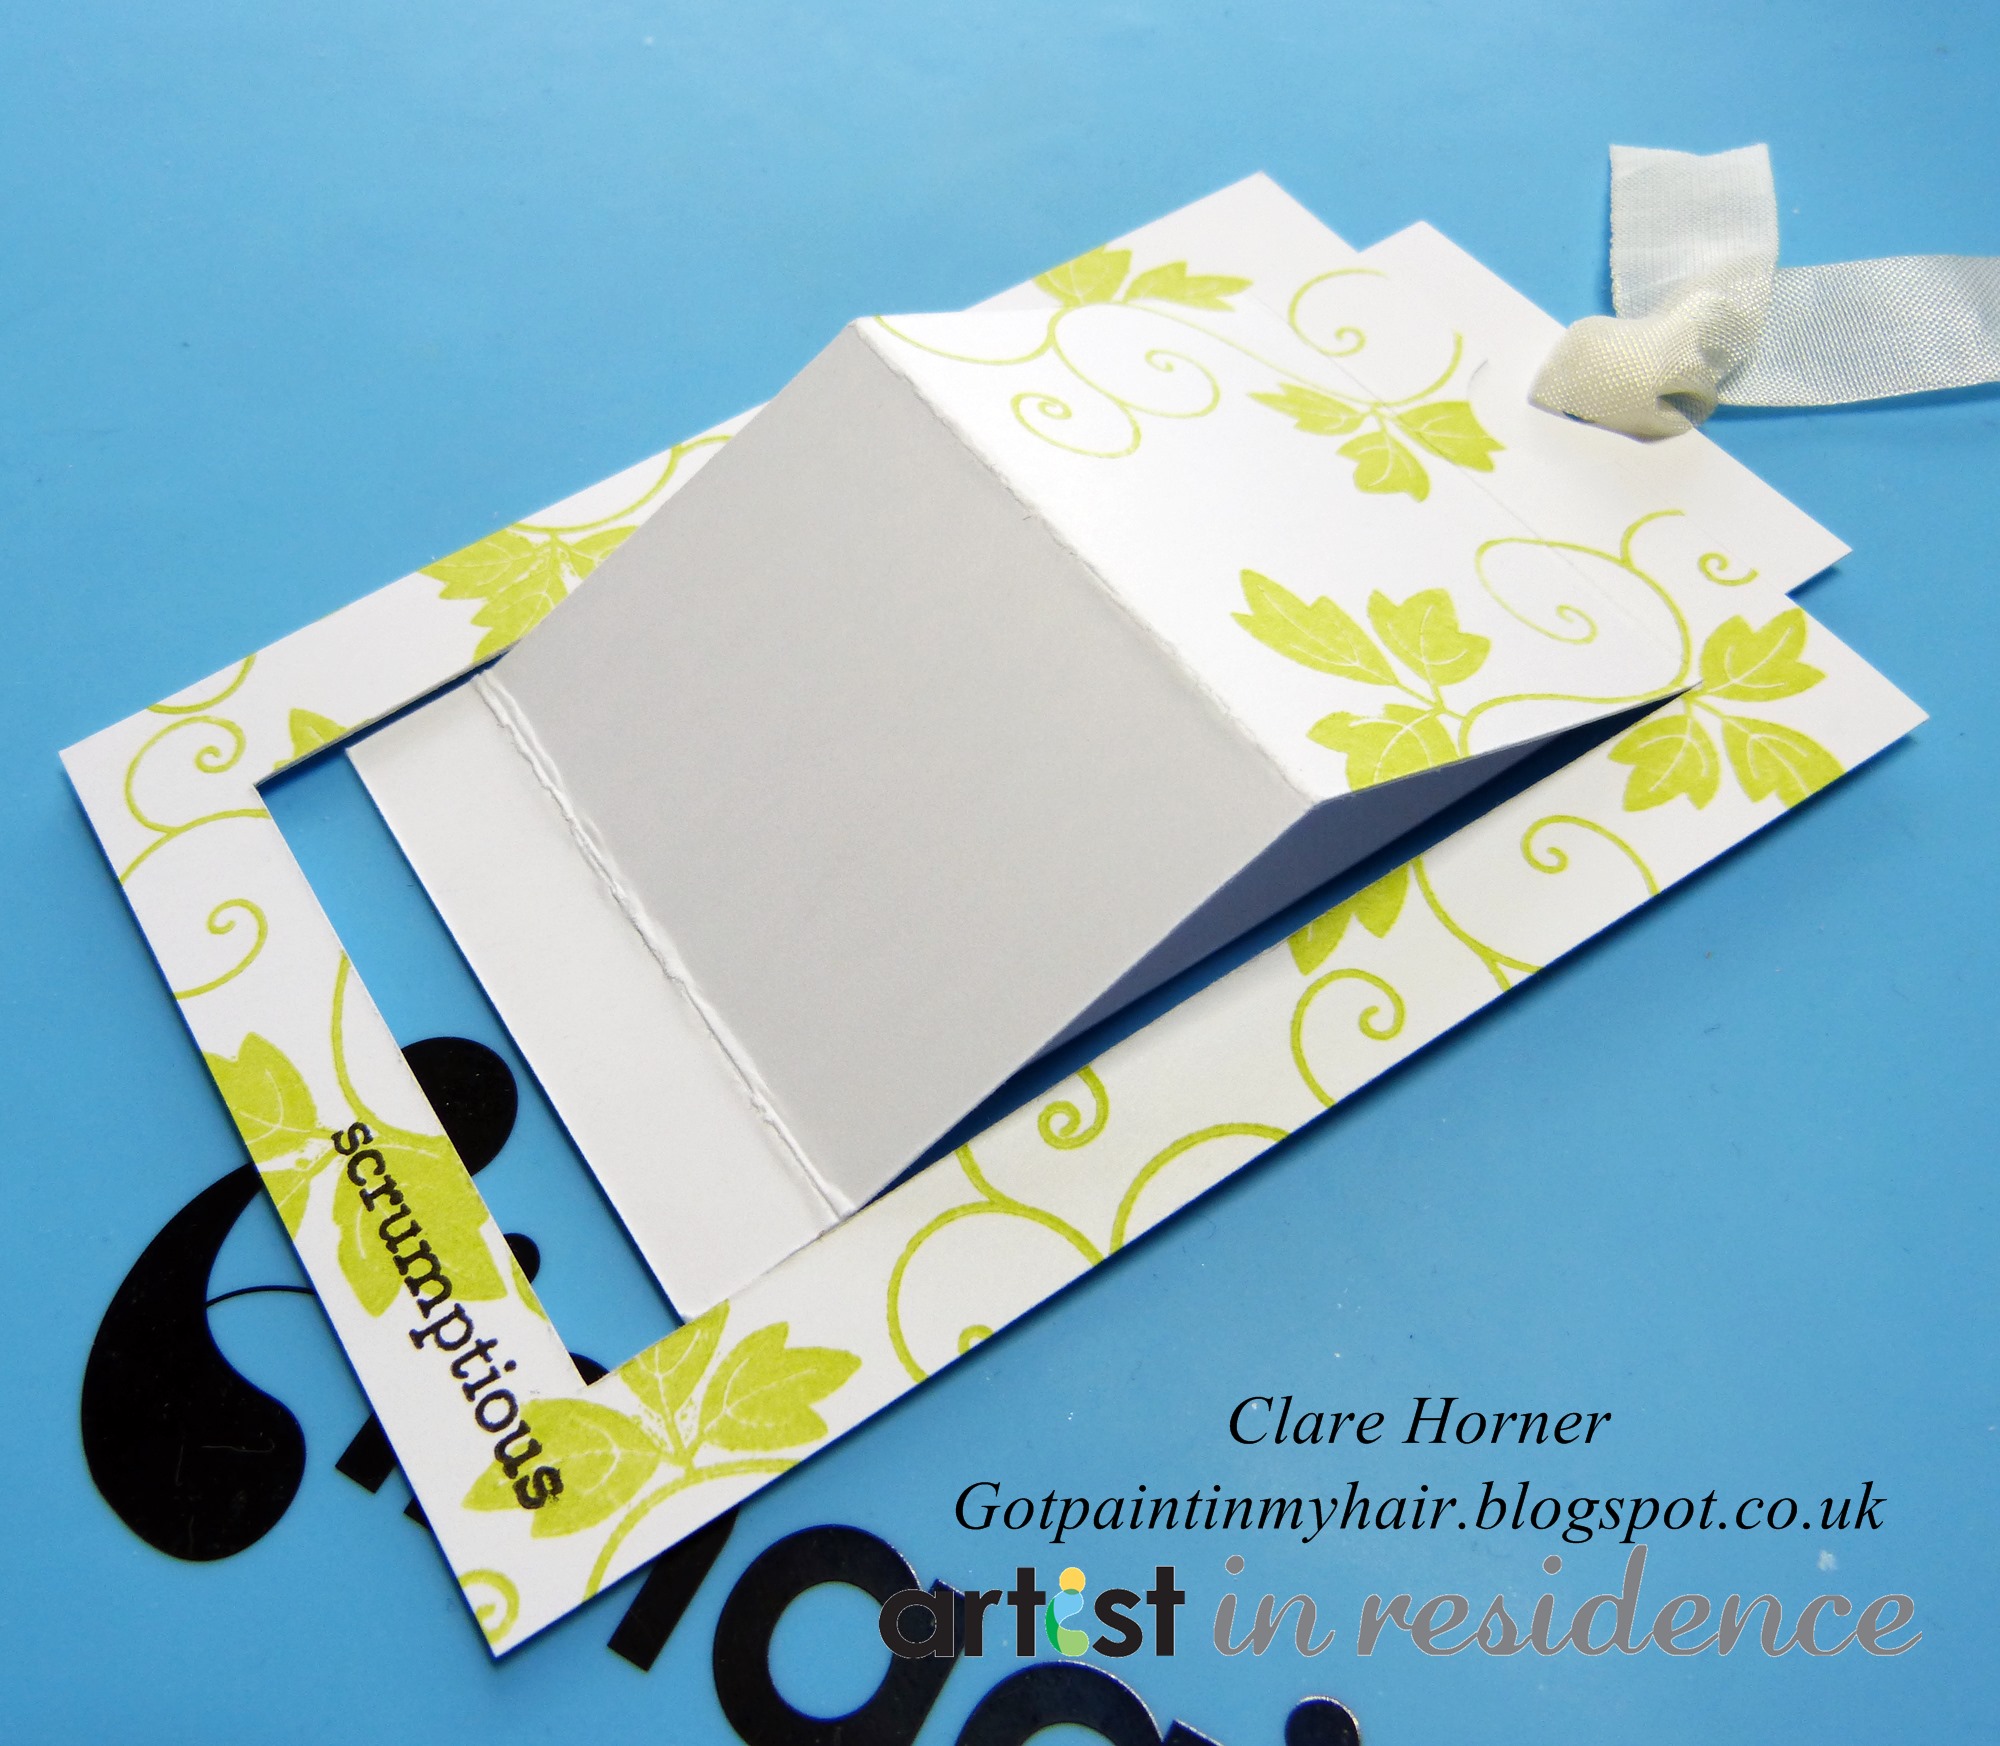
12a: Attach 3d foam to the decorated card piece on the bottom and two sides only. Glue down to card base.
12b: Insert the gift card from the top and gently pull the tab to make sure it works smoothly.
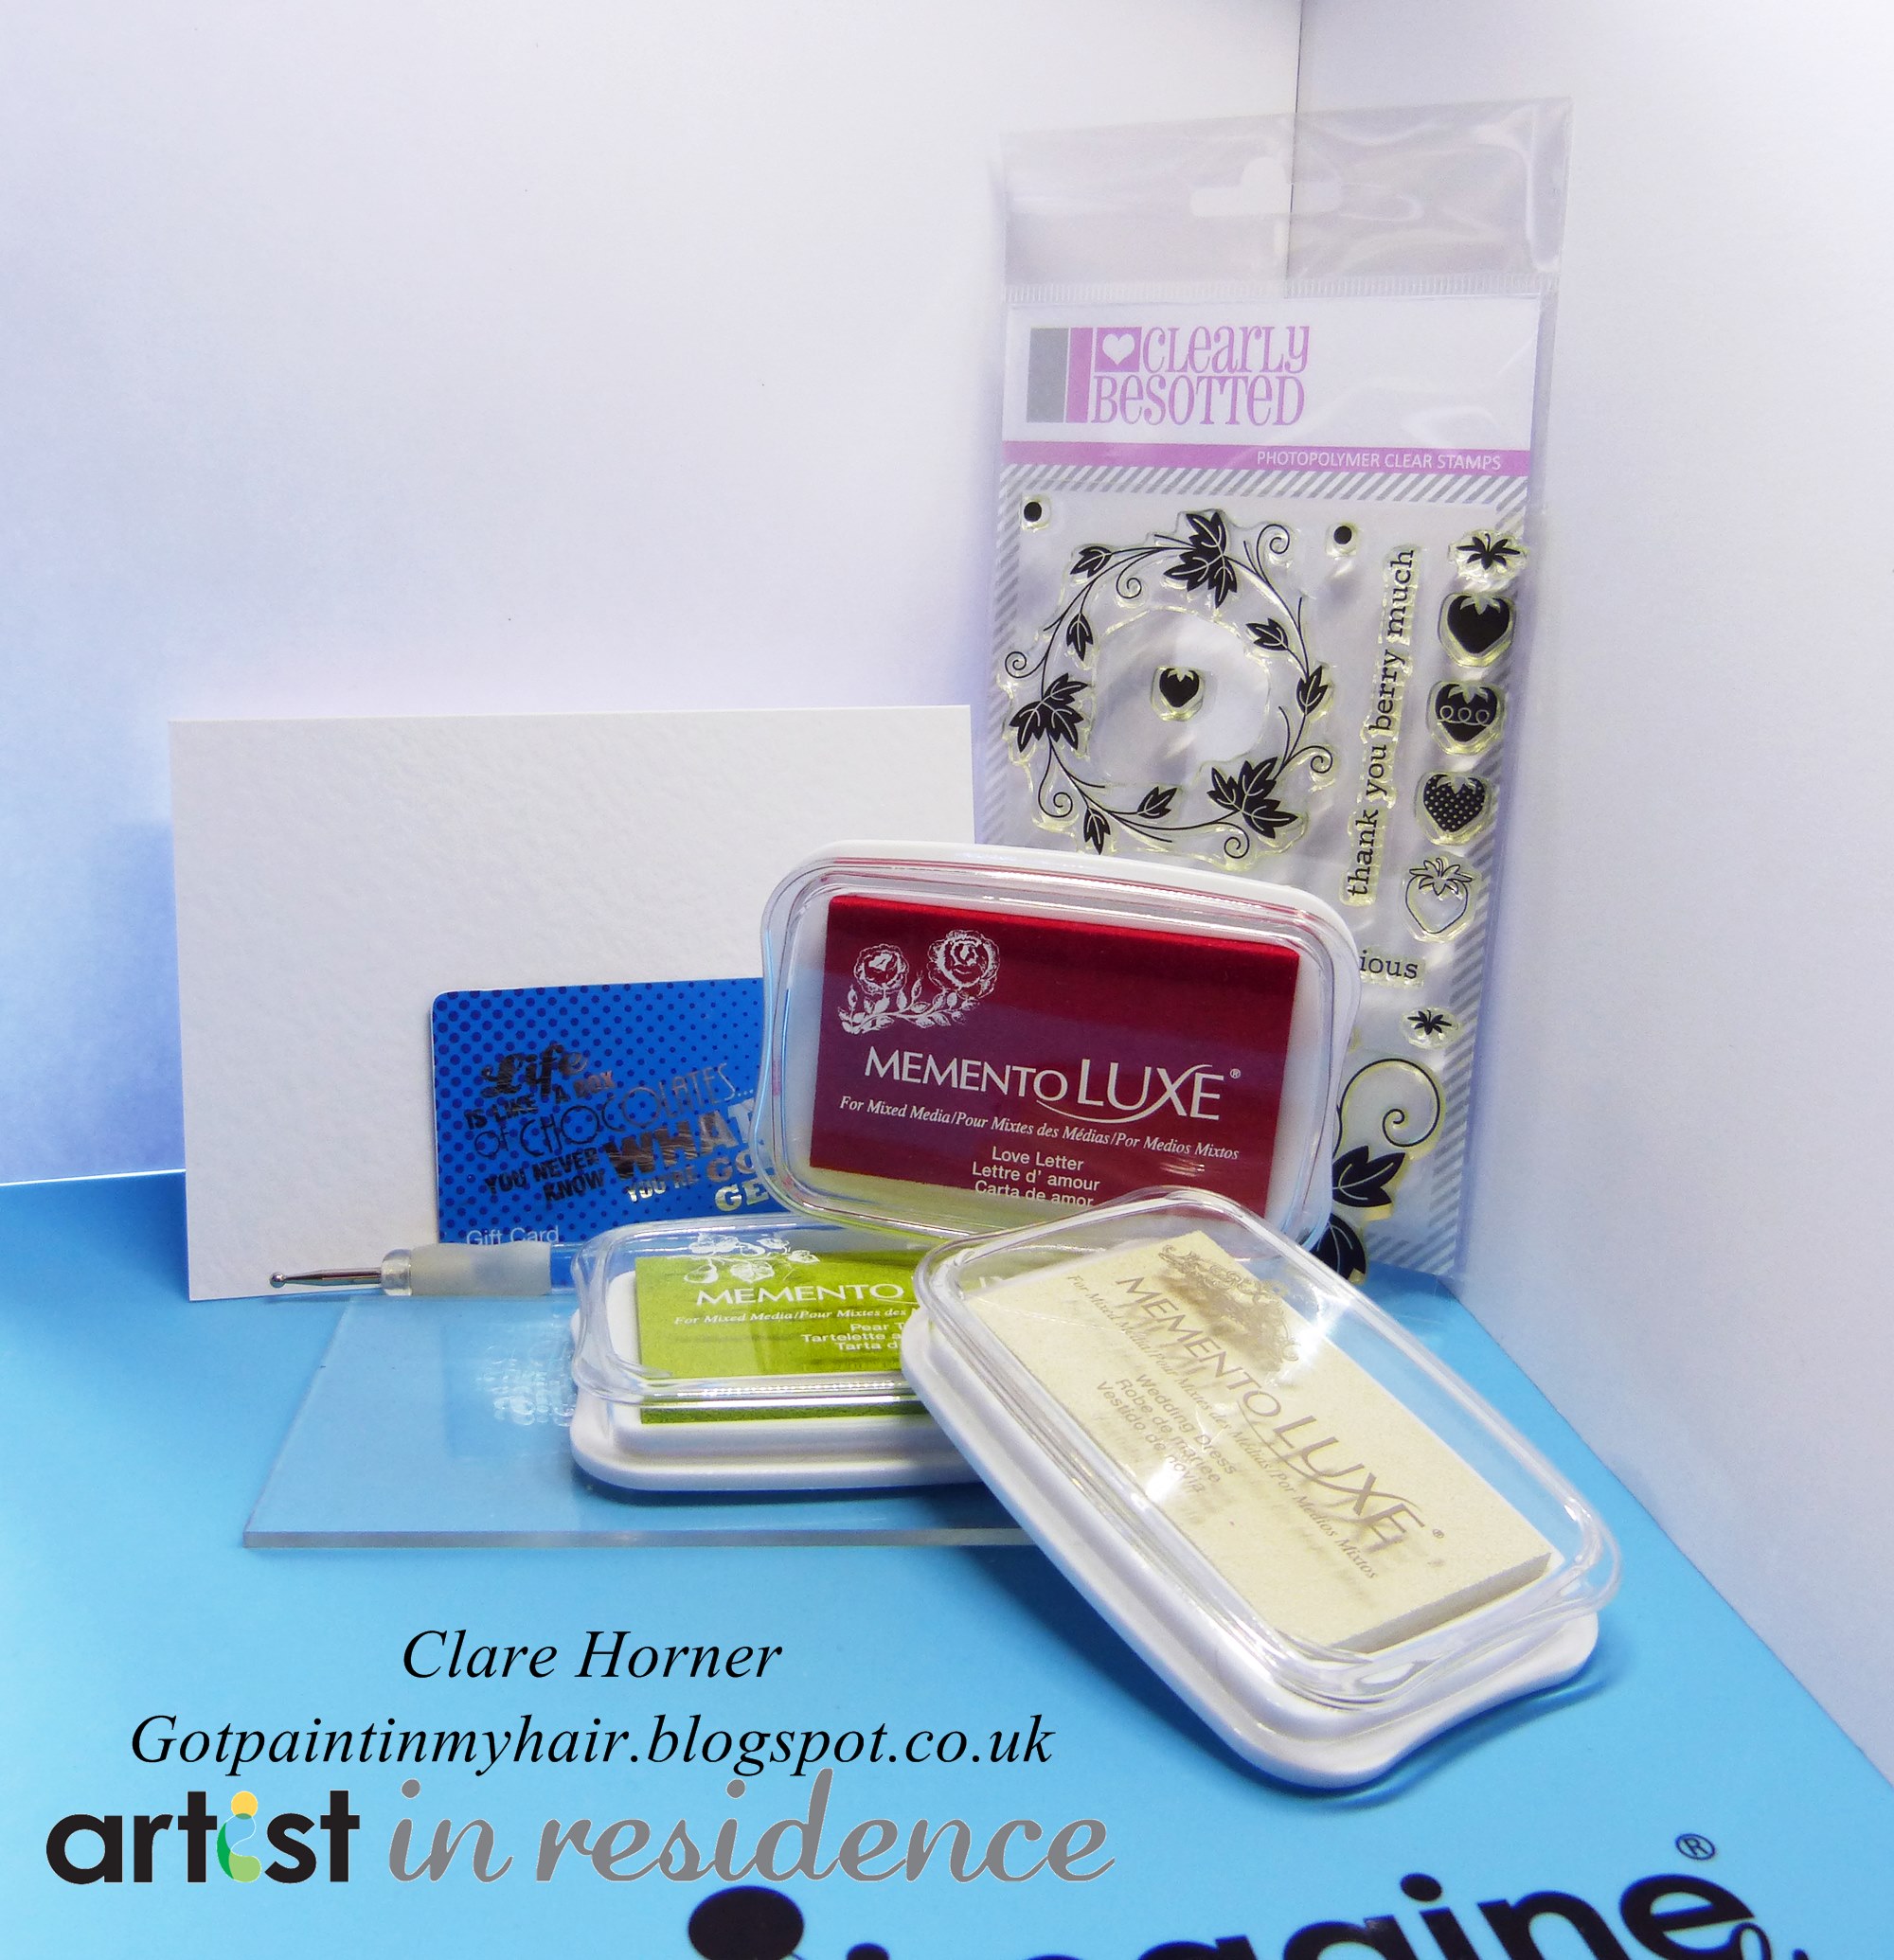
13: Stamp out some strawberries with Memento Luxe Love Letter, some flowers with Wedding Dress and Pear Tart. Dry and fussy cut out.
14: Stamp some tendrils in Pear Tart to the stark white square and attach the leaf circle, strawberries and flowers with 3d glue gel.
Imagine Crafts featuring Tsukiniko:
Other: