Array ( [0] => 280 [ID] => 280 [1] => 1 [TYPEID] => 1 [2] => 0 [SECTIONID] => 0 [3] => project-details [MOD_NAME] => project-details [4] => [TITLE] => [5] => Project Details [META_TITLE] => Easter Egg Hunt Greeting Card [6] => [META_DESCRIPTION] => Easter Egg Hunt Greeting Card [7] => [META_KEYWORDS] => [8] => [BUTTON_TITLE] => [9] => [BODY] => [10] => [BODY_SIDE] => [11] => [MODULE_PROCESSING] => [12] => [MODULE_META] => [13] => project-details-head.php [MODULE_HEAD] => project-details-head.php [14] => project-details-body.php [MODULE_BODY] => project-details-body.php [15] => [MODULE_SIDE] => [16] => 0 [TOP_ORDER] => 0 [17] => 0 [HITS_UNIQUE] => 0 [18] => 0 [HITS_REPEAT] => 0 [19] => 0 [ROBOT_HITS] => 0 [20] => 0000-00-00 00:00:00 [LASTVIEWED] => 0000-00-00 00:00:00 [21] => 0000-00-00 00:00:00 [ROBOT_LASTVIEWED] => 0000-00-00 00:00:00 [22] => 0.70 [PRIORITY] => 0.70 [23] => 1 [SITEMAP] => 1 [24] => 1 [ACTIVE] => 1 [25] => 1 [DISPLAY_TITLE] => 1 [26] => 0 [SSL_MODE] => 0 [27] => 0 [EDITABLE] => 0 [28] => 0 [DELETABLE] => 0 [29] => 2013-11-05 00:00:00 [LASTUPDATED] => 2013-11-05 00:00:00 [30] => 2013-11-05 00:00:00 [CREATED] => 2013-11-05 00:00:00 )
Imagine Crafts
LearnMakeCommunityShop

Easter Egg Hunt Greeting Card

It's that time of the year where the kids get to find all of those eggs hidden in the yard. What a perfect idea for creating a fun card - an Easter basket filled with brightly decorated eggs!


Easter Egg Hunt Greeting Card using StazOn ink

Directions:


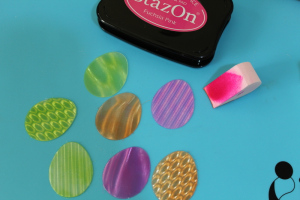
Using various sheets of Vertigo, die cut some eggs and color using various colors of StazOn with an InkBlusher.

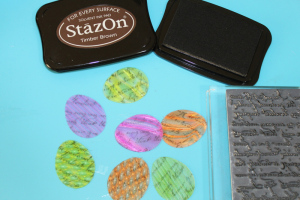
Stamp the script onto the eggs with Timber Brown StazOn and allow to dry.

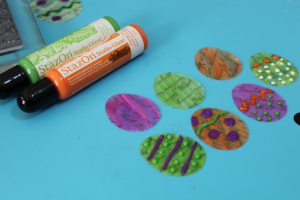
Time to decorate! The tip of StazOn Glaze is great for detail work like decorating the eggs. Choose coordinating colors of StazOn Studio Glaze to add dots, stipes and zig zigs to the eggs. Let dry completely.

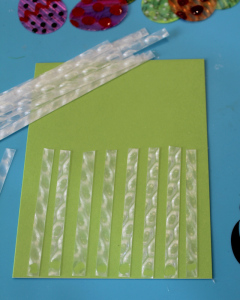
To creative the basket, cut a sheet of Vertigo into 1/4 inch strips. Line up approx 8 strips about a 1/4 inch apart on the lower half of your card and adhere just the lower edges using small glue dots.

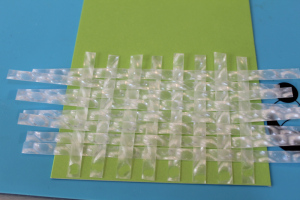
Next weave in approx 8 horizontal strips cut to the same size. It is easiest to trim and adhere the edges after the strips are woven together. Using the glue dots, adhere the right and left edges leaving the basket top open.

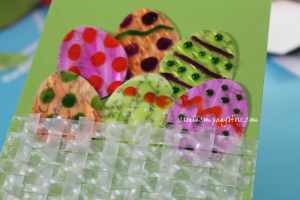
Arrange the eggs in the basket - at this point I realized the Vertigo eggs were translucent and lost some of the detail when layered so I decided to die cut eggs using white cardstock and adhered to the back of each egg so they would stand out.

The last step is cutting the scalloped edge of 1/2" strips of white cardstock and adhering to the card edges - this covers all the basket ends and finishes the card.

by Maureen Cronin

Difficulty

Beginner

Time

About an hour

Materials Needed

IMAGINE Crafts featuring Tsukineko:

Other Supplies:

  • Amuse Studio: Egg die
  • Stampendous: Script stamp
  • Fiskars: Scalloped Edge punch
  • Miscellaneous: green and white cardstock, glue dots, paper cutter, adhesive


Sign up for our newsletter
Facebook Pinterest Twitter YouTube Vimeo