Array ( [0] => 280 [ID] => 280 [1] => 1 [TYPEID] => 1 [2] => 0 [SECTIONID] => 0 [3] => project-details [MOD_NAME] => project-details [4] => [TITLE] => [5] => Project Details [META_TITLE] => Radiant Neon in Electric Pink for Valentine's Day Card [6] => [META_DESCRIPTION] => Radiant Neon in Electric Pink for Valentine's Day Card [7] => [META_KEYWORDS] => [8] => [BUTTON_TITLE] => [9] => [BODY] => [10] => [BODY_SIDE] => [11] => [MODULE_PROCESSING] => [12] => [MODULE_META] => [13] => project-details-head.php [MODULE_HEAD] => project-details-head.php [14] => project-details-body.php [MODULE_BODY] => project-details-body.php [15] => [MODULE_SIDE] => [16] => 0 [TOP_ORDER] => 0 [17] => 0 [HITS_UNIQUE] => 0 [18] => 0 [HITS_REPEAT] => 0 [19] => 0 [ROBOT_HITS] => 0 [20] => 0000-00-00 00:00:00 [LASTVIEWED] => 0000-00-00 00:00:00 [21] => 0000-00-00 00:00:00 [ROBOT_LASTVIEWED] => 0000-00-00 00:00:00 [22] => 0.70 [PRIORITY] => 0.70 [23] => 1 [SITEMAP] => 1 [24] => 1 [ACTIVE] => 1 [25] => 1 [DISPLAY_TITLE] => 1 [26] => 0 [SSL_MODE] => 0 [27] => 0 [EDITABLE] => 0 [28] => 0 [DELETABLE] => 0 [29] => 2013-11-05 00:00:00 [LASTUPDATED] => 2013-11-05 00:00:00 [30] => 2013-11-05 00:00:00 [CREATED] => 2013-11-05 00:00:00 )
Imagine Crafts
LearnMakeCommunityShop

Radiant Neon in Electric Pink for Valentine's Day Card

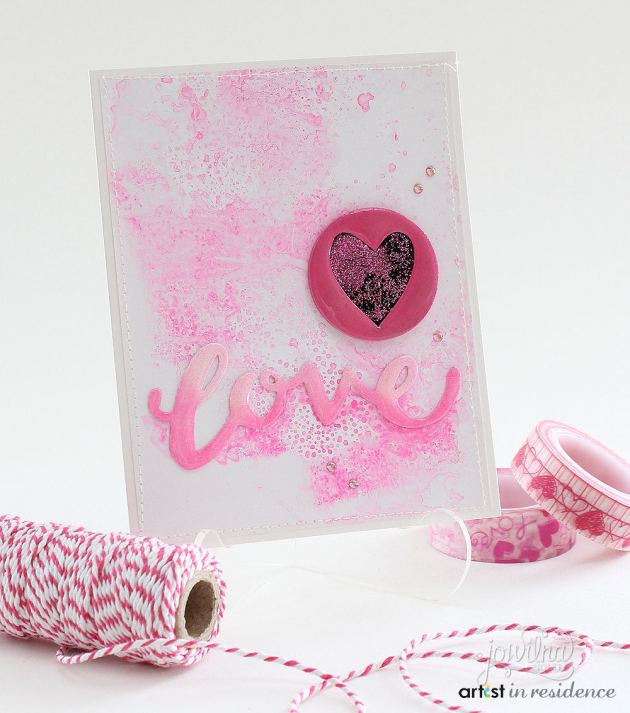
With the Ombre trend still very much alive and well, I was inspired to create a little Ombre magic on this Love themed card using my Radiant Neon Electric ink pad. 


Radiant Neon in Electric Pink for Valentine's Day Card

1. Cut/score the card base from white cardstock to a finished size measuring 4-1/4˝ x 5-1/4".

2. Cut a piece of white glossy photo paper measuring 4˝ x 5".

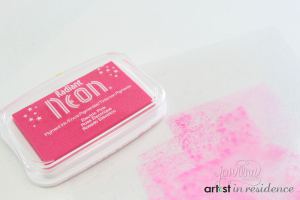
3. Lightly press the Radiant Neon Electric Pink inkpad onto a piece of plastic packaging (like buble wrap, for example) repeatedly.

4. Mist the ink on the plastic with water and dip your glossy cardstock into the ink to transfer the ink onto the glossy cardstock for a unique background pattern. Set aside to dry.

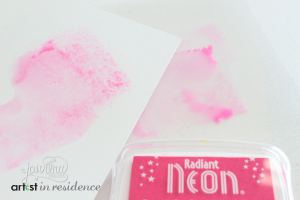
5. On smooth white cardstock, repeatedly tap the Radiant Neon Electric Pink inkpad with light pressure to add color.

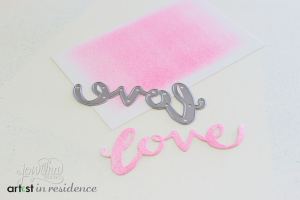
6. Die cut 'love'. Edge the bottom of the word with a Sponge Dauber inked with Radiant Neon Electric Pink.

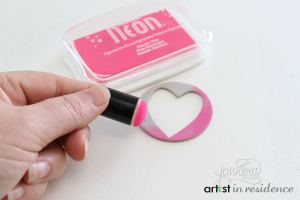
7. Use the Sponge Dauber and ink a chipboard heart frame. Seal the heart using irRESISTible Pico Embellisher Clear and let dry.

8. Cover the inside of the chipboard heart with irRESISTible Tuxedo Black.

9. Lightly sprinkle the wet heart with pink glitter and let it dry.

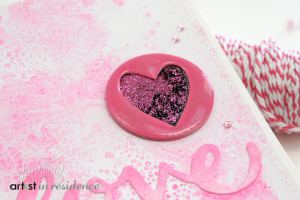
10. Insert the glitter heart back into the colored frame.

11. Assemble the card background. Adhere the colored glossy piece to the base card.

12. Adhere the heart embellishment and the ombre die cut word.

13. Embellish with rhinestones.

by Jowilna Nolte

Difficulty

Intermediate

Time

½ hour + drying time

Materials Needed

IMAGINE Crafts/Tsukineko:

Other Supplies:

  • Crate: Open Book die cut
  • Cricut: Cuttlebug
  • Tombow: Mono-Multi Adhesive
  • Miscellaneous: white smooth carsdtock, glossy photo paper, plastic packaging, water mister, chipboard hearts, glaze, rhinestones


Sign up for our newsletter
Facebook Pinterest Twitter YouTube Vimeo