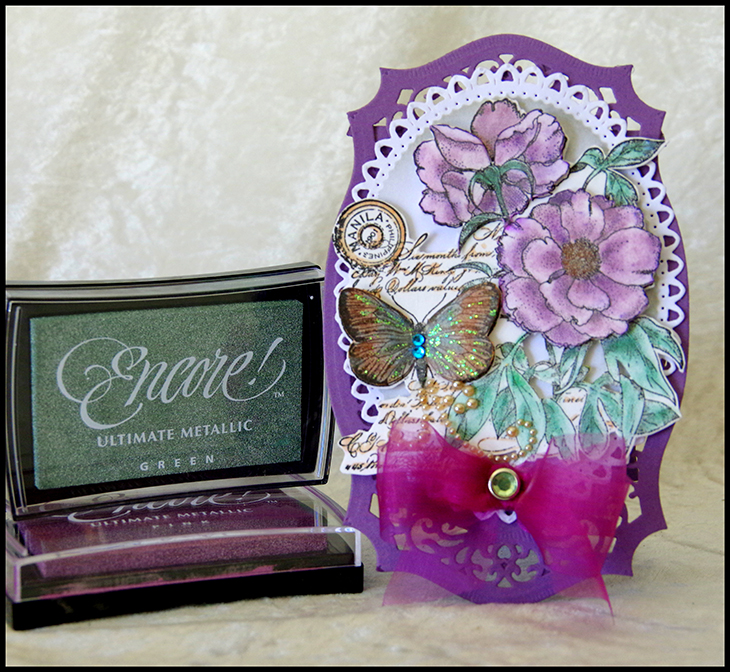
make / by product / sponge daubers / coloring with encore inks - butterfly card
Coloring with Encore Inks - Butterfly Card
Build layers of beautiful colors with Encore Ultimate Metallic Inks.
-
Stamp two copies of the image onto white cardstock using VersaFine Onyx Black ink.
-
Apply the first layer of color to the flowers on both images with Encore Pink using a Fantastix.
-
Add more layers of Encore Pink until the depth and shading desired is reached. NOTE: More detail is advised on the top layer, to make the flowers 'pop'.
-
Color the leaves using Encore Green on the first image.
-
Apply extra layers and shading with Encore Greento build depth in the leaves.
-
Fussy cut the flowers from the second image.
-
Layer the hand cut flowers onto the bottom layer with dimensional adhesive.
-
Color the butterfly on both layers using Encore Blue and Copper.
-
Fussy cut one of the butterflies and layer onto the bottom layer using liquid glue.
-
Cut around the layered image.
-
Cut/emboss one Grand Decorative Labels One Die #1 from with cardstock.
-
Use the die as a stencil and sponge with Encore Champagne using a Sponge Dauber before removing the die cut piece from the die.
-
Cut one Adorning Labels Twenty-Five and one labels Twenty-Five Die in purple cardstock.
-
Score the plain Label Twenty-Five ½˝ from the top and fold forward at the scored line.
-
Adhere to the Adorning Labels Twenty-Five using double sided tape, lining up the filigree pattern along the edges.
-
Center the Decorative Labels One to the front of the card base and adhere with dimensional tape.
-
Attach the image using dimensional adhesive.
-
Add liquid glitter sparingly to the wings of the butterfly.
-
Attach a double bow using sheer ribbon and a decorative brAdhere bling to the butterfly and from the bow as shown in the main photo.