make / by season/occasion / versamagic mason jar makeover
VersaMagic Mason Jar Makeover
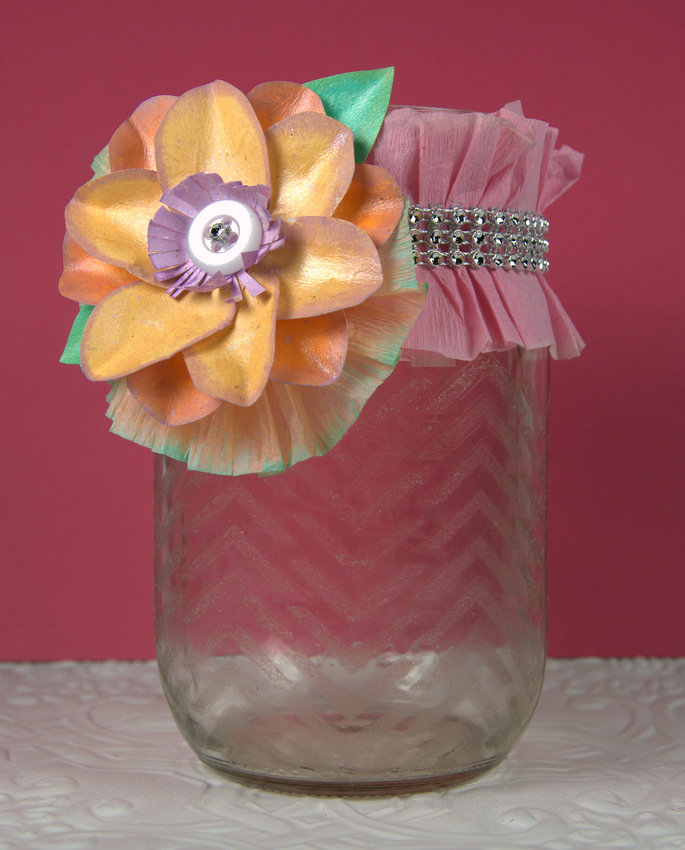
Stencil with Creative Medium for a faux etched-glass look.
-
Decorate jar: Wash and dry jar. Tape stencil flat around jar. With ink blusher, apply a very light coat of Vintage Creative Medium over stencil onto glass. The medium dries quickly and a heavy coat can bleed under stencil, so apply two light coats instead of one heavy. Once dry, remove stencil, reposition it around jar and repeat application of Creative Medium as before until jar is covered with design.
-
Fold and ruffle peach crepe paper streamer on one long end, secure with needle and thread. Rub Aquatic Splash ink along unstitched edge.
-
Ruffle pink crepe paper streamer by machine stitching down center, folding and gathering as you stitch. Alternately you can hand stitch and pull thread to gather. Wrap ruffle around jar, adhere in place with hot glue, cut thread ends. Cut Diamond Wrap to three rows wide and to fit center of ruffle, hot glue in place.
-
Create flower: Stamp Thatched Straw, Mango Madness (6 each for petals) and Aquatic Splash (2 for leaves) Dew Drops directly onto paper allowing the shape of the ink pad to create a dew drop ink image. For flower stamen, draw a 1 ½” circle on same paper. Using Lavender Fireworks spray color circle and lightly mist stamped dew drops. Let dry.
-
Cut each dew drop out around the perimeter of the shape. Applying ink direct to paper, color edges and back of petals with Spring Pansy, and leaves with Aloe Vera. Fold leaves in half lengthwise. Bend petals around the tip of your finger, creasing tips slightly. Paint petals and leaves with one coat of Shimmer Creative Medium to strengthen them and add a shimmery wet look.
-
Assemble flower by gluing Mango Madness petals in a spoke pattern. Hot glue leaves to back of flower with tips pointing outwards.
-
Hot glue Thatched Straw petals the same as (and on top of) flower, with petals alternating (not stacked).
-
Cut out flower stamen (circle). Using scissors, make small cuts towards center, curl tips with fingers. Hot glue to center of flower. Cut one jewel from Diamond Wrap, glue to center of button. Glue button to center of flower.
-
Hot glue peach ruffle to back of flower. Hot glue flower to jar over pink ruffle seam.