January – out with the old, in with the new…time for a fresh start and along with that fresh start is a time to get organized. But organizing doesn’t have to be boring, spice up your organizational containers with a bit of help from Creative Medium!
.jpg)
1. Begin by washing and drying each mason jar with soap and water to remove any dust and debris.
.jpg)
2. Tear two pieces of Tear It Tape from the roll and place over the embossed area of the jar.
.jpg)
3. Cut a piece of lace 3” x 11”.
4. Remove the backing paper from the tape; wrap the lace around the center of the jar and secure the ends with the tape.
.jpg)
5. Use the palette knife to spread Creative Medium (color your choice) in a nice even layer over the entire piece of lace.
6. Wipe off excess Creative Medium from the palette knife and wash with soap and water.
.jpg)
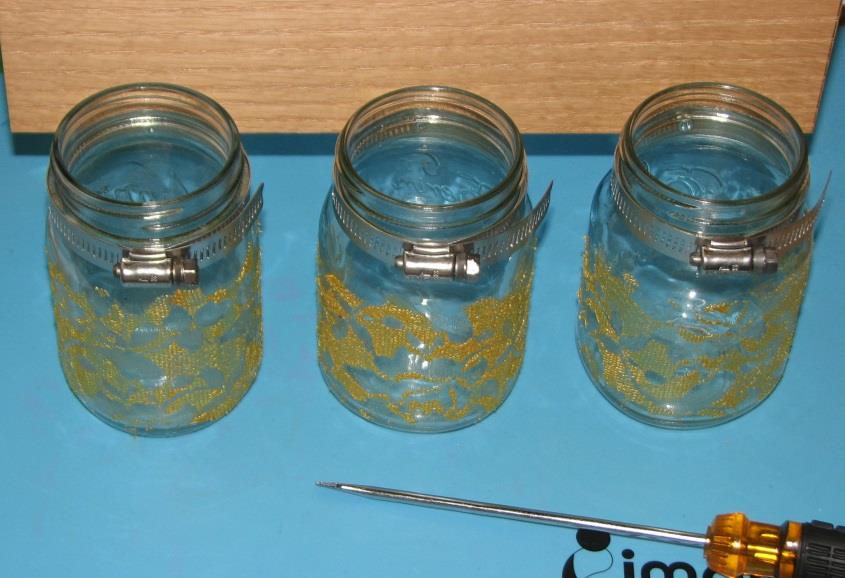
7. Slowly peel the lace away from the mason jar revealing the lacey design. Discard the lace.
.jpg)
8. Repeat steps 5, 6 and 7 until each jar has been decorated.
9. Allow the Creative Medium time to thoroughly dry.
.jpg)
.jpg)
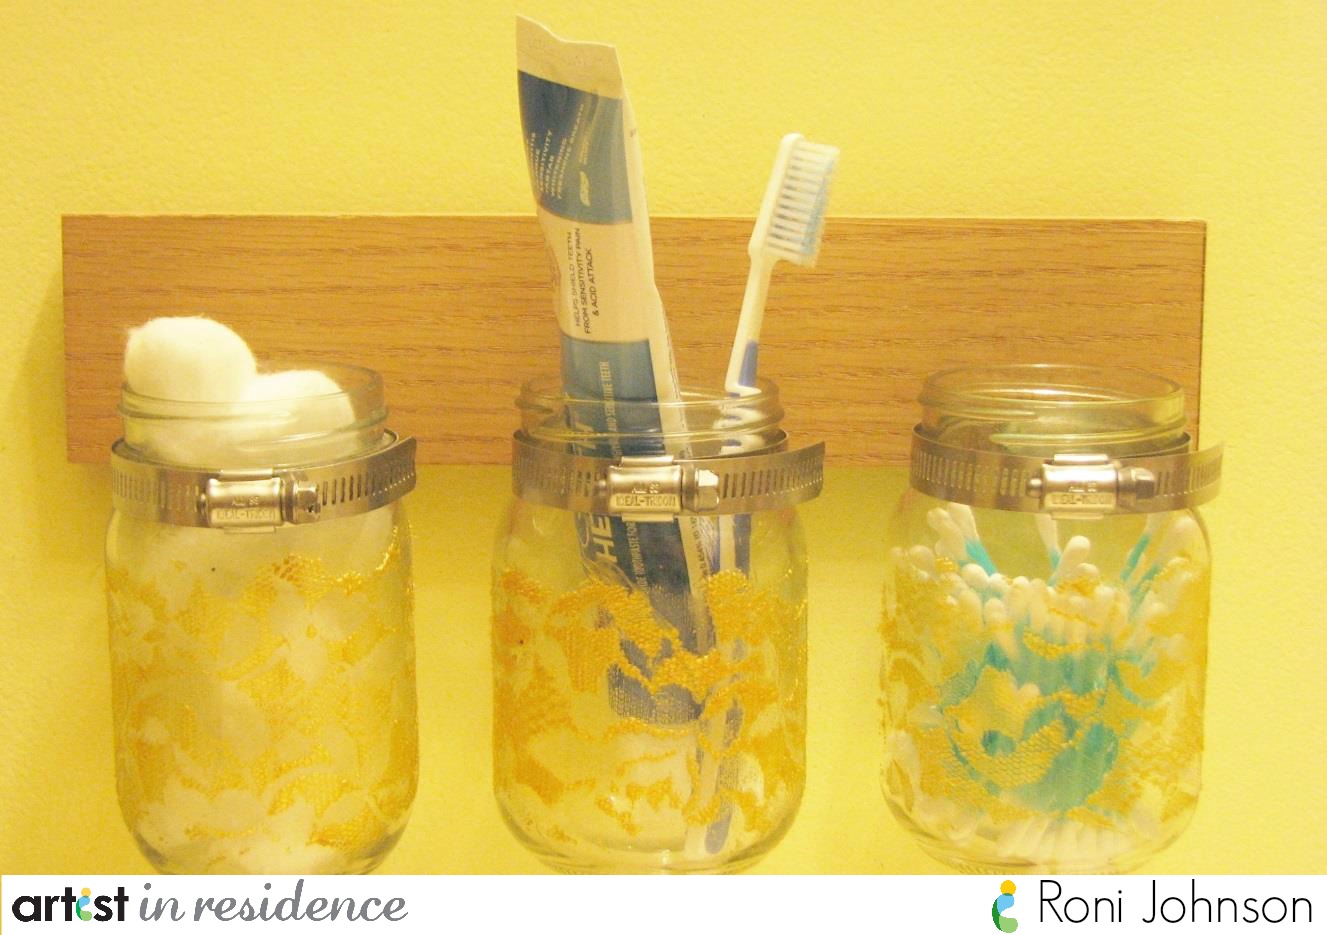
10. Screw the hose clamps to a piece of wood which had previously been cut to size (2 5/8” x 12”).
NOTE: A piece of oak was used for the example which matches our wood trim. You may choose to use other types of wood or a piece of pine painted or stained to match your décor.
11. Insert each mason jar into the hose clamps; use a screw driver to adjust the clamp to secure the jar.
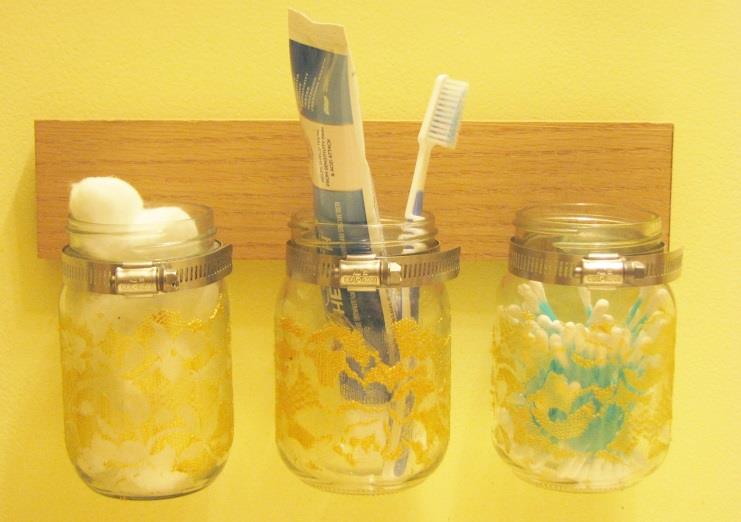
12. Mount the organizer to desired wall and fill.
Imagine Crafts featuring Tsukineko:
Other Supplies: