Array ( [0] => 280 [ID] => 280 [1] => 1 [TYPEID] => 1 [2] => 0 [SECTIONID] => 0 [3] => project-details [MOD_NAME] => project-details [4] => [TITLE] => [5] => Project Details [META_TITLE] => Floral Summer Tank with Memento Luxe [6] => [META_DESCRIPTION] => Floral Summer Tank with Memento Luxe [7] => [META_KEYWORDS] => [8] => [BUTTON_TITLE] => [9] => [BODY] => [10] => [BODY_SIDE] => [11] => [MODULE_PROCESSING] => [12] => [MODULE_META] => [13] => project-details-head.php [MODULE_HEAD] => project-details-head.php [14] => project-details-body.php [MODULE_BODY] => project-details-body.php [15] => [MODULE_SIDE] => [16] => 0 [TOP_ORDER] => 0 [17] => 0 [HITS_UNIQUE] => 0 [18] => 0 [HITS_REPEAT] => 0 [19] => 0 [ROBOT_HITS] => 0 [20] => 0000-00-00 00:00:00 [LASTVIEWED] => 0000-00-00 00:00:00 [21] => 0000-00-00 00:00:00 [ROBOT_LASTVIEWED] => 0000-00-00 00:00:00 [22] => 0.70 [PRIORITY] => 0.70 [23] => 1 [SITEMAP] => 1 [24] => 1 [ACTIVE] => 1 [25] => 1 [DISPLAY_TITLE] => 1 [26] => 0 [SSL_MODE] => 0 [27] => 0 [EDITABLE] => 0 [28] => 0 [DELETABLE] => 0 [29] => 2013-11-05 00:00:00 [LASTUPDATED] => 2013-11-05 00:00:00 [30] => 2013-11-05 00:00:00 [CREATED] => 2013-11-05 00:00:00 )
Imagine Crafts
LearnMakeCommunityShop

Floral Summer Tank with Memento Luxe

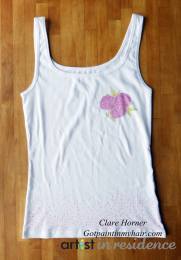
My summer wardrobe is full of boring plain shirts, how about yours? This year I was so happy to receive some of the gorgeous Memento Luxe inks and have quite literally gone to town jazzing up my clothes with my favorite images. Check it out!


Floral Summer Tank with Memento Luxe

Directions

1 watermarked

Step 1: Place a sheet of scrap paper inside your shirt.

Step 2: On the back of your vest stamp the falling snow stamp with Memento Luxe Rose Bud above the hem line, thickest part of the pattern closet to the bottom. Repeat all around. one side.

2 watermarked

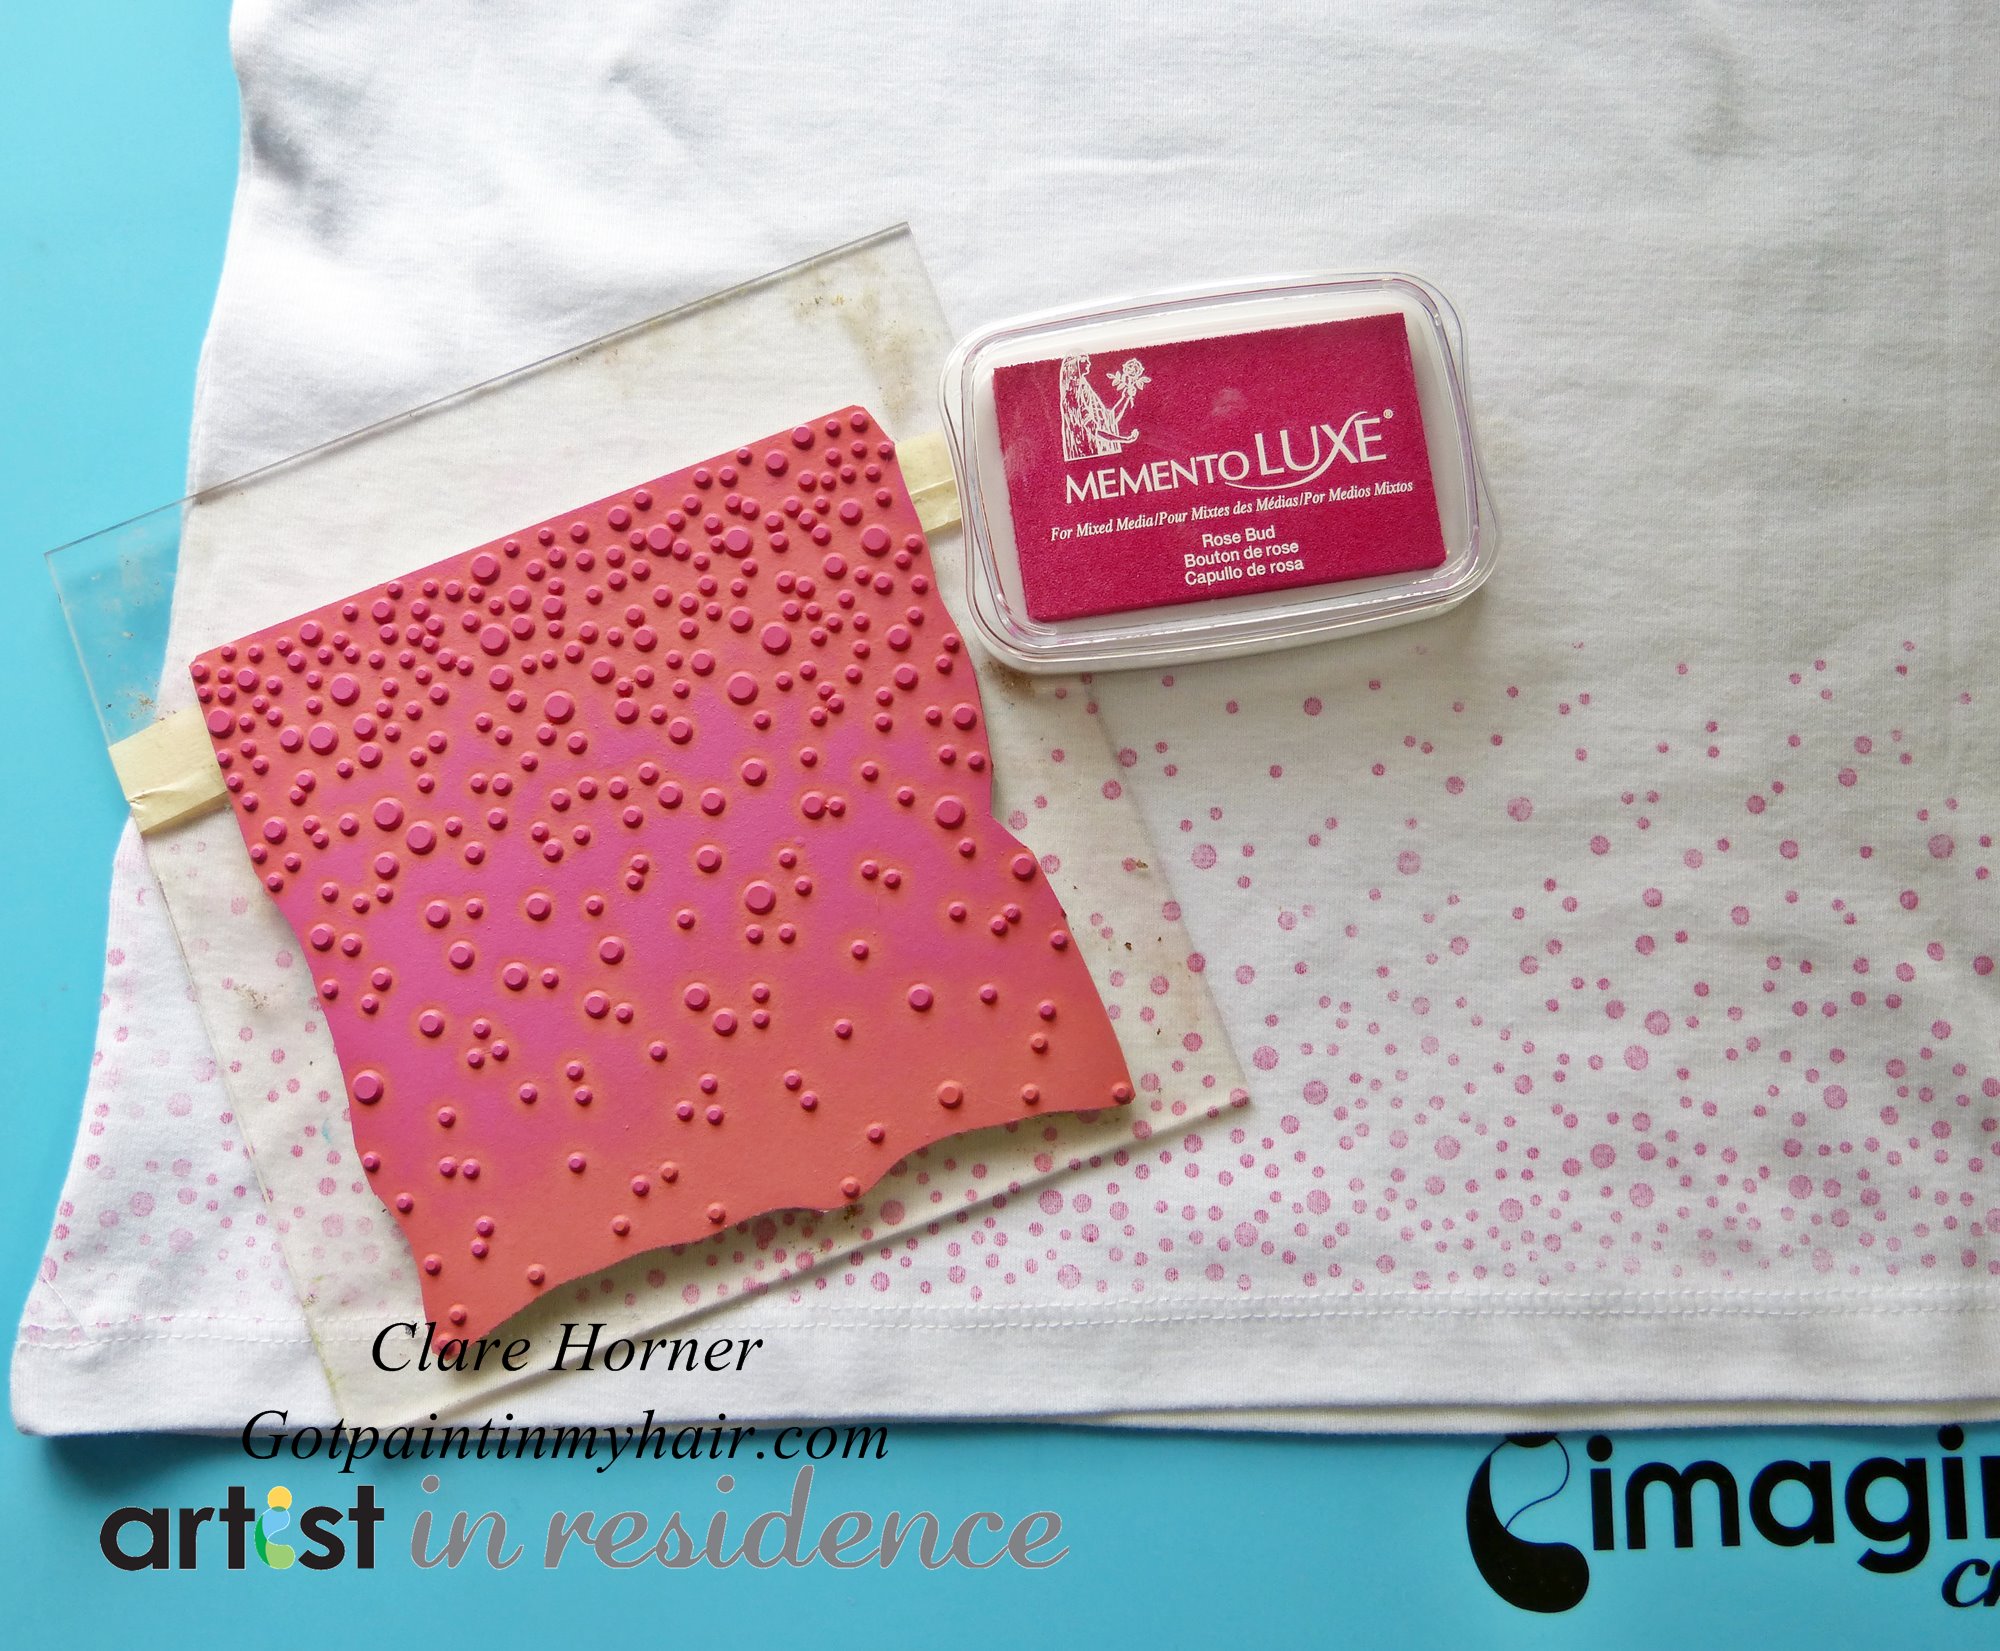
Step 3: Dry the ink carefully with a heat tool, making sure you do not burn your fabric, then repeat on the other front side.

Step 4: Put your shirt on and decide where you want your flowers to be placed.

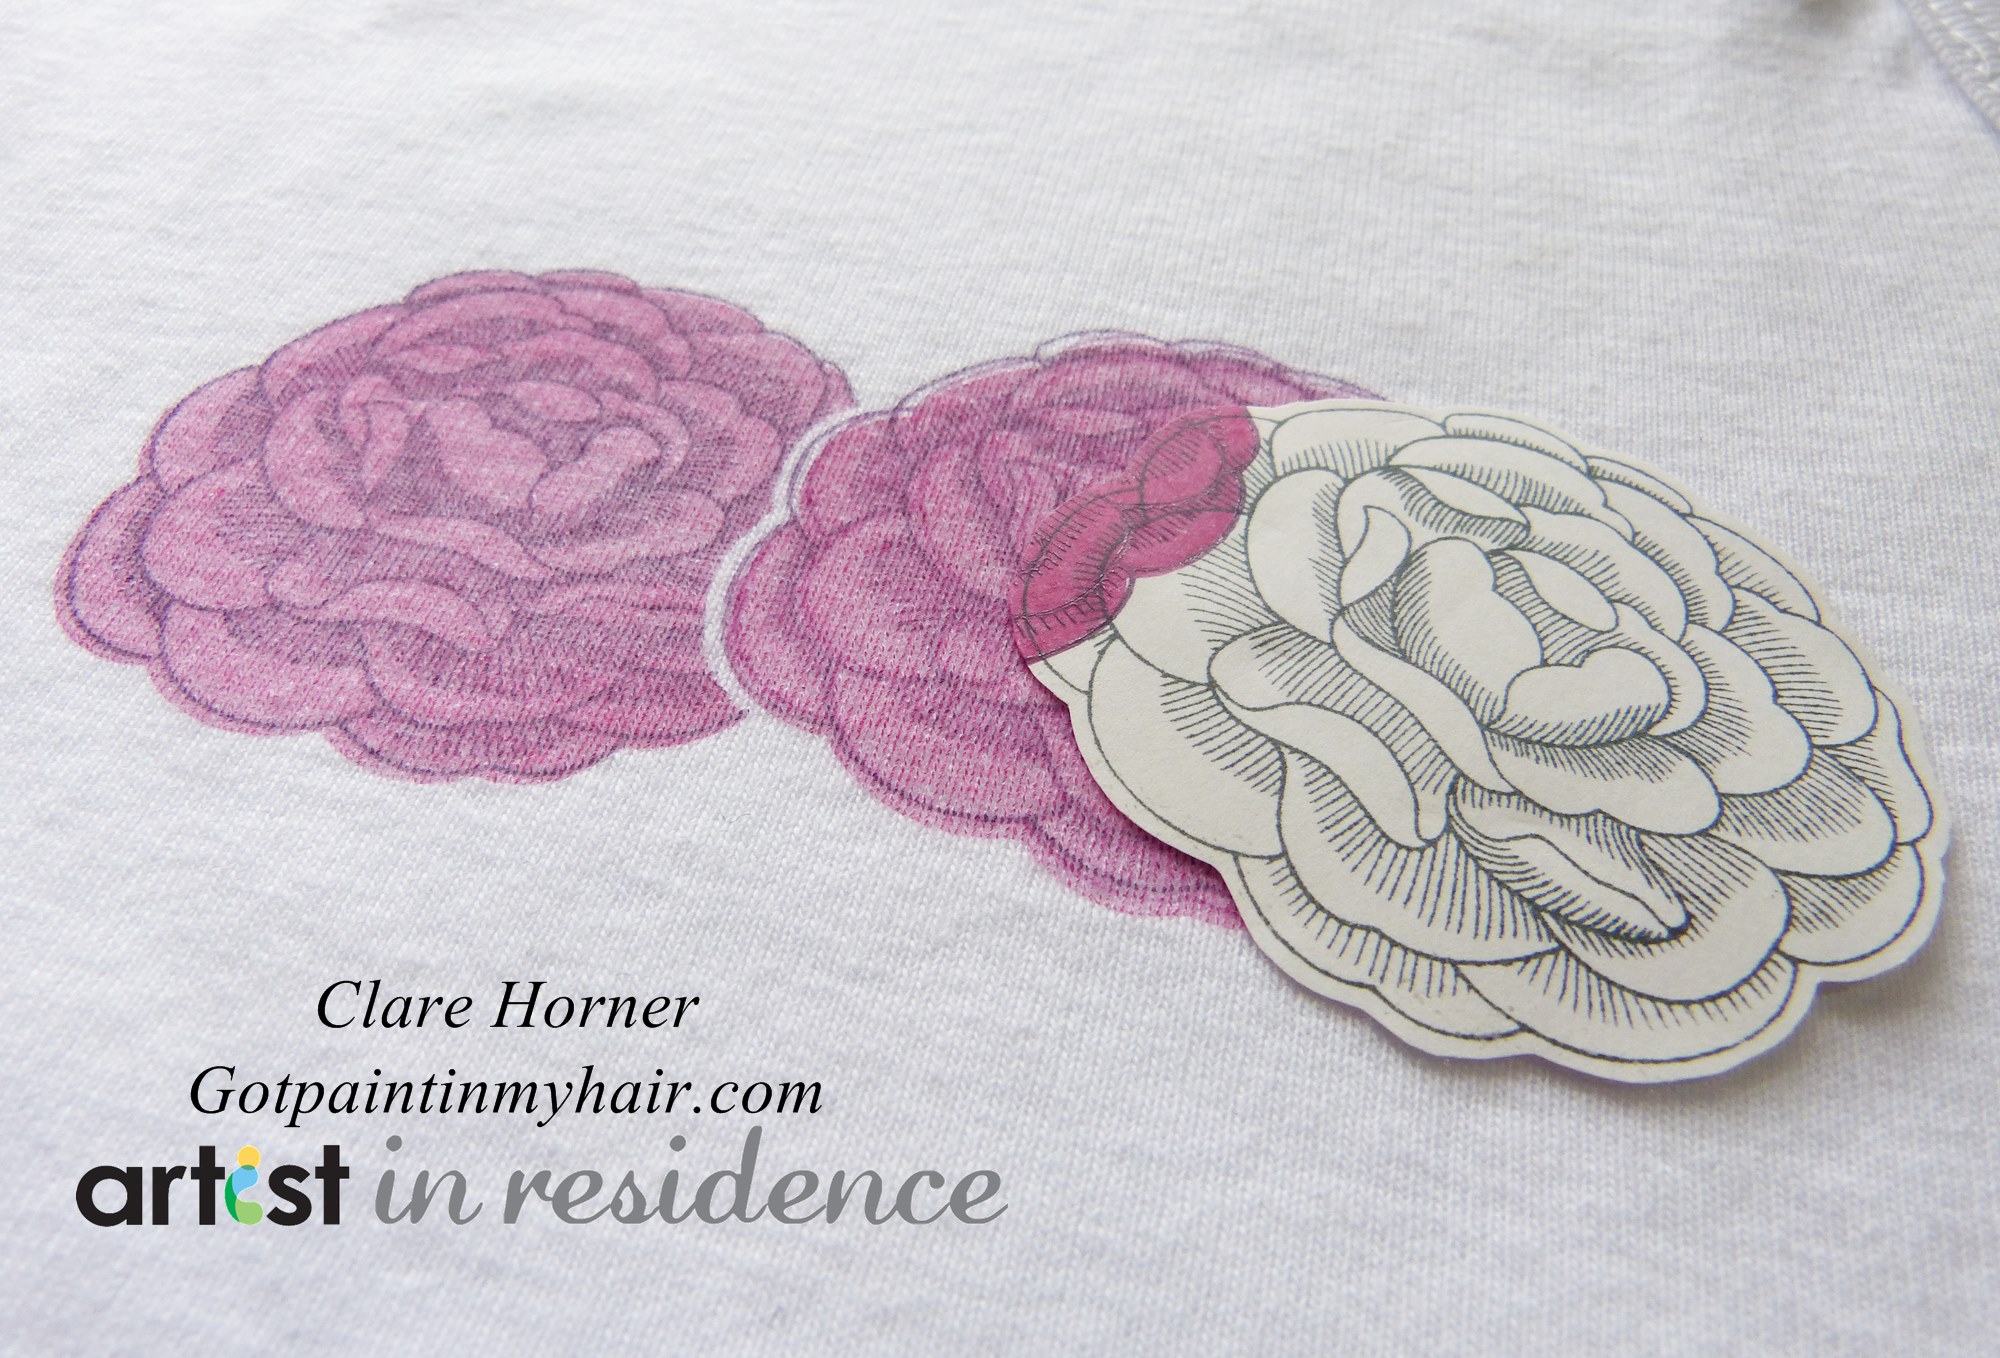
Step 5: Taking the largest flower base from the sketched blooms set stamp once where you want your image to be.

3 watermarked

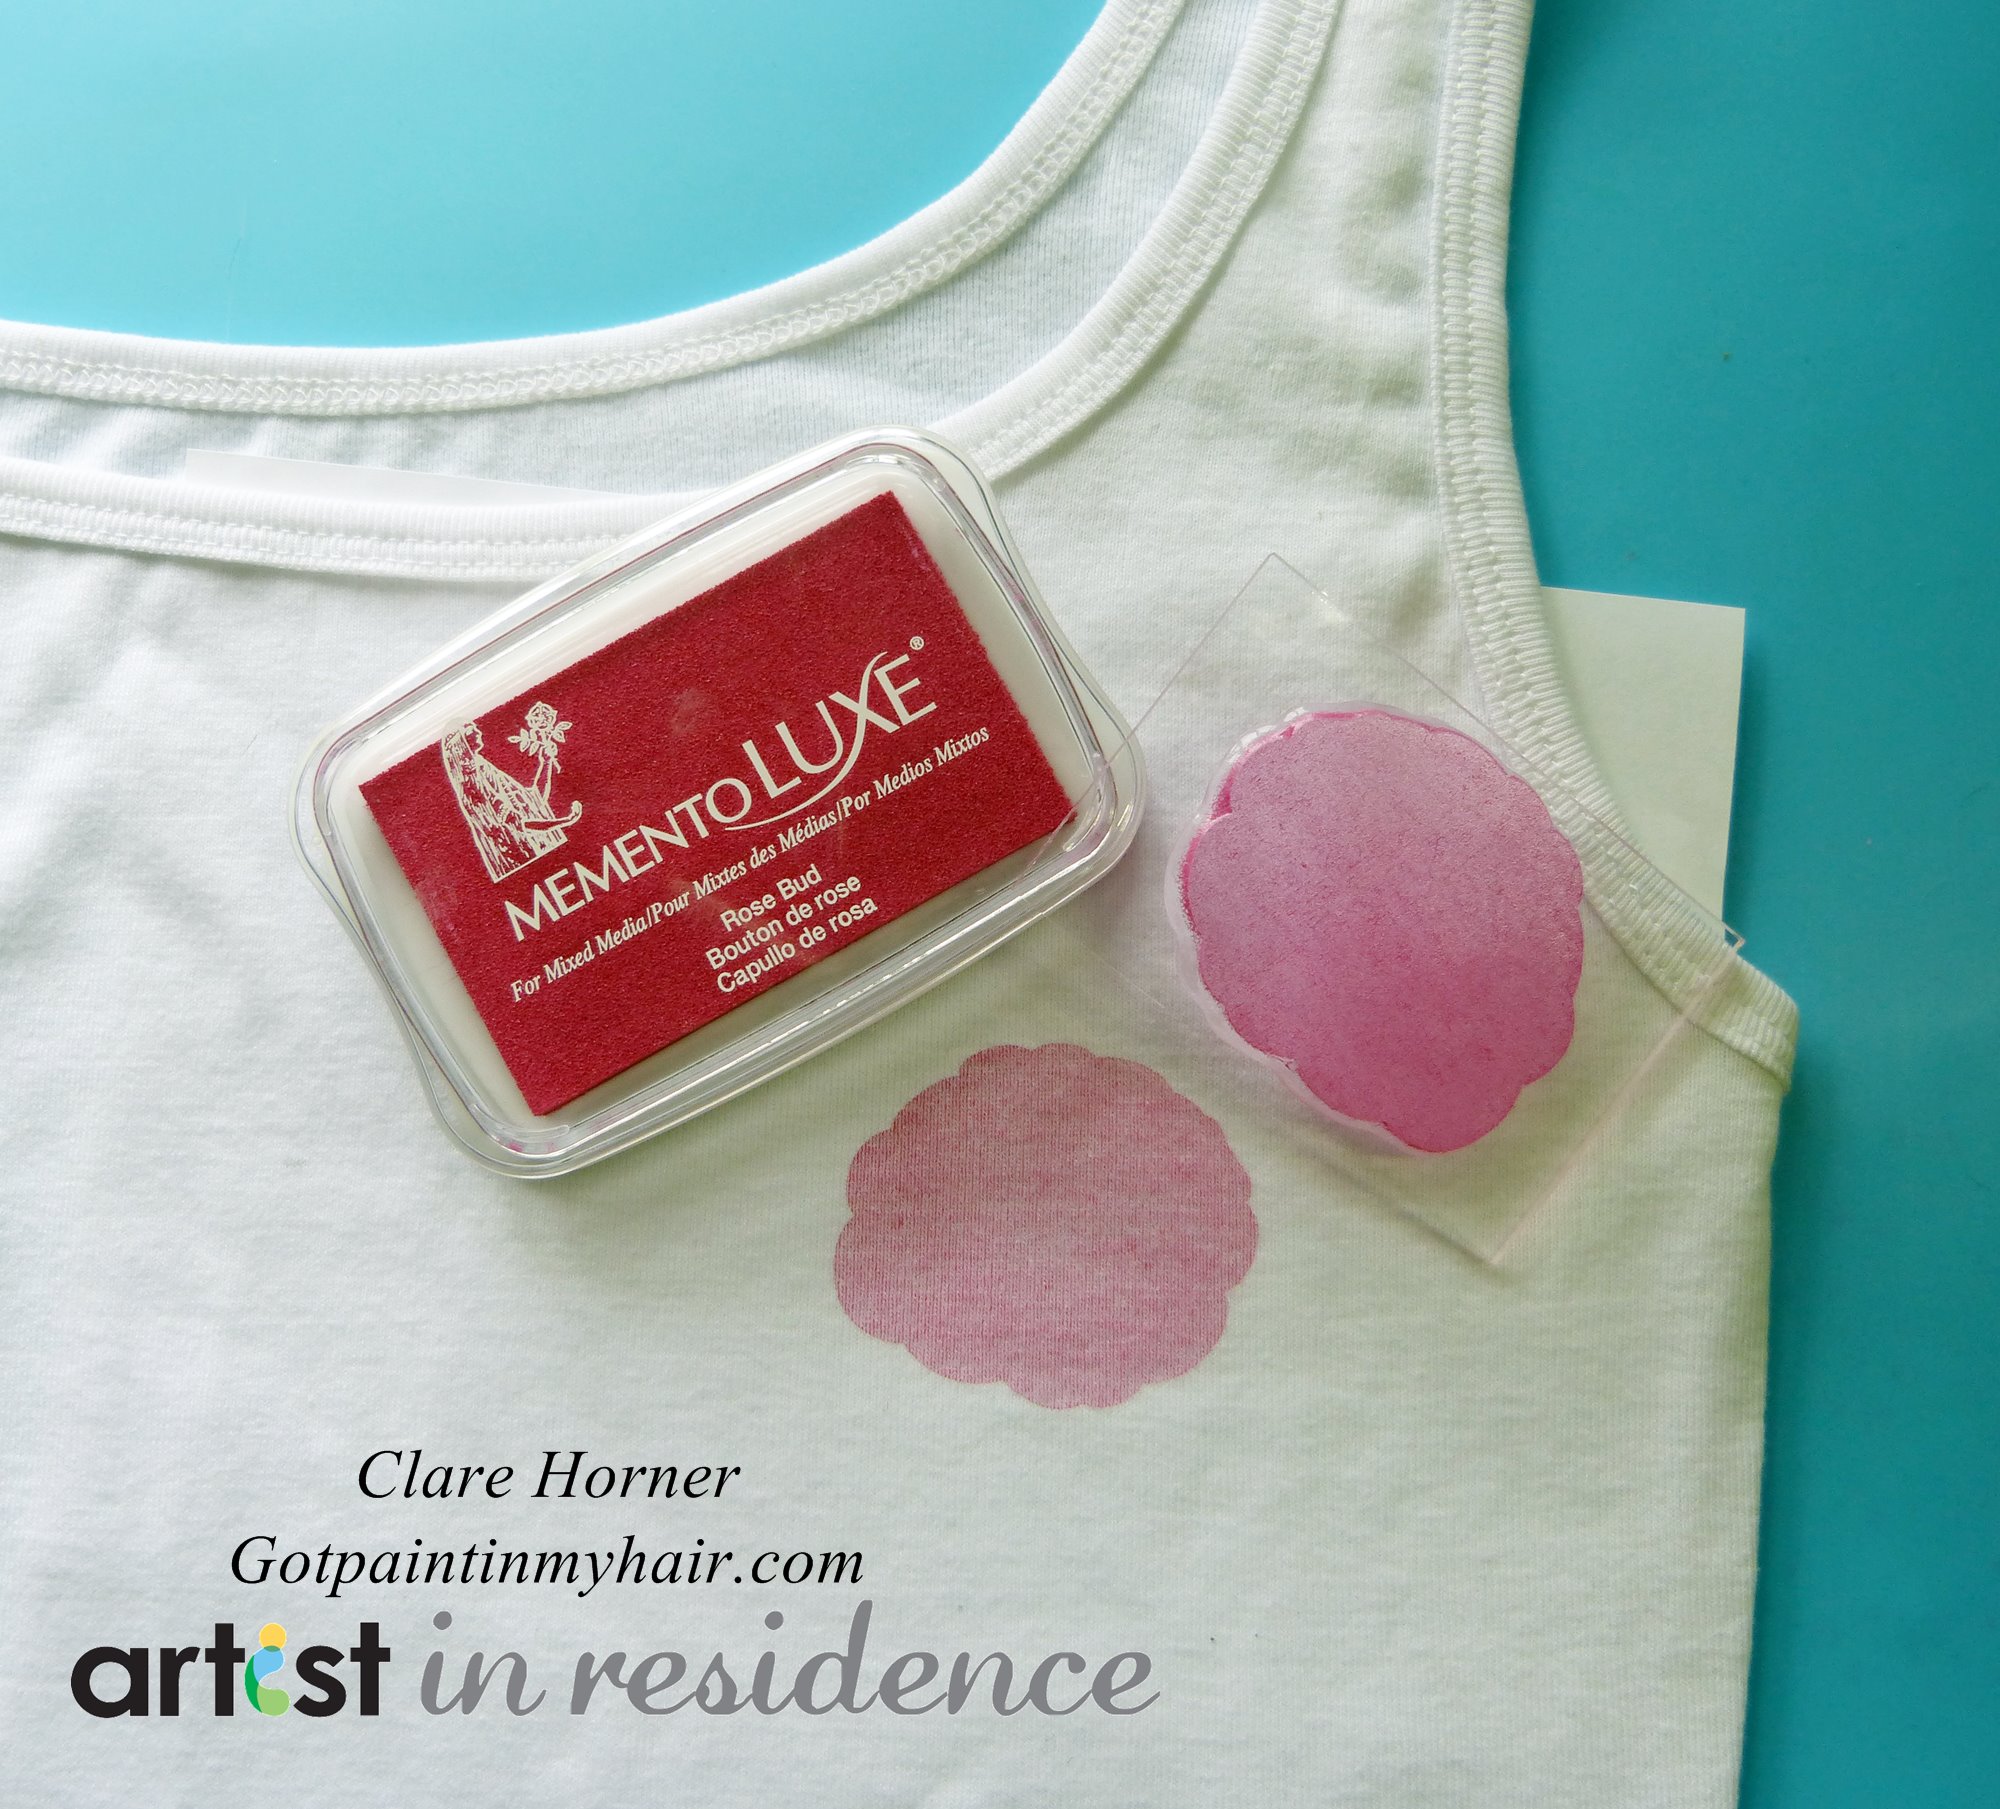
Step 6: Taking the corresponding detail stamp, stamp over the top with  Sweet Plum.

4 watermarked

Step 7: Stamp the detail flower three times onto masking paper, cut out with a border. Mask off your first flower and repeat step 6. Mask off the second flower and repeat step 6.

5 watermarked

Step 8: Using pear tart stamp the largest leaf base stamp in Pear Tart.

6 watermarked

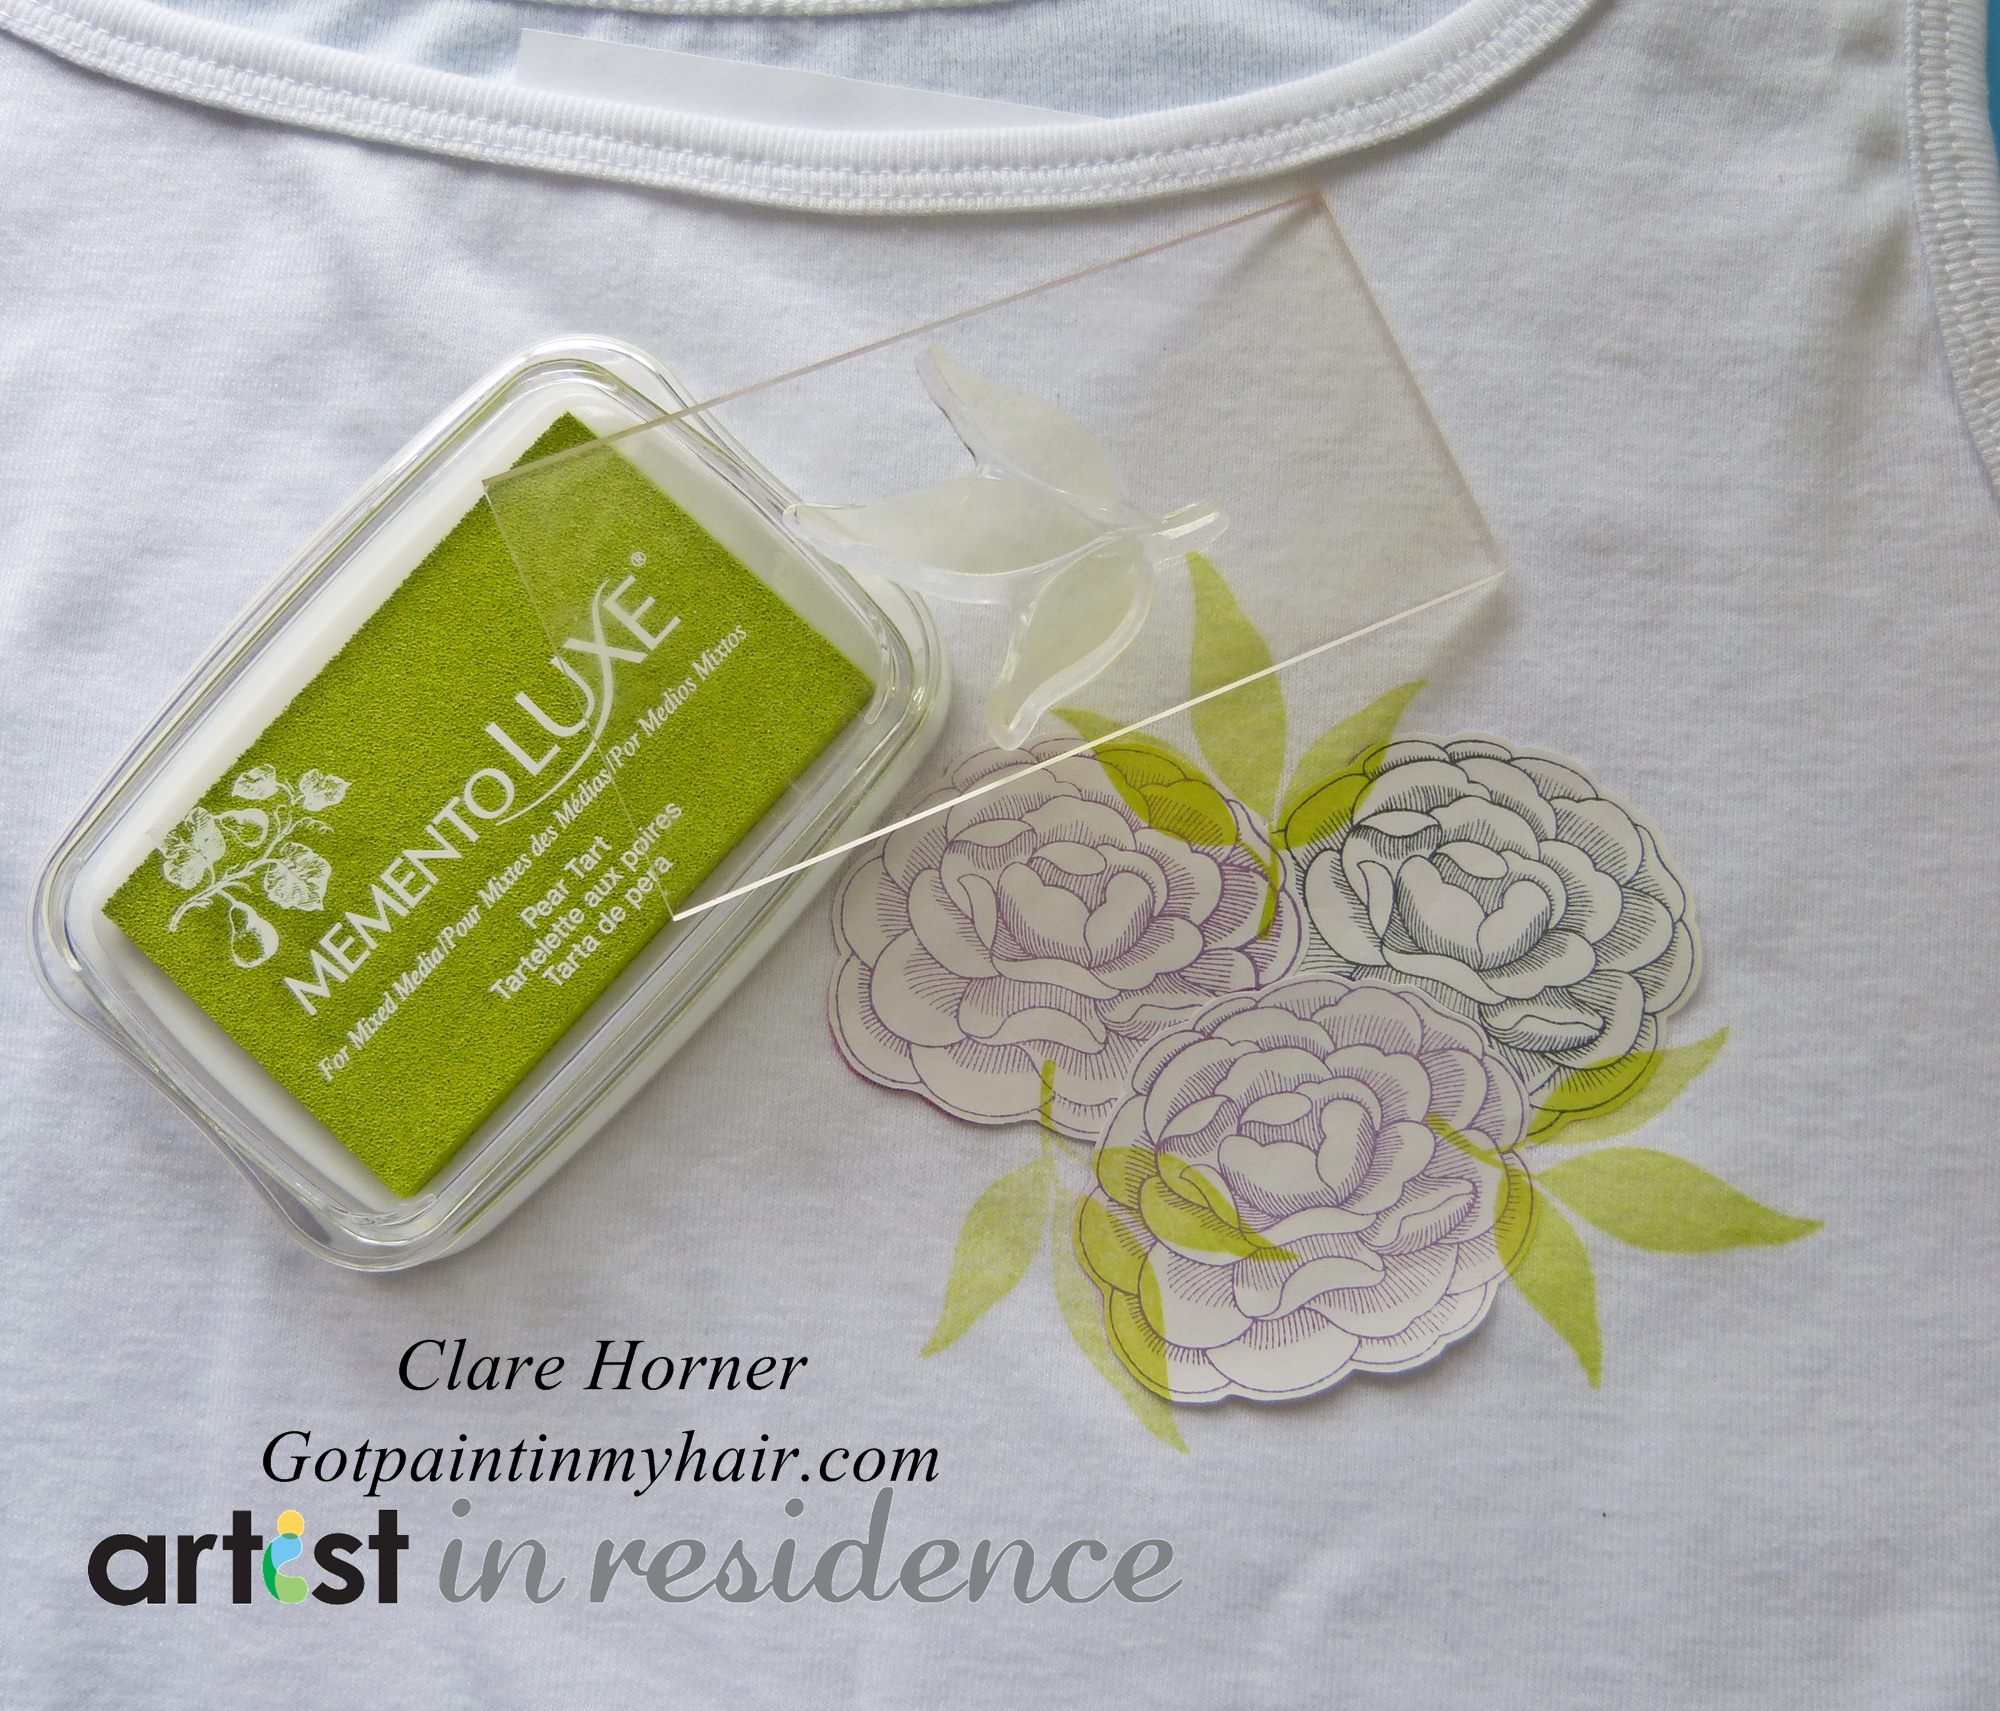
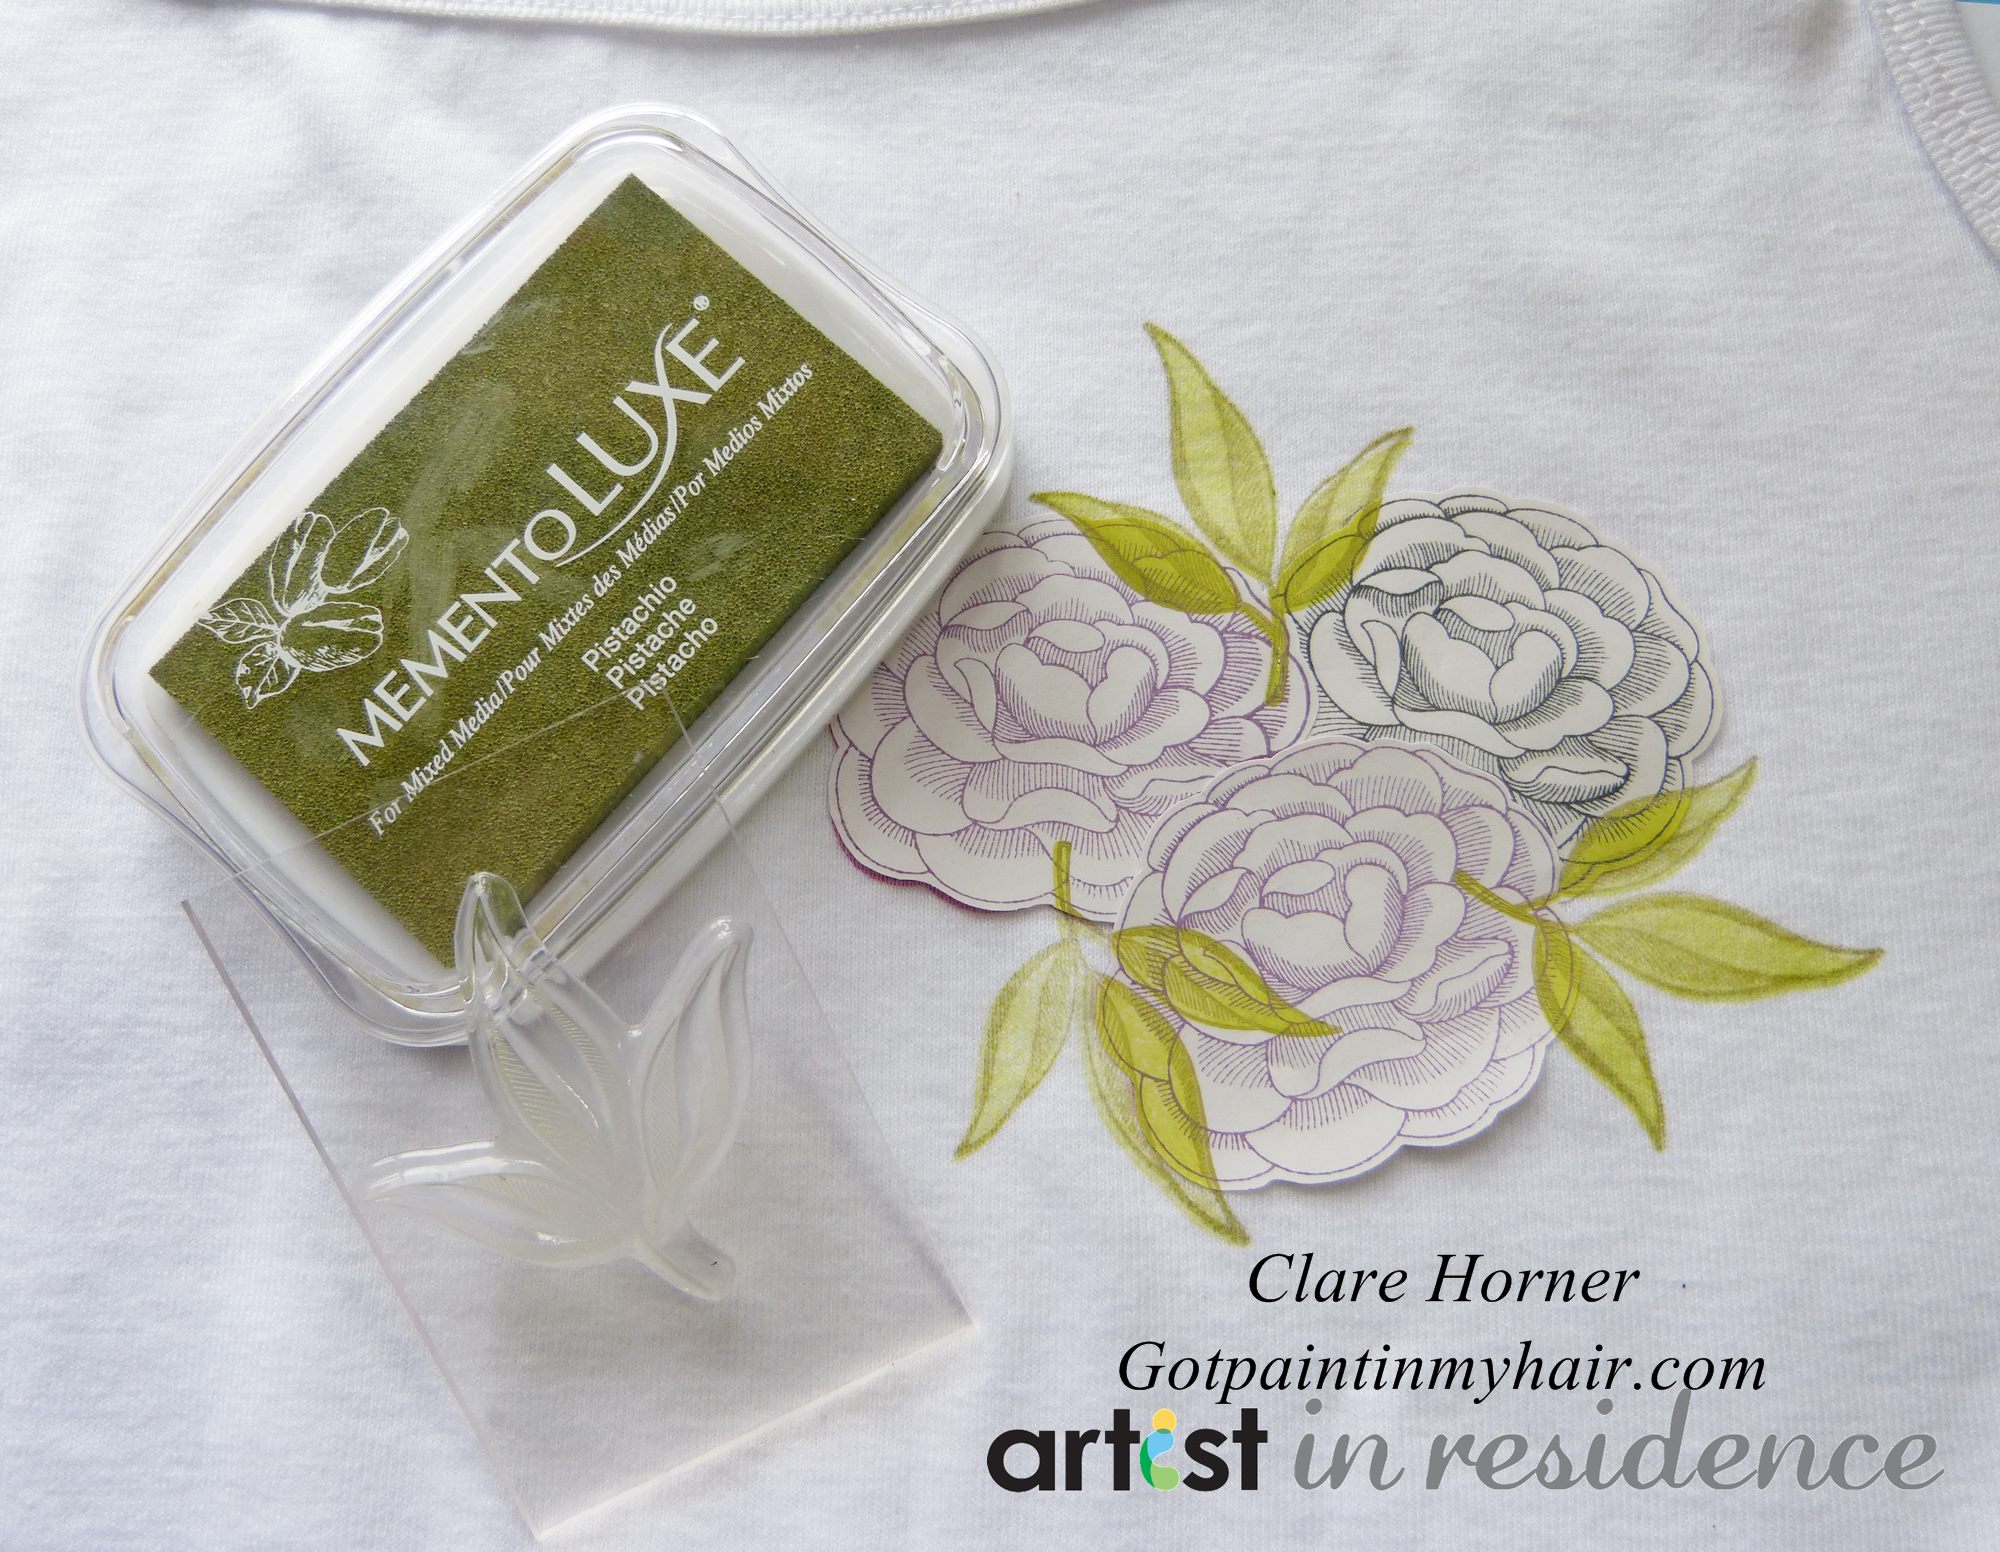
Step 9: Using pistachio stamp the leaf detail stamp over the top.

7 watermarked

Step 10: Carefully remove your masks. Dry off the ink with a heat tool and iron on the reverse with a clothes iron to heat set all inked areas. Wear and Enjoy!

8 watermarked

by Clare Horner

Difficulty

Beginner

Time

1/2 hour + dry time

Materials Needed

Imagine Crafts featuring Tsukiniko:


Other Supplies:

  • Cotton Shirt/Vest
  • Stamps: Simon Says Stamp - Falling Snow, Clearly Besotted - Sketched Blooms.
  • Acrylic block
  • Heat Tool
  • Iron
  • Scrap Paper, Masking paper (post it note type).


Sign up for our newsletter
Facebook Pinterest Twitter YouTube Vimeo