Array ( [0] => 280 [ID] => 280 [1] => 1 [TYPEID] => 1 [2] => 0 [SECTIONID] => 0 [3] => project-details [MOD_NAME] => project-details [4] => [TITLE] => [5] => Project Details [META_TITLE] => All-Purpose Ink for a Custom Vintage Bridal Hair Clip [6] => [META_DESCRIPTION] => All-Purpose Ink for a Custom Vintage Bridal Hair Clip [7] => [META_KEYWORDS] => [8] => [BUTTON_TITLE] => [9] => [BODY] => [10] => [BODY_SIDE] => [11] => [MODULE_PROCESSING] => [12] => [MODULE_META] => [13] => project-details-head.php [MODULE_HEAD] => project-details-head.php [14] => project-details-body.php [MODULE_BODY] => project-details-body.php [15] => [MODULE_SIDE] => [16] => 0 [TOP_ORDER] => 0 [17] => 0 [HITS_UNIQUE] => 0 [18] => 0 [HITS_REPEAT] => 0 [19] => 0 [ROBOT_HITS] => 0 [20] => 0000-00-00 00:00:00 [LASTVIEWED] => 0000-00-00 00:00:00 [21] => 0000-00-00 00:00:00 [ROBOT_LASTVIEWED] => 0000-00-00 00:00:00 [22] => 0.70 [PRIORITY] => 0.70 [23] => 1 [SITEMAP] => 1 [24] => 1 [ACTIVE] => 1 [25] => 1 [DISPLAY_TITLE] => 1 [26] => 0 [SSL_MODE] => 0 [27] => 0 [EDITABLE] => 0 [28] => 0 [DELETABLE] => 0 [29] => 2013-11-05 00:00:00 [LASTUPDATED] => 2013-11-05 00:00:00 [30] => 2013-11-05 00:00:00 [CREATED] => 2013-11-05 00:00:00 )
Imagine Crafts
LearnMakeCommunityShop

All-Purpose Ink for a Custom Vintage Bridal Hair Clip

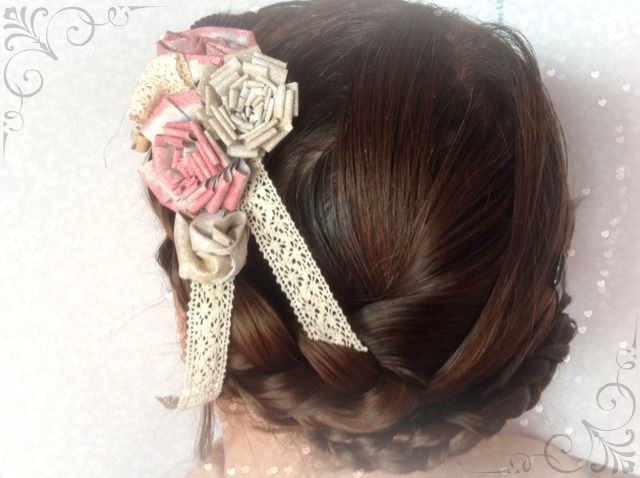
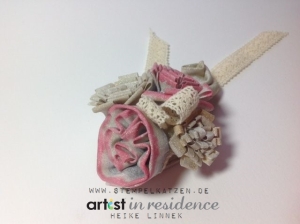
Vintage weddings are kind of romantic and elegant with a touch of past times. It can be defined very individually but the romantic touch is always presented. This really romantic sparkling flower clip can be used in several ways: the bride’s hair, the groom’s buttonhole or, in a bigger dimension, as wedding bouquet, or for any decoration.


All-Purpose Ink for a Custom Vintage Bridal Hair Clip


2015_HL_wedding_fabric_step1

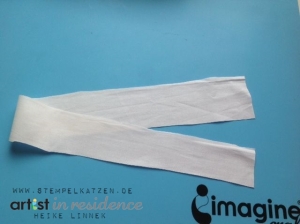
1. Cut two 100% cotton wool cloth width, one in 2 ½” x 24” and a smaller one in 1 ½” x 24”.

2015_HL_wedding_fabric_step2

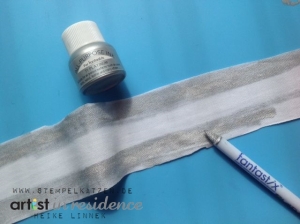
2. Color the two outer thirds of the bigger stripe with All-Purpose-Ink Platinum. This works very fast and easy when using a Fantastix like a brush.

2015_HL_wedding_fabric_step3

3. Color the center with All-Purpose-Ink Champagne Mist.

2015_HL_wedding_fabric_step4b

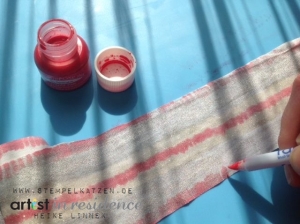
4. Set accents in the middle and at the border with All-Purpose-Ink Rose Pink.

2015_HL_wedding_fabric_step5

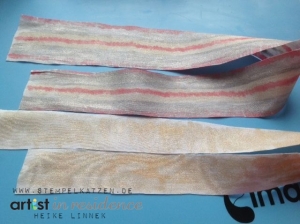
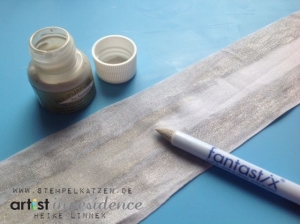
5. Color the second, smaller stripe only with All-Purpose-Ink Champagne Mist.
Cut the bigger stripe in half to get 2 stripes, finished sizes 2 ½”x 12”.
Cut the smaller stripe in thirds to get three stripes, finished sizes 2x 1 ½”x12”.

2015_HL_wedding_fabric_step6b

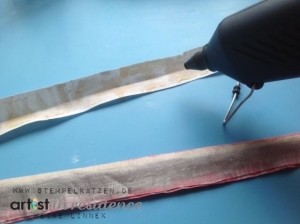
6. Fold every stipe endwise in half and glue it together with a hot glue gun.

2015_HL_wedding_fabric_step7

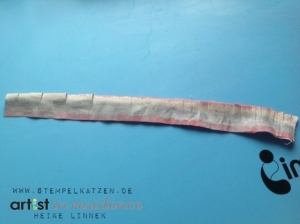
7. Cut one bigger stripe as shown from the upper closed folded side. Start with small sections and let them grow wider to the end. Don’t cut through everything, there must stay a border at the glued side.

2015_HL_wedding_fabric_step8

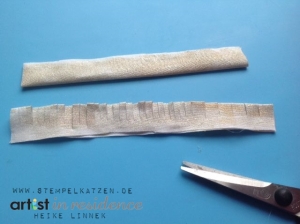
8. Cut one smaller stripe in the same way.

2015_HL_wedding_fabric_step9abL

9. Now all stripes can be ruffled in the same way, even with or without incised lines. Start on one end. Gather it, set a hot glue point and press it on for a few seconds. Work spiraled around the center in the same method: ruffle, glue point, press - always in the same direction till the end.

2015_HL_wedding_fabric_step10

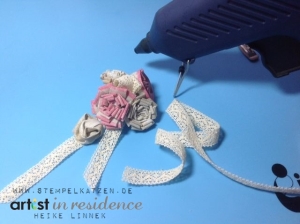
10. Take a lace ribbon, arrange the flowers and glue everything together.

2015_HL_wedding_fabric

 
by Heike Linnek

Difficulty

Intermediate

Time

1 hour + dry time

Materials Needed

Imagine Crafts feat. Tsukineko: 

Other

  • Stampin Up!: Ribbon Victoria
  • Miscellaneous: white cotton fabric; hot glue gun; scissors; Iron; hair clip


Sign up for our newsletter
Facebook Pinterest Twitter YouTube Vimeo