Array ( [0] => 280 [ID] => 280 [1] => 1 [TYPEID] => 1 [2] => 0 [SECTIONID] => 0 [3] => project-details [MOD_NAME] => project-details [4] => [TITLE] => [5] => Project Details [META_TITLE] => Imagine SHEET Metal Leather Cuff Class [6] => [META_DESCRIPTION] => Imagine SHEET Metal Leather Cuff Class [7] => [META_KEYWORDS] => [8] => [BUTTON_TITLE] => [9] => [BODY] => [10] => [BODY_SIDE] => [11] => [MODULE_PROCESSING] => [12] => [MODULE_META] => [13] => project-details-head.php [MODULE_HEAD] => project-details-head.php [14] => project-details-body.php [MODULE_BODY] => project-details-body.php [15] => [MODULE_SIDE] => [16] => 0 [TOP_ORDER] => 0 [17] => 0 [HITS_UNIQUE] => 0 [18] => 0 [HITS_REPEAT] => 0 [19] => 0 [ROBOT_HITS] => 0 [20] => 0000-00-00 00:00:00 [LASTVIEWED] => 0000-00-00 00:00:00 [21] => 0000-00-00 00:00:00 [ROBOT_LASTVIEWED] => 0000-00-00 00:00:00 [22] => 0.70 [PRIORITY] => 0.70 [23] => 1 [SITEMAP] => 1 [24] => 1 [ACTIVE] => 1 [25] => 1 [DISPLAY_TITLE] => 1 [26] => 0 [SSL_MODE] => 0 [27] => 0 [EDITABLE] => 0 [28] => 0 [DELETABLE] => 0 [29] => 2013-11-05 00:00:00 [LASTUPDATED] => 2013-11-05 00:00:00 [30] => 2013-11-05 00:00:00 [CREATED] => 2013-11-05 00:00:00 )
Imagine Crafts
LearnMakeCommunityShop

Imagine SHEET Metal Leather Cuff Class

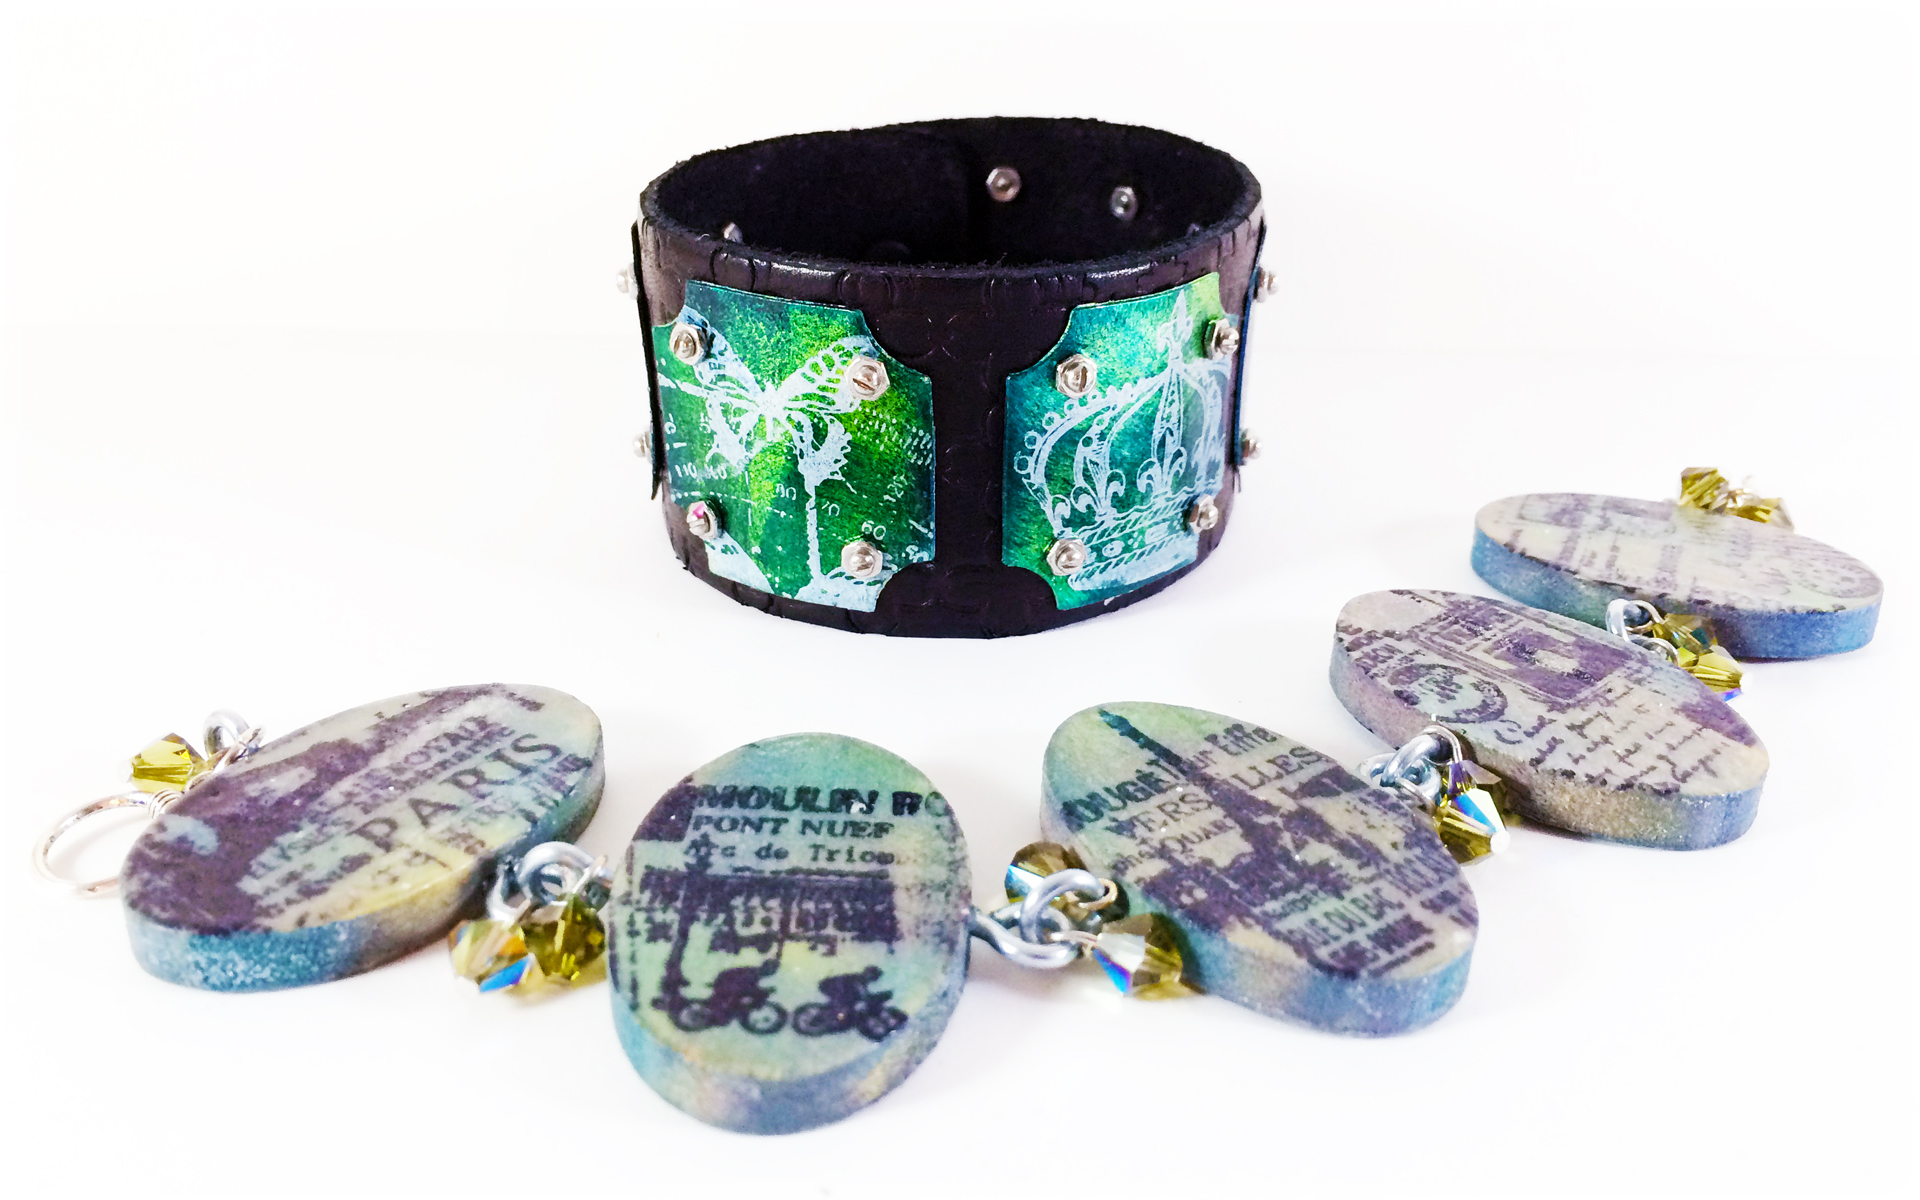
This was one of the projects that was taught at the 2015 CHA Winter IMAGINE Crafts Jewelry Basics workshop.


Imagine SHEET Metal Leather Cuff Class

1. Die cut SHEET Metal pieces to desired shape.

2. Punch holes with a 1/8˝ hole punch in the four corners.

3. Using a metal piece as a die, punch coordinating holes through the leather cuff.

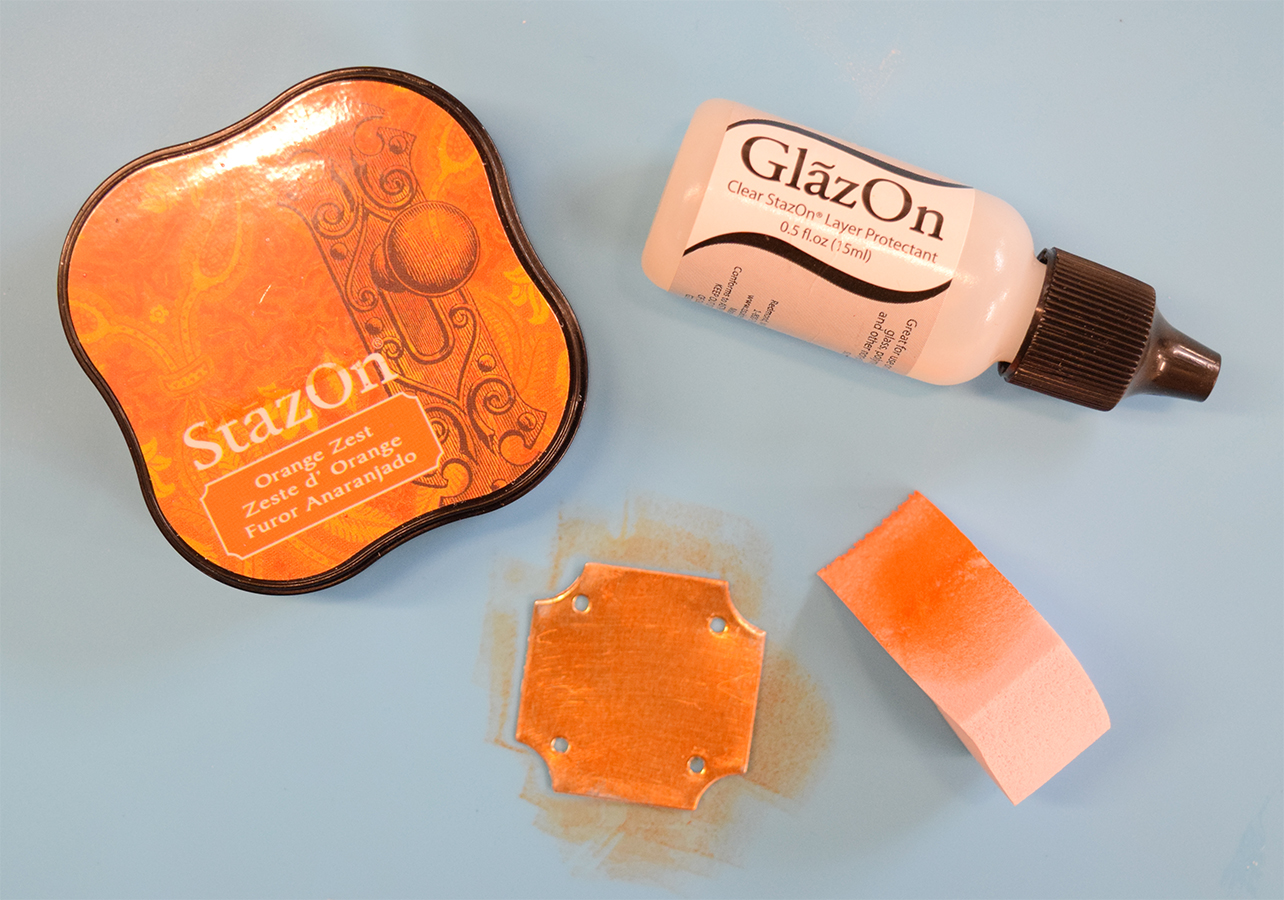
4.Choose three colors of StazOn inks to use for your background colors – you’ll be working from lighter to darker on all the metal pieces.

5. With an InkBlusher, apply the first (lightest) color of StazOn ink to the metal; allow to dry completely.

6. Use a different InkBlusher to apply a thin coat of GlazOn over the entire surface of the metal.

7. Continue to add the other colors of StazOn onto the metal pieces in the same method, StazOn always followed by a layer of GlazOn once the ink has dried completely.

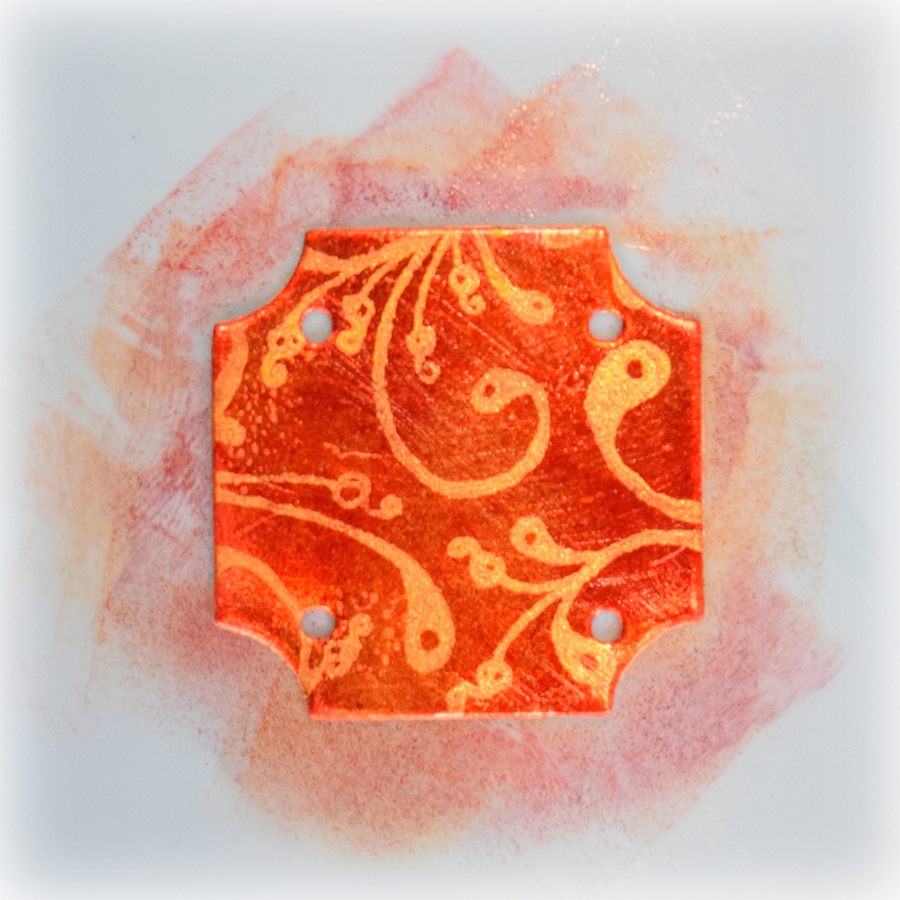
8. After the background coloring is complete, stamp with StazOn Metallic colors with your choice of stamp. TIP: Have the inked stamp facing up so that you are placing the metal piece face down onto the stamp to avoid the metal from slipping.

9. Once the metallic ink has dried, apply at least two coats of GlazOn over the metal pieces to seal them completely.

10. Attach the metal pieces to the leather cuff with brads.

11. Slightly “bend” the metal pieces into shape around your wrist.

by John Creighton Petersen

Difficulty

Beginner

Time

Less than an hour

Materials Needed

IMAGINE Crafts Supplies:

Other Supplies:

  • Spellbinders: die cuts and die cut machine to create shapes
  • Miscellaneous: hole punch, leather cuff, brads


Sign up for our newsletter
Facebook Pinterest Twitter YouTube Vimeo