make / by aesthetic / happy anniversary in silver delicata
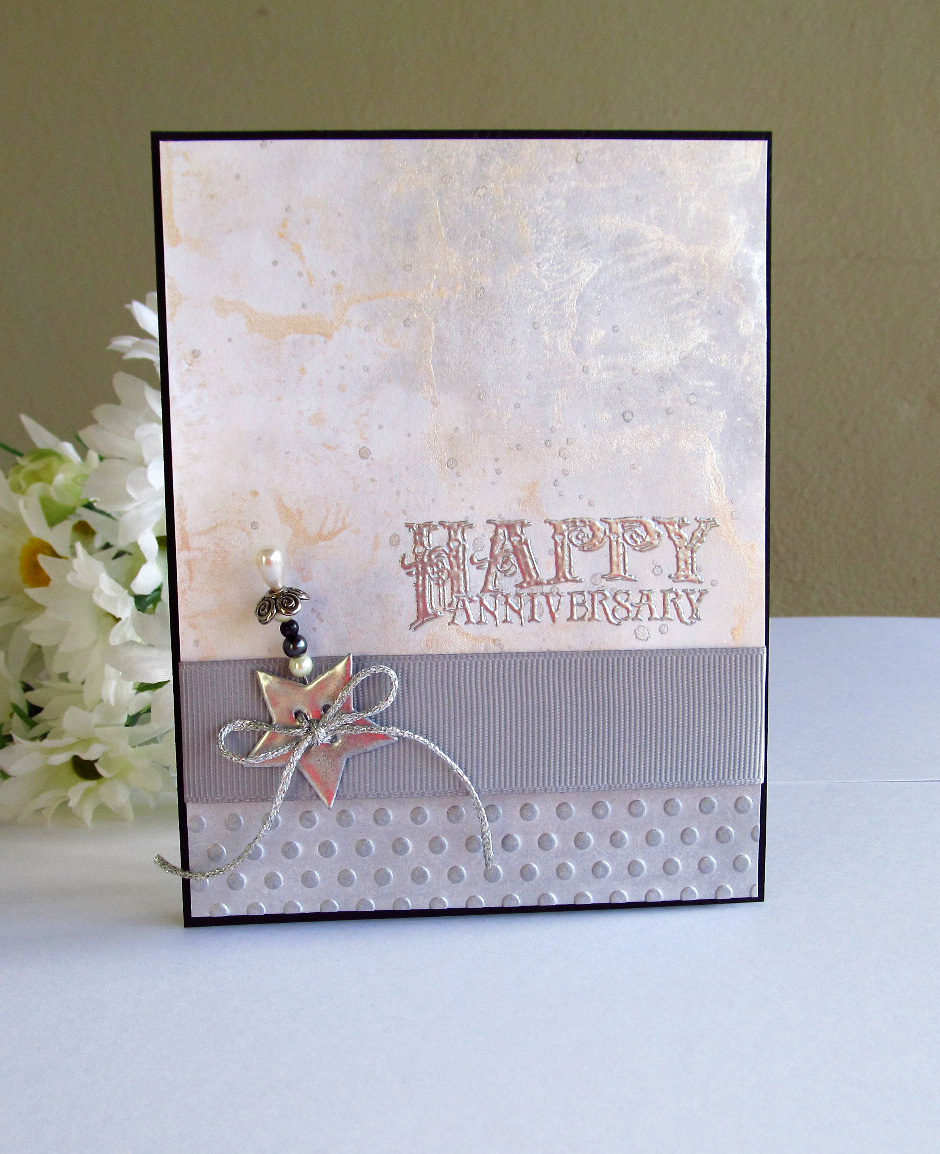
Happy Anniversary in Silver Delicata
Celebrate this special milestone with beautiful silver highlights.
-
On your Craft Mat, smoosh Delicata Silvery Shimmer and Golden Glitz inks. Spritz with water.
-
Swirl white card stock around in the watered down inks. When you are pleased with the effect, let dry.
-
Stamp and heat emboss sentiment with silver embossing powder.
-
Dry emboss a small scrap of white card stock with Polka Dots folder and then ink with Delicata Silvery Shimmer. Add this section to the bottom of the sentiment panel to form a card front that measures 4 x 5-1/4 inches.
-
Wrap gray ribbon around card front to cover the "seam".
-
Die cut and heat emboss Star with silver embossing powder. The one pictured has been heat embossed three times. Tie cord in button holes and adhere to ribbon.
-
Assemble hat pin and beads as desired. Slide pin behind star embellishment.
-
Adhere card front to a black card base measuring 4-1/4 x 5-1/2 inches using foam adhesive.