Array ( [0] => 280 [ID] => 280 [1] => 1 [TYPEID] => 1 [2] => 0 [SECTIONID] => 0 [3] => project-details [MOD_NAME] => project-details [4] => [TITLE] => [5] => Project Details [META_TITLE] => Create a Quick, Easy and Elegant Wedding Invitation [6] => [META_DESCRIPTION] => Tutoiral on how make a quick, easy and elegant wedding invitiation [7] => [META_KEYWORDS] => [8] => [BUTTON_TITLE] => [9] => [BODY] => [10] => [BODY_SIDE] => [11] => [MODULE_PROCESSING] => [12] => [MODULE_META] => [13] => project-details-head.php [MODULE_HEAD] => project-details-head.php [14] => project-details-body.php [MODULE_BODY] => project-details-body.php [15] => [MODULE_SIDE] => [16] => 0 [TOP_ORDER] => 0 [17] => 0 [HITS_UNIQUE] => 0 [18] => 0 [HITS_REPEAT] => 0 [19] => 0 [ROBOT_HITS] => 0 [20] => 0000-00-00 00:00:00 [LASTVIEWED] => 0000-00-00 00:00:00 [21] => 0000-00-00 00:00:00 [ROBOT_LASTVIEWED] => 0000-00-00 00:00:00 [22] => 0.70 [PRIORITY] => 0.70 [23] => 1 [SITEMAP] => 1 [24] => 1 [ACTIVE] => 1 [25] => 1 [DISPLAY_TITLE] => 1 [26] => 0 [SSL_MODE] => 0 [27] => 0 [EDITABLE] => 0 [28] => 0 [DELETABLE] => 0 [29] => 2013-11-05 00:00:00 [LASTUPDATED] => 2013-11-05 00:00:00 [30] => 2013-11-05 00:00:00 [CREATED] => 2013-11-05 00:00:00 )
Imagine Crafts
LearnMakeCommunityShop

Quick, Easy and Elegant Wedding Invitations

There are a lot of people out there planning for their big day! It’s a good thing that this project is designed to inspire those planning for their wedding day to create quick, simple and elegant handmade wedding invitations.


Step 1

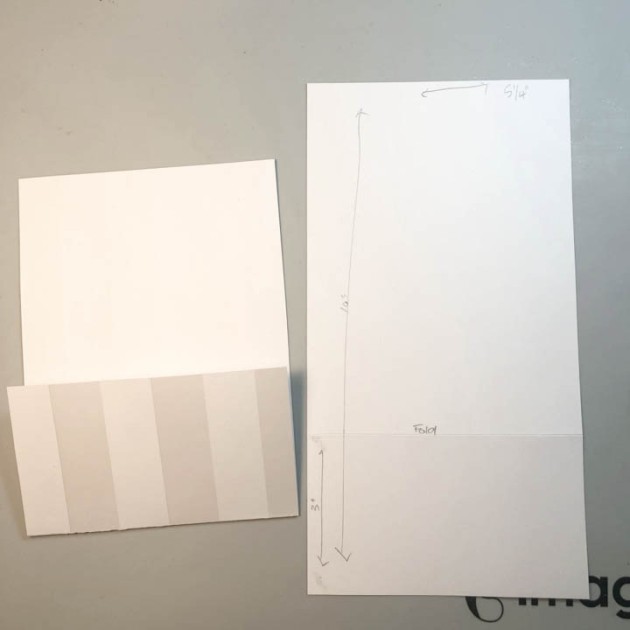
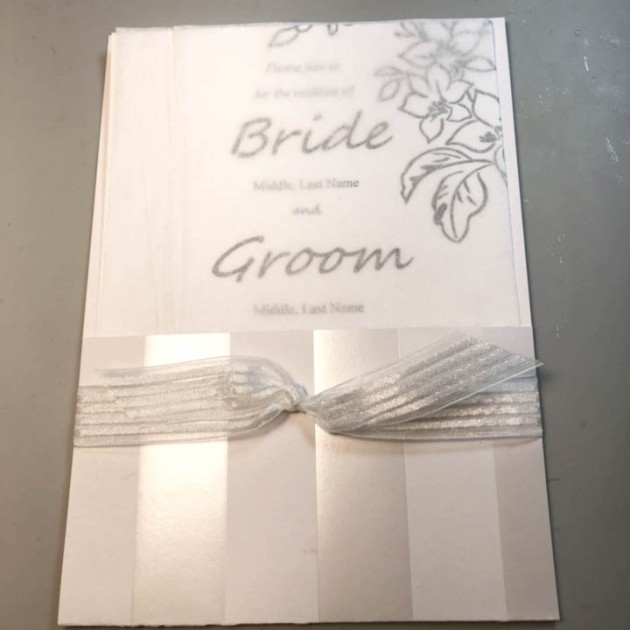
Cut a piece of decorative cardstock to size, 5 ¼” x 10”.  Fold up at 3” from the bottom.


Step 2

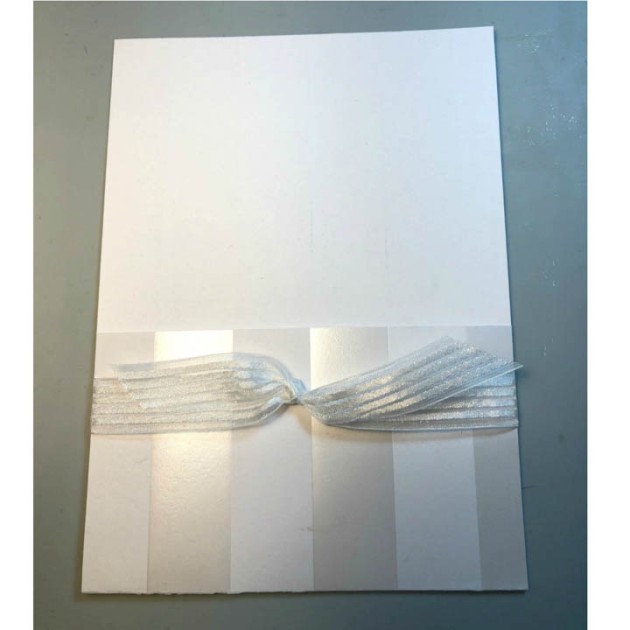
Tie sheer ribbon around the bottom portion of the folder.


Step 3

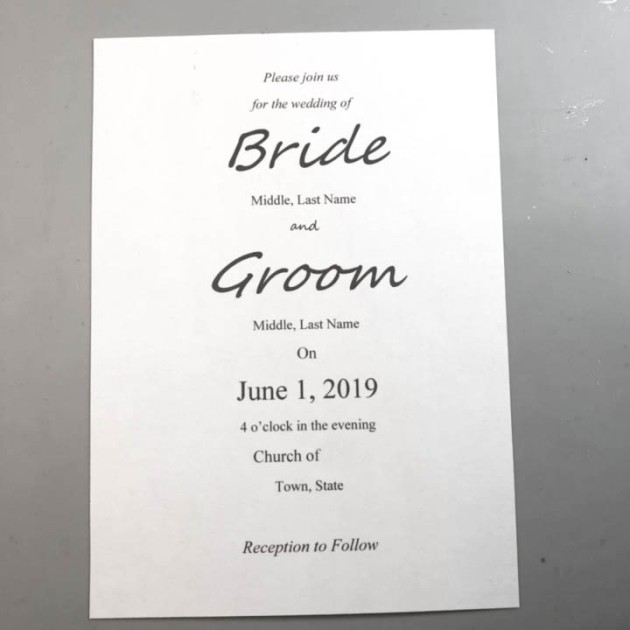
Print wedding announcement on a 5”x 7” piece of cardstock.


Step 4

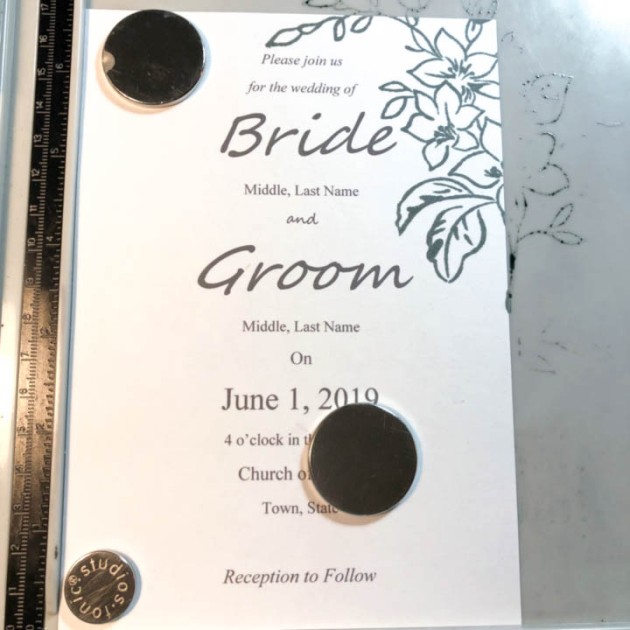
Stamp floral image with Memento London Fog at top right and bottom left of invitation.


Step 5

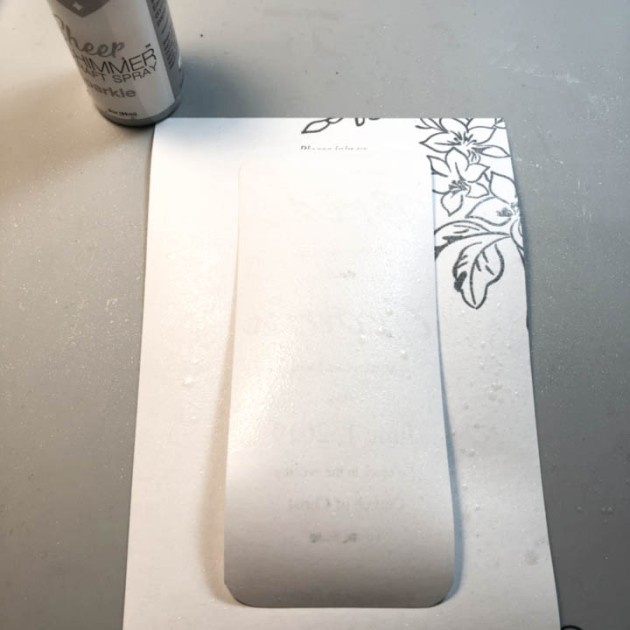
Create a template to cover printed words and spray with Sheer Shimmer Craft Spray.


Step 6

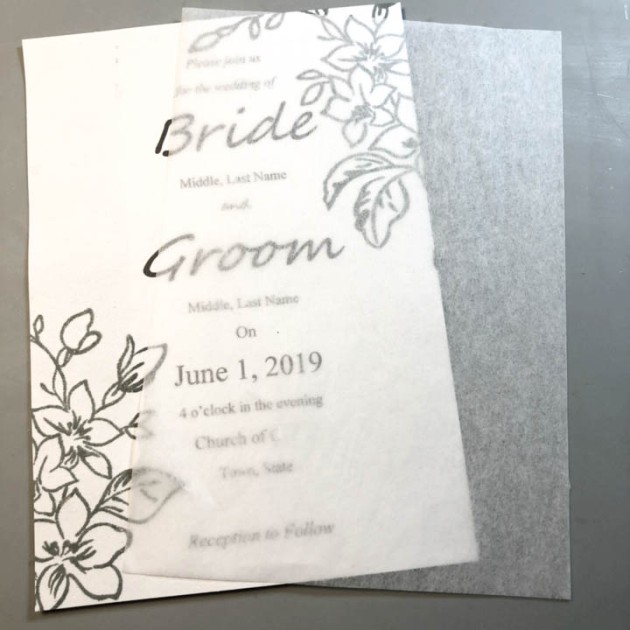
Cut tissue paper to cover invitation.


Step 7

Slide invitation, with tissue cover, into the previously made folder.


Step 8

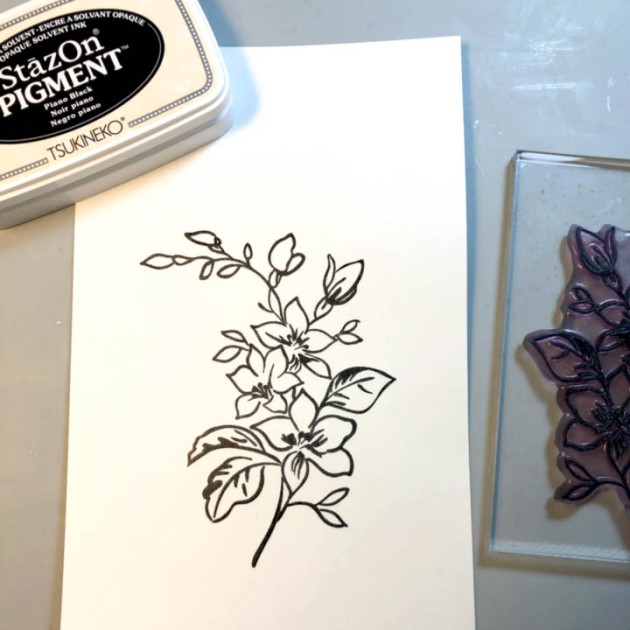
Stamp floral design on cardstock with StazOn Pigment ink in Piano Black.


Step 9

Using watercolor pen and VersaMagic ink, water-color floral image.


Step 10

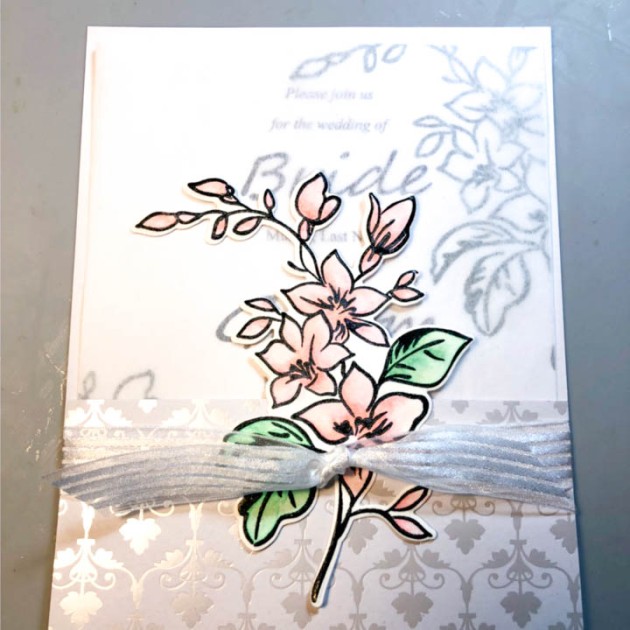
With matching die, cut out floral image.


Step 11

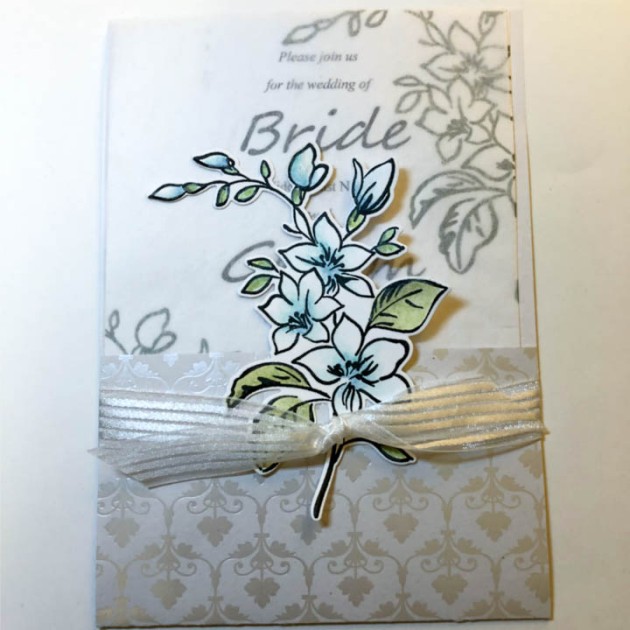
Adhere to the bottom portion of folder front, see the example for placement. Try the same design in different color schemes.

by Lori Warren

Difficulty

Beginner

Time

30 minutes per invitation

Materials Needed

Imagine
Other
  • Celebrate 360 – Sheer Ribbon
  • Alta New – Best Mom Stamp and Die set
  • Recollection – White Satin 12” x 12” paper
  • Paper Source – Invitation Tissue Paper


Sign up for our newsletter
Facebook Pinterest Twitter YouTube Vimeo