Array ( [0] => 280 [ID] => 280 [1] => 1 [TYPEID] => 1 [2] => 0 [SECTIONID] => 0 [3] => project-details [MOD_NAME] => project-details [4] => [TITLE] => [5] => Project Details [META_TITLE] => Learn how to create a Stamped [6] => [META_DESCRIPTION] => Tutorial to learn how to create a stamped collage using StazOn Pigment. [7] => [META_KEYWORDS] => [8] => [BUTTON_TITLE] => [9] => [BODY] => [10] => [BODY_SIDE] => [11] => [MODULE_PROCESSING] => [12] => [MODULE_META] => [13] => project-details-head.php [MODULE_HEAD] => project-details-head.php [14] => project-details-body.php [MODULE_BODY] => project-details-body.php [15] => [MODULE_SIDE] => [16] => 0 [TOP_ORDER] => 0 [17] => 0 [HITS_UNIQUE] => 0 [18] => 0 [HITS_REPEAT] => 0 [19] => 0 [ROBOT_HITS] => 0 [20] => 0000-00-00 00:00:00 [LASTVIEWED] => 0000-00-00 00:00:00 [21] => 0000-00-00 00:00:00 [ROBOT_LASTVIEWED] => 0000-00-00 00:00:00 [22] => 0.70 [PRIORITY] => 0.70 [23] => 1 [SITEMAP] => 1 [24] => 1 [ACTIVE] => 1 [25] => 1 [DISPLAY_TITLE] => 1 [26] => 0 [SSL_MODE] => 0 [27] => 0 [EDITABLE] => 0 [28] => 0 [DELETABLE] => 0 [29] => 2013-11-05 00:00:00 [LASTUPDATED] => 2013-11-05 00:00:00 [30] => 2013-11-05 00:00:00 [CREATED] => 2013-11-05 00:00:00 )
Imagine Crafts
LearnMakeCommunityShop

StazOn Pigment Lightbulb Shine Bright Art Collage

I love StazOn Pigment ink about as much as I love stamping!  Finding ways to maximize the use of this mixed media ink would be a big win in my book! How to go about achieving this goal? A stamped collage, of course!  Multiple stamps + multiple StazOn Pigment inks = Happy Stamper!


Step 1

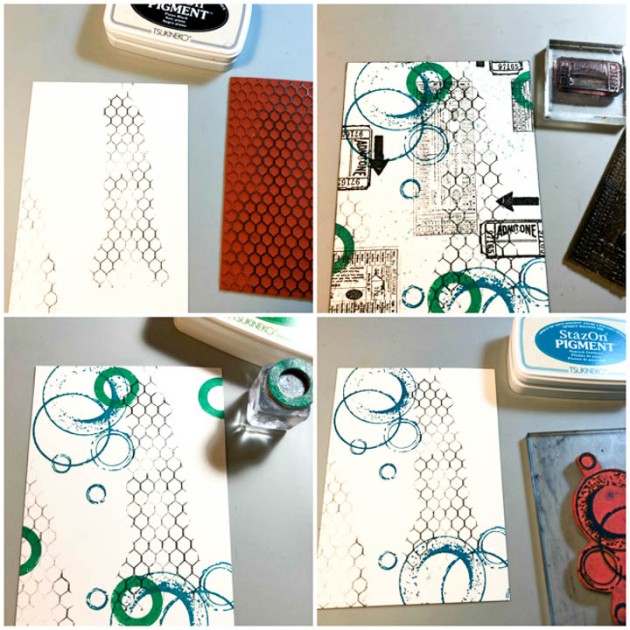
Use stamps and a selection of StazOn Pigment ink to stamp a collage style background on a 6” x 4 ¼” panel of cardstock.  Remember to overlap and group images for the best effect.


Step 2

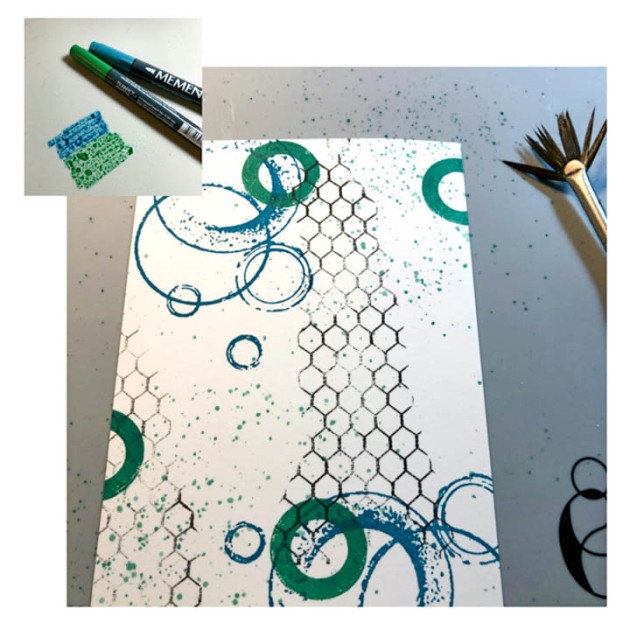
Apply Memento ink (Cottage Ivy & Teal Zeal) directly to craft matte, add water and then use fan brush to apply ink splatters to panel.


Step 3

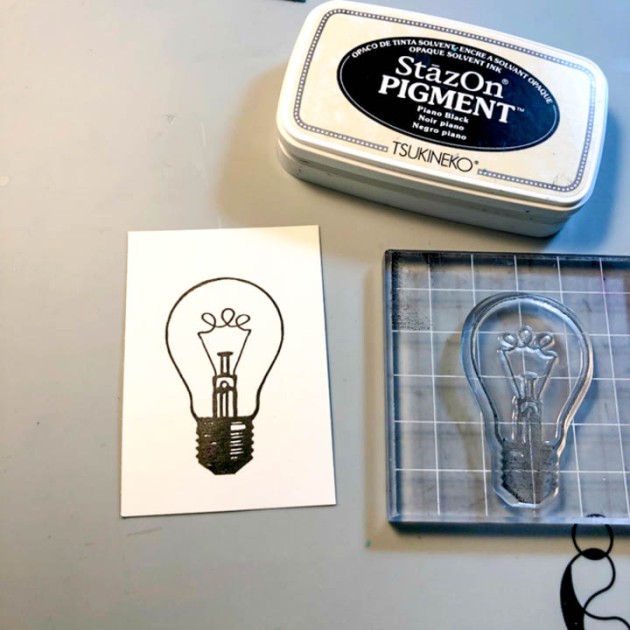
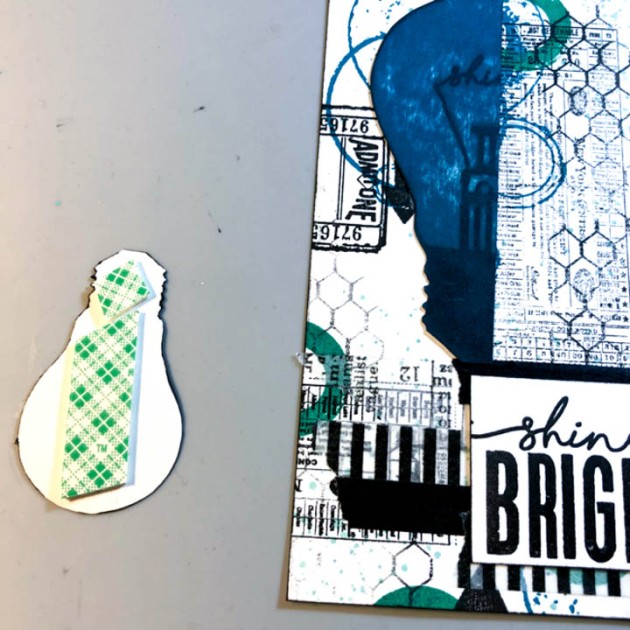
With Piano Black StazOn Pigment ink, stamp the small image of lightbulb onto white cardstock.


Step 4

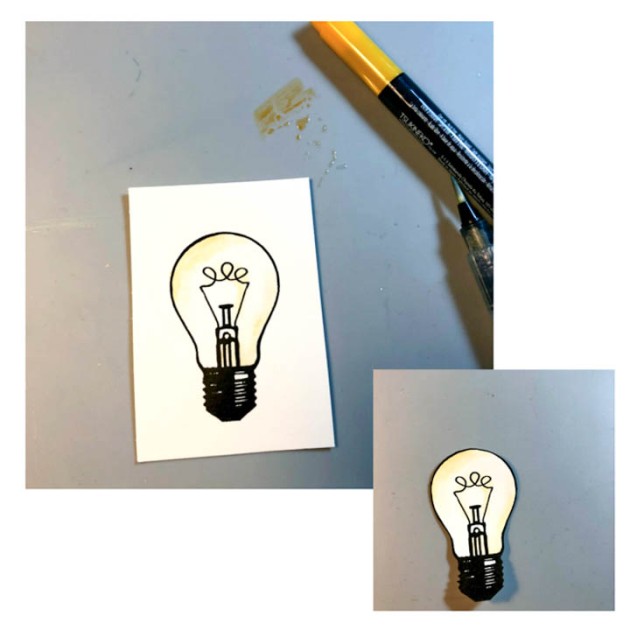
Using watercolor method (wet ink on matte), use Memento ink to lightly color lightbulb. Fussy cut image out.


Step 5

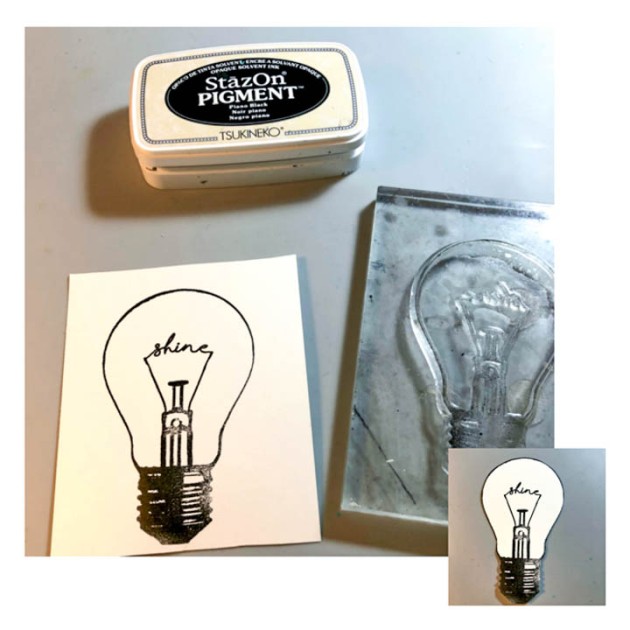
Stamp large lightbulb image onto white cardstock (with Piano Black, StazOn Pigment Ink) and then fussy cut the image out.


Step 6

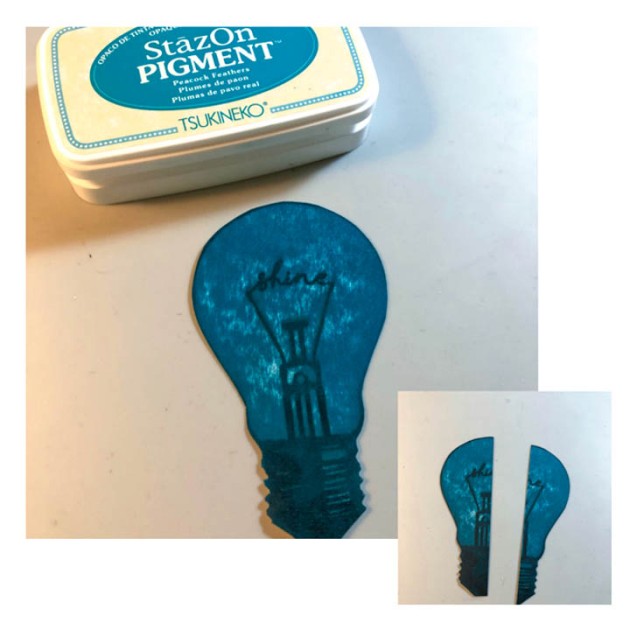
Apply StazOn Peacock Feathers ink directly from ink pad to large lightbulb image. Cut image in half, lengthwise.


Step 7

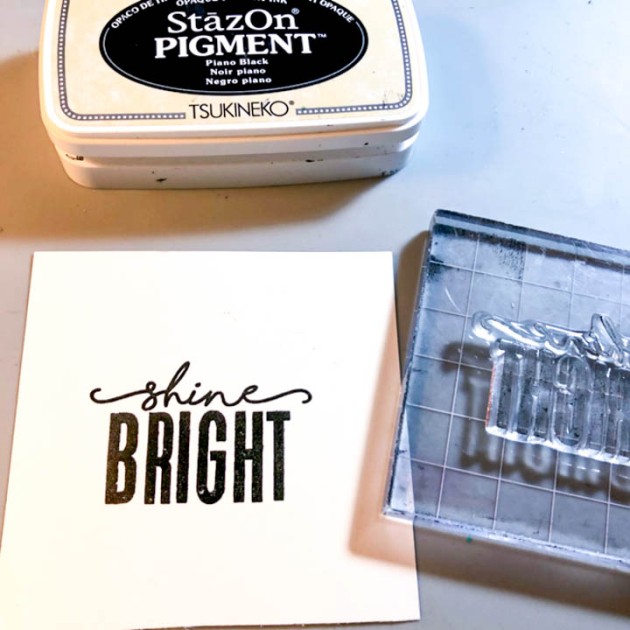
Stamp the “Shine Bright” sentiment with Piano Black StazOn Pigment Ink.


Step 8

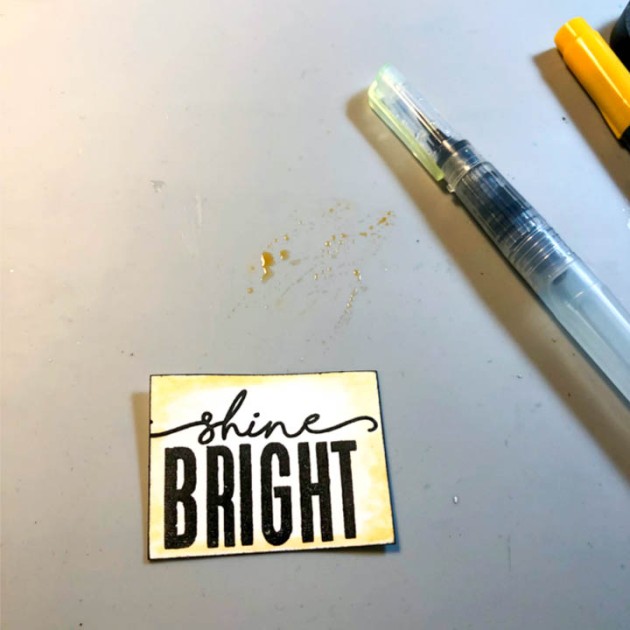
Make a close trim around the saying (rectangle in shape). Color lightly with Memento (watercolor method).


Step 9

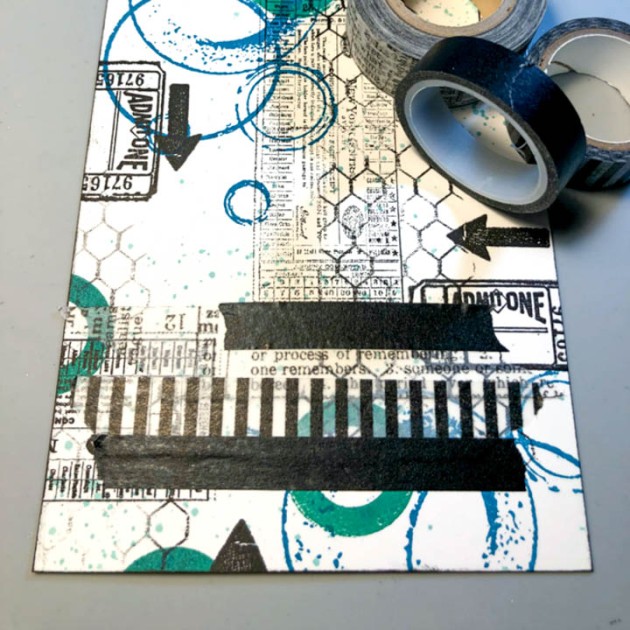
Apply washi tape to lower portion of the card.


Step 10

Prep small lightbulb and saying with 3M double sided dimensional tape.


Step 11

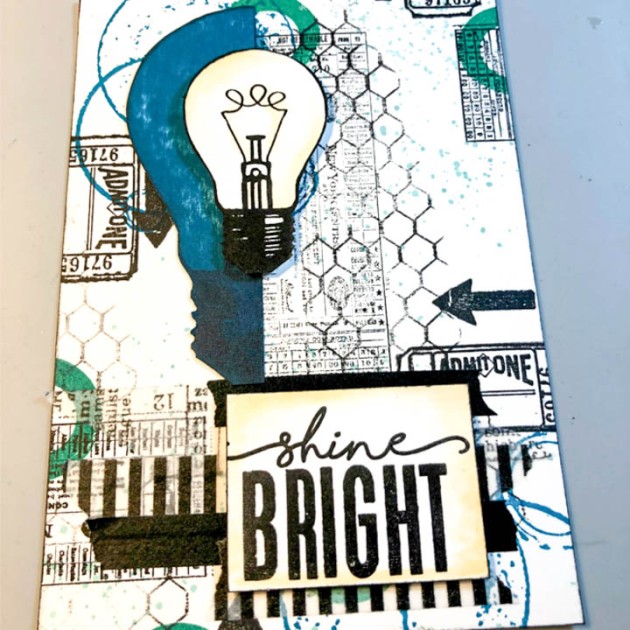
Adhere left half of the large lightbulb image to the top portion of the card, slightly off center. Mount small lightbulb over this image (see card for placement).  Adhere saying over the washi tape.


Step 12

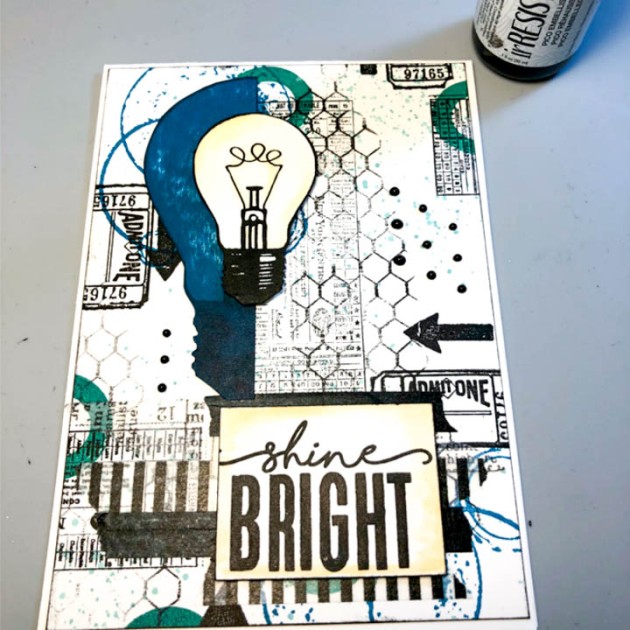
Mount panel to A6 sized card base of white cardstock. Apply black dots to the background with the Tuxedo Black irresistible Pico Embellisher.

by Lori Warren

Difficulty

Intermediate

Time

1 hour

Materials Needed

Imagine
Other
  • Lori’s Cards & Creations - Grungy Circles stamp
  • Tim Holtz Collection – Stampers Anonymous, The Journal stamp set
  • Visual Image, Shining Bright stamp set
  • Washi Tape
  • Lost Coast Designs, Chickenwire Background stamp
  • 3M Double Sided Mounting tape
  • Cardstock
  • Watercolor brush


Sign up for our newsletter
Facebook Pinterest Twitter YouTube Vimeo