Array ( [0] => 280 [ID] => 280 [1] => 1 [TYPEID] => 1 [2] => 0 [SECTIONID] => 0 [3] => project-details [MOD_NAME] => project-details [4] => [TITLE] => [5] => Project Details [META_TITLE] => Double Embossing "Believe" Greeting Card [6] => [META_DESCRIPTION] => Double Embossing "Believe" Greeting Card [7] => [META_KEYWORDS] => [8] => [BUTTON_TITLE] => [9] => [BODY] => [10] => [BODY_SIDE] => [11] => [MODULE_PROCESSING] => [12] => [MODULE_META] => [13] => project-details-head.php [MODULE_HEAD] => project-details-head.php [14] => project-details-body.php [MODULE_BODY] => project-details-body.php [15] => [MODULE_SIDE] => [16] => 0 [TOP_ORDER] => 0 [17] => 0 [HITS_UNIQUE] => 0 [18] => 0 [HITS_REPEAT] => 0 [19] => 0 [ROBOT_HITS] => 0 [20] => 0000-00-00 00:00:00 [LASTVIEWED] => 0000-00-00 00:00:00 [21] => 0000-00-00 00:00:00 [ROBOT_LASTVIEWED] => 0000-00-00 00:00:00 [22] => 0.70 [PRIORITY] => 0.70 [23] => 1 [SITEMAP] => 1 [24] => 1 [ACTIVE] => 1 [25] => 1 [DISPLAY_TITLE] => 1 [26] => 0 [SSL_MODE] => 0 [27] => 0 [EDITABLE] => 0 [28] => 0 [DELETABLE] => 0 [29] => 2013-11-05 00:00:00 [LASTUPDATED] => 2013-11-05 00:00:00 [30] => 2013-11-05 00:00:00 [CREATED] => 2013-11-05 00:00:00 )
Imagine Crafts
LearnMakeCommunityShop

Double Embossing "Believe" Greeting Card

Embossing is the easy way to create texture in papercrafts. But, did you know you can layer different embossing powders on the same paper? Double embossing is simple, fun and you only need to understand embossing basics to achieve this cool effect.


Double Embossing
VersaMark, green and white embossing powder
Step 1

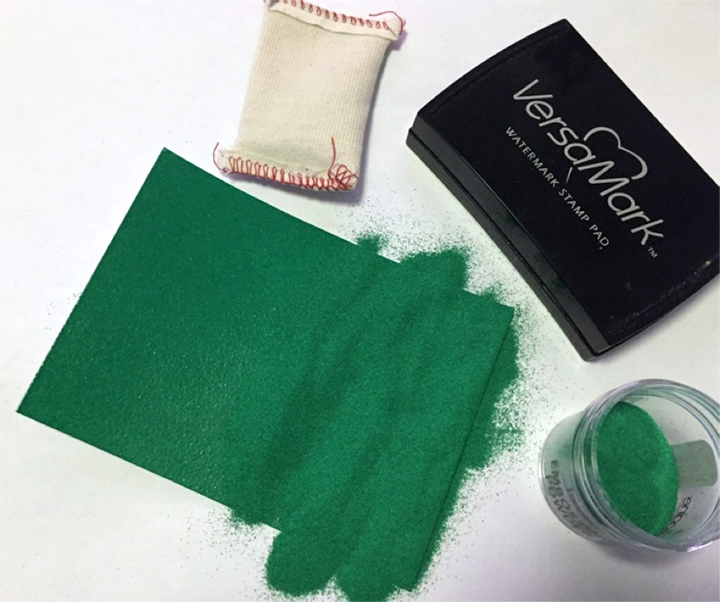
Take a piece of glossy cardstock and rub with the embossing buddy to avoid the static of the paper. Ink glossy paper using Versamark. Press the inkpad directly over the card stock to cover the whole surface. Cover the inked surface with Candy Green Embossing Powder and melt with the heat tool. You may need a second layer of embossing to create a uniform look.

VersaMark, green and white embossing powder

Step 2

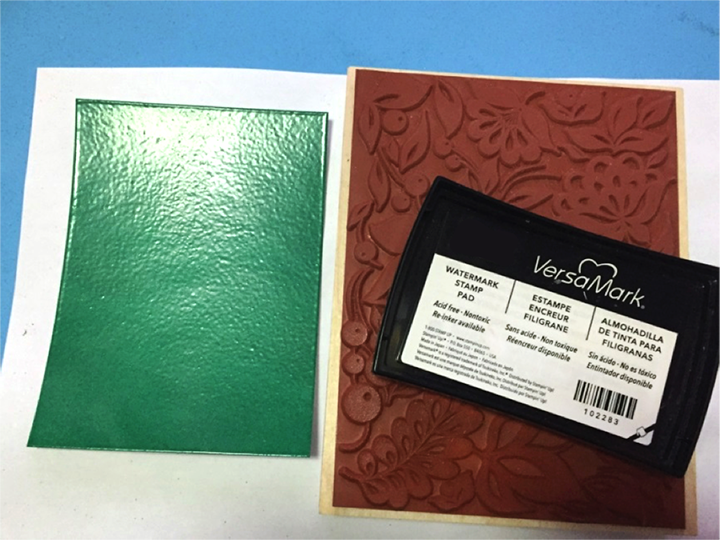
Ink background stamp with Versamark. Stamp background over the embossed piece. For larger stamps, I preferred to stamp in opposite way and press the paper with my hands over the stamps.

VersaMark, green and white embossing powder

Step 3

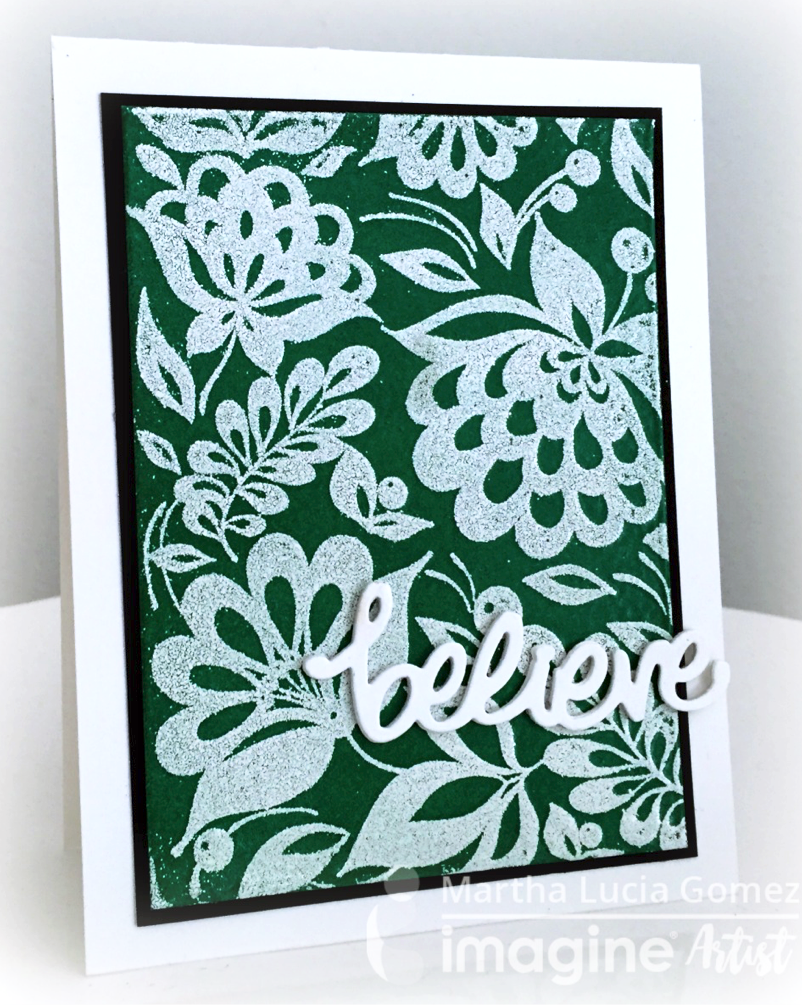
Cover the stamped image with White Embossing Powder and melt with the heat tool. Tadaaa, the background is complete!

VersaMark, green and white embossing powder
 Step 4

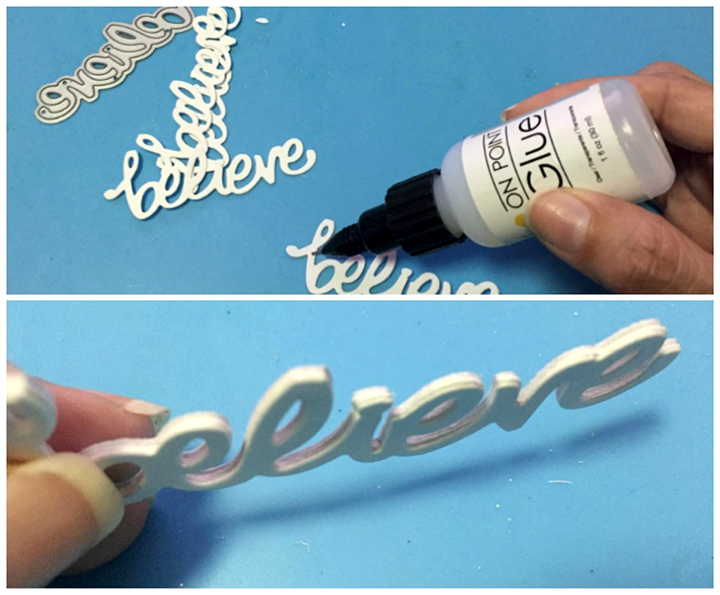
Die cut several “believe” dies from white cardstock. Use On Point Glue to stack the dies and create a raised effect. Create the base and layer for your card and assemble all the pieces using Tear it! Tape. Secure the "believe" sentiment and enjoy! 


by Martha Lucia Gomez

Difficulty

Beginner

Time

30 minutes

Materials Needed

Supplies

Imagine
Other
  • Cardstock – White, Black
  • Hero Arts – Large Floral Background
  • Little Yellow Bicycle – Believe Die Cut
  • Stampin Up – Embossing Buddy


Sign up for our newsletter
Facebook Pinterest Twitter YouTube Vimeo