Array ( [0] => 280 [ID] => 280 [1] => 1 [TYPEID] => 1 [2] => 0 [SECTIONID] => 0 [3] => project-details [MOD_NAME] => project-details [4] => [TITLE] => [5] => Project Details [META_TITLE] => StazOn Studio Glaze for a Halloween Masquerade Craft [6] => [META_DESCRIPTION] => StazOn Studio Glaze for a Halloween Masquerade Craft [7] => [META_KEYWORDS] => [8] => [BUTTON_TITLE] => [9] => [BODY] => [10] => [BODY_SIDE] => [11] => [MODULE_PROCESSING] => [12] => [MODULE_META] => [13] => project-details-head.php [MODULE_HEAD] => project-details-head.php [14] => project-details-body.php [MODULE_BODY] => project-details-body.php [15] => [MODULE_SIDE] => [16] => 0 [TOP_ORDER] => 0 [17] => 0 [HITS_UNIQUE] => 0 [18] => 0 [HITS_REPEAT] => 0 [19] => 0 [ROBOT_HITS] => 0 [20] => 0000-00-00 00:00:00 [LASTVIEWED] => 0000-00-00 00:00:00 [21] => 0000-00-00 00:00:00 [ROBOT_LASTVIEWED] => 0000-00-00 00:00:00 [22] => 0.70 [PRIORITY] => 0.70 [23] => 1 [SITEMAP] => 1 [24] => 1 [ACTIVE] => 1 [25] => 1 [DISPLAY_TITLE] => 1 [26] => 0 [SSL_MODE] => 0 [27] => 0 [EDITABLE] => 0 [28] => 0 [DELETABLE] => 0 [29] => 2013-11-05 00:00:00 [LASTUPDATED] => 2013-11-05 00:00:00 [30] => 2013-11-05 00:00:00 [CREATED] => 2013-11-05 00:00:00 )
Imagine Crafts
LearnMakeCommunityShop

StazOn Studio Glaze for a Halloween Masquerade Craft

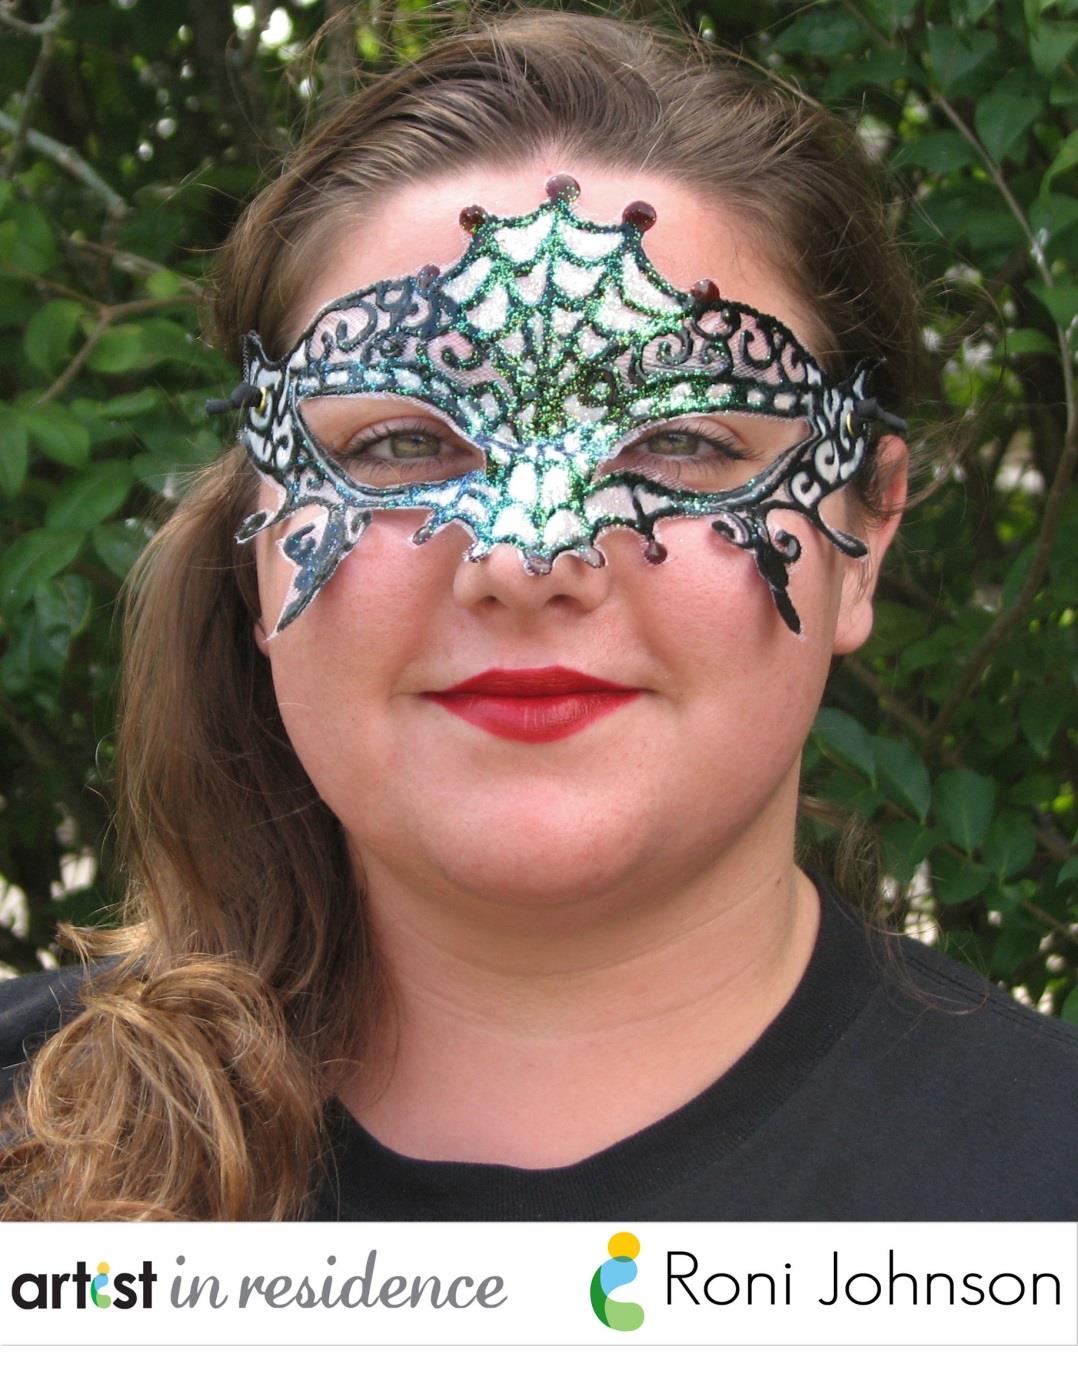
Halloween party in your near future? No idea what you’re going to wear? No problem – grab a couple bottles of StazOn Studio Glaze, a bit of tulle and you’re in business. You can be the belle of the ball – or in this case Spiderella of the ball. Create your very own one of a kind mask and wow all of the spooks on All Hallows Eve.
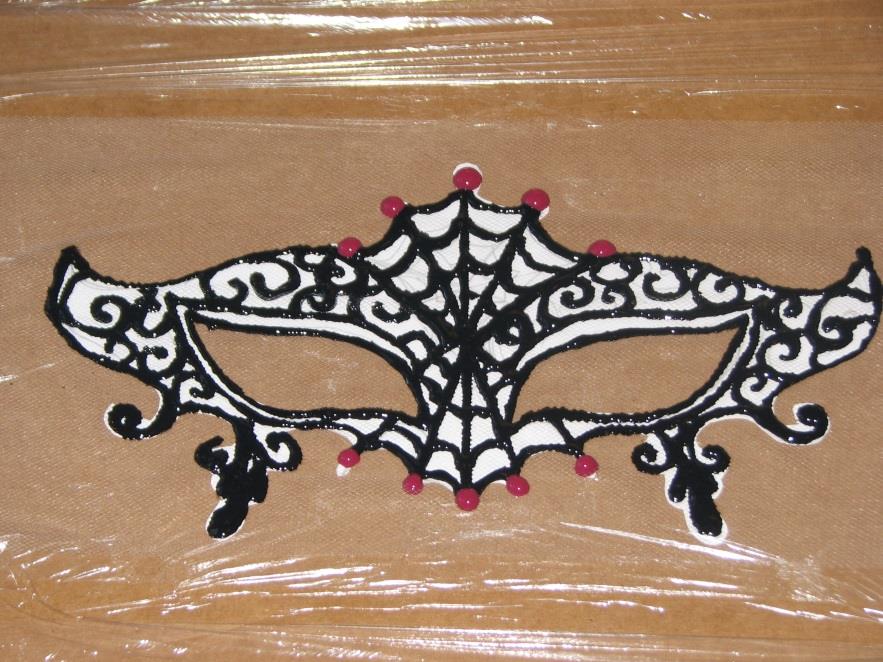

StazOn Studio Glaze for a Halloween Masquerade Craft

Step 1

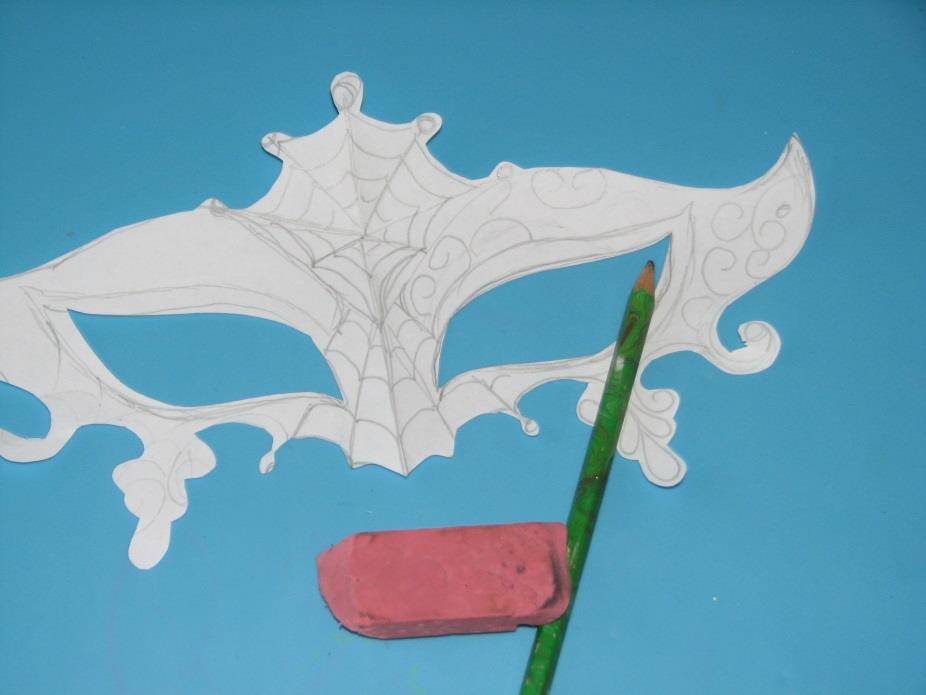
Fold a piece of copy paper in half; draw a basic mask design and cut it out.

Step 2

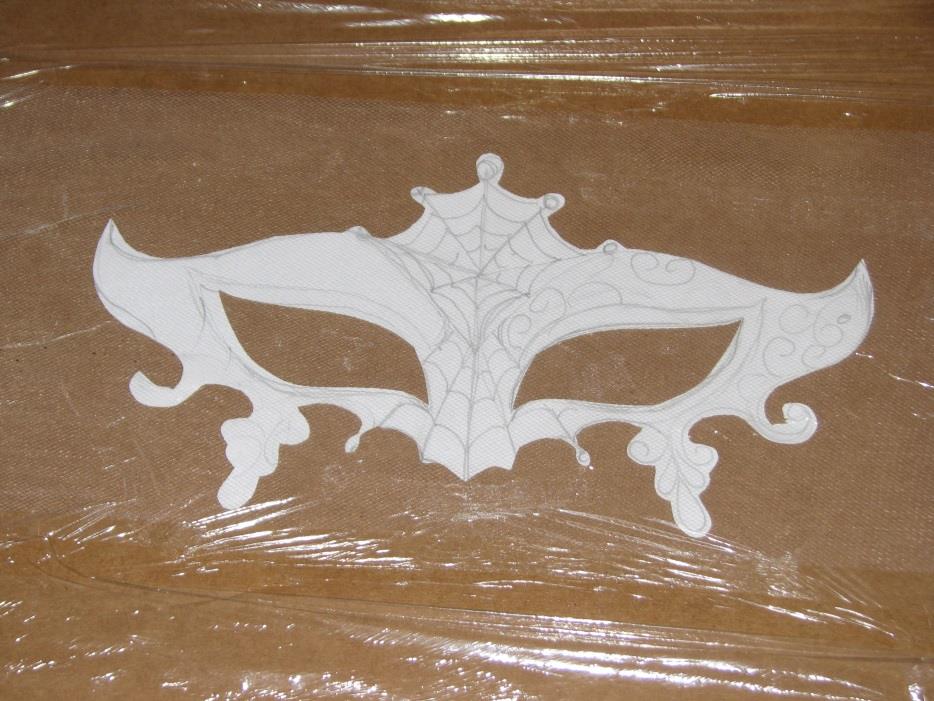
Fill in the mask with designs and doodles to fill up the mask. This can be as simple, elegant or extravagant as desired. Adhere the mask pattern to a piece of cardboard; cover the mask with a piece of plastic cling wrap.
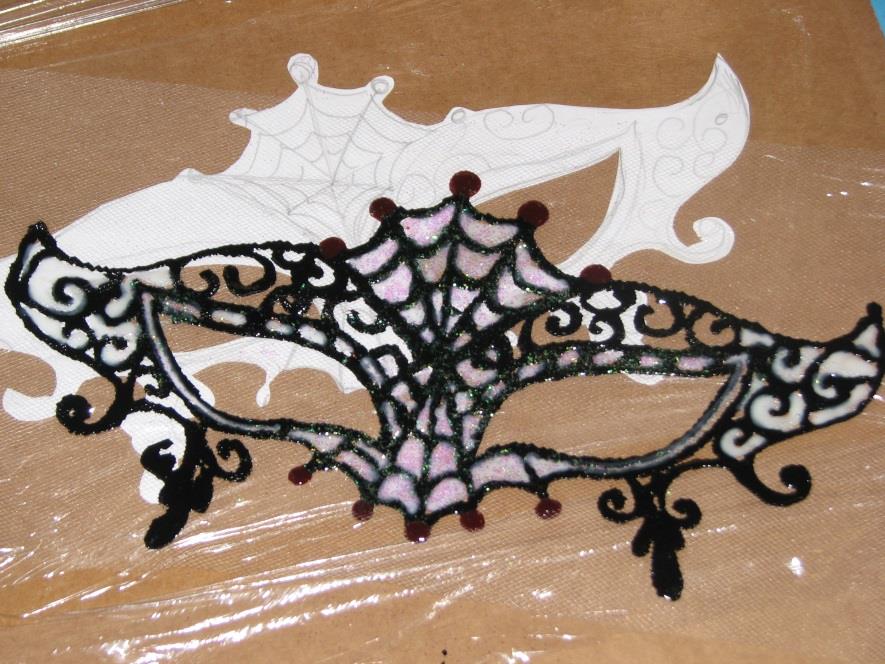
Step 3

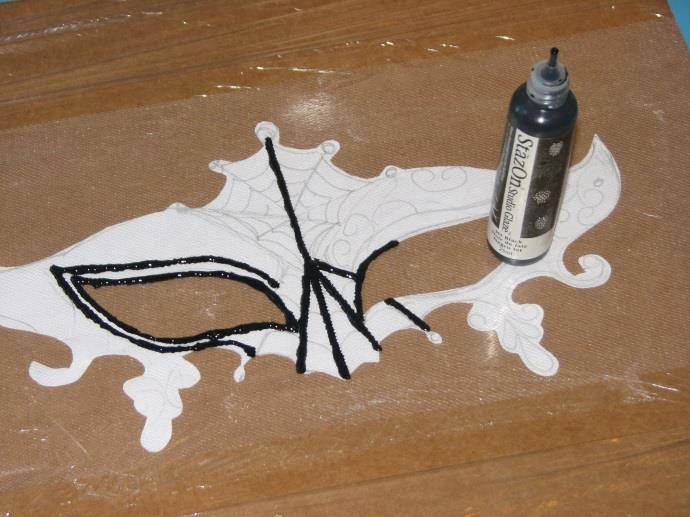
Cut a piece of tulle 2” larger than the mask, secure it to the cling wrap. Shake desired color of Studio Glaze vigorously. Remove the cap and begin tracing thick lines of Studio Glaze over the pattern.

Step 4

Continue tracing the pattern with one or more colors of Studio Glaze until the entire pattern has been duplicated on the tulle. Set the mask aside to dry for 24-48 hours.

Step 5

If desired, fill in some areas of the mask with Cotton White Studio Glaze. Sprinkle with a fine or extra fine glitter. Set aside to dry for another 24-48 hours.

Step 6

Once the Studio Glaze has completely dried, carefully peel the Studio Glaze mask/tulle from the plastic wrap.
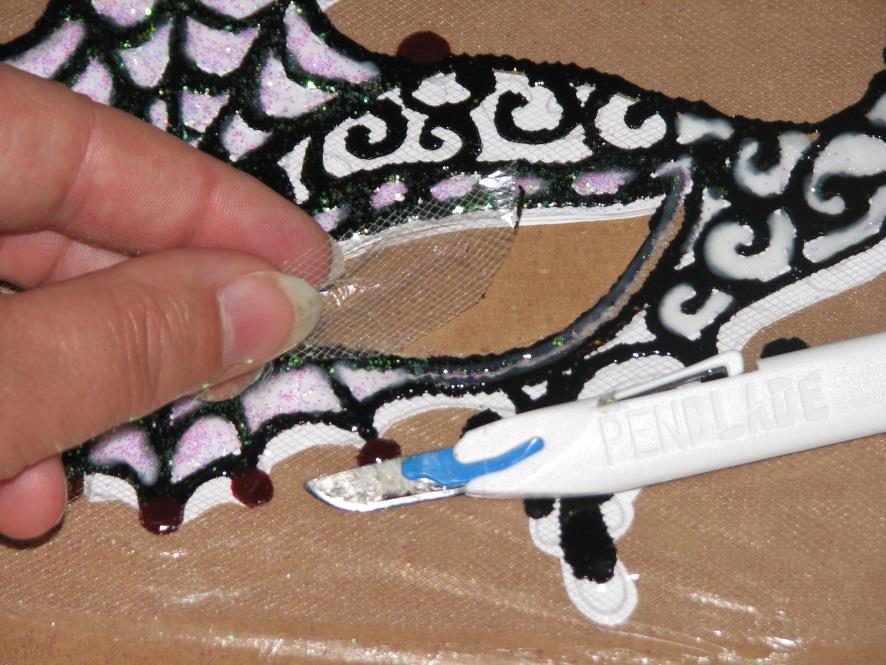
Step 7

Use a sharp craft knife to cut away the excess tulle.
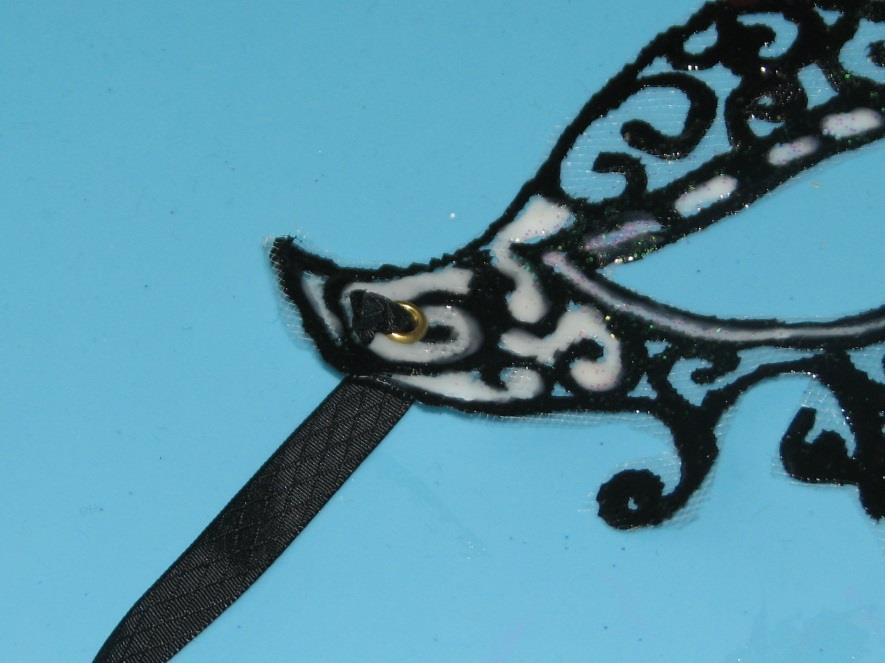
Step 8

Trim a small piece of acetate and adhere it to the back of the mask where you will be adding the ribbon ties for a bit of added strength. Punch a hole & secure an eyelet in the hole on both sides of the mask. Tie a piece of ribbon on each side. Your mask is now ready to be worn.


by Roni Johnson

Difficulty

Advanced

Time

1 hour plus dry time

Materials Needed

Imagine
  • StazOn Studio Glaze – Jet Black, Cotton White, Claret
Other
  • Meyer Imports – Glitter
  • Plastic wrap
  • Tulle
  • Ribbon
  • Eyelets
  • Adhesive
  • Copy paper
  • Cardboard
  • Pencil & eraser


Sign up for our newsletter
Facebook Pinterest Twitter YouTube Vimeo