Array ( [0] => 280 [ID] => 280 [1] => 1 [TYPEID] => 1 [2] => 0 [SECTIONID] => 0 [3] => project-details [MOD_NAME] => project-details [4] => [TITLE] => [5] => Project Details [META_TITLE] => Go Confidently In The Direction of Your Dreams [6] => [META_DESCRIPTION] => Go Confidently In The Direction of Your Dreams [7] => [META_KEYWORDS] => [8] => [BUTTON_TITLE] => [9] => [BODY] => [10] => [BODY_SIDE] => [11] => [MODULE_PROCESSING] => [12] => [MODULE_META] => [13] => project-details-head.php [MODULE_HEAD] => project-details-head.php [14] => project-details-body.php [MODULE_BODY] => project-details-body.php [15] => [MODULE_SIDE] => [16] => 0 [TOP_ORDER] => 0 [17] => 0 [HITS_UNIQUE] => 0 [18] => 0 [HITS_REPEAT] => 0 [19] => 0 [ROBOT_HITS] => 0 [20] => 0000-00-00 00:00:00 [LASTVIEWED] => 0000-00-00 00:00:00 [21] => 0000-00-00 00:00:00 [ROBOT_LASTVIEWED] => 0000-00-00 00:00:00 [22] => 0.70 [PRIORITY] => 0.70 [23] => 1 [SITEMAP] => 1 [24] => 1 [ACTIVE] => 1 [25] => 1 [DISPLAY_TITLE] => 1 [26] => 0 [SSL_MODE] => 0 [27] => 0 [EDITABLE] => 0 [28] => 0 [DELETABLE] => 0 [29] => 2013-11-05 00:00:00 [LASTUPDATED] => 2013-11-05 00:00:00 [30] => 2013-11-05 00:00:00 [CREATED] => 2013-11-05 00:00:00 )
Imagine Crafts
LearnMakeCommunityShop

Go Confidently In The Direction of Your Dreams

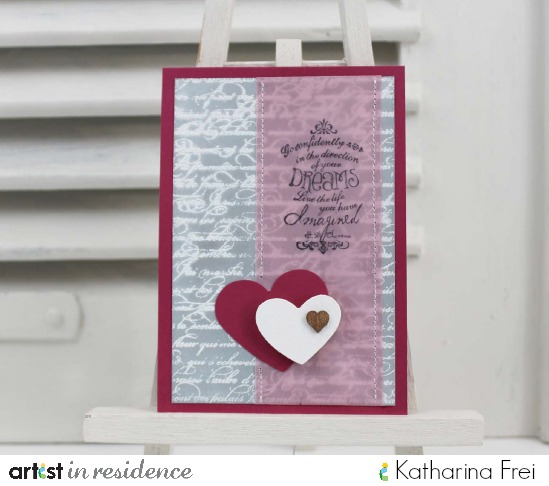
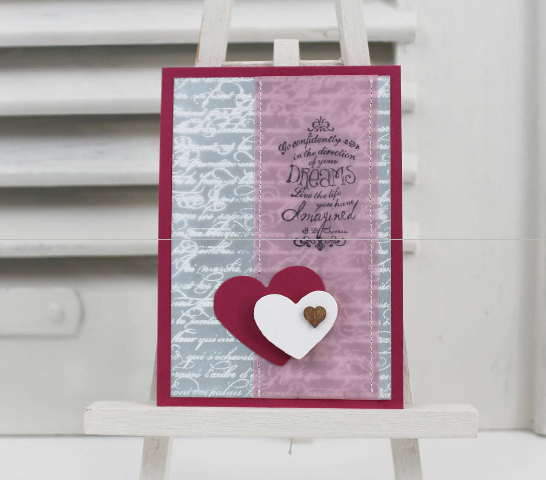
I love large background stamps! Especially the ones using beautiful, romantic scripts. There is nothing easier to create your own custom backgrounds with these stamps, some embossing powder and pigment ink.
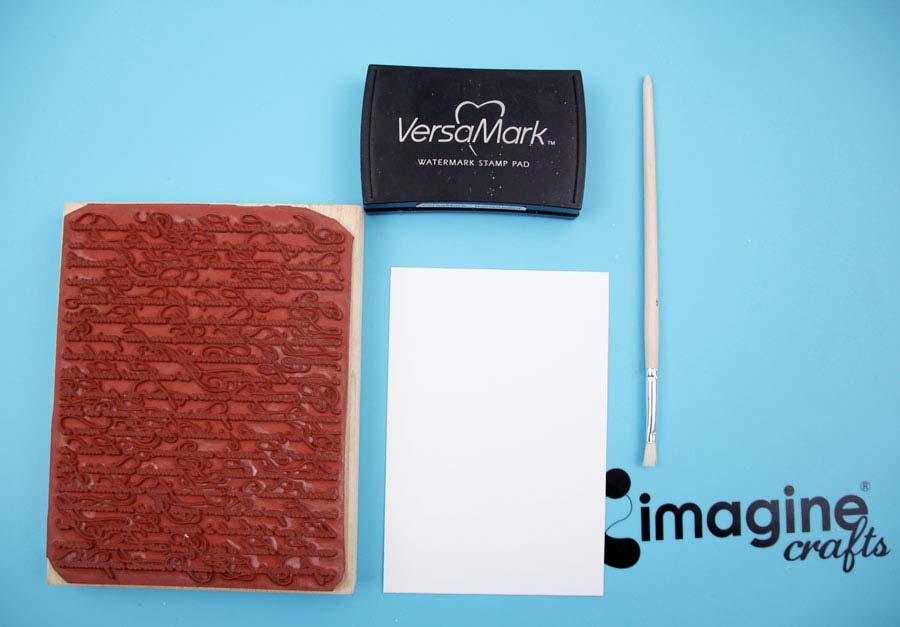
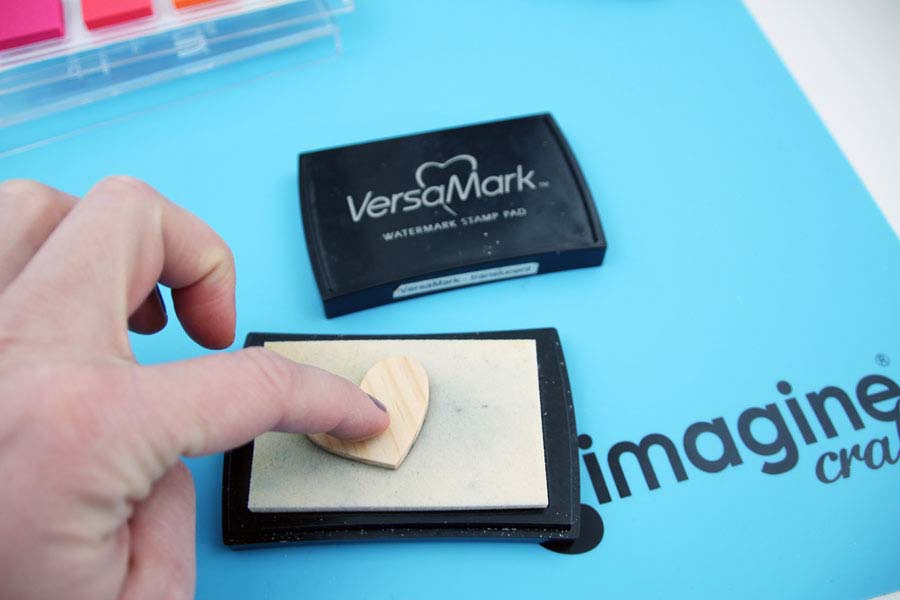

Go Confidently In The Direction of Your Dreams

Directions

Step 1.
After cutting a piece of white cardstock to size, I stamped the background with translucent VersaMark ink.
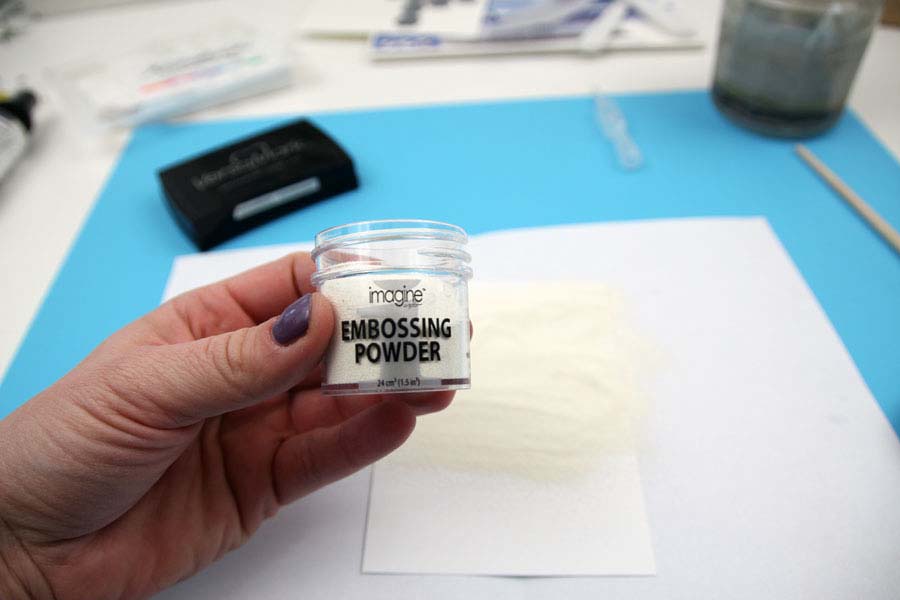
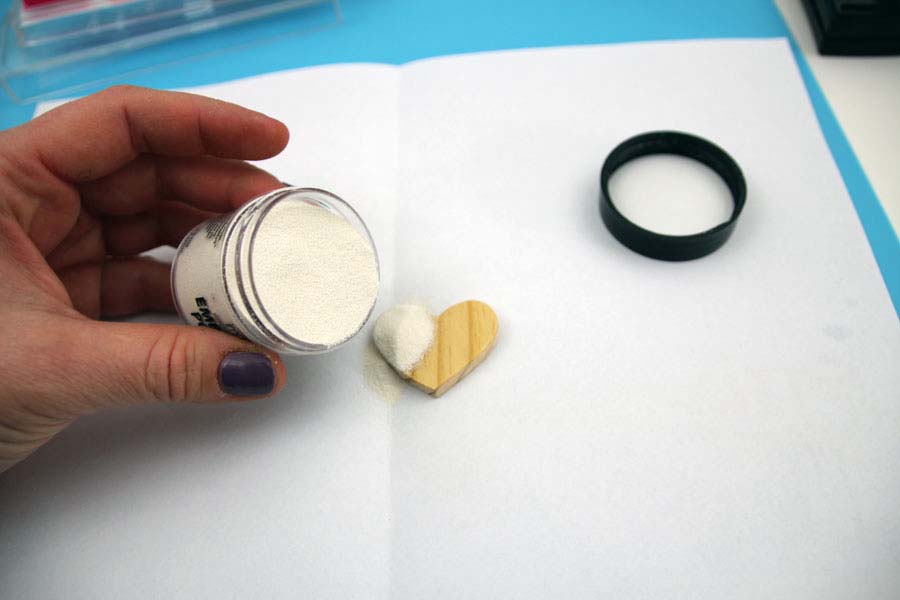
Step 2.
I spread white embossing powder all over the ink right afterwards, shook off the excess and heat set the powder with my heat tool.
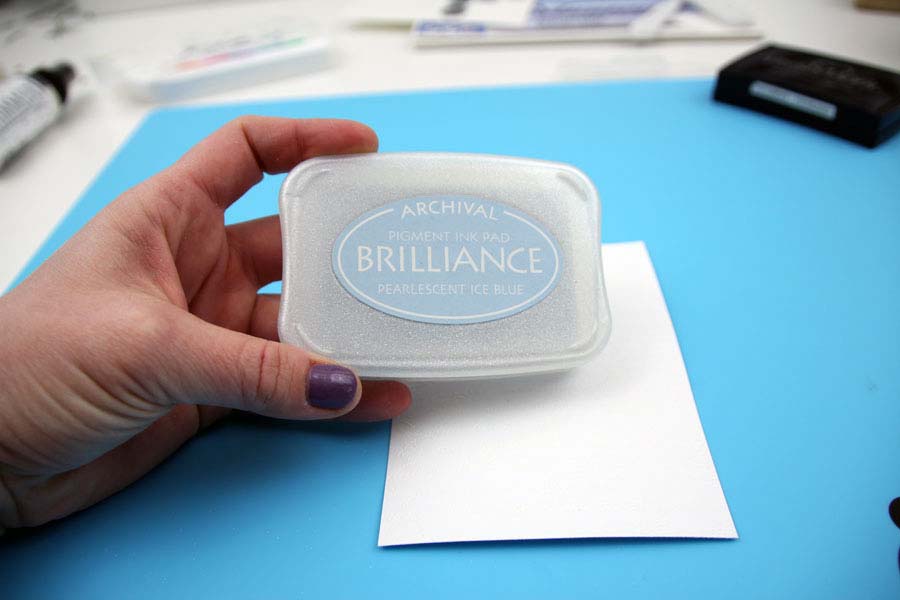
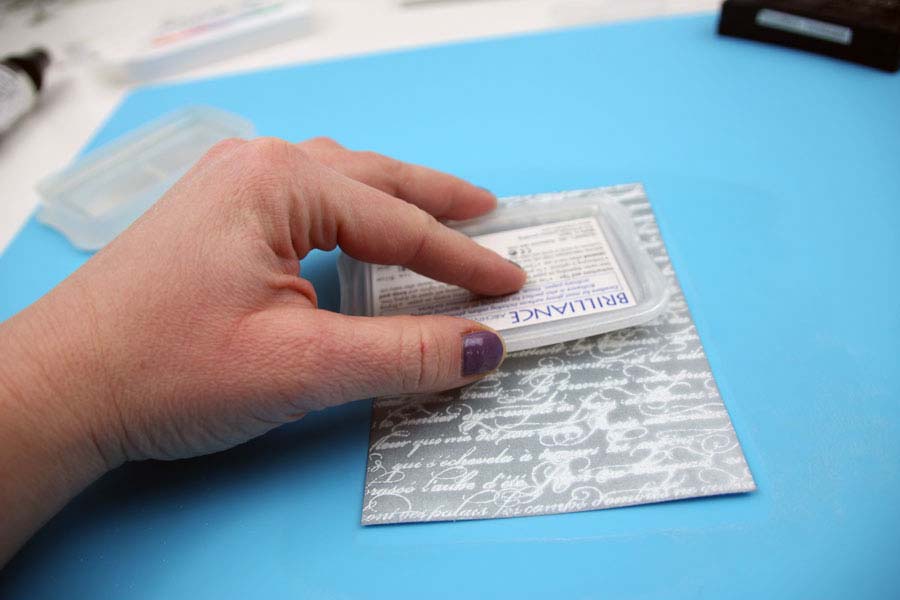
Step 3.
I chose the Brilliance ink pad "pearlescent blue" to color the background, because of it's phenomenal intensity and shimmer, and rubbed over the embossed background directly with the inkpad.
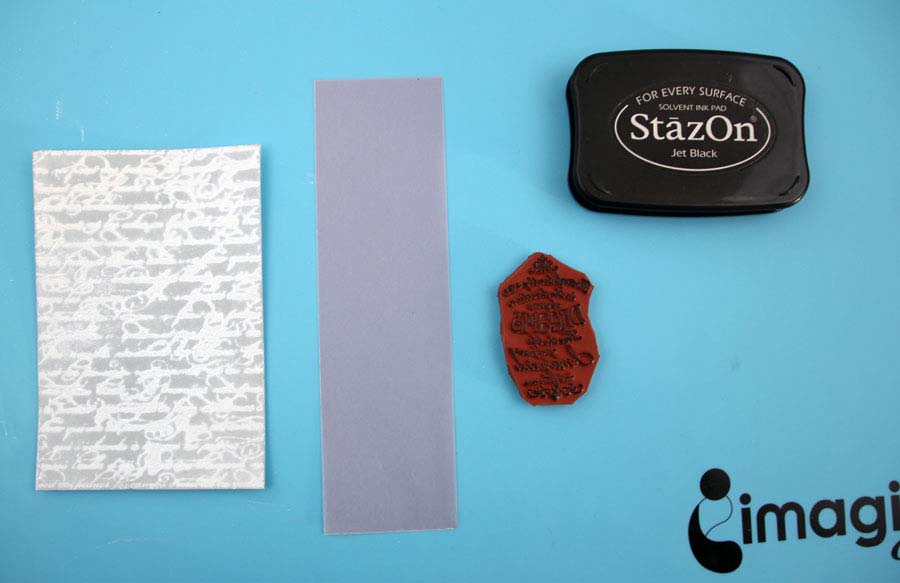
Step 4.
StazOn is my favourite ink to stamp on very smooth surfaces. Therefore I used it to stamp the sentiment on the velvet vellum.

Step 5.
To match the color and style of the embellishments the ones of my background, I also embossed the Monterey Pine heart with white embossing powder. A beautiful and easy way to add dimension to your projects.

by Katharina Frei

Difficulty

Beginner

Time

1/2 hour + dry time

Materials Needed

Imagine Crafts featuring Tsukineko:

Other:

  • Stampin'Up background stamp, heart punch, vellum, sewing machine, scissors, adhesive tape, heat tool


Sign up for our newsletter
Facebook Pinterest Twitter YouTube Vimeo