Array ( [0] => 280 [ID] => 280 [1] => 1 [TYPEID] => 1 [2] => 0 [SECTIONID] => 0 [3] => project-details [MOD_NAME] => project-details [4] => [TITLE] => [5] => Project Details [META_TITLE] => Polar Bear Christmas Card Tutorial [6] => [META_DESCRIPTION] => See how to make this adorable christmas card featuring a polar bear image and fun texture made with Amplify! texture paste. [7] => [META_KEYWORDS] => [8] => [BUTTON_TITLE] => [9] => [BODY] => [10] => [BODY_SIDE] => [11] => [MODULE_PROCESSING] => [12] => [MODULE_META] => [13] => project-details-head.php [MODULE_HEAD] => project-details-head.php [14] => project-details-body.php [MODULE_BODY] => project-details-body.php [15] => [MODULE_SIDE] => [16] => 0 [TOP_ORDER] => 0 [17] => 0 [HITS_UNIQUE] => 0 [18] => 0 [HITS_REPEAT] => 0 [19] => 0 [ROBOT_HITS] => 0 [20] => 0000-00-00 00:00:00 [LASTVIEWED] => 0000-00-00 00:00:00 [21] => 0000-00-00 00:00:00 [ROBOT_LASTVIEWED] => 0000-00-00 00:00:00 [22] => 0.70 [PRIORITY] => 0.70 [23] => 1 [SITEMAP] => 1 [24] => 1 [ACTIVE] => 1 [25] => 1 [DISPLAY_TITLE] => 1 [26] => 0 [SSL_MODE] => 0 [27] => 0 [EDITABLE] => 0 [28] => 0 [DELETABLE] => 0 [29] => 2013-11-05 00:00:00 [LASTUPDATED] => 2013-11-05 00:00:00 [30] => 2013-11-05 00:00:00 [CREATED] => 2013-11-05 00:00:00 )
Imagine Crafts
LearnMakeCommunityShop

Baby, It's Cold Outside! Holiday Card

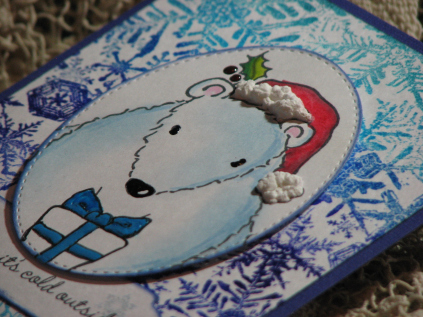
Burrrr, who’s a better authority about the cold than polar bears?  Nobody I know! Use Amplify in White on this holiday card!


card making, paper craft, hand made cards, hand made, paper crafting, stamping, scrapbooking, card maker, paper crafts, cards, crafting, hobby, card making ideas, DIY, clear stamps, scrapbook,  greeting cards, scrap, birthday card, thank you card

Directions:

2015_December_RJ_BabyItsColdOutside_01

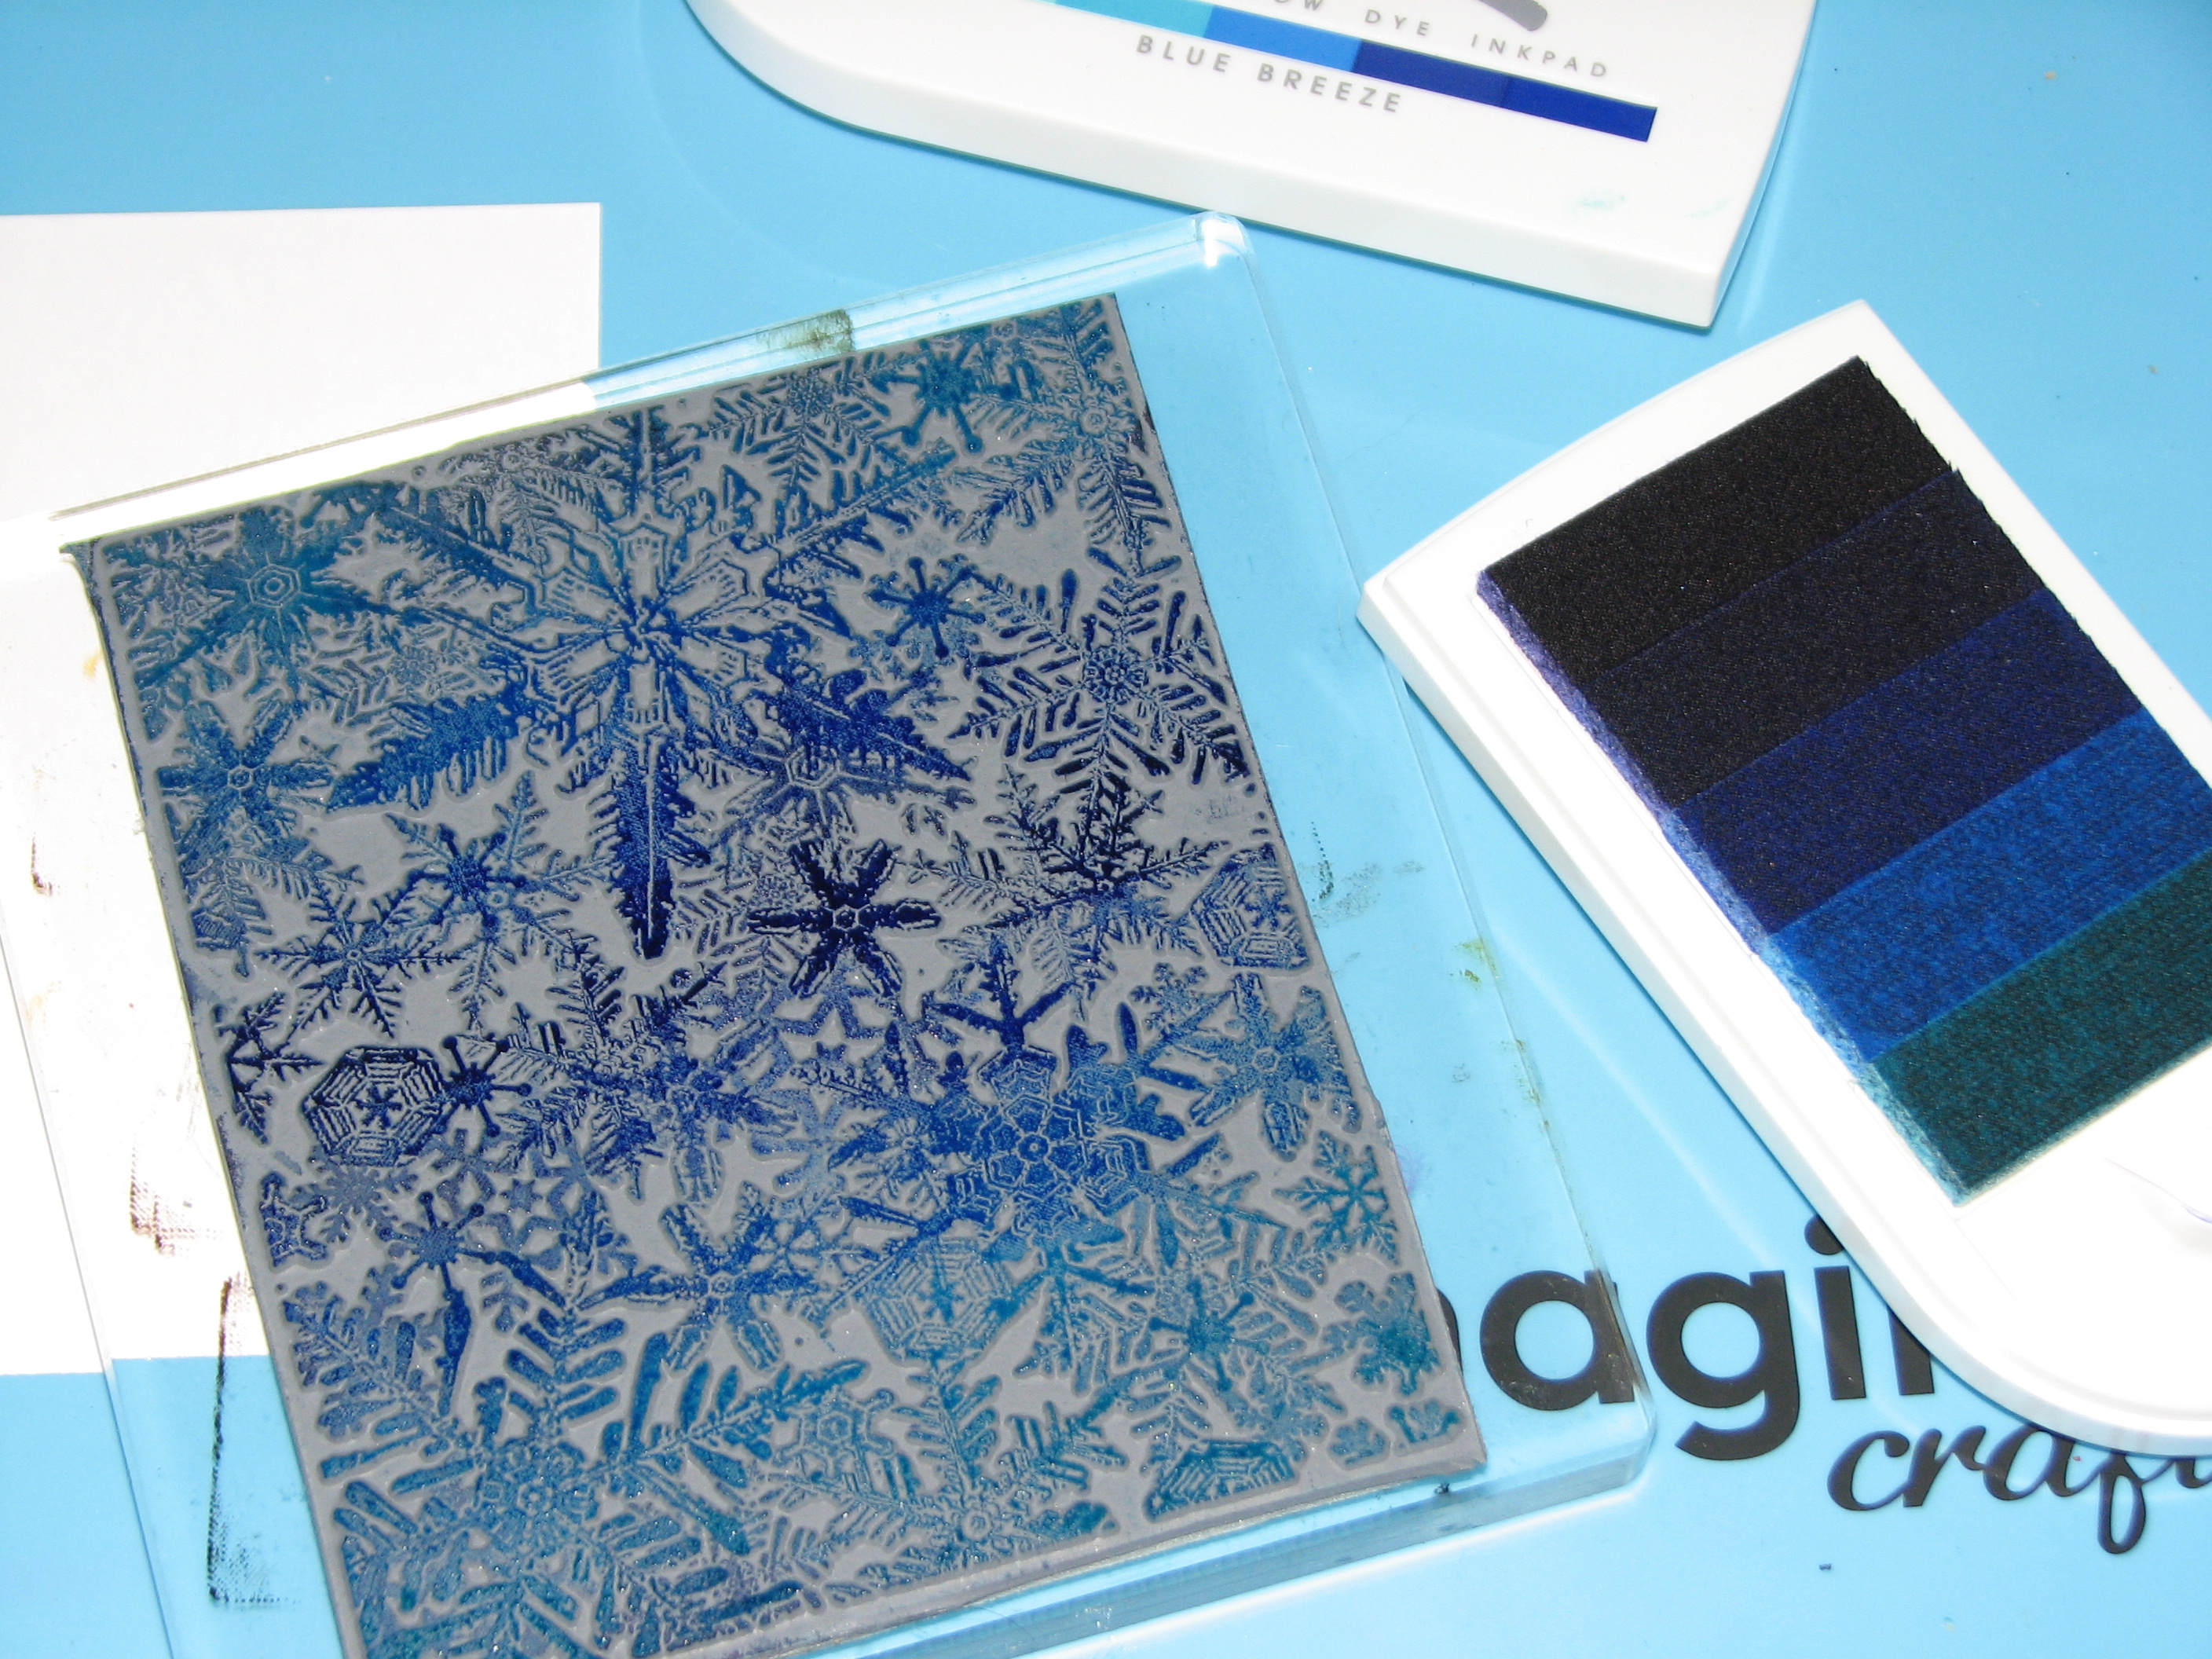
1. Begin by sliding the ink pads together on the Blue Breeze Kaliedacolor ink pad; Ink the snowflake background stamp making sure to keep the colors aligned as you ink along the stamp.  Since this was such a large stamp I inked the top portion then flipped the ink pad around, lined up the existing darkest blue area on the stamp with the ink pad and again inked across the image.

2015_December_RJ_BabyItsColdOutside_02

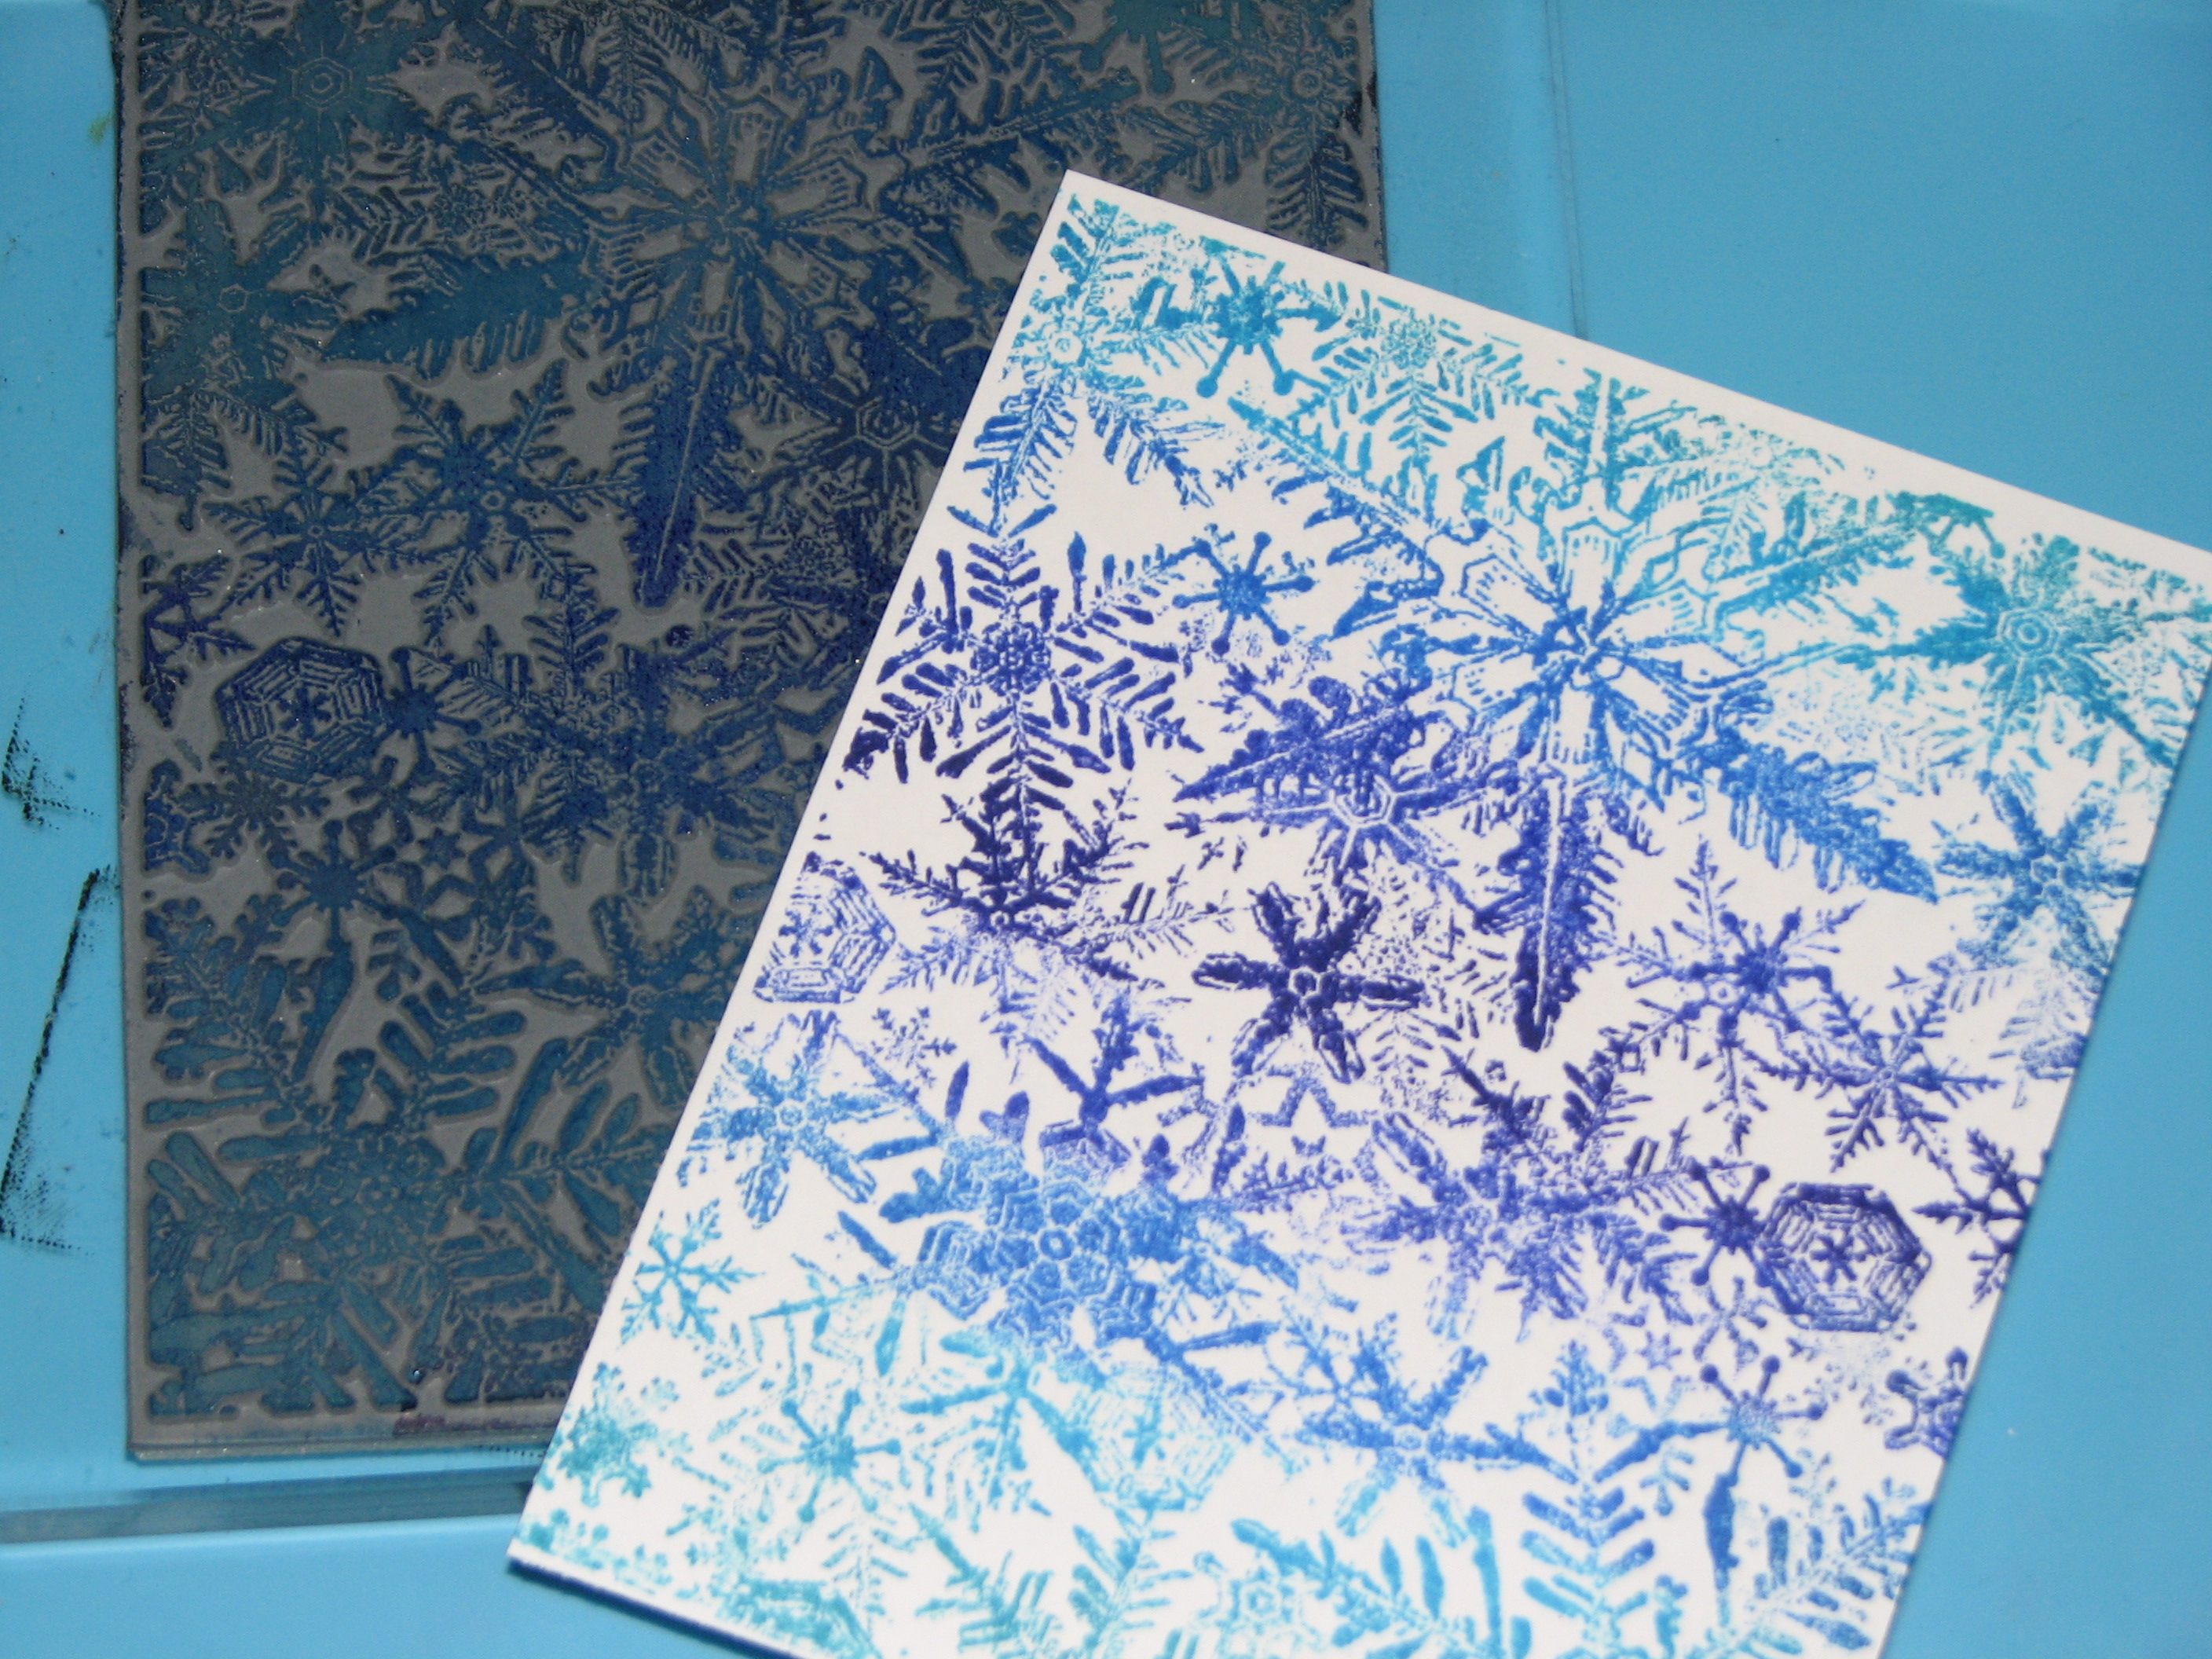
2. Press the inked stamp onto a blank card panel; immediately sprinkle with clear embossing powder and heat to melt.  Since this is dye ink and dries quickly the embossing powder will stick to random areas of the design which is exactly what you’re going for.  Set the card panel aside for now.

2015_December_RJ_BabyItsColdOutside_03

3. Stamp the polar bear as follows: bear body – Memento Summer Sky; ears – Angel Pink; hat and berries – a combination of Love Letter, Rhubarb Stalk; holly leaf – Pear Tart, Ivy Cottage.

2015_December_RJ_BabyItsColdOutside_04

4. Apply White Radiant Neon Amplify to the bears hat fringe and ball; heat to activate the medium.

2015_December_RJ_BabyItsColdOutside_05

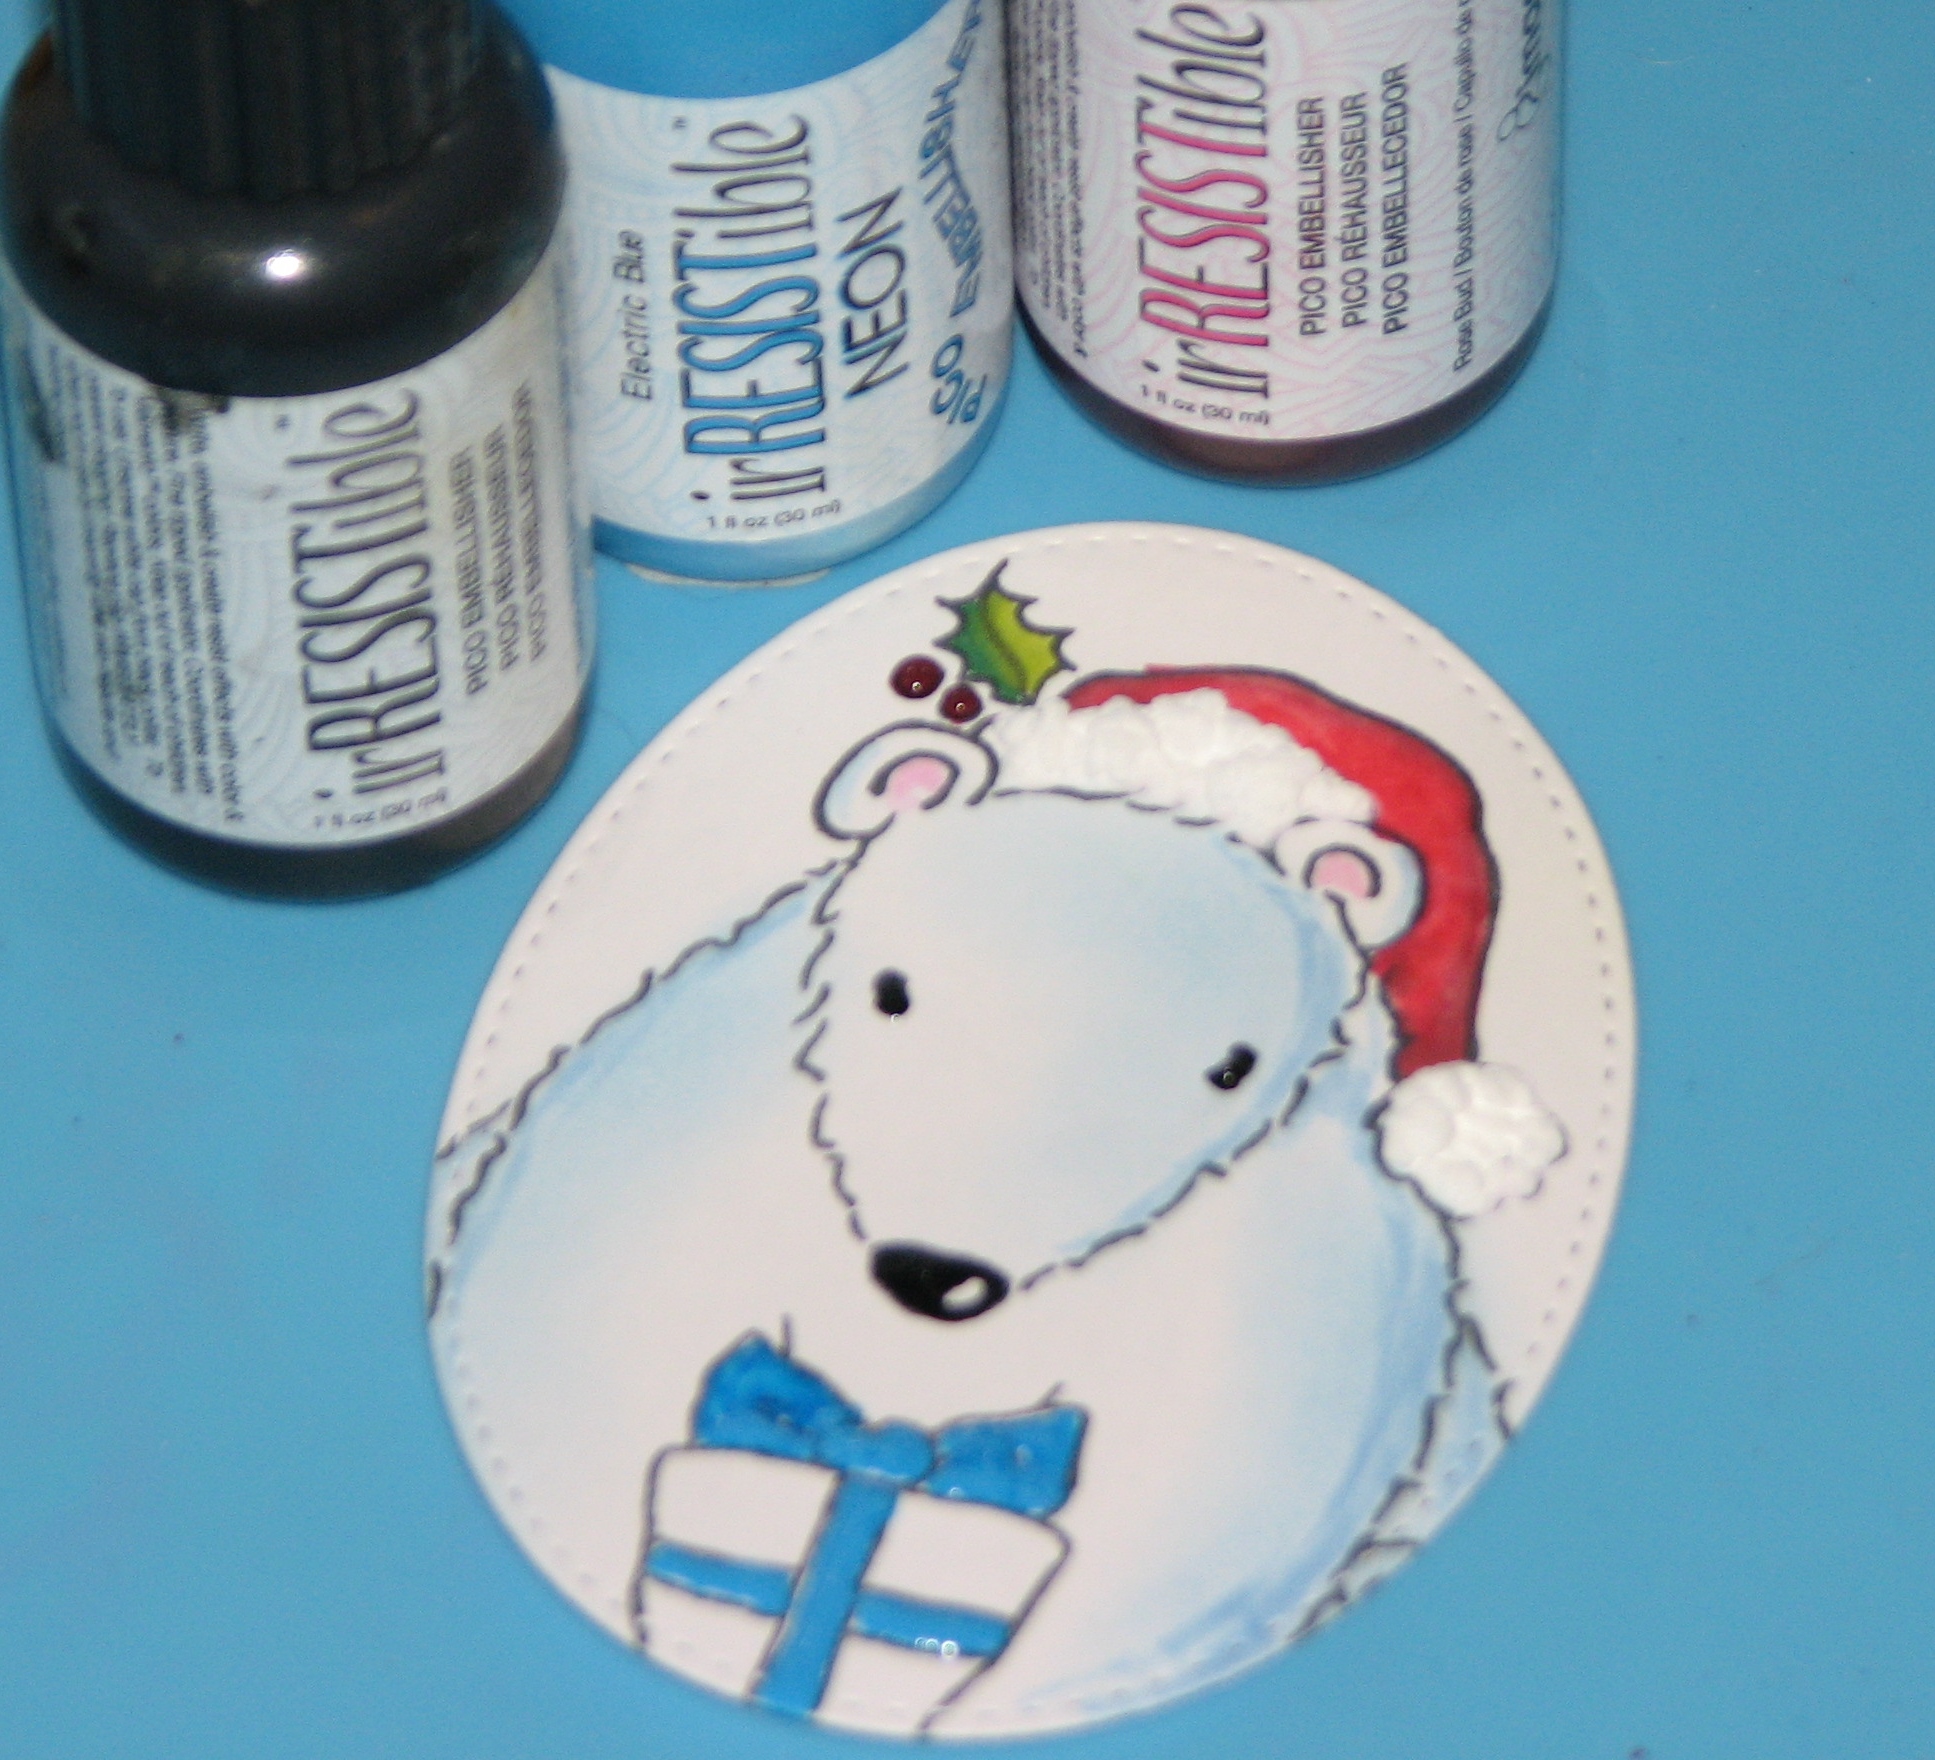
5. For a bit of raised detail add touches of irRESISTible Pico Embellisher to the eyes and nose (Tuxedo Black), berries (Rose Bud) and ribbon (Electric Blue).

2015_December_RJ_BabyItsColdOutside_06

6. Die cut the main image and affix to the card panel using double stick foam tape.


7. Stamp sentiment on white cardstock, die-cut and affix to the card.

by Roni Johnson

Difficulty

Beginner - Intermediate

Time

1/2 hour + dry time

Materials Needed

Imagine Crafts featuring Tsukineko:

  • Memento Ink – Summer Sky, Love Letter, Rhubarb Stalk, Angel Pink, Pear Tart, Ivy Cottage
  • Radiant Neon Amplify – White
  • irRESISTible Pico Embellisher – Electric Blue, Tuxedo Black, Rose Bud
  • Kaliedacolor Ink Pad – Blue Breeze
  • Sponge Dauber

Other

  • Woodware Craft Collection – Bear
  • Technique Tuesday – Sentiment
  • Chapel Road Artstamps – Snowflake Background
  • Georgia Pacific – White Cardstock
  • ClubScrap.com – Colored Cardstock
  • Spellbinders – Oval Die
  • X-Cut – Label Die


Sign up for our newsletter
Facebook Pinterest Twitter YouTube Vimeo