Array ( [0] => 280 [ID] => 280 [1] => 1 [TYPEID] => 1 [2] => 0 [SECTIONID] => 0 [3] => project-details [MOD_NAME] => project-details [4] => [TITLE] => [5] => Project Details [META_TITLE] => A Colorful Christmas Card Tutorial [6] => [META_DESCRIPTION] => Learn how to make these colorful christmas cards using Kaleidacolor and Delicata inks. [7] => [META_KEYWORDS] => [8] => [BUTTON_TITLE] => [9] => [BODY] => [10] => [BODY_SIDE] => [11] => [MODULE_PROCESSING] => [12] => [MODULE_META] => [13] => project-details-head.php [MODULE_HEAD] => project-details-head.php [14] => project-details-body.php [MODULE_BODY] => project-details-body.php [15] => [MODULE_SIDE] => [16] => 0 [TOP_ORDER] => 0 [17] => 0 [HITS_UNIQUE] => 0 [18] => 0 [HITS_REPEAT] => 0 [19] => 0 [ROBOT_HITS] => 0 [20] => 0000-00-00 00:00:00 [LASTVIEWED] => 0000-00-00 00:00:00 [21] => 0000-00-00 00:00:00 [ROBOT_LASTVIEWED] => 0000-00-00 00:00:00 [22] => 0.70 [PRIORITY] => 0.70 [23] => 1 [SITEMAP] => 1 [24] => 1 [ACTIVE] => 1 [25] => 1 [DISPLAY_TITLE] => 1 [26] => 0 [SSL_MODE] => 0 [27] => 0 [EDITABLE] => 0 [28] => 0 [DELETABLE] => 0 [29] => 2013-11-05 00:00:00 [LASTUPDATED] => 2013-11-05 00:00:00 [30] => 2013-11-05 00:00:00 [CREATED] => 2013-11-05 00:00:00 )
Imagine Crafts
LearnMakeCommunityShop

A Colorful Merry Christmas

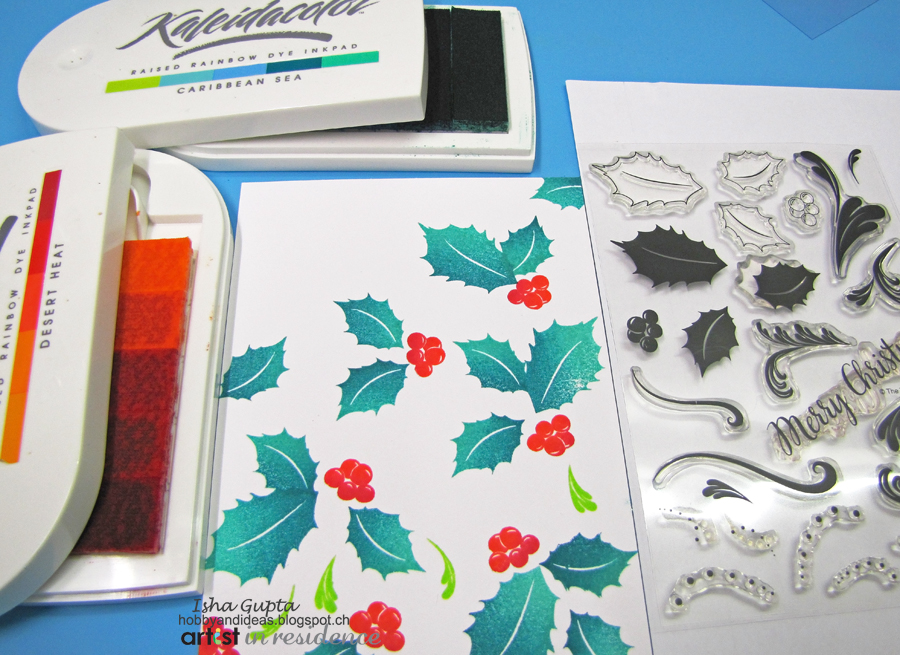
Christmas is soon coming and I really like how much depth and dimension can be achieved by using the vibrant and lovely colors of Kaleidacolor inks. Perfect for Holiday season :)


A bright and cheery Chrismas card featuring holly images stamped with Kaleidacolor.

Directions:

AIR_2015_IG_Merry Christmas_Step1

1.  Make a cardbase using white cardstock.

2.  Cut another piece of the same size as the card front.Start by stamping 2 sizes of leaves using Kaleidacolor ink in Caribbean.

3.  Stamp the berries using Desert Heat Kaleidacolor ink. This is so we can have balanced distribution of all the elements.

4.  Stamp the tiny green images using the light green part of the Caribbean ink.

AIR_2015_IG_Merry Christmas_Step2

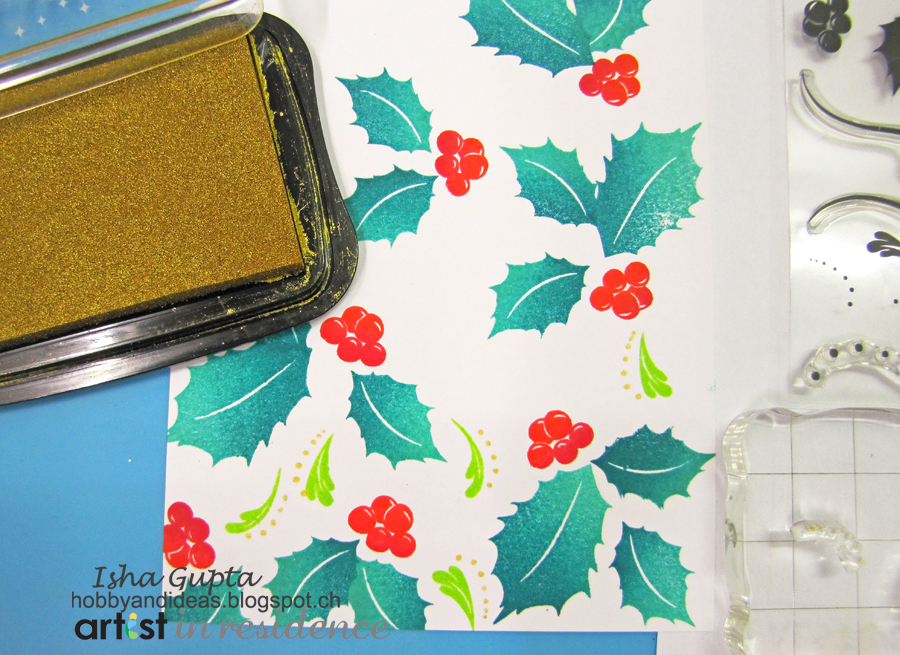
5.  Using Delicata Gold ink stamp the dotted image near the tiny green images. Fill the entire panel the same way.

AIR_2015_IG_Merry Christmas_Step3

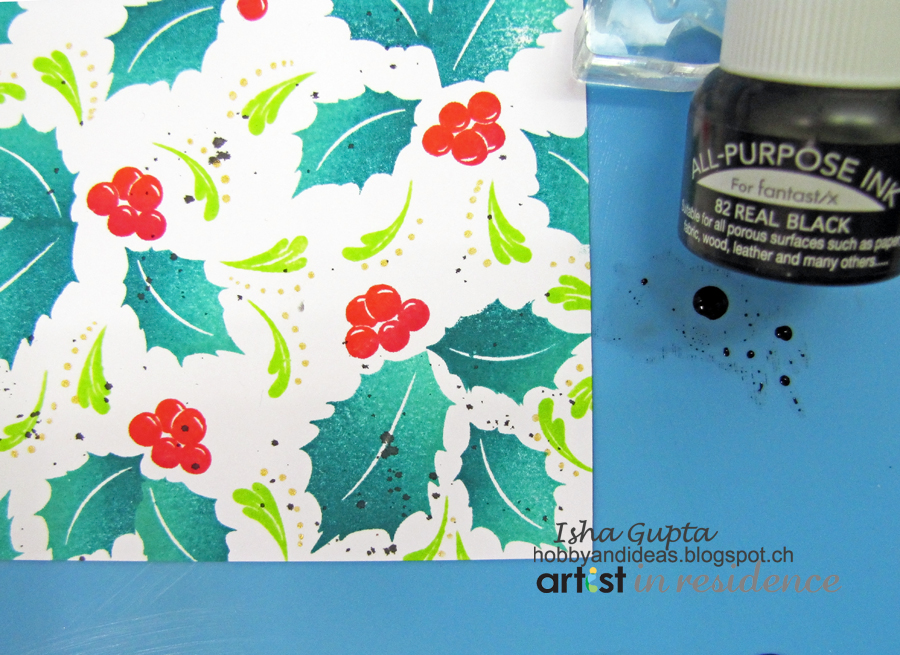
6. Take a tiny amount of Real Black All-Purpose ink onto the craft mat. Add a drop of water and flick it onto the panel using a paint brush.

7. Once dry, decorate the 2 sides by using the stitched borders die.

8. Stamp the Sentiment using VersaFine Onyx black ink. Tie gold thread around the stamped panel and adhere the sentiment onto it using 3D foam.

9. Adhere the panel to the cardbase.

This is how the close-up looks

AIR_2015_IG_Merry Christmas_cl

by Isha Gupta

Difficulty

Beginner - Intermediate

Time

1/2 hour + dry time

Materials Needed

Imagine Crafts featuring Tsukineko:

  • Kaleidacolor Ink: Caribbean Sea, Desert Heat
  • VersaFine Onyx Black ink
  • Delicata Golden Glitz
  • All Purpose Ink: Real Black
  • Craft Mat

Other

  • Stamp: The Ton (Holiday Flourishes)
  • Die: Lawn Fawn (Stitched Borders)
  • CardStock: Neenah Solar White
  • Others: Gold Sewing Thread, Scrapbook Adhesives by 3L – 3D Foam,  Paint brush No. 6 Round


Sign up for our newsletter
Facebook Pinterest Twitter YouTube Vimeo