Array ( [0] => 280 [ID] => 280 [1] => 1 [TYPEID] => 1 [2] => 0 [SECTIONID] => 0 [3] => project-details [MOD_NAME] => project-details [4] => [TITLE] => [5] => Project Details [META_TITLE] => StazOn Studio Glaze to Make a Smile Greeting Card [6] => [META_DESCRIPTION] => StazOn Studio Glaze to Make a Smile Greeting Card [7] => [META_KEYWORDS] => [8] => [BUTTON_TITLE] => [9] => [BODY] => [10] => [BODY_SIDE] => [11] => [MODULE_PROCESSING] => [12] => [MODULE_META] => [13] => project-details-head.php [MODULE_HEAD] => project-details-head.php [14] => project-details-body.php [MODULE_BODY] => project-details-body.php [15] => [MODULE_SIDE] => [16] => 0 [TOP_ORDER] => 0 [17] => 0 [HITS_UNIQUE] => 0 [18] => 0 [HITS_REPEAT] => 0 [19] => 0 [ROBOT_HITS] => 0 [20] => 0000-00-00 00:00:00 [LASTVIEWED] => 0000-00-00 00:00:00 [21] => 0000-00-00 00:00:00 [ROBOT_LASTVIEWED] => 0000-00-00 00:00:00 [22] => 0.70 [PRIORITY] => 0.70 [23] => 1 [SITEMAP] => 1 [24] => 1 [ACTIVE] => 1 [25] => 1 [DISPLAY_TITLE] => 1 [26] => 0 [SSL_MODE] => 0 [27] => 0 [EDITABLE] => 0 [28] => 0 [DELETABLE] => 0 [29] => 2013-11-05 00:00:00 [LASTUPDATED] => 2013-11-05 00:00:00 [30] => 2013-11-05 00:00:00 [CREATED] => 2013-11-05 00:00:00 )
Imagine Crafts
LearnMakeCommunityShop

StazOn Studio Glaze to Make a Smile Greeting Card

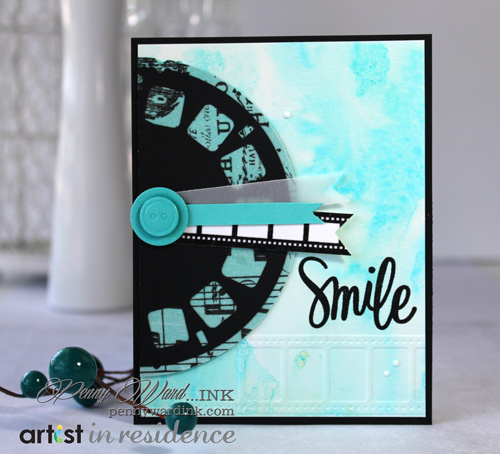
Fun embossing, cute washi tape and for those in my generation, a super fun Viewmaster! 


StazOn Studio Glaze to Make a Smile Greeting Card

Directions:

2015_PW_artist_Picture-Day_step1   2015_PW_artist_Picture-Day_step2

1.  Cut watercolor paper 4 x 5.25 inches. Using a large paintbrush, dampen the whole panel with water. Place a large drop of StazOn Studio Glaze Blue Hawaii at top of paper. Take your really wet paintbrush and pounce the Blue Hawaii until it starts running down the paper. Continue this process until you are happy. Let dry.

2015_PW_artist_Picture-Day_step3

2.  Do the exact same process with Fireworks Bahama Blue. Let dry. Emboss this panel with the embossing folder. Adhere this panel to a card base of Black cardstock trimmed to 4.25 x 11 inches then folded in half.

2015_PW_artist_Picture-Day_step4

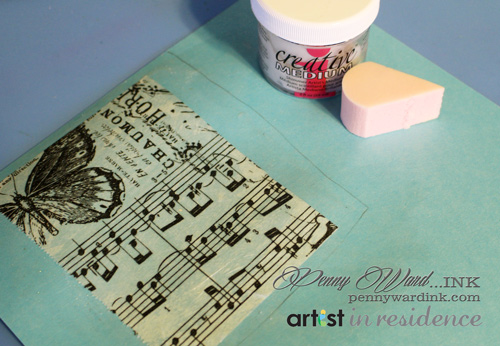
3.  On Light Blue cardstock, sponge on Creative Medium Shimmer, apply tissue and smooth out with more Creative Medium shimmer using a sponge. Let dry.

4.  Cut Viewmaster embellishment with Silhouette Cameo and Black cardstock. Use the above "Tissue" cardstock for the Viewmaster base cut. Adhere these together, trim about half off and adhere to card front.

2015_PW_artist_Picture-Day_step5

5. Die cut buttons and coat with irRESISTible Pico Shimmer, let dry. Cut strips of blue cardstock, vellum and washi tape, trim ends and adhere to cardfront over the Viewmaster center. Add buttons with foam adhesive. Stamp sentiment with VersaFine Onyx Black ink and add Pico Wedding Dress dots as desired.

 
by Penny Ward

Difficulty

Intermediate

Time

45 min + dry time

Materials Needed

Imagine Crafts featuring Tsukineko: 

Other

  • My Favorite Things:  Buttons Galore die
  • Darice:  Movie Theme embossing folder
  • Tim Holtz:  Tissue Wrap
  • Simon Says Stamp:  Happy and Smile stamp set
  • Silhouette Cameo & Viewmaster cut file
  • Miscellaneous:  Watercolor paper, Vellum, Black cardstock, Light Blue cardstock, Favorite adhesive


Sign up for our newsletter
Facebook Pinterest Twitter YouTube Vimeo