Array ( [0] => 280 [ID] => 280 [1] => 1 [TYPEID] => 1 [2] => 0 [SECTIONID] => 0 [3] => project-details [MOD_NAME] => project-details [4] => [TITLE] => [5] => Project Details [META_TITLE] => Canisters With A French Flair - Kitchen Crafts [6] => [META_DESCRIPTION] => Canisters With A French Flair - Kitchen Crafts [7] => [META_KEYWORDS] => [8] => [BUTTON_TITLE] => [9] => [BODY] => [10] => [BODY_SIDE] => [11] => [MODULE_PROCESSING] => [12] => [MODULE_META] => [13] => project-details-head.php [MODULE_HEAD] => project-details-head.php [14] => project-details-body.php [MODULE_BODY] => project-details-body.php [15] => [MODULE_SIDE] => [16] => 0 [TOP_ORDER] => 0 [17] => 0 [HITS_UNIQUE] => 0 [18] => 0 [HITS_REPEAT] => 0 [19] => 0 [ROBOT_HITS] => 0 [20] => 0000-00-00 00:00:00 [LASTVIEWED] => 0000-00-00 00:00:00 [21] => 0000-00-00 00:00:00 [ROBOT_LASTVIEWED] => 0000-00-00 00:00:00 [22] => 0.70 [PRIORITY] => 0.70 [23] => 1 [SITEMAP] => 1 [24] => 1 [ACTIVE] => 1 [25] => 1 [DISPLAY_TITLE] => 1 [26] => 0 [SSL_MODE] => 0 [27] => 0 [EDITABLE] => 0 [28] => 0 [DELETABLE] => 0 [29] => 2013-11-05 00:00:00 [LASTUPDATED] => 2013-11-05 00:00:00 [30] => 2013-11-05 00:00:00 [CREATED] => 2013-11-05 00:00:00 )
Imagine Crafts
LearnMakeCommunityShop

Canisters With A French Flair - Kitchen Crafts

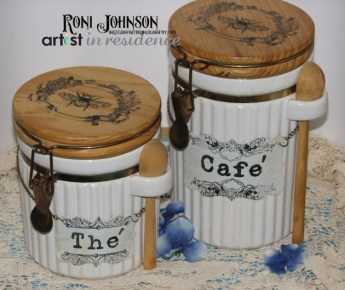
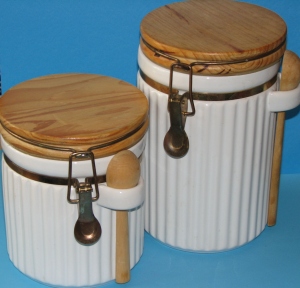
I found this nifty pair of canisters at a flea market recently and I thought it would be fun to kick it up a notch and give them a little French flair.


Canisters With A French Flair - Kitchen Crafts

Directions:

1. Wash and dry the canisters completely.

2015_July_RJ_FrenchCanister_01

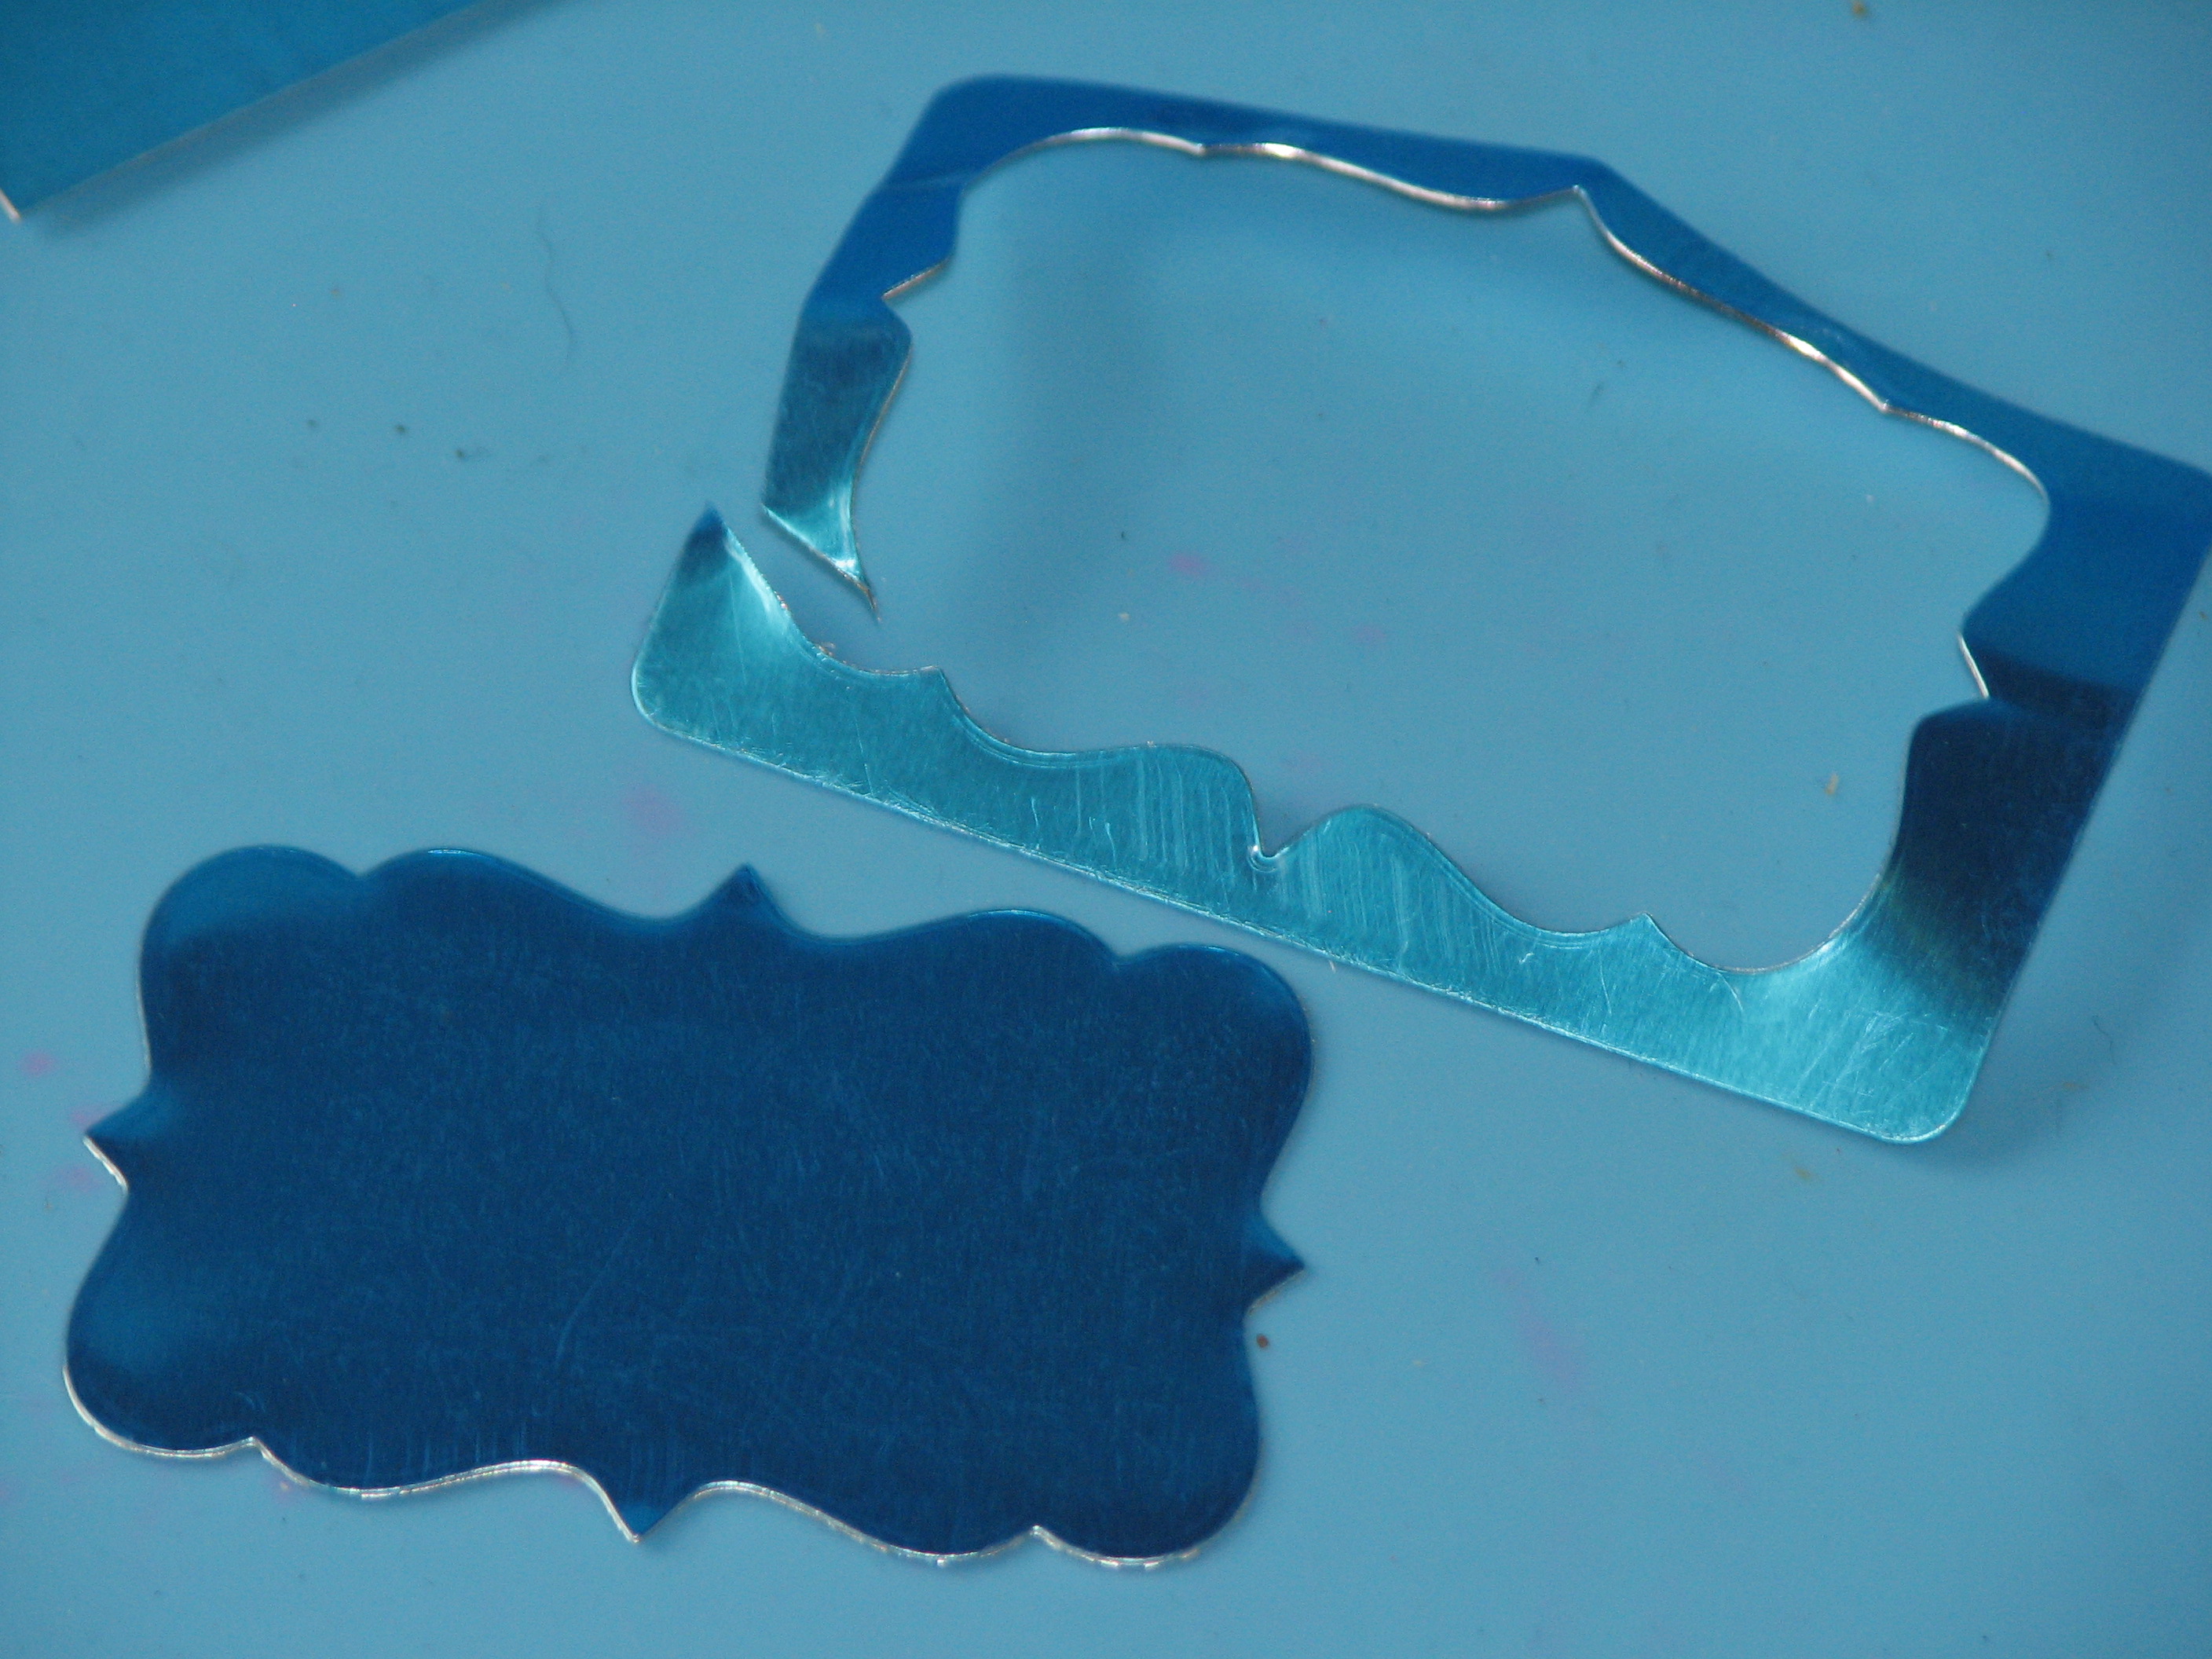
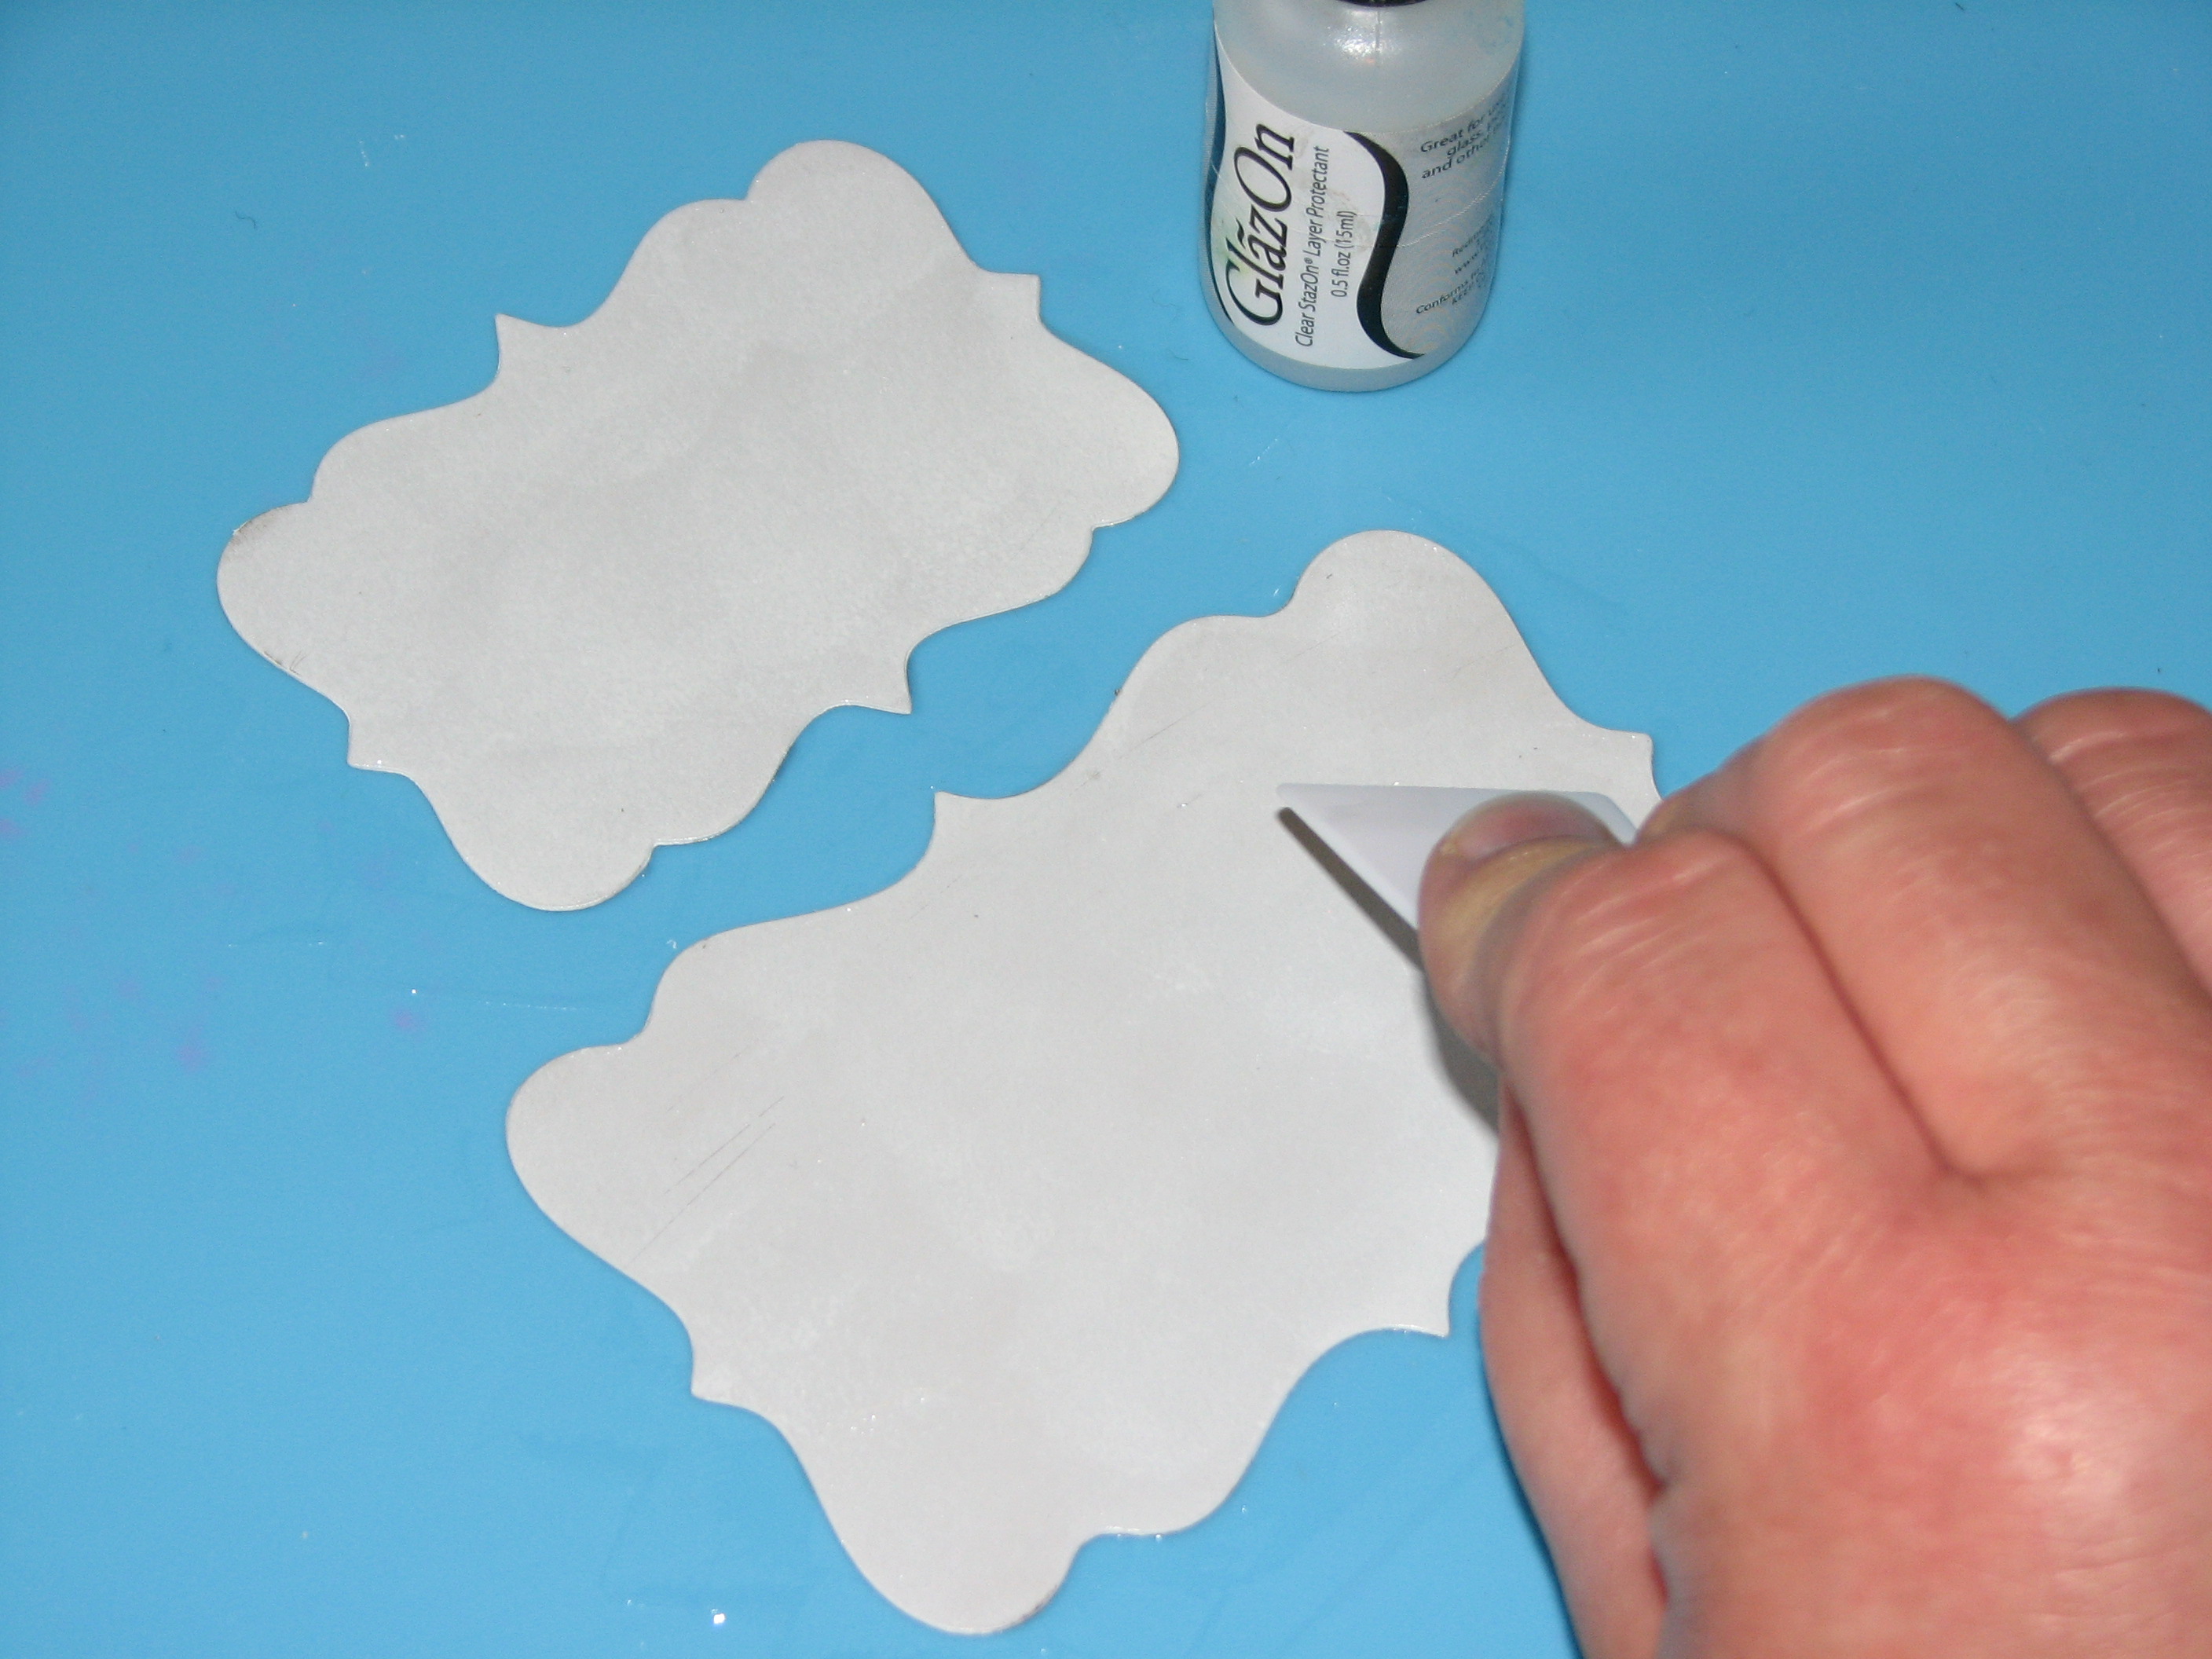
2. Die-cut desired size label from an ATC size piece of SHEET Metal (blue side up).  Depending on the die used it may or may not cut completely through but it will cut it enough that you should be able to easily remove the excess metal.

2015_July_RJ_FrenchCanister_02  2015_July_RJ_FrenchCanister_03 2015_July_RJ_FrenchCanister_04

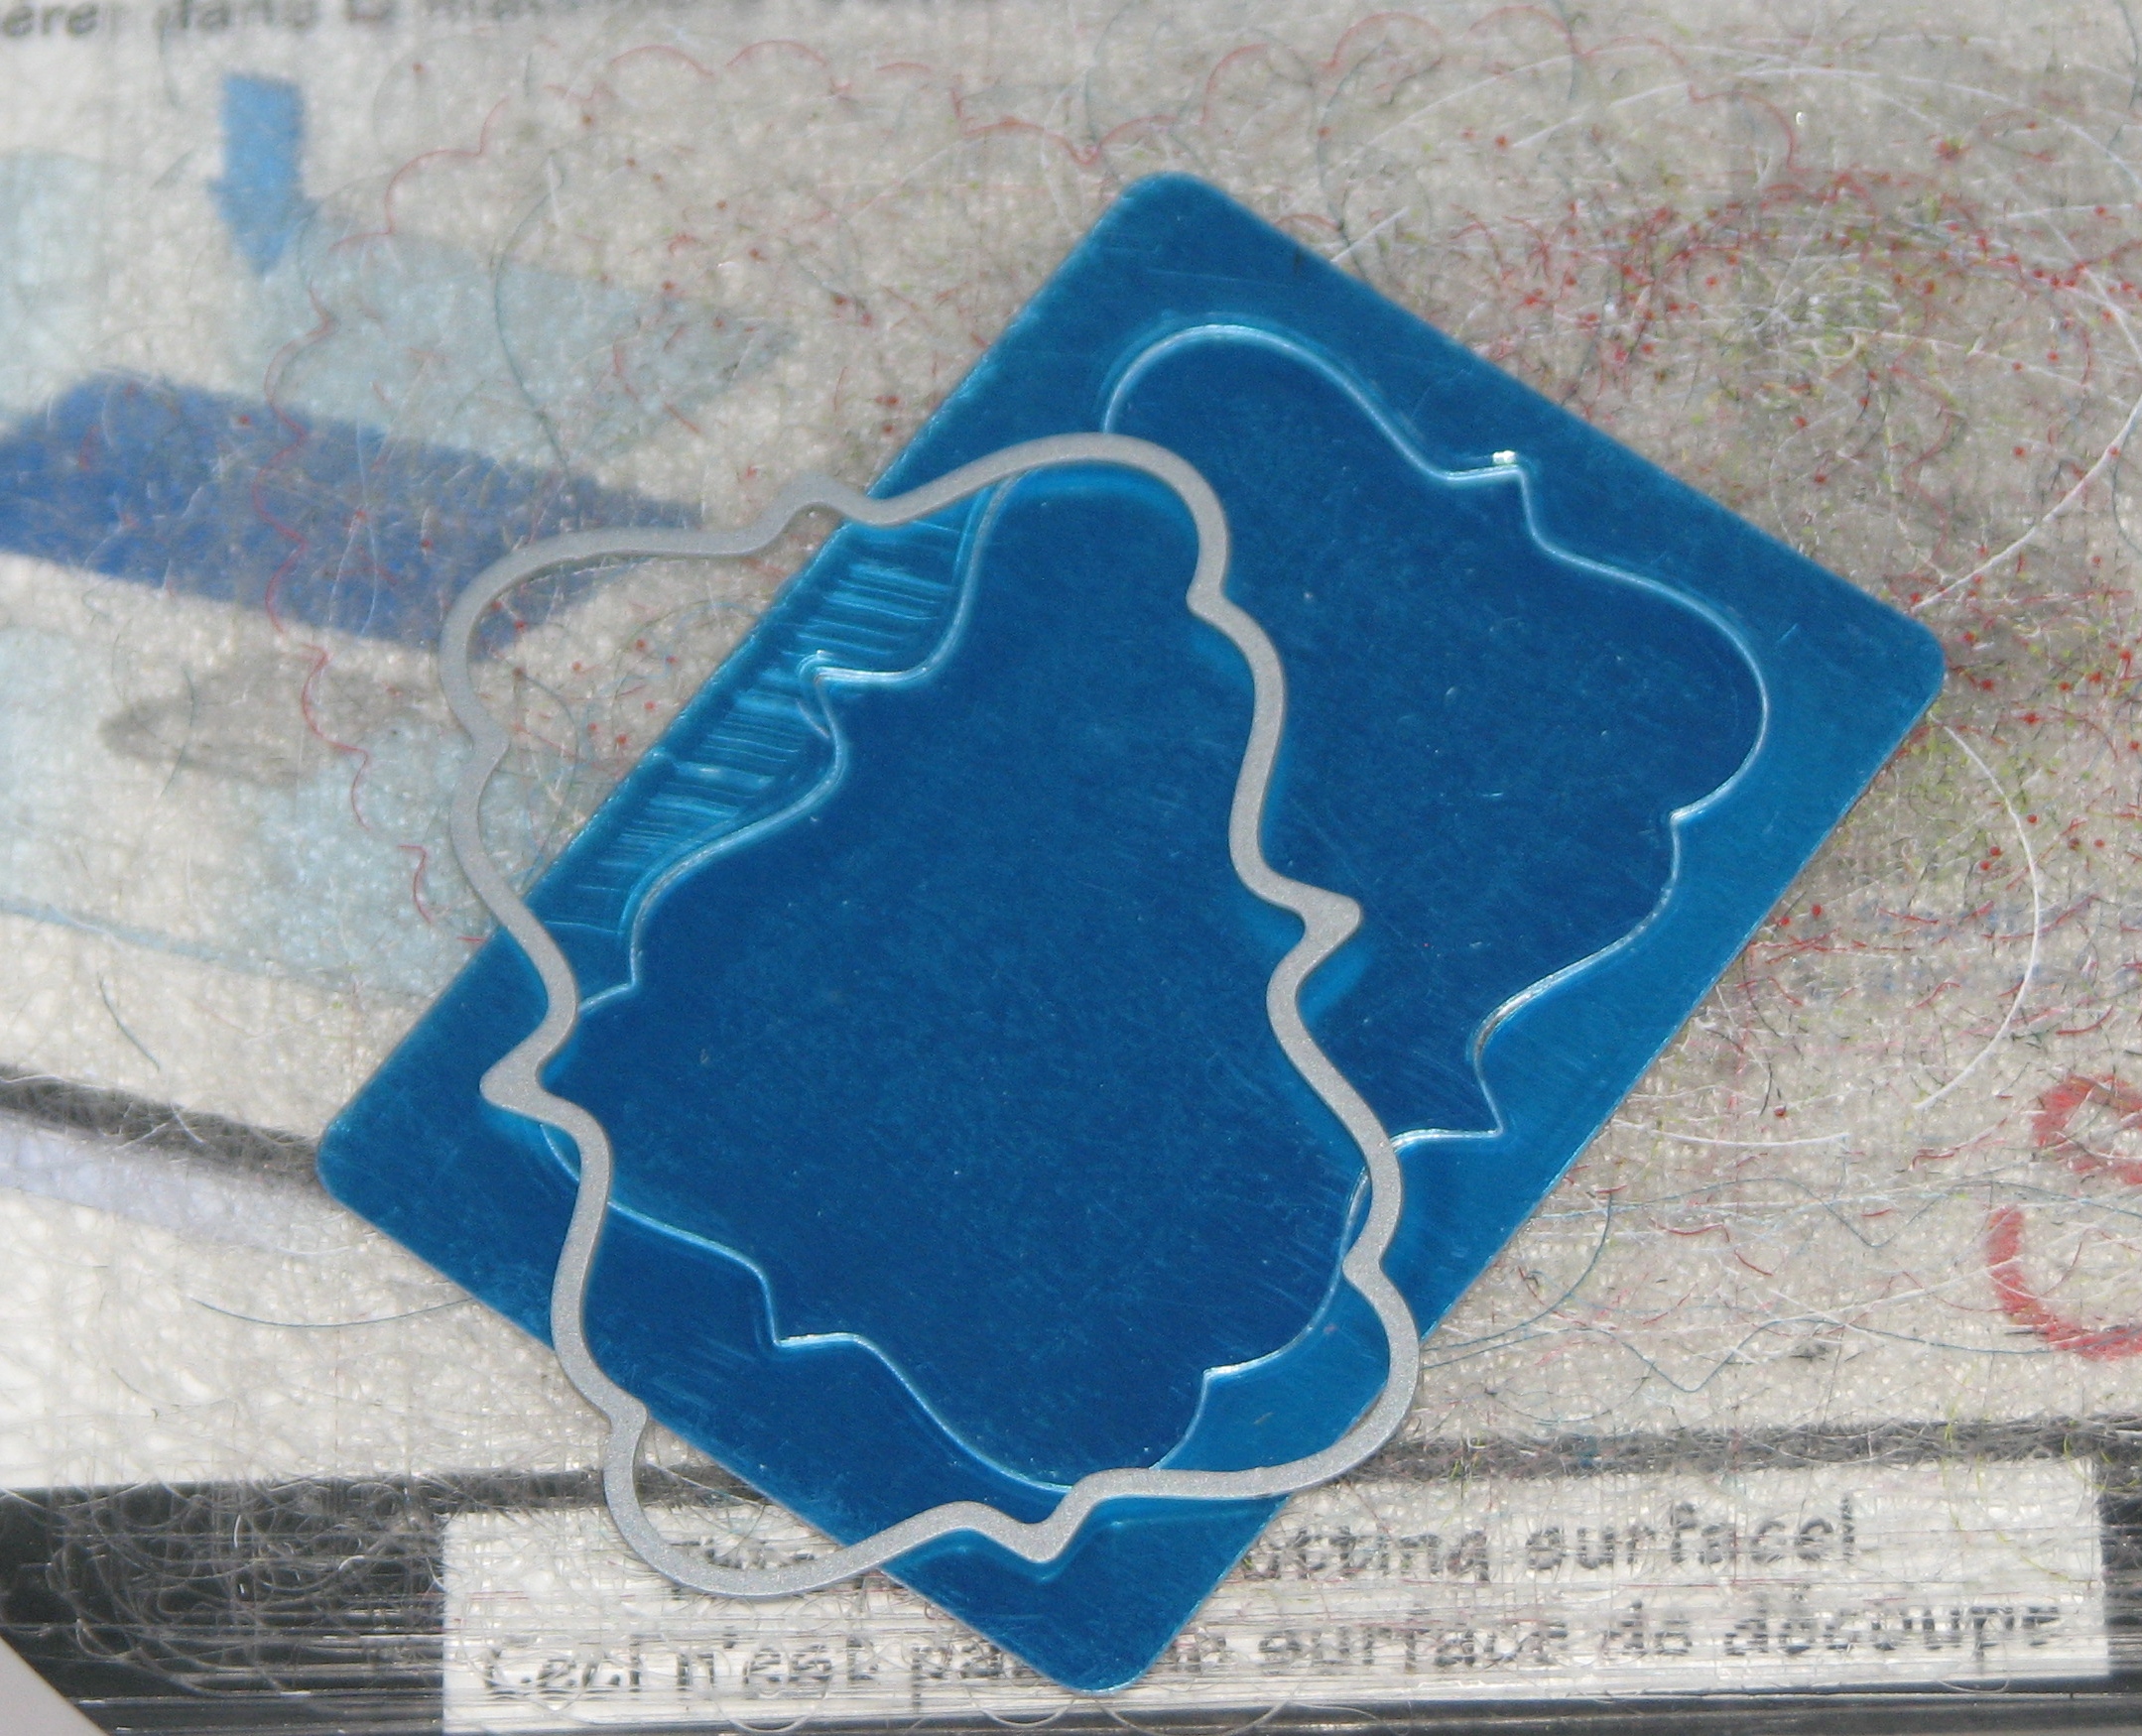
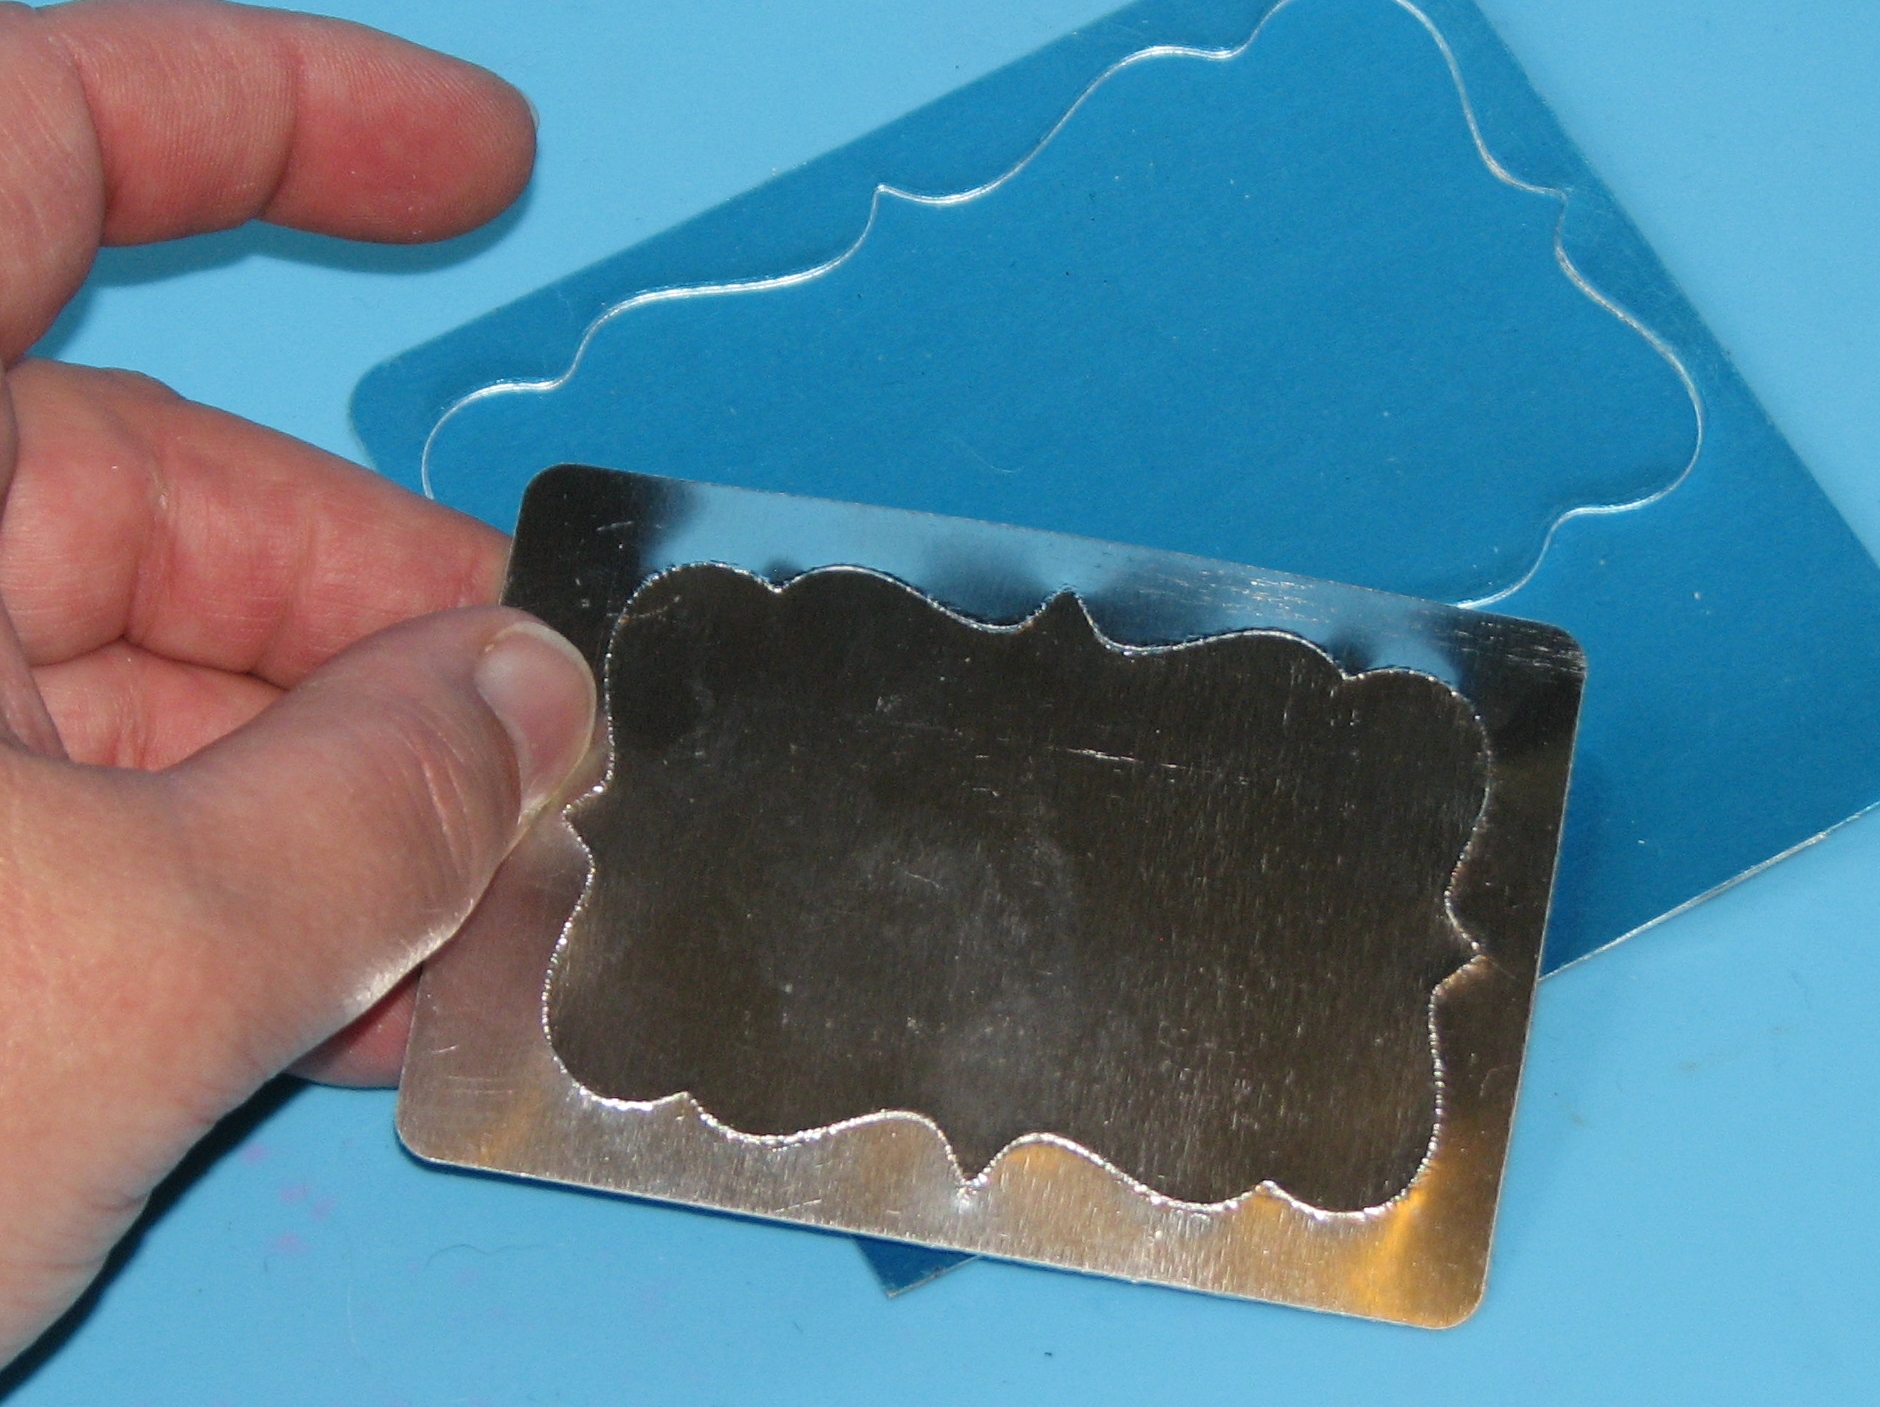
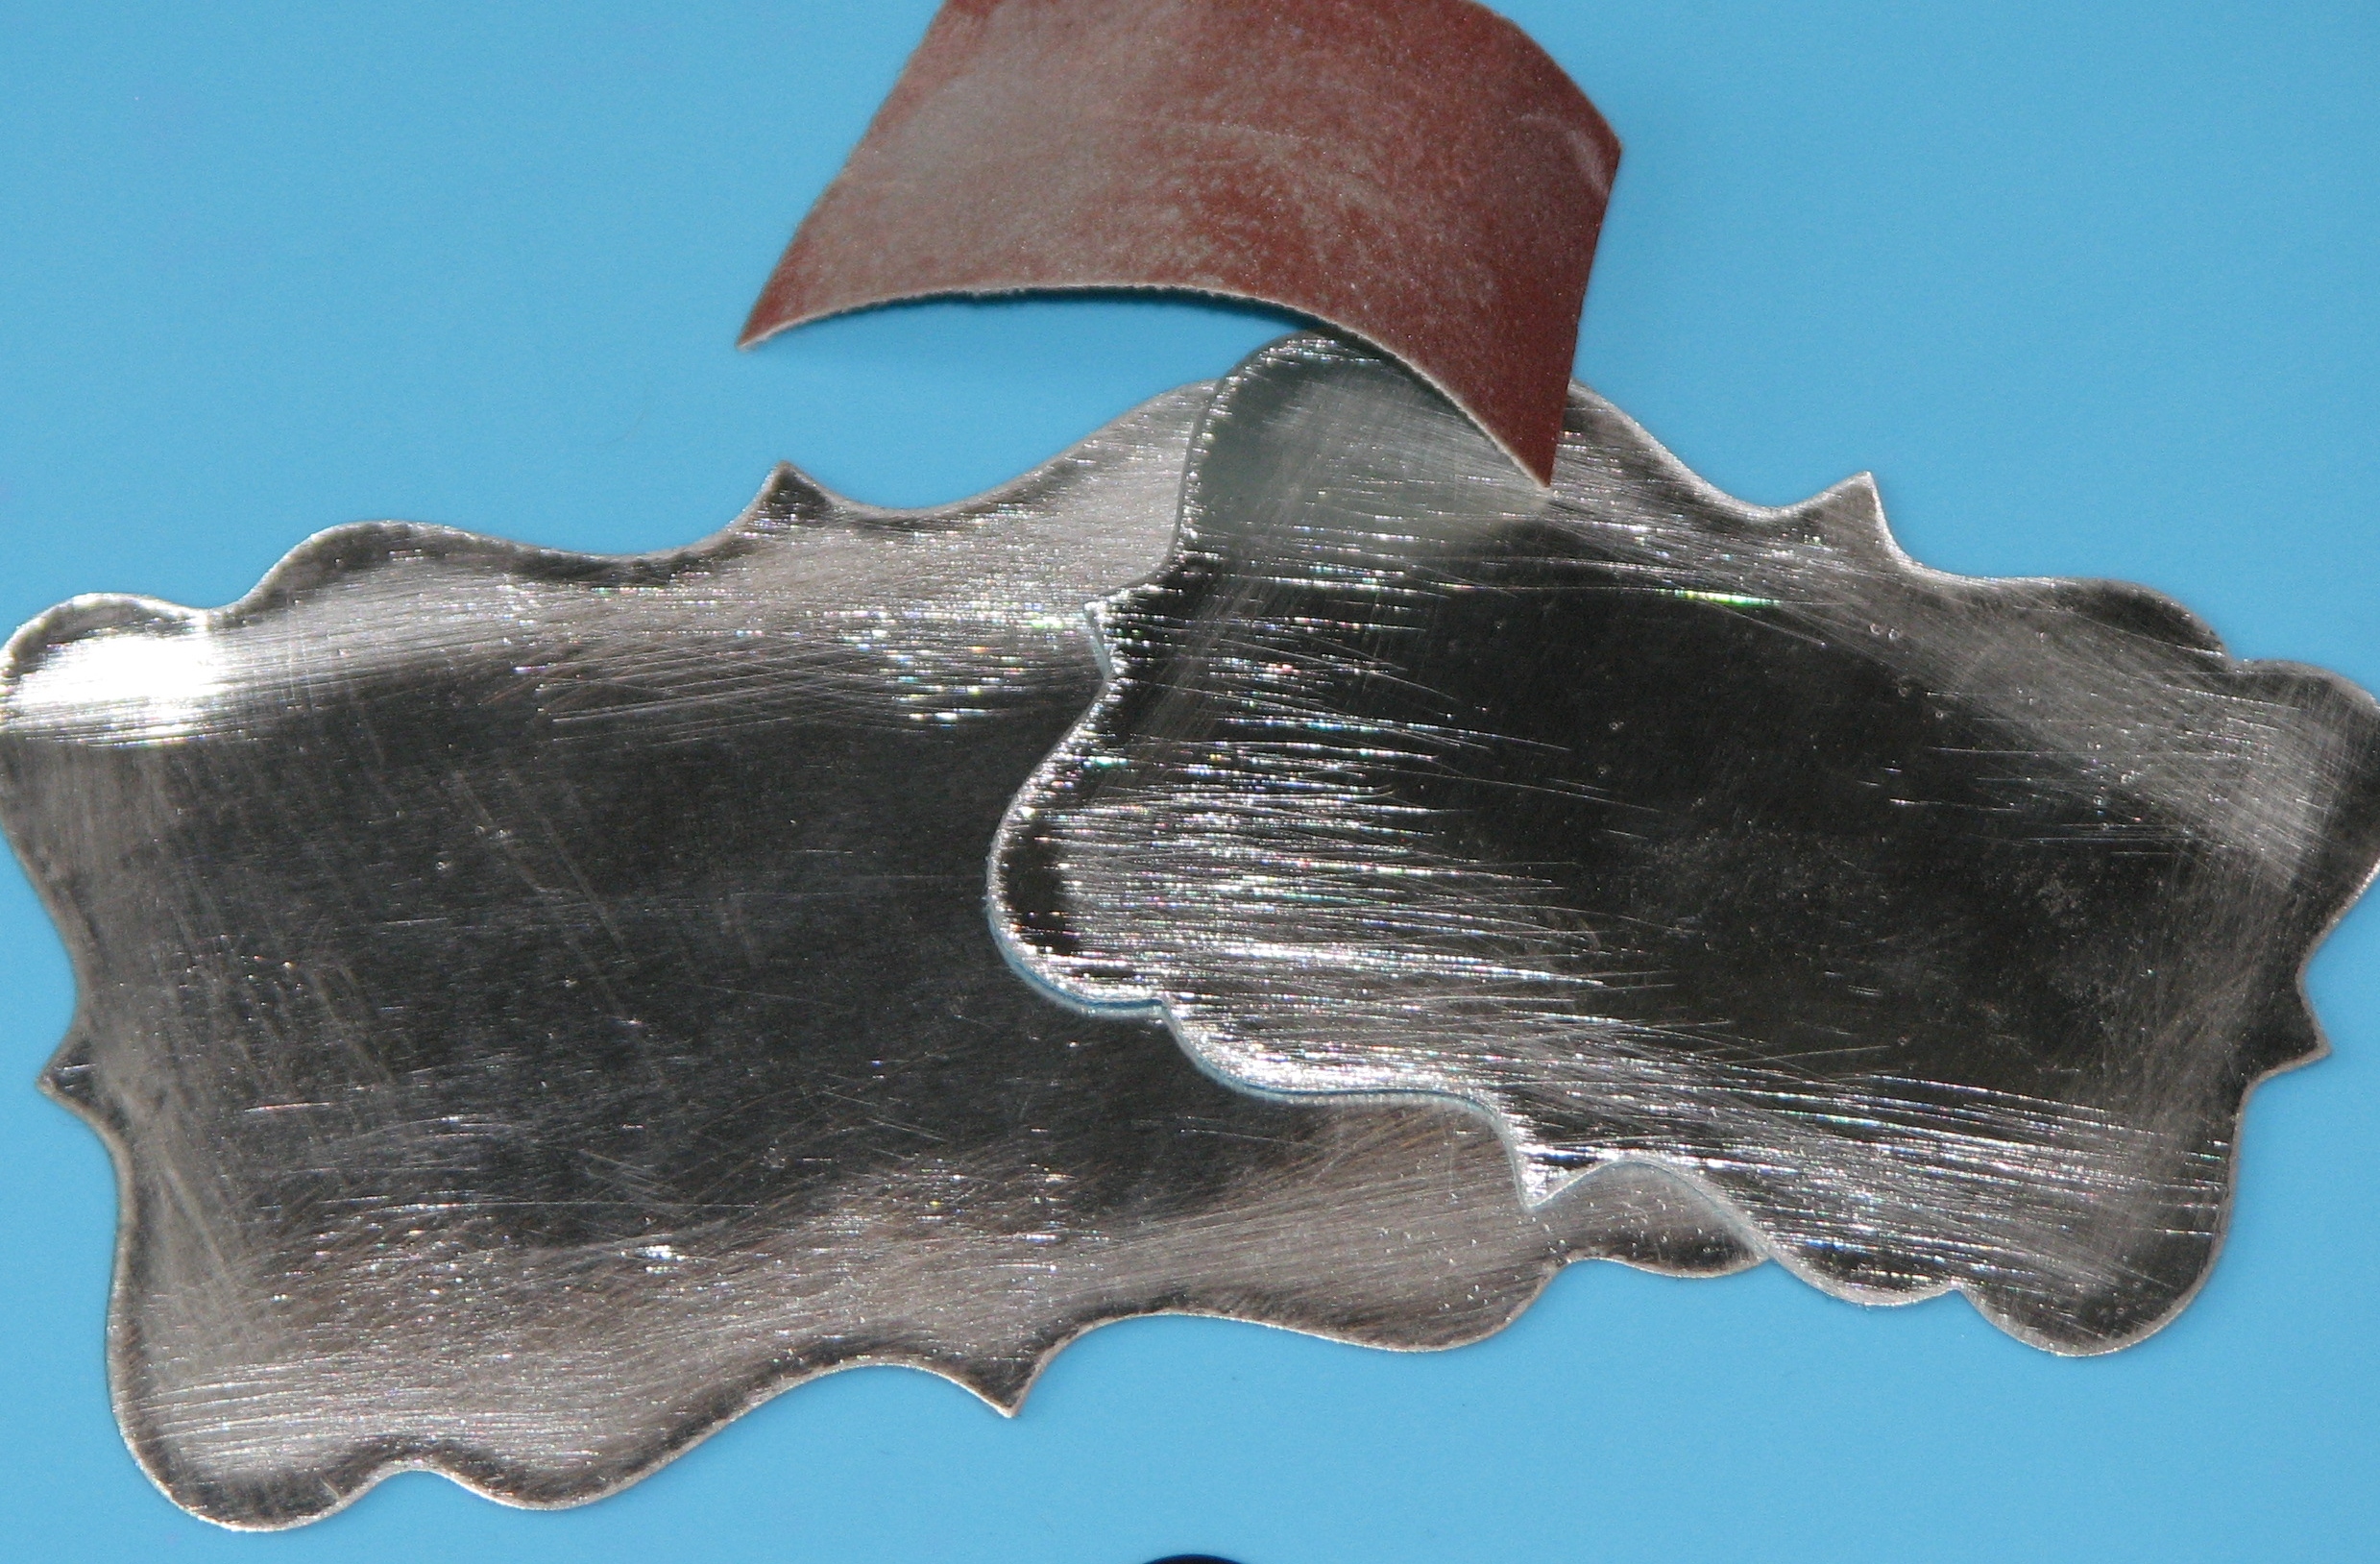
3. Sand the back side of the die-cut label to remove any sharp edges.

2015_July_RJ_FrenchCanister_05

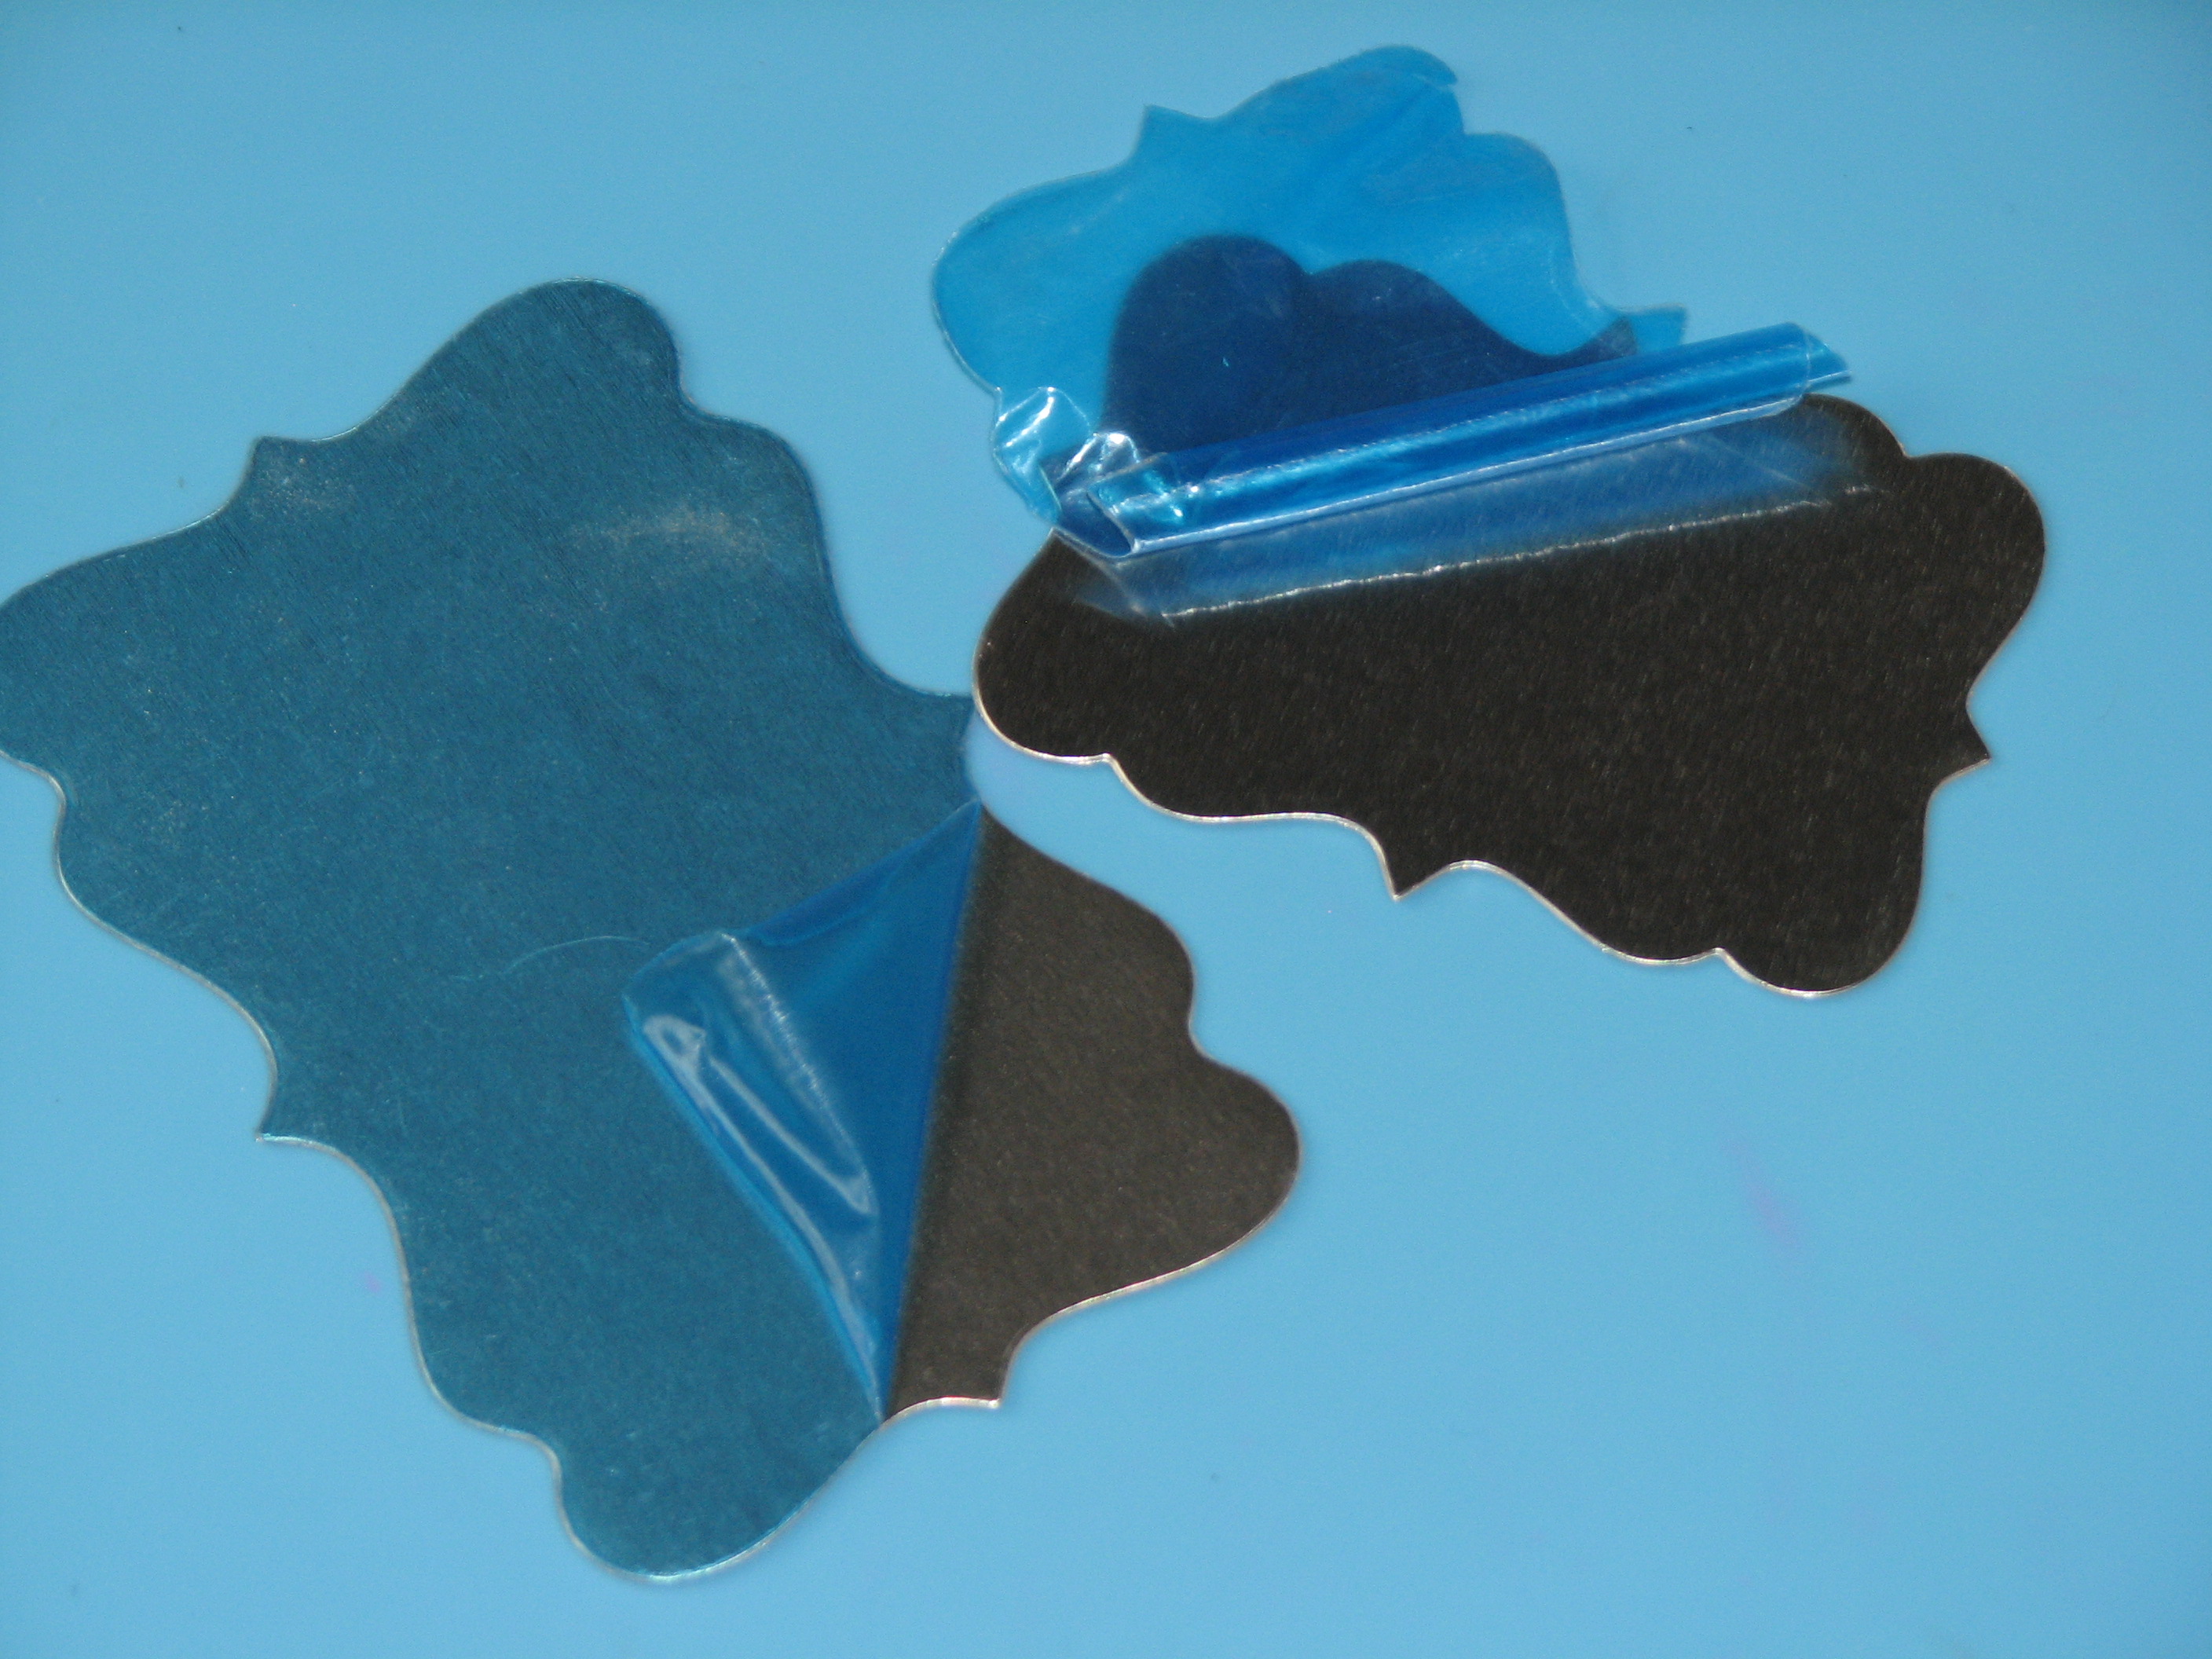
4. Flip the label over and remove the protective blue film.

2015_July_RJ_FrenchCanister_06

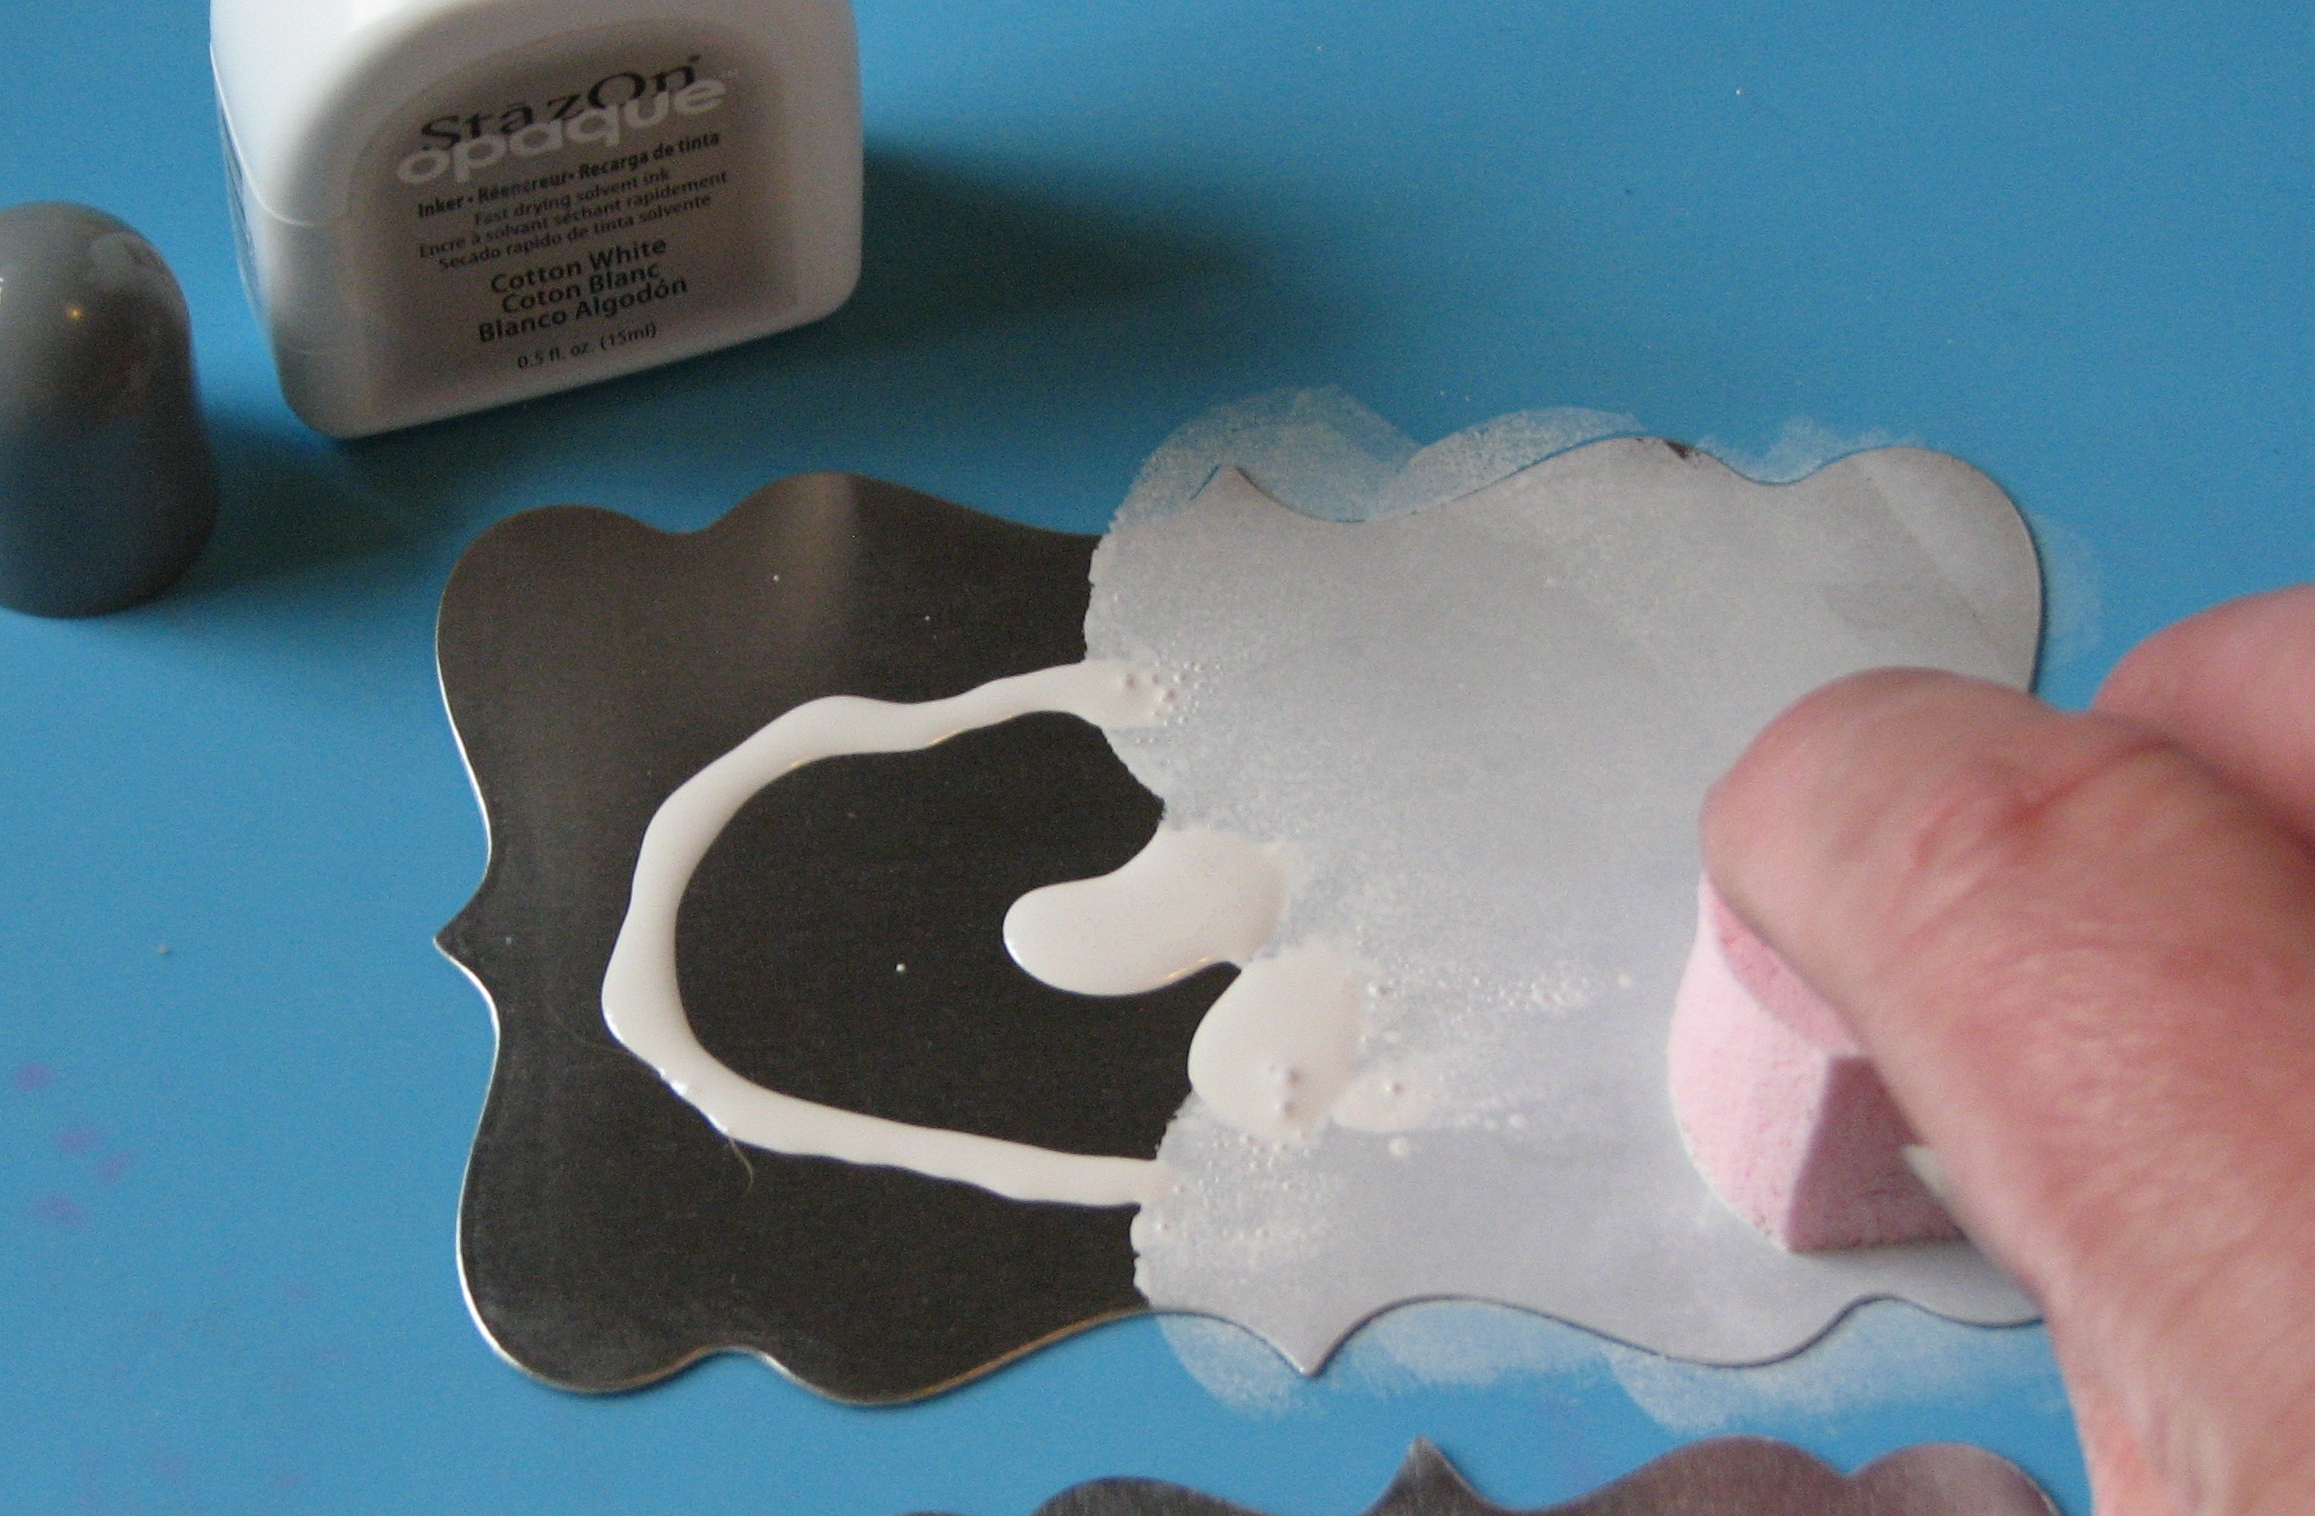
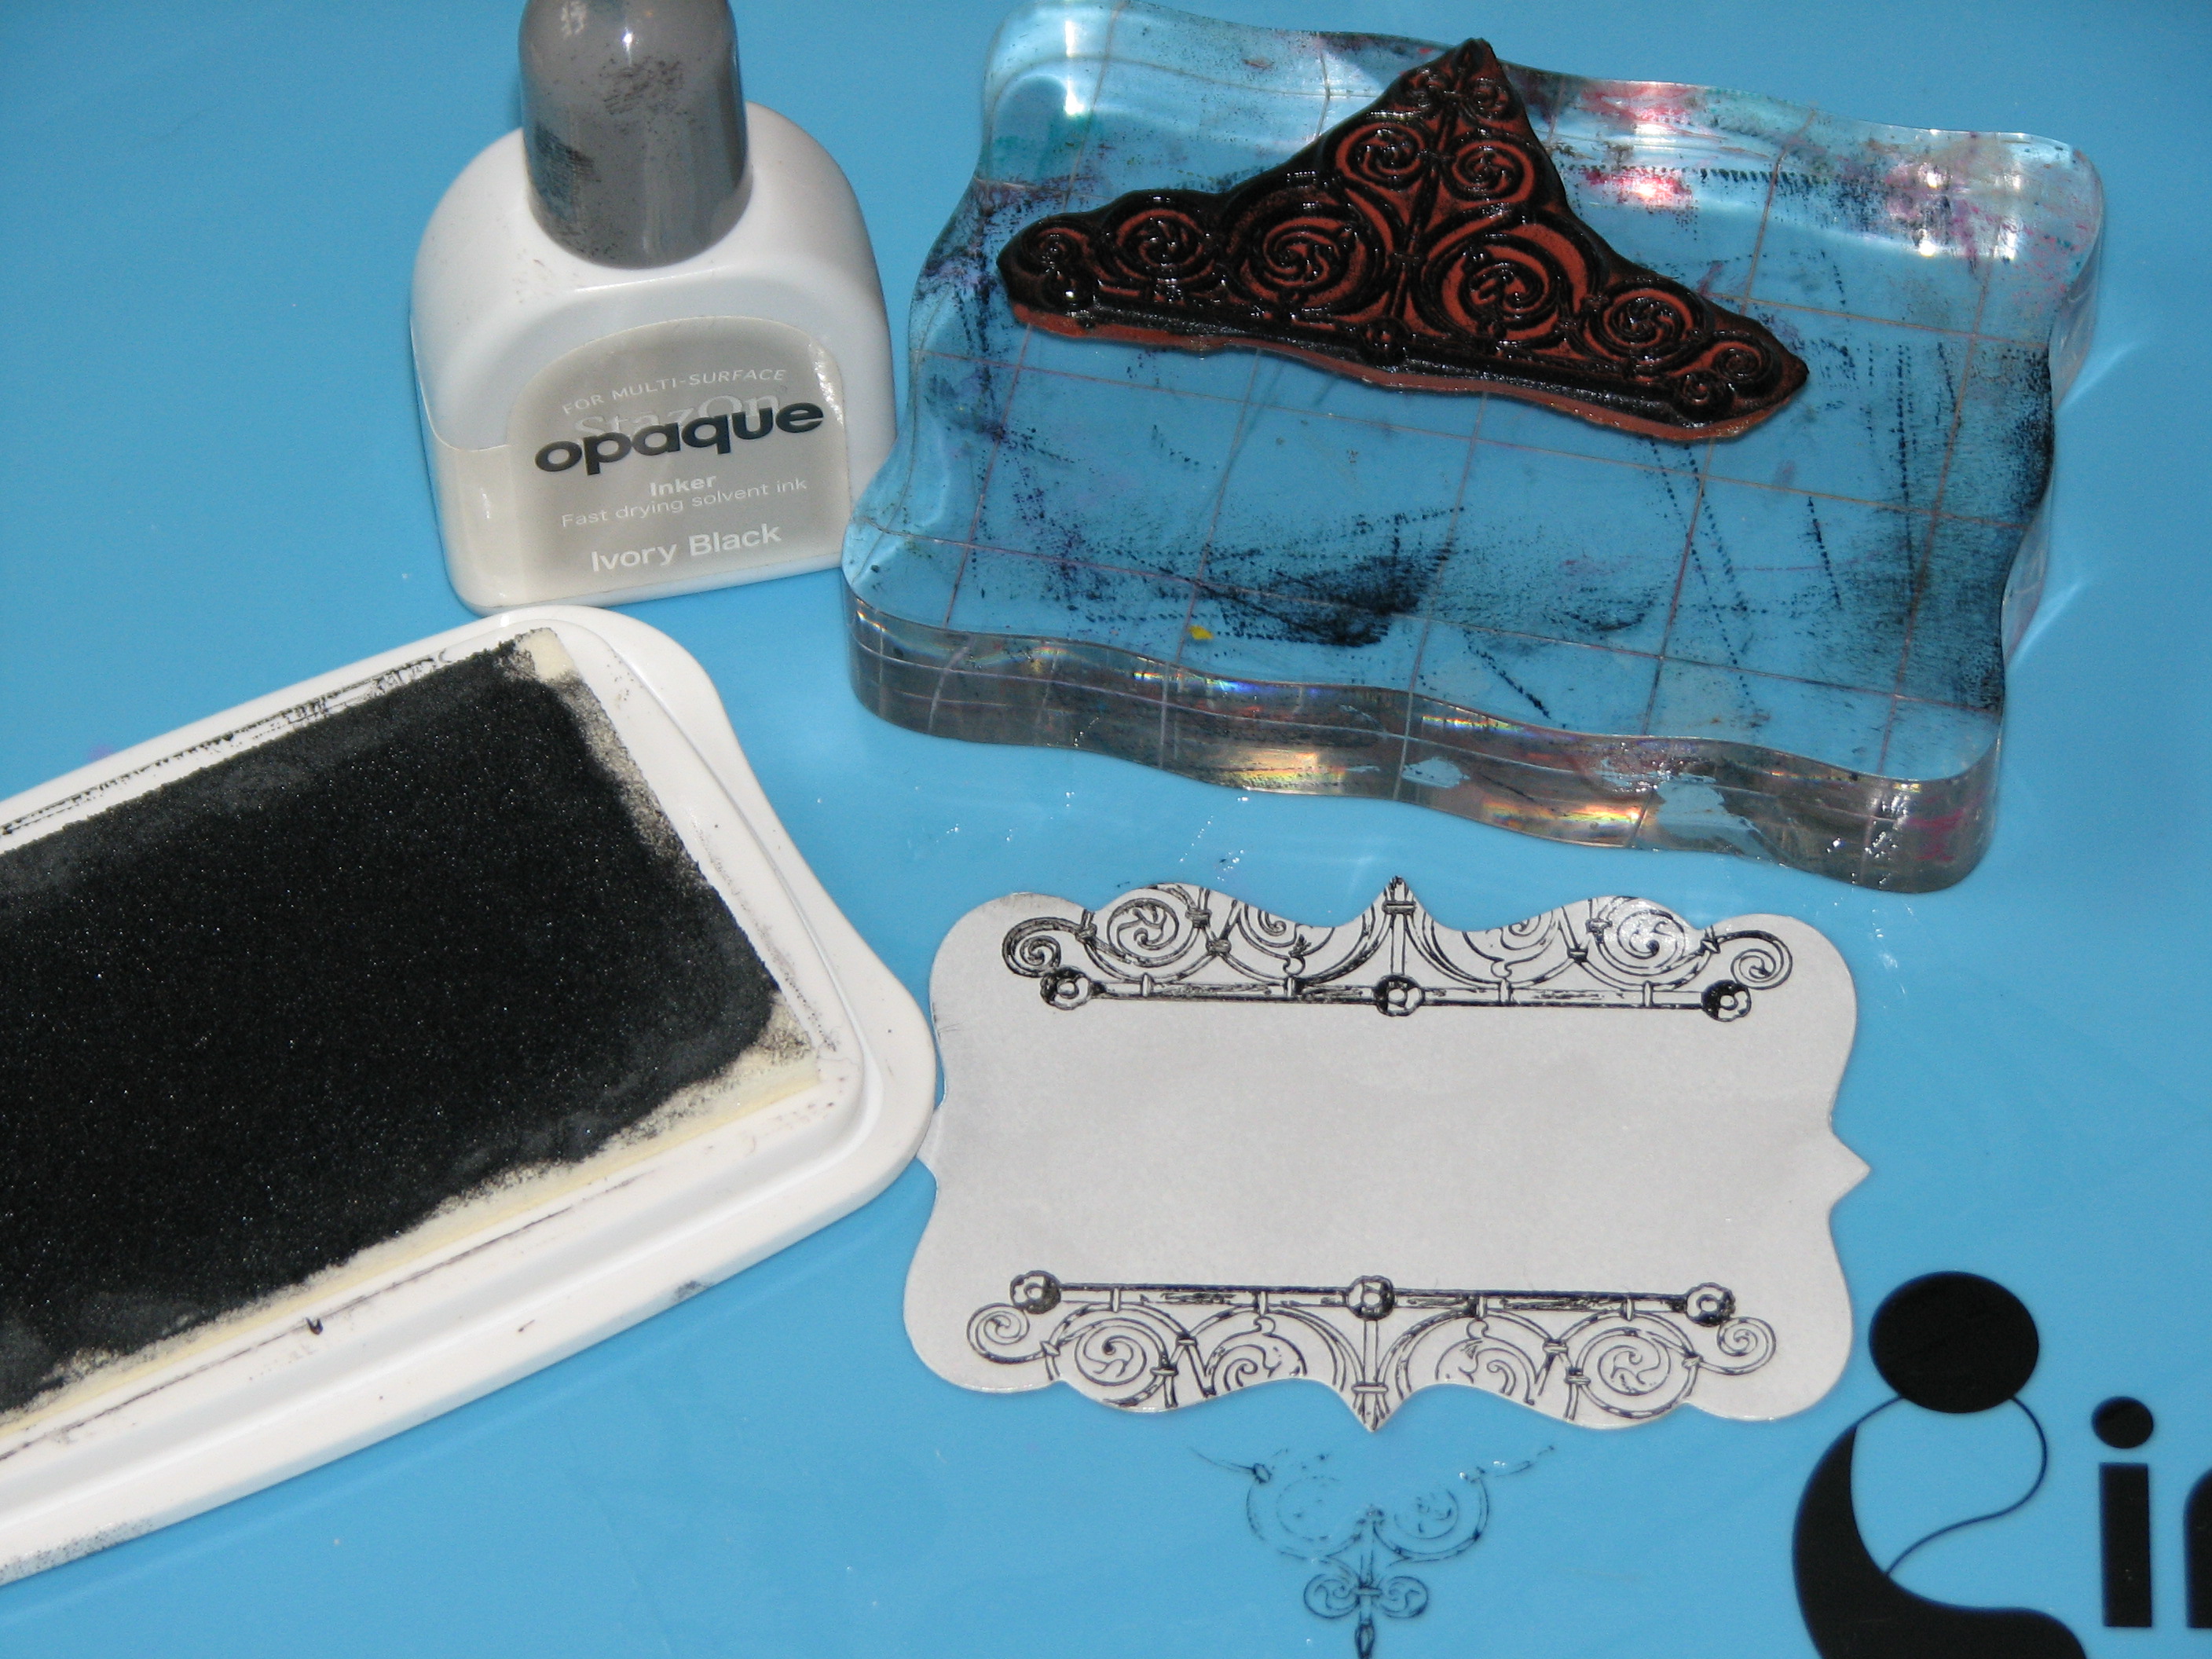
5. Shake the StazOn Cotton White Opaque Inker bottle to ensure it’s mixed, then squirt a bit of the ink onto the metal label and spread around using an Ink Blusher until the entire label has been covered.

2015_July_RJ_FrenchCanister_07 2015_July_RJ_FrenchCanister_08

6. Apply a thin layer of Clear StazOn GlazOn sealant.

2015_July_RJ_FrenchCanister_09

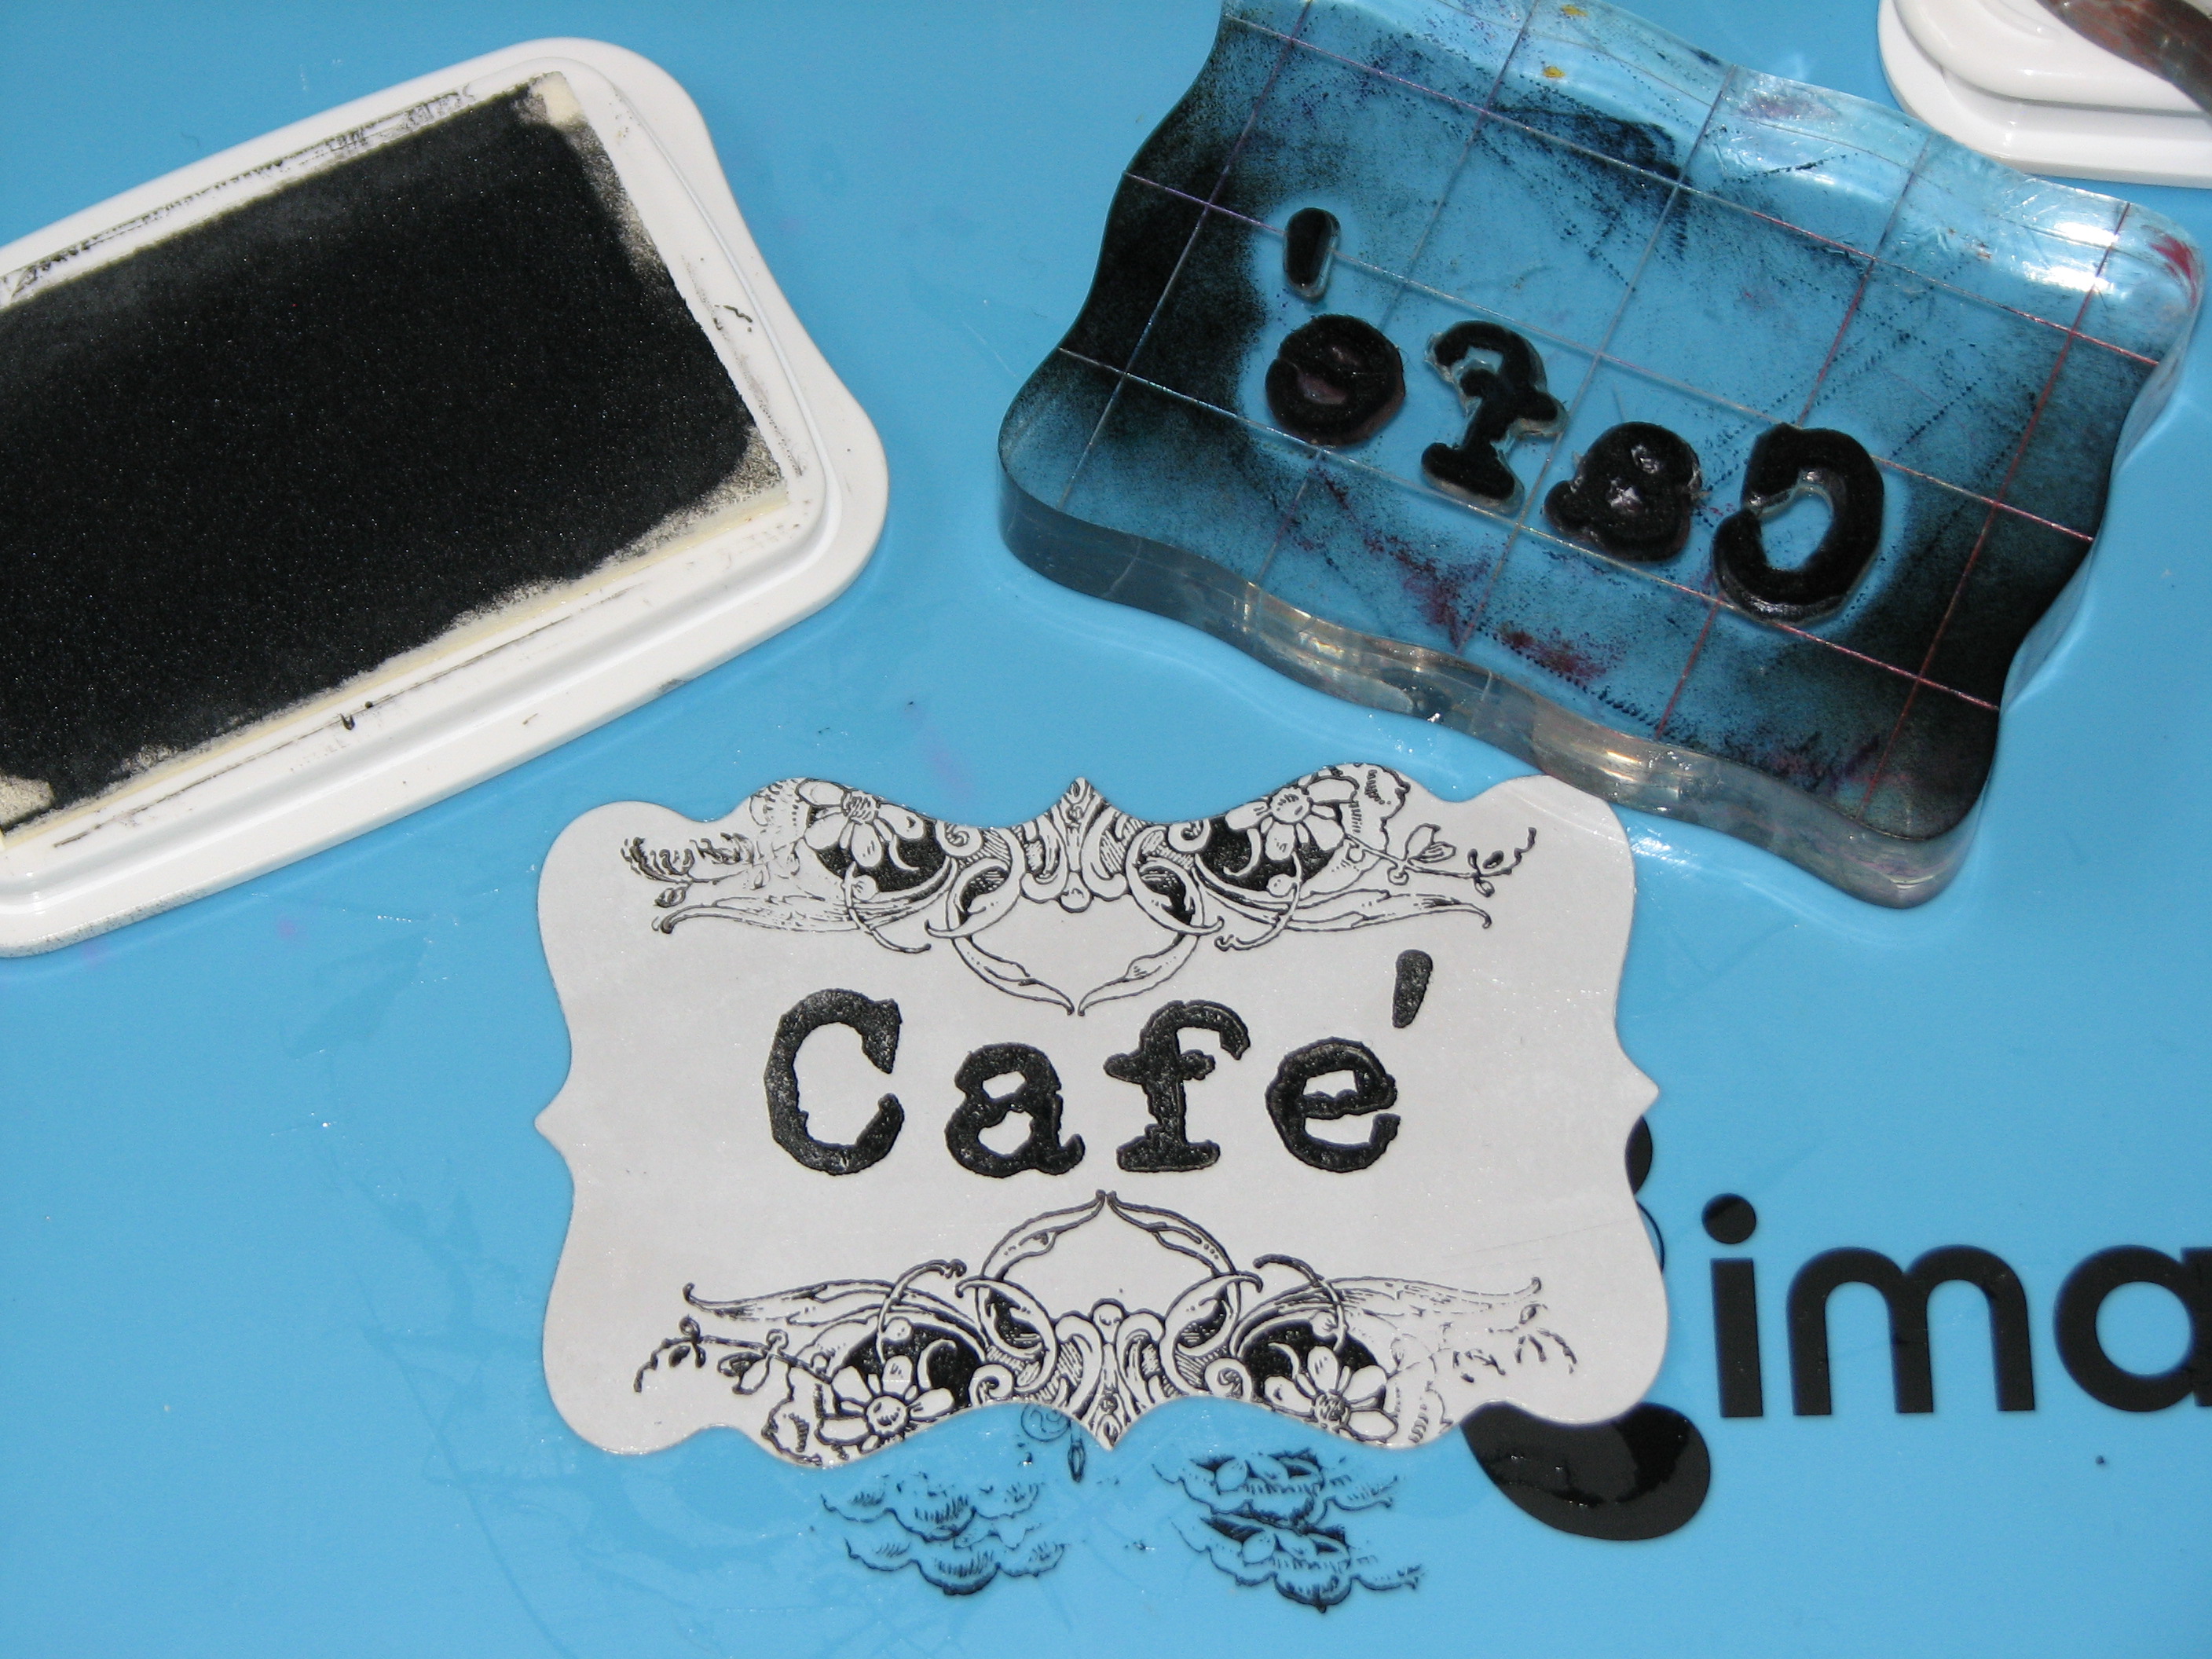
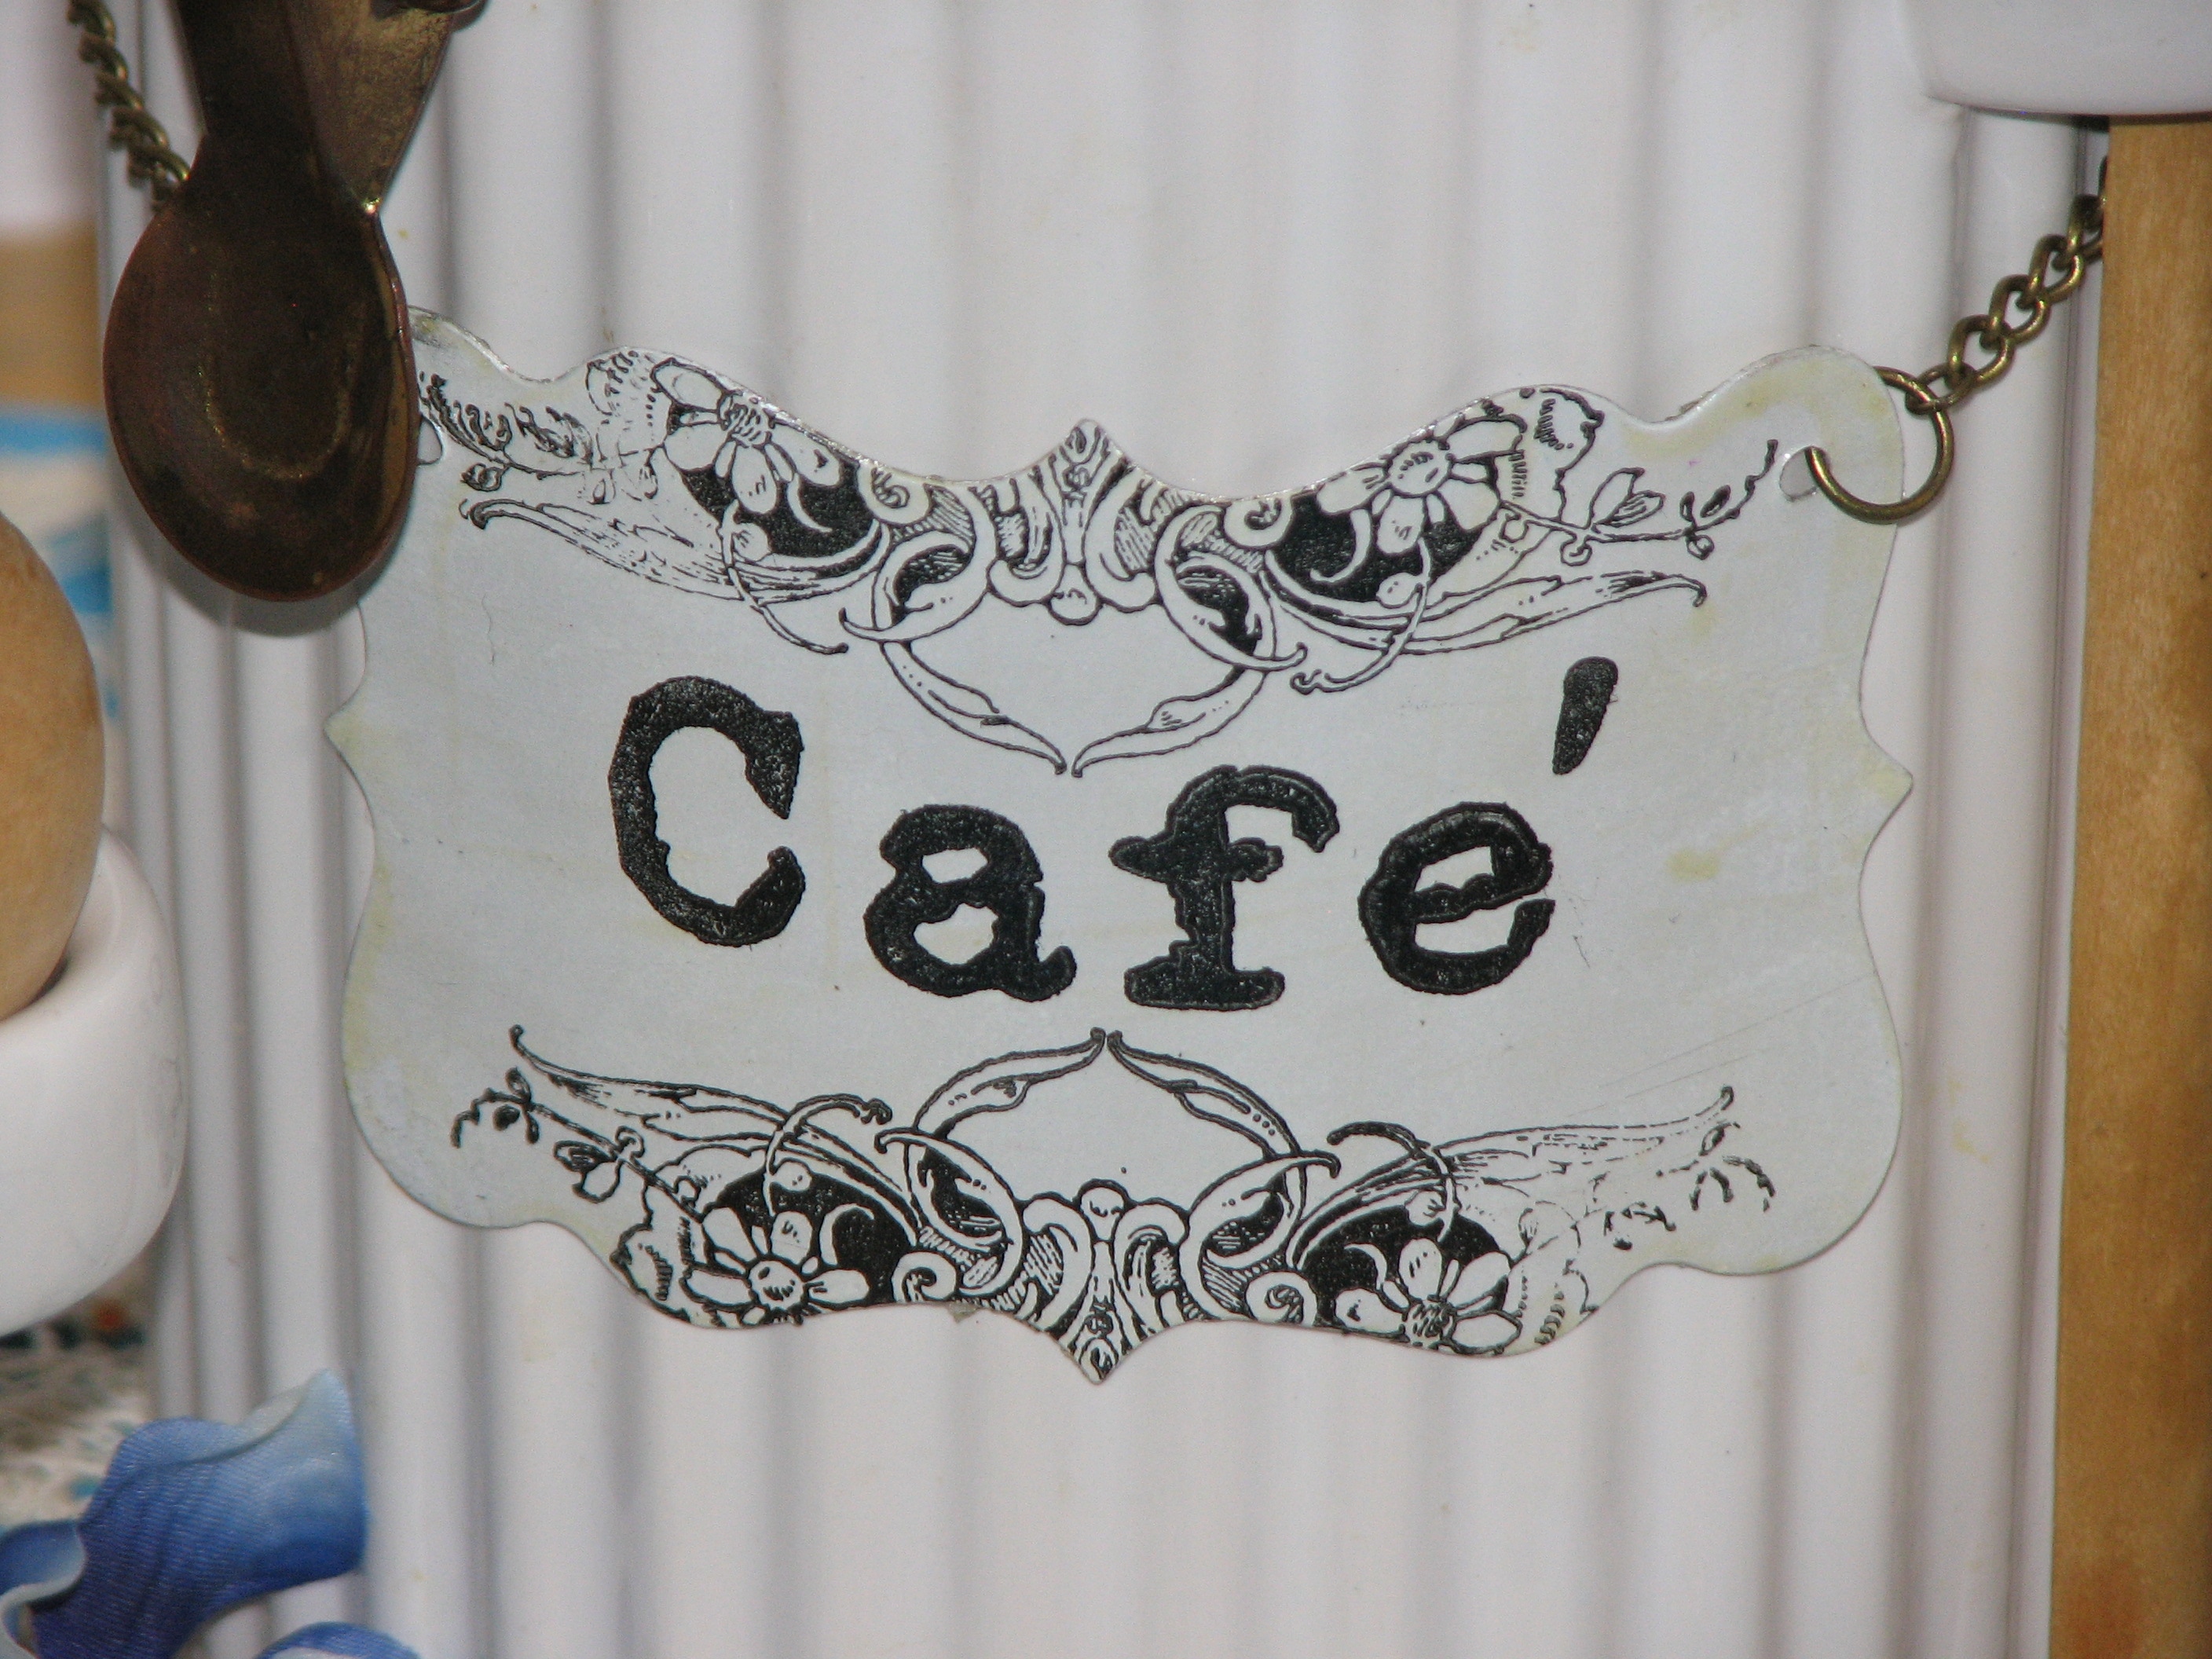
7. Stamp decorative flourishes with Ivory Black Opaque StazOn ink. Let dry and apply a layer of Clear GlazOn.

8. Stamp text again using Ivory Black Opaque StazOn ink.

2015_July_RJ_FrenchCanister_10 2015_July_RJ_FrenchCanister_11

9. Apply the final layer of GlazOn Clear for a fresh clean look or Antique GlazOn for a warm vintage feel.

2015_July_RJ_FrenchCanister_12

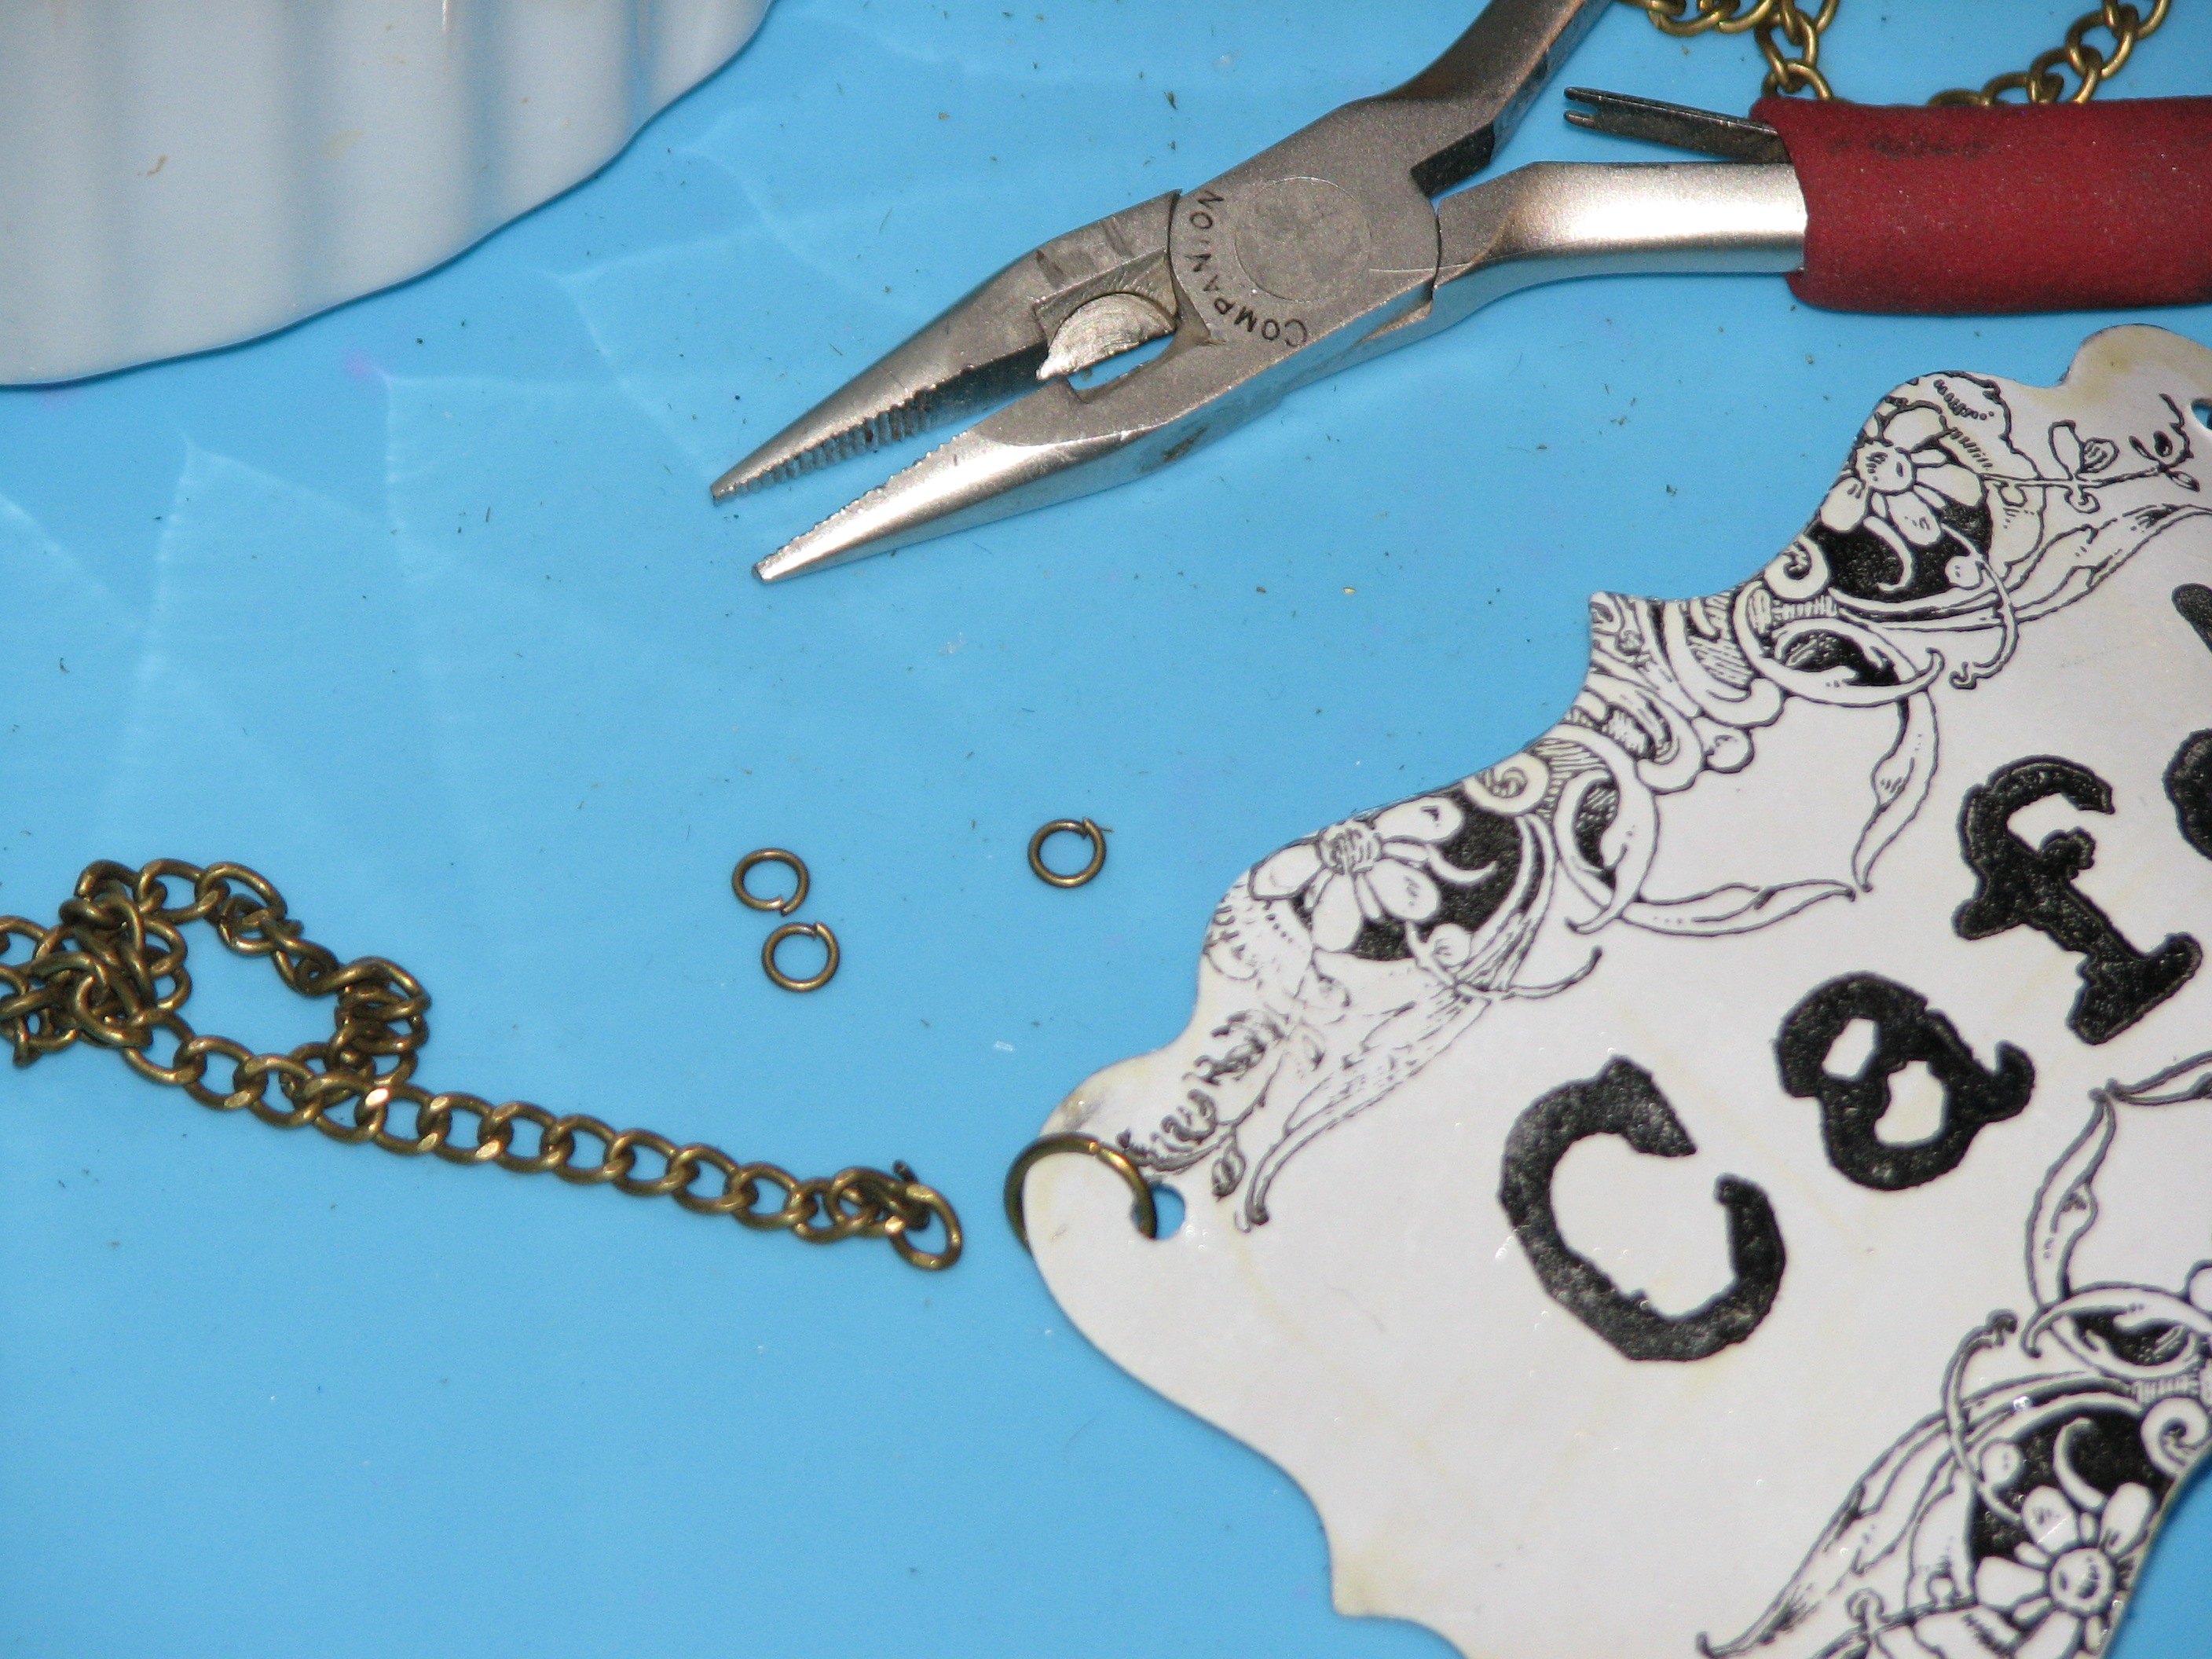
10. Bend the metal label to where it fits the contour of the canister.

2015_July_RJ_FrenchCanister_13

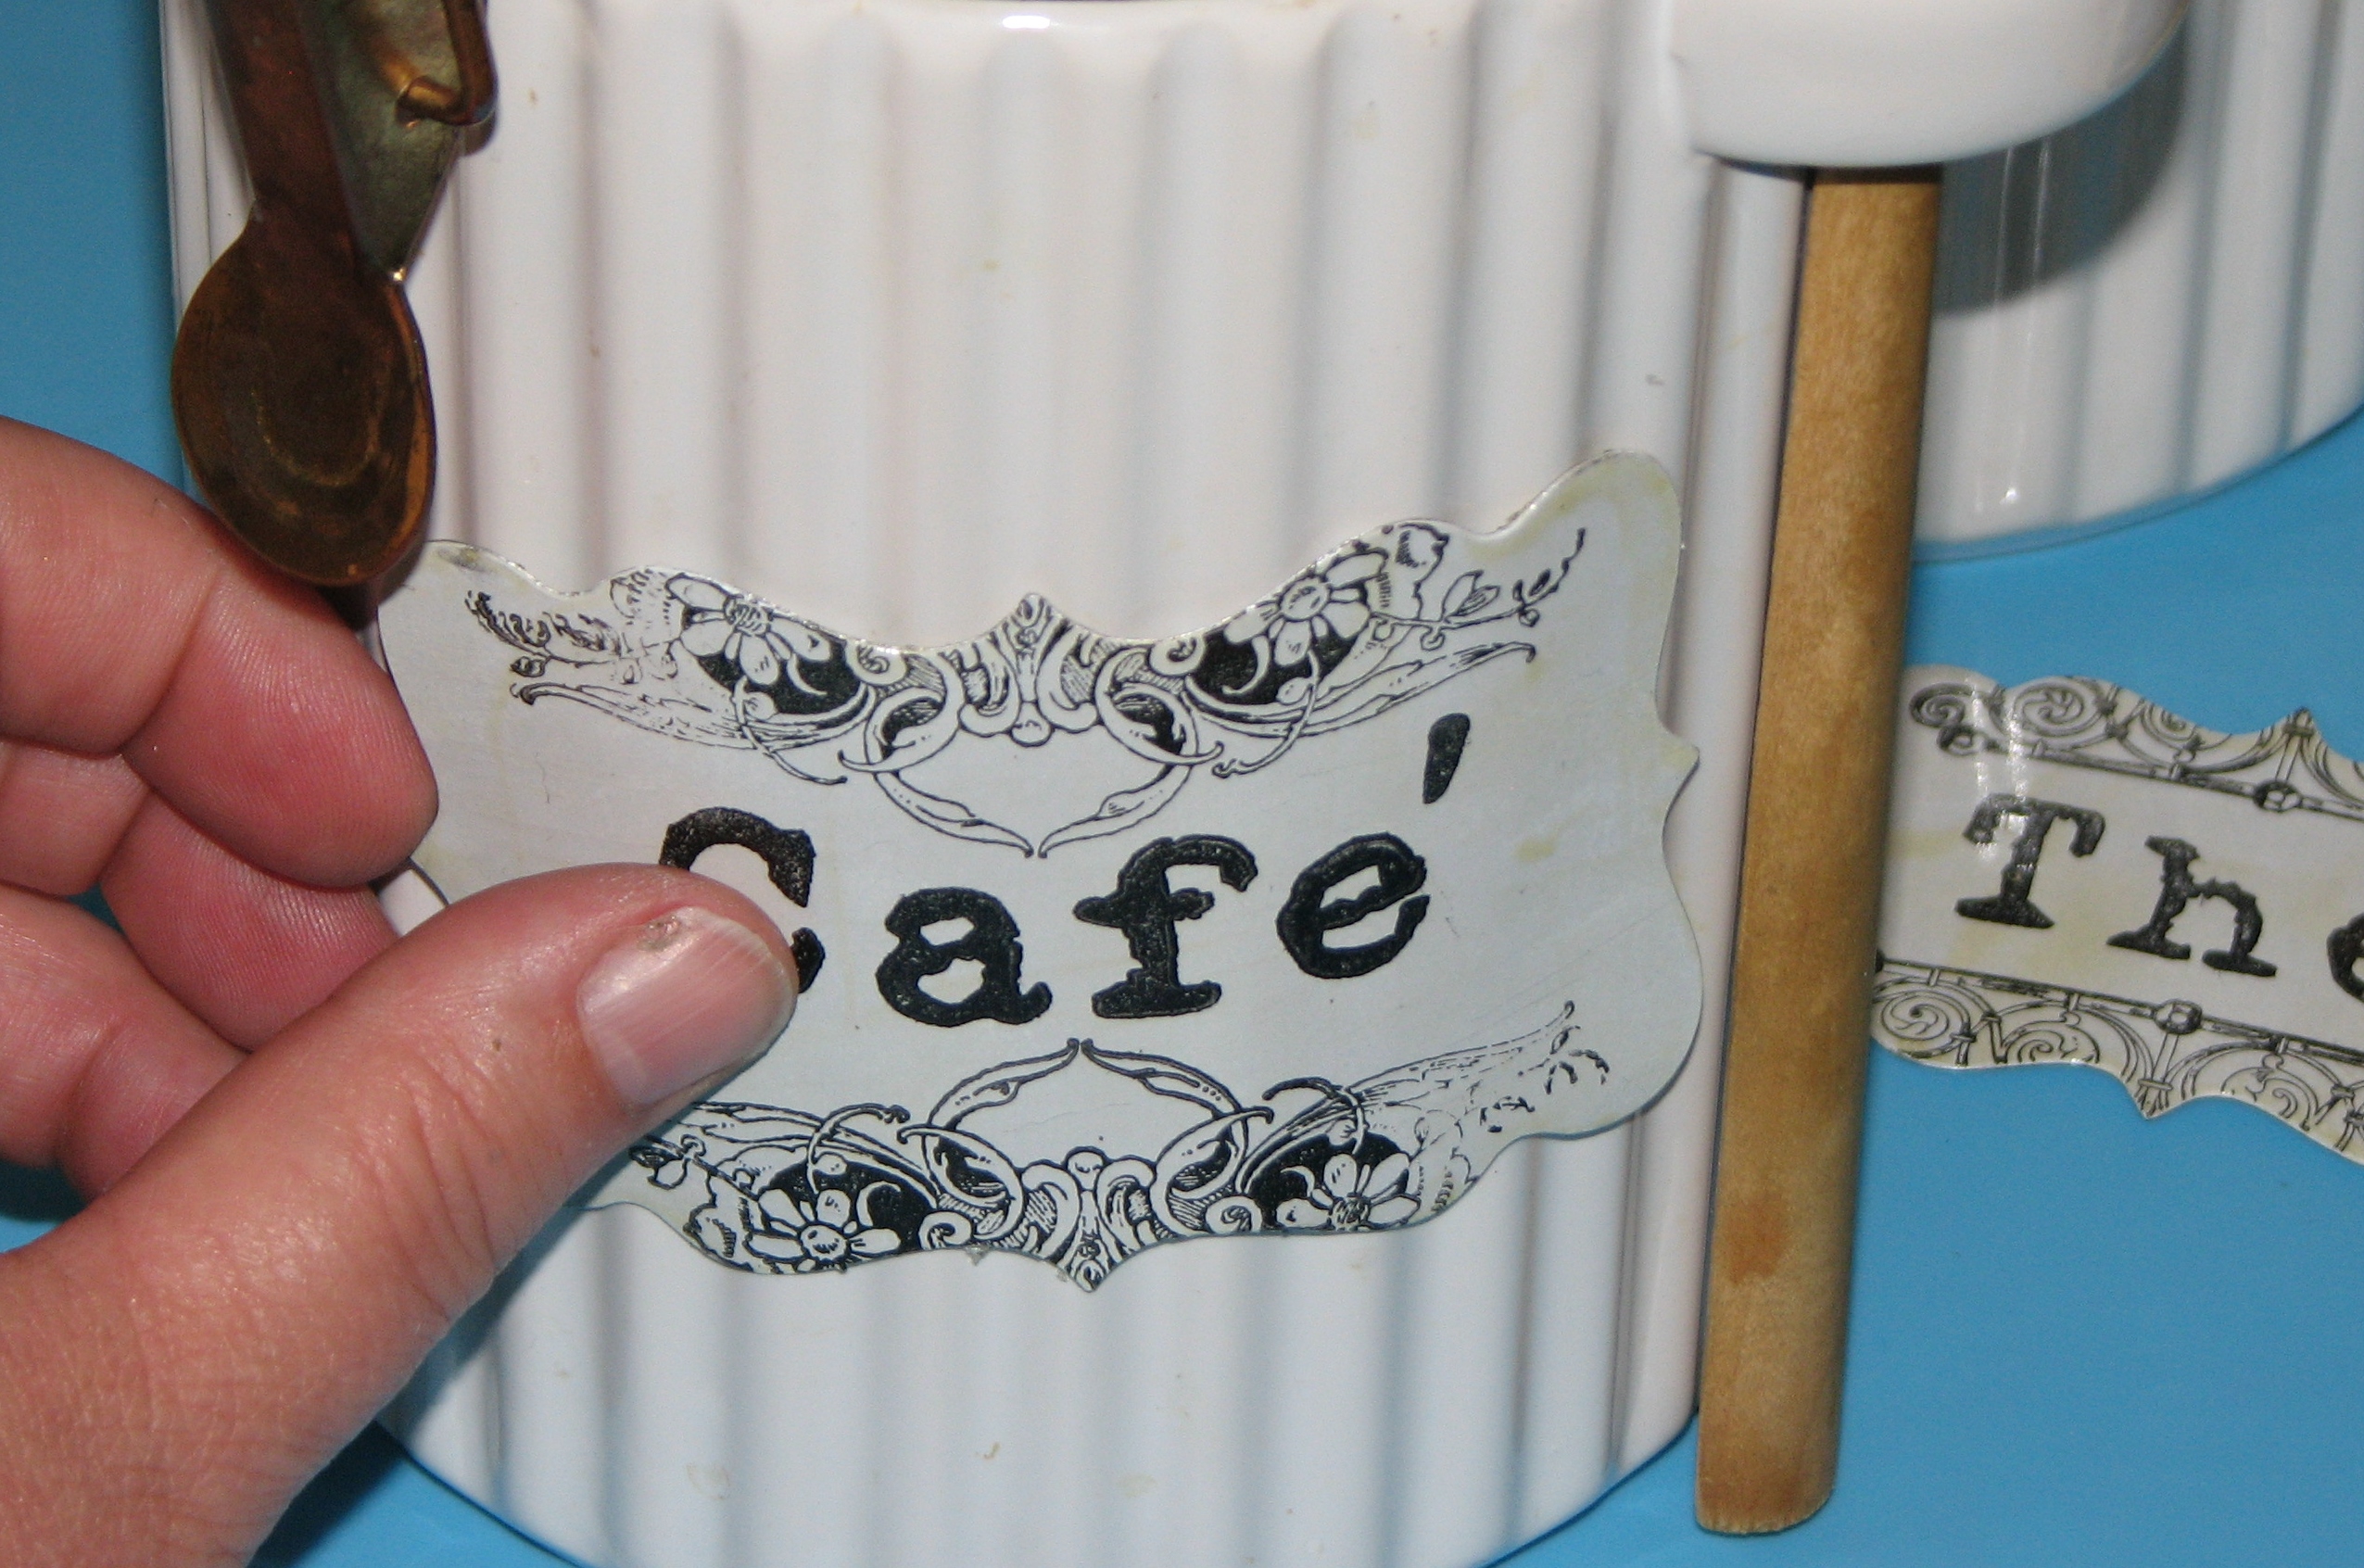
11. Punch two holes in the upper corners of each label then add necessary findings and chain which will enable you to hang the labels from the canisters.

2015_July_RJ_FrenchCanister_14 2015_July_RJ_FrenchCanister_15

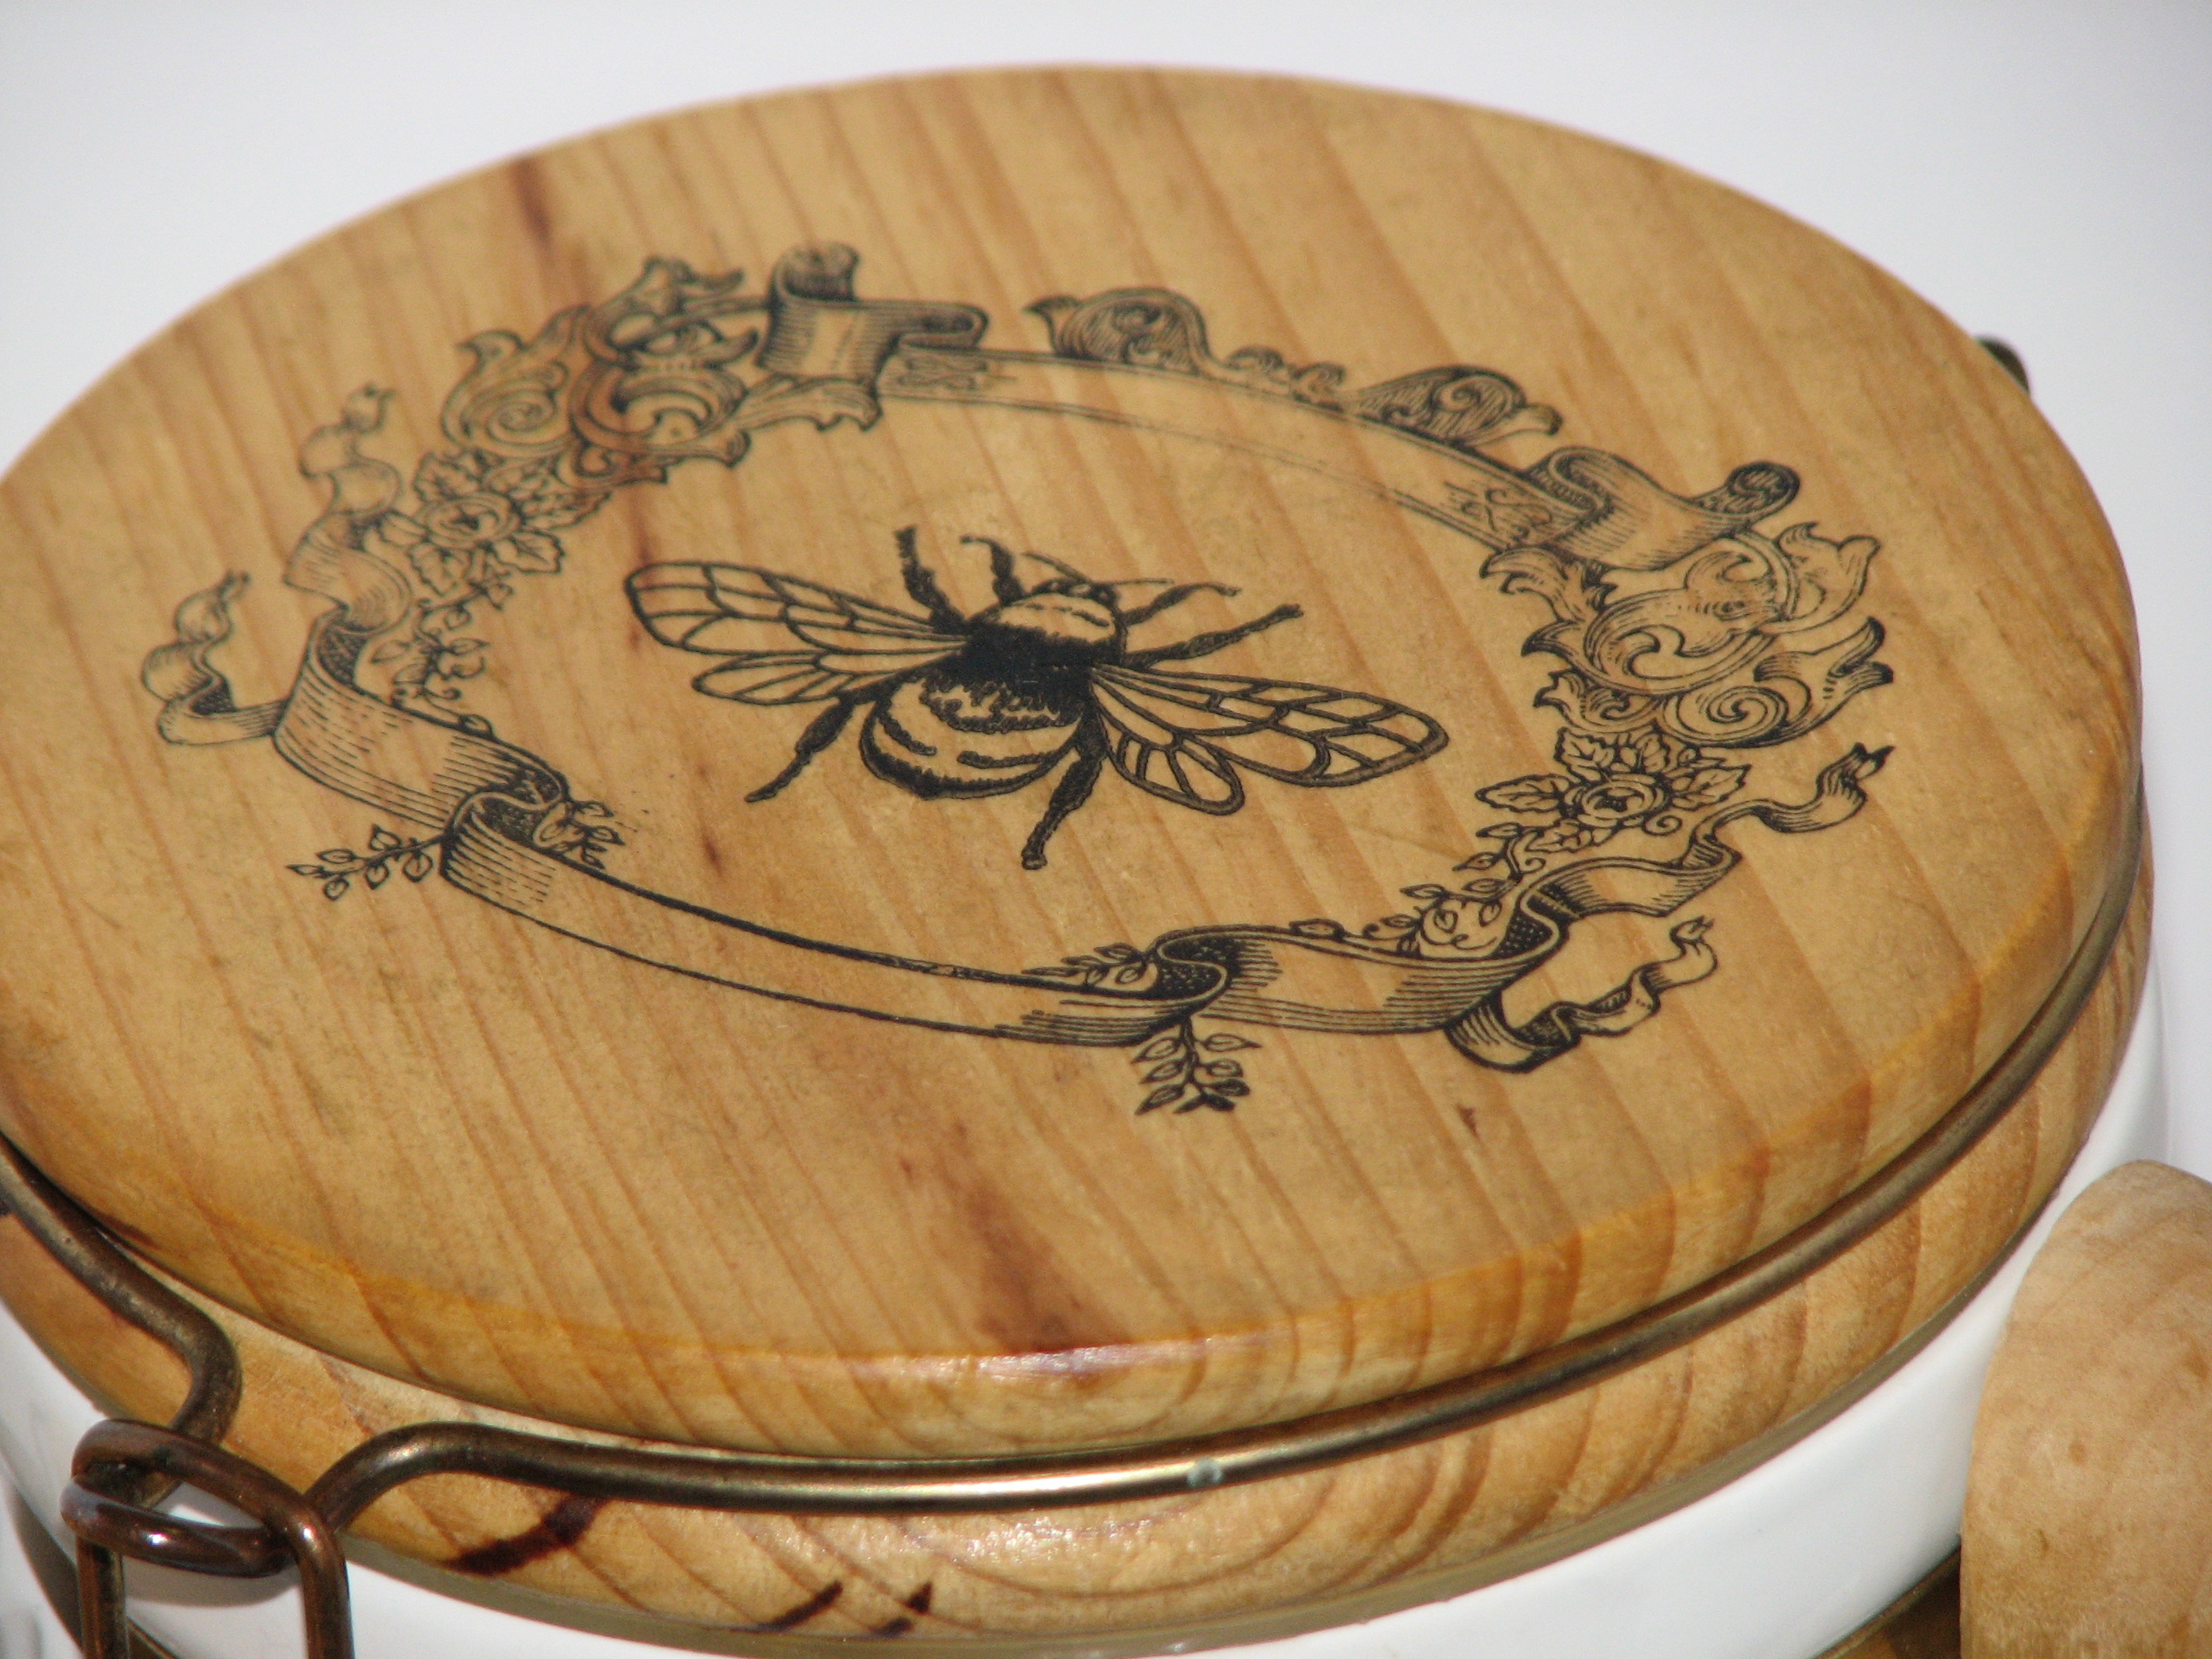
12. For an extra bit of French flair stamp a fancy flourish and bee on the canister lid using Opaque Ivory Black StazOn Ink. Cover with a thin layer of GlazOn.

2015_July_RJ_FrenchCanister_16

by Roni Johnson

Difficulty

Intermediate

Time

1 hour + dry time

Materials Needed

Imagine Crafts featuring Tsukineko:

  • SHEET Metal – ATC
  • StazOn Ink – Cotton White (opaque),  Ivory Black
  • GlazOn – Clear (Original) and or Antique
  • Ink Blusher

Other

  •  
  • Deep Red Stamps – various Flourish Boarders, Lable Wreath & Bee
  • MSE! – Alphabet Stamps
  • QuickCutz Nesting Die Frame 3
  • Miscellaneous: Thrift Store Canisters, Jewelry Chain, Findings, Tools


Sign up for our newsletter
Facebook Pinterest Twitter YouTube Vimeo