Array ( [0] => 280 [ID] => 280 [1] => 1 [TYPEID] => 1 [2] => 0 [SECTIONID] => 0 [3] => project-details [MOD_NAME] => project-details [4] => [TITLE] => [5] => Project Details [META_TITLE] => Amplify! Mono-Printed Dimension Tag [6] => [META_DESCRIPTION] => Amplify! Mono-Printed Dimension Tag [7] => [META_KEYWORDS] => [8] => [BUTTON_TITLE] => [9] => [BODY] => [10] => [BODY_SIDE] => [11] => [MODULE_PROCESSING] => [12] => [MODULE_META] => [13] => project-details-head.php [MODULE_HEAD] => project-details-head.php [14] => project-details-body.php [MODULE_BODY] => project-details-body.php [15] => [MODULE_SIDE] => [16] => 0 [TOP_ORDER] => 0 [17] => 0 [HITS_UNIQUE] => 0 [18] => 0 [HITS_REPEAT] => 0 [19] => 0 [ROBOT_HITS] => 0 [20] => 0000-00-00 00:00:00 [LASTVIEWED] => 0000-00-00 00:00:00 [21] => 0000-00-00 00:00:00 [ROBOT_LASTVIEWED] => 0000-00-00 00:00:00 [22] => 0.70 [PRIORITY] => 0.70 [23] => 1 [SITEMAP] => 1 [24] => 1 [ACTIVE] => 1 [25] => 1 [DISPLAY_TITLE] => 1 [26] => 0 [SSL_MODE] => 0 [27] => 0 [EDITABLE] => 0 [28] => 0 [DELETABLE] => 0 [29] => 2013-11-05 00:00:00 [LASTUPDATED] => 2013-11-05 00:00:00 [30] => 2013-11-05 00:00:00 [CREATED] => 2013-11-05 00:00:00 )
Imagine Crafts
LearnMakeCommunityShop

Amplify! Mono-Printed Dimension Tag

Monoprinting makes a lot of fun and offers a wide variety of options to create several layers on a project. Experimenting with this technique using only my craft mat, I found out that Radiant Neon Amplify! is the perfect color to add new dimension and feel to the surface.


Amplify! Mono-Printed Dimension Tag

2015_April_HL_fauxgelli_step1

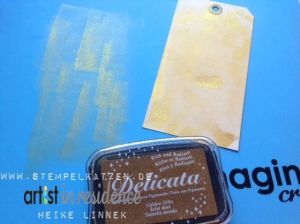
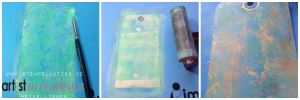
1. Apply Delicata Golden Glitz to the craft mat and take a first imprint.

2015_April_HL_fauxgelli_step2

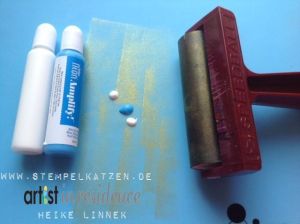
2. Don’t clean the mat. Add Radiant Neon Amplify! White and Electric Blue and disperse it with a brayer.

2015_April_HL_technique_step3

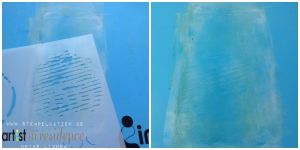
3. Work quickly. Create structure pressing a stencil into the wet color.

2015_April_HL_technique_step4

4. Take an imprint for the second layer. Use a brayer to get enough pressure.

2015_April_HL_technique_step5

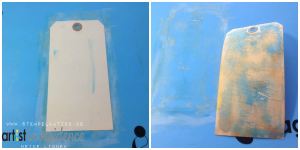
5. Apply Radiant Neon Electric Green. Draw a pattern with Doodlestix. Take the next imprint for the third layer.

2015_April_HL_technique_step6

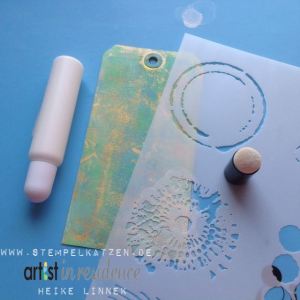
6. Stencil the next layer with a sponge dauber using Radiant Neon White.
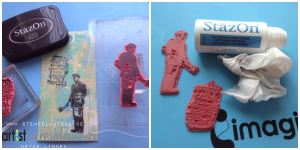
2015_April_HL_technique_step7

7. Time to stamp.

2015_April_HLtechnique_step8

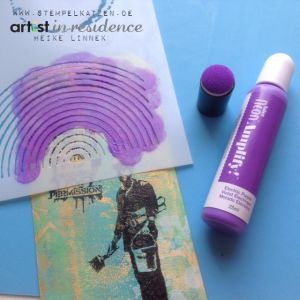
8. Now a darker color, Radiant Neon Electric Purple, can be stenciled exactly in the right position.

2015_April_HL_technique_step9

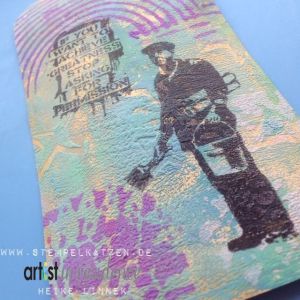
9. Heat the project with a heater tool. It doesn’t matter if the color is dried before. Amplify! will puff up for sure and show a completely new dimension and haptic.

by Heike Linnek

Difficulty

Intermediate

Time

45 min + dry time

Materials Needed

Imagine Crafts feat. Tsukineko: 

Other:

  • Stencil: TCW Well Roundet
  • Manila Tag
  • Miscellaneous: brayer; acrylic block; cord; heater tool


Sign up for our newsletter
Facebook Pinterest Twitter YouTube Vimeo