make / by project type / happy 4th of july card
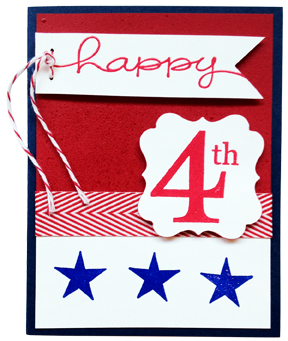
Happy 4th of July Card
Share your patriotism with this simple card.
-
Dimensions: finished card size 4-1/4” x 5-1/2” (blue cardstock). Cut 1 piece of white cardstock to 1-3/4” x 3-7/8” and cut 1 piece of red cardstock to 3-1/2” x 3-7/8”.
-
Spray Goosebumps onto red cardstock piece; allow to dry completely.
-
Stamp 3 stars with VersaColor Indigo onto the white cardstock piece. Emboss stars with Clear Embossing Powder.
-
Adhere white cardstock onto the red cardstock piece at the bottom, lining up edges.
-
Cut 4-1/4” length of ribbon and adhere on the backside over the seam where the red and white cardstock pieces meet.
-
Stamp “happy” and “4th” onto white cardstock with VersaColor in Cardinal. Emboss both with Clear Embossing Powder.
-
Use die cut to cut frame around “4th”.
-
Trim around “happy” to create a strip approximately one inch high. Create a pennant by making a dove-tail cut at the end of this piece after the “y”.
-
Punch 2 holes before the “h” in “happy”. String 6 inches of baker’s twine through the holes then tie into a double knot.
-
Adhere background piece onto the blue card base. Adhere “happy” pennant and framed “4th” onto the card.