Array ( [0] => 280 [ID] => 280 [1] => 1 [TYPEID] => 1 [2] => 0 [SECTIONID] => 0 [3] => project-details [MOD_NAME] => project-details [4] => [TITLE] => [5] => Project Details [META_TITLE] => DIY Feather Stamp Card [6] => [META_DESCRIPTION] => DIY Feather Stamp Card [7] => [META_KEYWORDS] => [8] => [BUTTON_TITLE] => [9] => [BODY] => [10] => [BODY_SIDE] => [11] => [MODULE_PROCESSING] => [12] => [MODULE_META] => [13] => project-details-head.php [MODULE_HEAD] => project-details-head.php [14] => project-details-body.php [MODULE_BODY] => project-details-body.php [15] => [MODULE_SIDE] => [16] => 0 [TOP_ORDER] => 0 [17] => 0 [HITS_UNIQUE] => 0 [18] => 0 [HITS_REPEAT] => 0 [19] => 0 [ROBOT_HITS] => 0 [20] => 0000-00-00 00:00:00 [LASTVIEWED] => 0000-00-00 00:00:00 [21] => 0000-00-00 00:00:00 [ROBOT_LASTVIEWED] => 0000-00-00 00:00:00 [22] => 0.70 [PRIORITY] => 0.70 [23] => 1 [SITEMAP] => 1 [24] => 1 [ACTIVE] => 1 [25] => 1 [DISPLAY_TITLE] => 1 [26] => 0 [SSL_MODE] => 0 [27] => 0 [EDITABLE] => 0 [28] => 0 [DELETABLE] => 0 [29] => 2013-11-05 00:00:00 [LASTUPDATED] => 2013-11-05 00:00:00 [30] => 2013-11-05 00:00:00 [CREATED] => 2013-11-05 00:00:00 )
Imagine Crafts
LearnMakeCommunityShop

DIY Feather Stamp Card

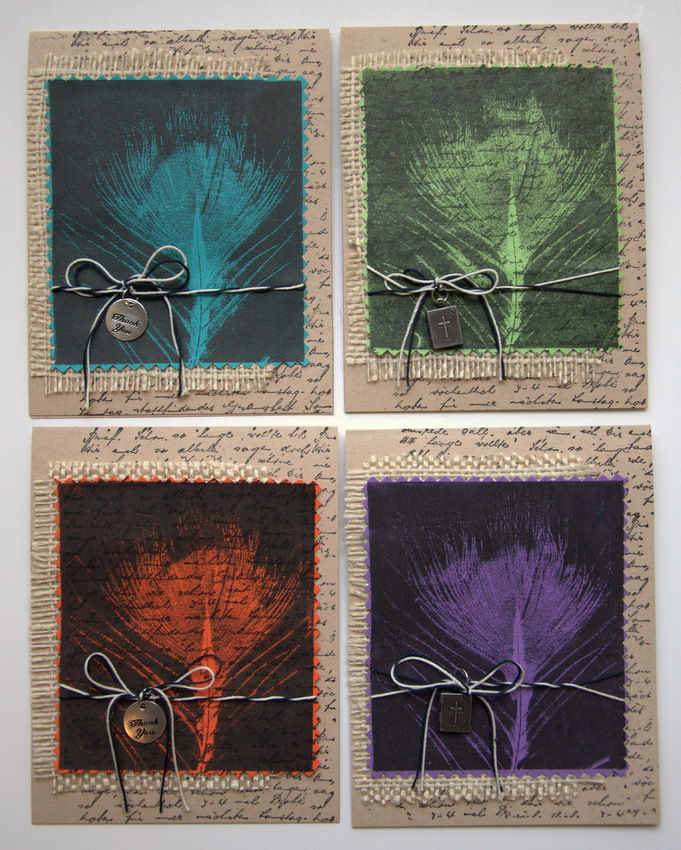
With Tack ‘N Peel as an adhesive, a feather becomes a stamp for a unique effect.


DIY Feather Stamp Card
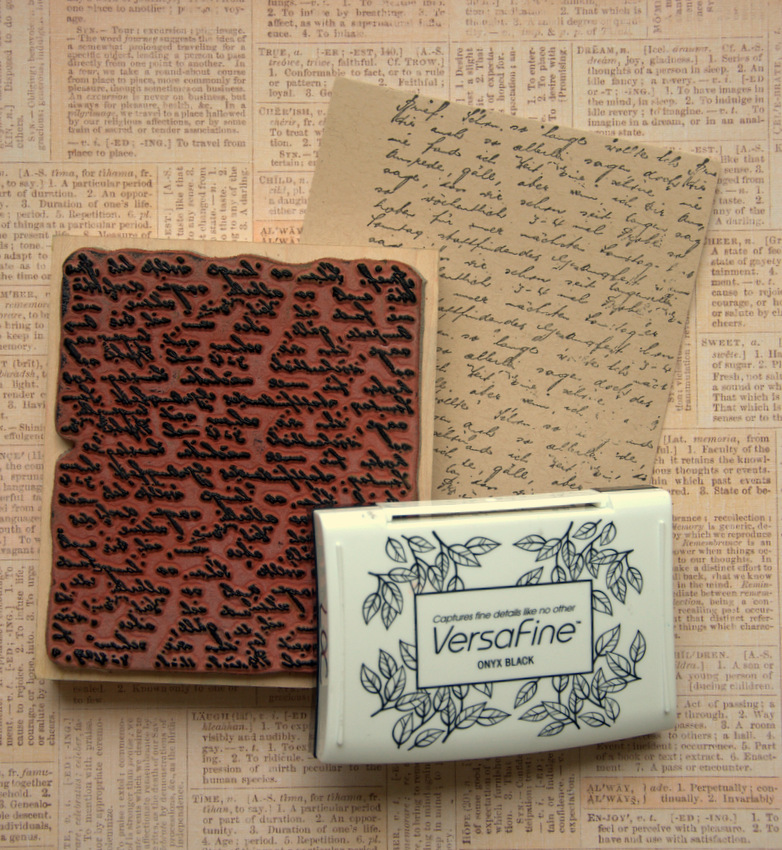
  1. Cut Tack ‘N Peel in half, peel off backing and apply to clear acrylic block. Peel off backing on other side and adhere feather face down to sticky surface. Generously ink feather and Tack ‘N Peel with Onyx Black VersaFine.  Practice stamping on scrap paper to see if image is clear, add more ink if needed to get a good impression. Ink and stamp onto colored card stock. Repeat on different colored card stock. To clean ink off of Tack ‘N Peel use Staz-On Cleaner.
  2. Using pinking shears, cut around perimeter of stamped feather image (cut in a rectangular shape, allowing the color of the paper to show and become a “frame”). On 2 feather images stamp over feather with Background Script and Onyx Black ink. With string or Baker’s Twine, tie a charm to lower half of stamped image. Repeat for a total of 4 stamped feather images.
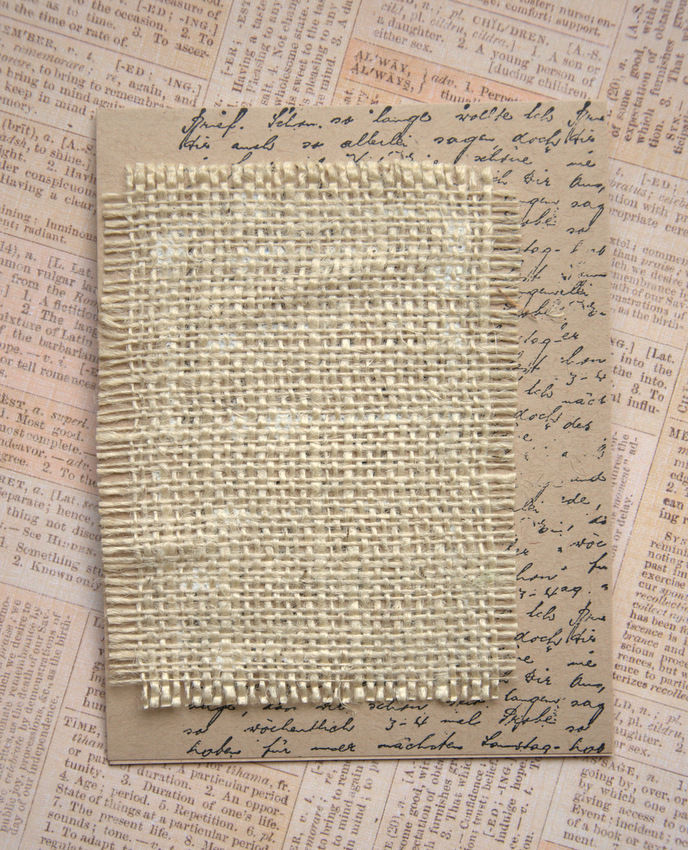
  3. Cut Kraft paper in half and fold to make two 4 ¼” X 5 ½” top-fold cards. Repeat with other Kraft paper for a total of 4 cards. Using Background Script and Onyx Black ink, and aligning the right side of the stamp with the right side of the card, stamp the front of the Kraft cards.
  4. Cut 4 pieces of burlap 3 ½” X 4 ¾”. Pull out 2-3 threads from each edge to create fringe. Glue to stamped Kraft cards, aligning left side of burlap to left side of card.
  5. Glue stamped feather image to center of card on top of burlap.
     
  6. Tie ribbon and yarn around 4 stacked cards. Add decorative embellishments.
by Laura Kirste Campbelle

Difficulty

Beginner - Easy

Time

1-2 hours

Materials Needed

From Imagine Crafts/Tsukineko

  • Tack ‘N Peel
  • VersaFine Ink in Onyx Black
  • Staz-On Cleaner in Dauber Top

Miscellaneous:

  • Penny Black stamp – Background Script
  • Colored card stock, 4 different colors
  • Kraft or tan card stock, 2 sheets
  • Small peacock feather
  • Clear acrylic block, 4” or larger
  • Tacky glue
  • Cutting board or scissors & pinking shears
  • Burlap, 1/8 yard
  • Metal charms, 4
  • Black and white string or Baker’s Twine


Sign up for our newsletter
Facebook Pinterest Twitter YouTube Vimeo