make / by product / sponge daubers / conversation hearts valentine's day card
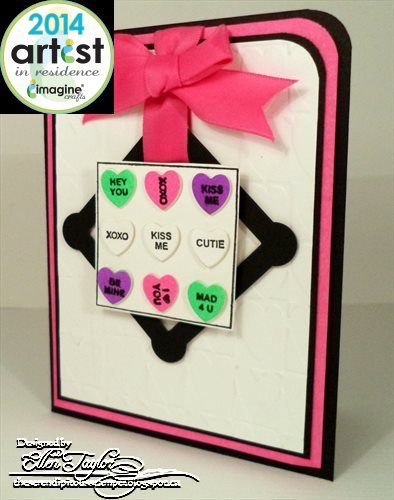
Conversation Hearts Valentine's Day Card
Take a bright twist on this Valentine's card with Radiant Neon inks.
-
Drag Radiant Neon Electric Pink, Electric Purple and Electric Green directly over 3 separate pieces of white card stock. Let dry.
-
Using Versafine Onyx Black, Stamp Conversation Hearts using VersaFine Onyx Black onto the Electric Pink, Electric Green, and Electric Purple pieces of cardstock plus onto a white piece of cardstock.
-
Heat emboss with Clear Embossing Powder.
-
Die cut hearts using the Conversation Heart Block die.
-
Cut the white layering piece block.
-
Adhere 3 white, 2 Electric Green, 2 Electric Purple and 2 Electric Pink Conversation Hearts onto the Heart Block.
-
Create card base from black cardstock with finished dimensions of 4-1/4˝ x 5-1/2˝.
-
Cut layering pieces of the following: white cardstock to 4˝x 5¼˝ (edge with Electric Pink); black cardstock 3-3/4˝ x 5˝; white cardstock 3-1/2˝ x 4-3/4˝.
-
Round the top right corner of all the layering pieces.
-
Emboss the smallest white layering piece using the patterned embossing folder.
-
To create matching ribbon, ink a Sponge Dauber with Electric Pink and color the satin ribbon on both sides; allow to dry completely.
-
Die cut the decorative Square Shaker Frame piece from black cardstock
-
Loop the Electric Pink colored ribbon through it and adhere the ribbon to the back of the cardstock. Finish with a bow.
-
Adhere pieces as shown.