Array ( [0] => 280 [ID] => 280 [1] => 1 [TYPEID] => 1 [2] => 0 [SECTIONID] => 0 [3] => project-details [MOD_NAME] => project-details [4] => [TITLE] => [5] => Project Details [META_TITLE] => irRESISTible Banner with Black Chalkboard Style Theme [6] => [META_DESCRIPTION] => irRESISTible Banner with Black Chalkboard Style Theme [7] => [META_KEYWORDS] => [8] => [BUTTON_TITLE] => [9] => [BODY] => [10] => [BODY_SIDE] => [11] => [MODULE_PROCESSING] => [12] => [MODULE_META] => [13] => project-details-head.php [MODULE_HEAD] => project-details-head.php [14] => project-details-body.php [MODULE_BODY] => project-details-body.php [15] => [MODULE_SIDE] => [16] => 0 [TOP_ORDER] => 0 [17] => 0 [HITS_UNIQUE] => 0 [18] => 0 [HITS_REPEAT] => 0 [19] => 0 [ROBOT_HITS] => 0 [20] => 0000-00-00 00:00:00 [LASTVIEWED] => 0000-00-00 00:00:00 [21] => 0000-00-00 00:00:00 [ROBOT_LASTVIEWED] => 0000-00-00 00:00:00 [22] => 0.70 [PRIORITY] => 0.70 [23] => 1 [SITEMAP] => 1 [24] => 1 [ACTIVE] => 1 [25] => 1 [DISPLAY_TITLE] => 1 [26] => 0 [SSL_MODE] => 0 [27] => 0 [EDITABLE] => 0 [28] => 0 [DELETABLE] => 0 [29] => 2013-11-05 00:00:00 [LASTUPDATED] => 2013-11-05 00:00:00 [30] => 2013-11-05 00:00:00 [CREATED] => 2013-11-05 00:00:00 )
Imagine Crafts
LearnMakeCommunityShop

irRESISTible Banner with Black Chalkboard Style Theme

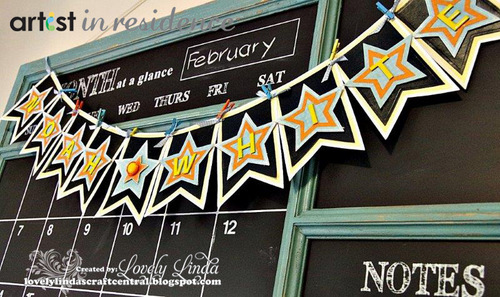
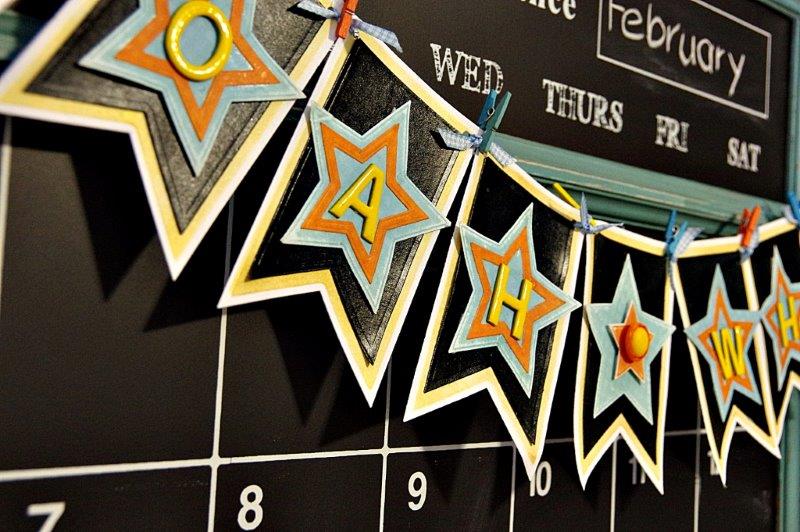
Instead of buying one of those boring, standard banners from a party store, why not create your own that's sure to WOW and amaze all your guests? It's simple to create a layered banner that gets everyone into a festive mood for celebrating!


irRESISTible Banner with Black Chalkboard Style Theme

1. Cut/emboss ten (10) Baby Bunting #6 using white cardstock.

2. Cut/emboss ten (10) Baby Bunting #5 using Black cardstock.

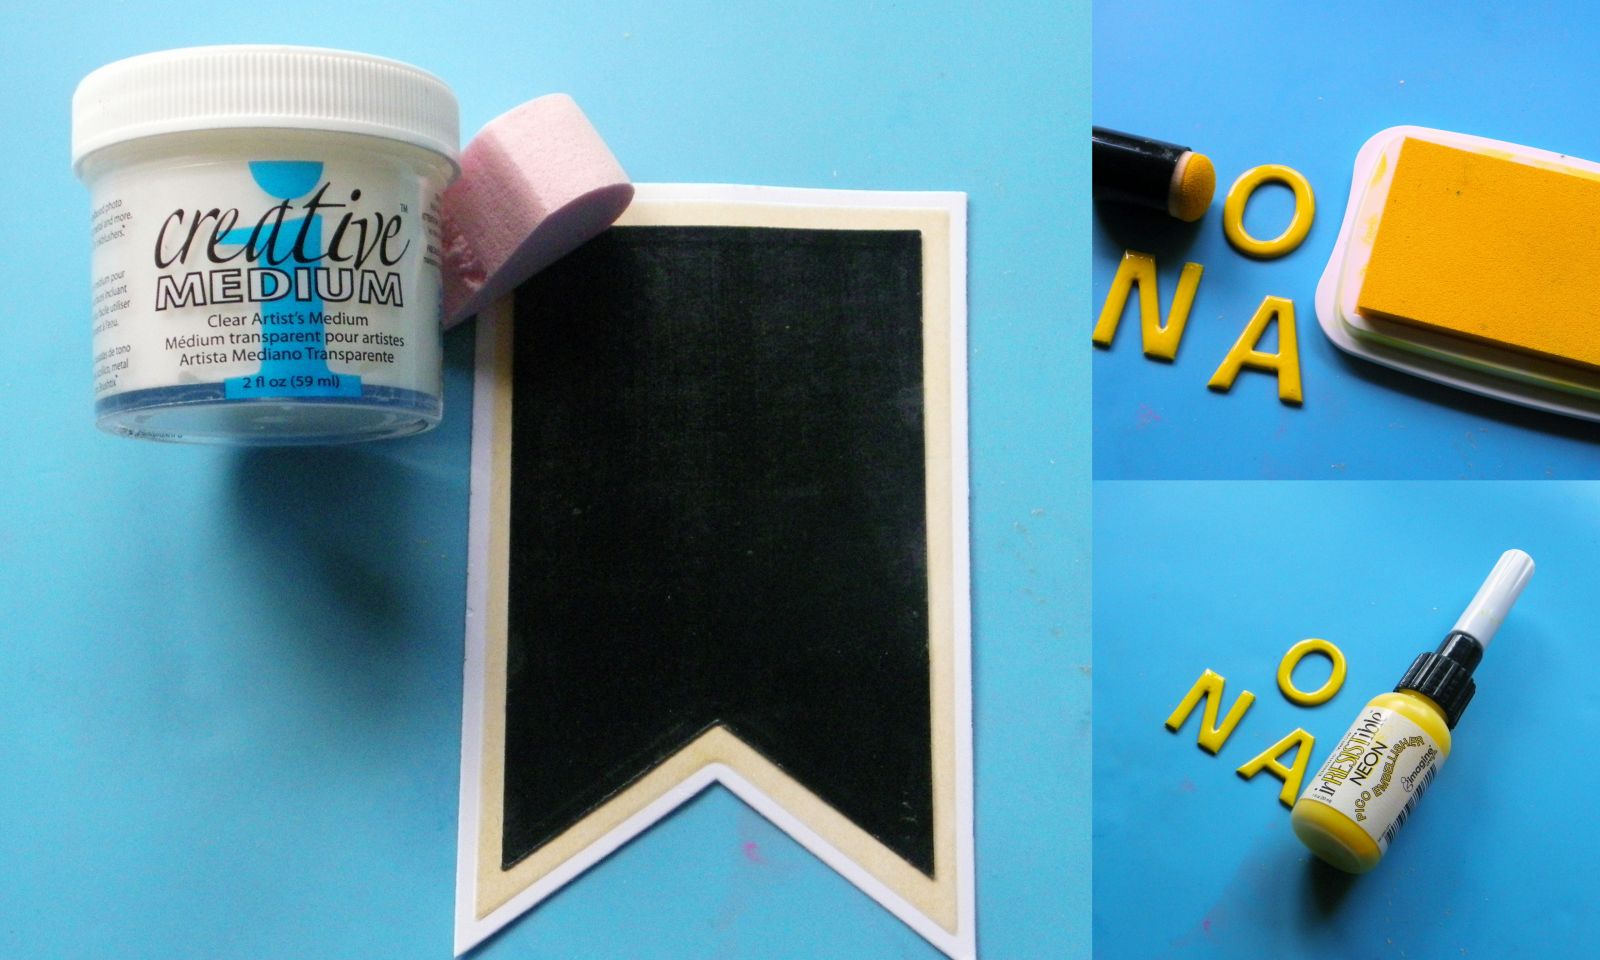
3. Coat black buntings with Clear Creative Medium; allow to dry completely.

4. Color chipboard letters using Radiant Neon Electric Yellow with a Sponge Dauber.

5. Once the letters have dried, apply irRESISTible Pico Embellisher Radiant Neon Electric Yellow over the letters.

6. Adhere the black buntings to the larger white buntings using double sided tape.

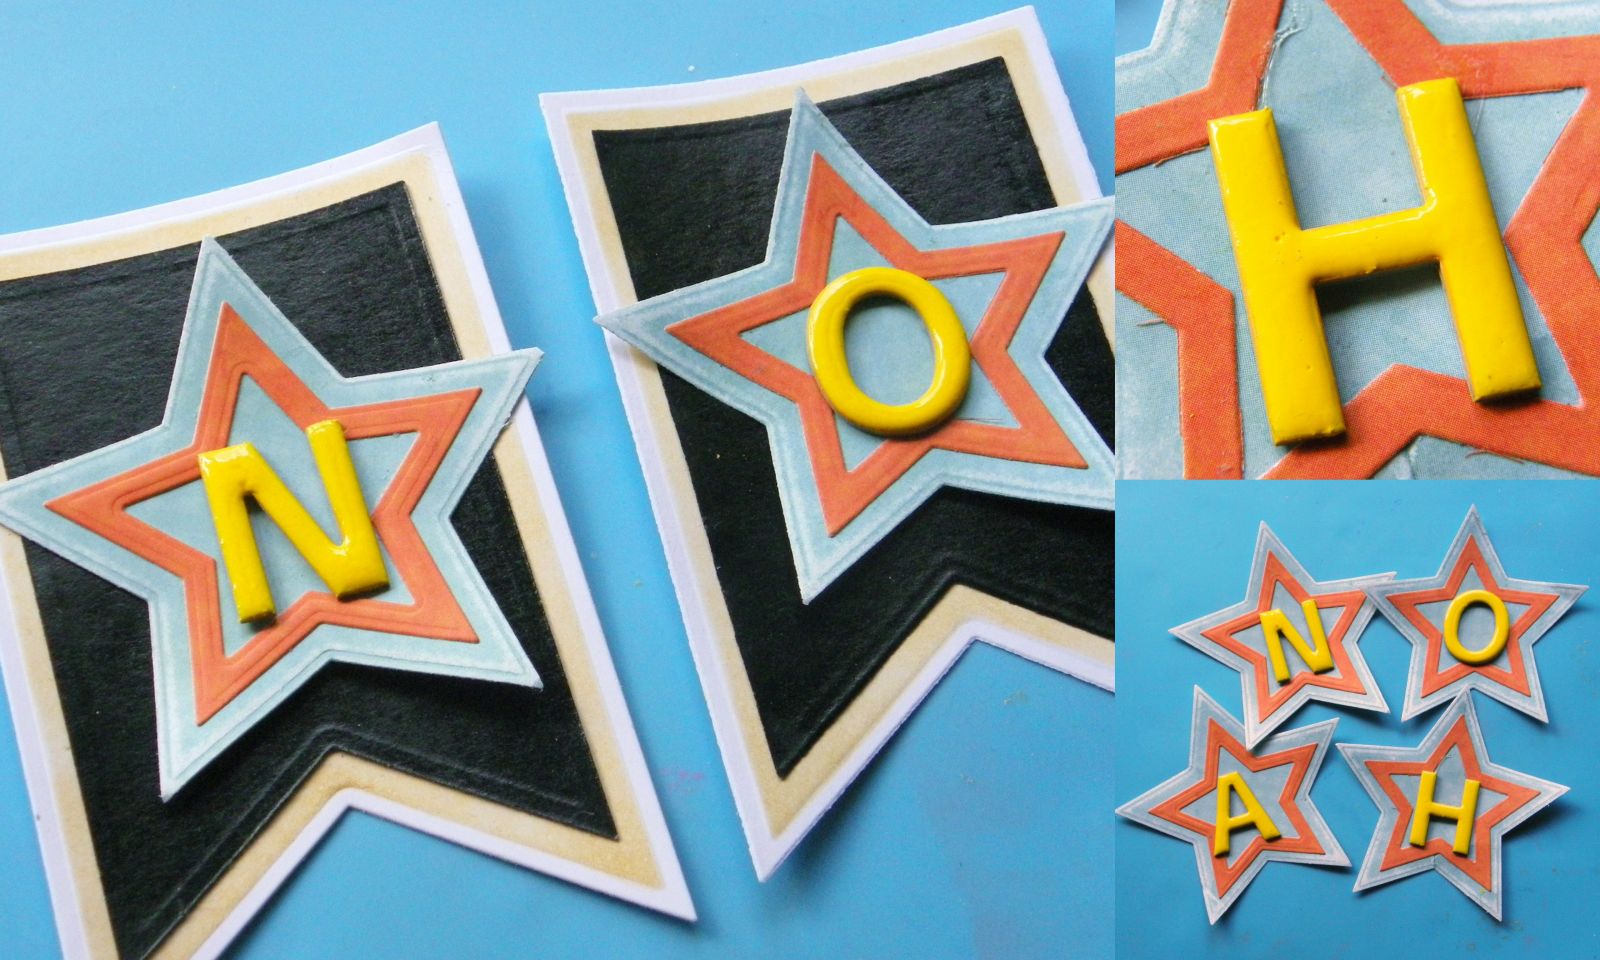
7. Adhere the letters letter to precut stars with a liquid glue.

8. Attach stars to the buntings using foam squares.

by Linda Lucas

Difficulty

Beginner

Time

1 hour + drying time

Materials Needed

Imagine Crafts featuring Tsukineko:

Other Supplies:

  • Spellbinders: Grand Calibur Machine, Nestabilities Baby Buntings and Stars Five dies
  • Scrapbook Adhesives by 3L: E-Z Runner, 3D Foam Squares
  • Miscellaneous:  Blue patterned paper, black and white cardstock, chipboard letters


Sign up for our newsletter
Facebook Pinterest Twitter YouTube Vimeo